Course students
Create student account
In Learny LMS, your students can register themselves from the website, and as an admin, you can manually register a student.
This doc will help you enroll students manually and manage them in this WordPress plugin.
- Log in to the admin panel.
- Select the "Learny LMS" option from the left menu.
- Click on the "Student" option from the sub-menu.
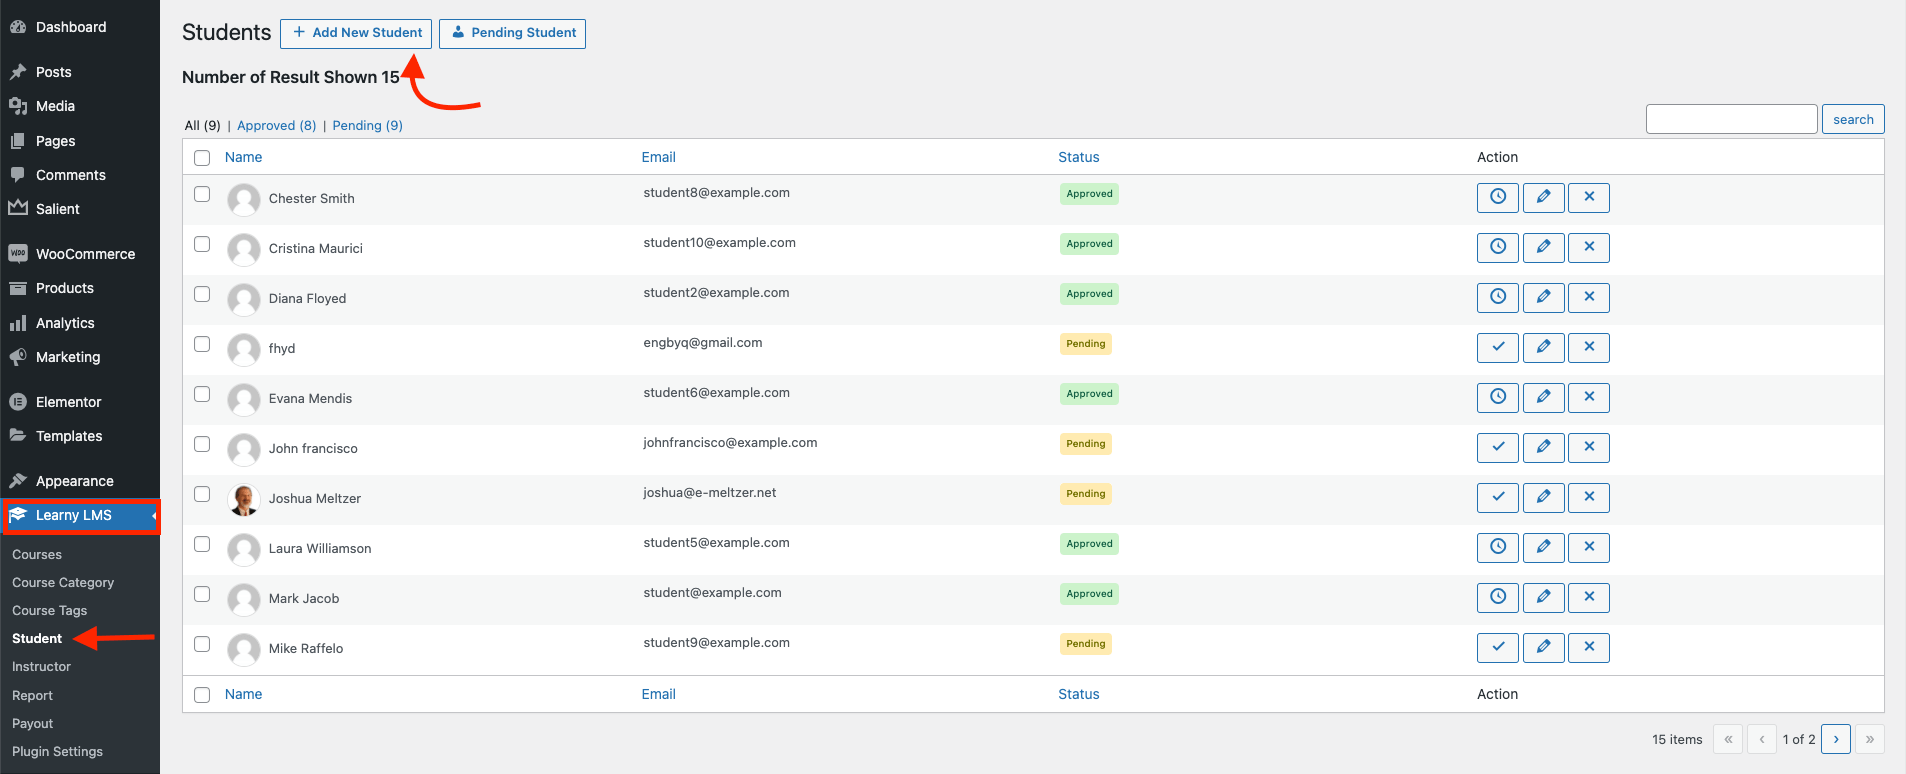
- Choose the "Add new student" option.

Figure 1. Learny LMS Adding New Student
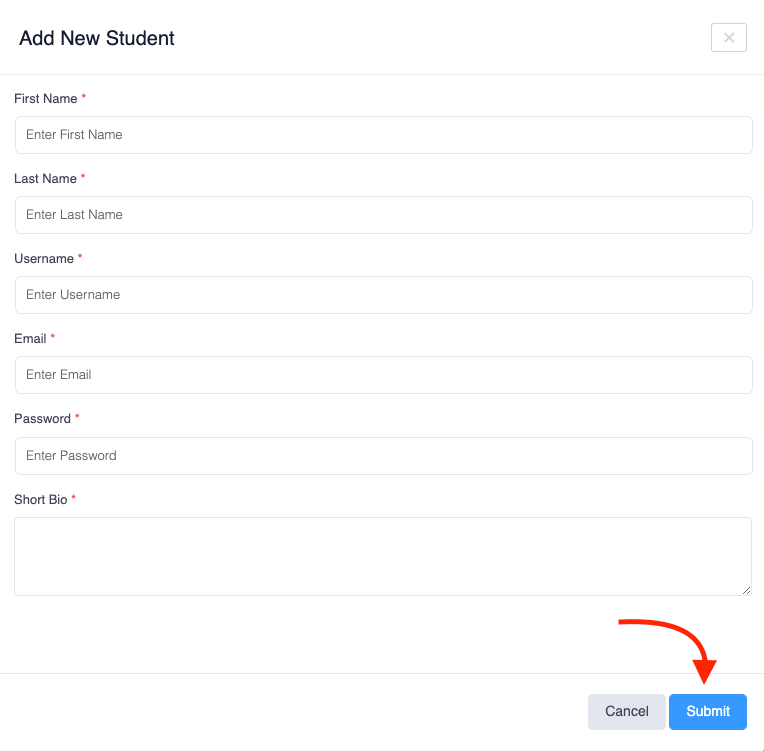
After choosing the button, you have to provide information about your new student. They are:
- Student's name
- Student's user name
- Password
- Short bio
- Click on the "Submit" button to save your data.

Figure 2. Learny LMS Saving New Student's Info
Pending students
You can manually approve or mark a student's account as pending in Learny LMS if you want. After drawing them as pending, your students can not log in to their accounts. To mark a student as pending, you have to follow the steps below:
- Select the "Learny LMS" option from the left menu.
- Click on the "Student" option from the sub-menu.
- Choose a student.
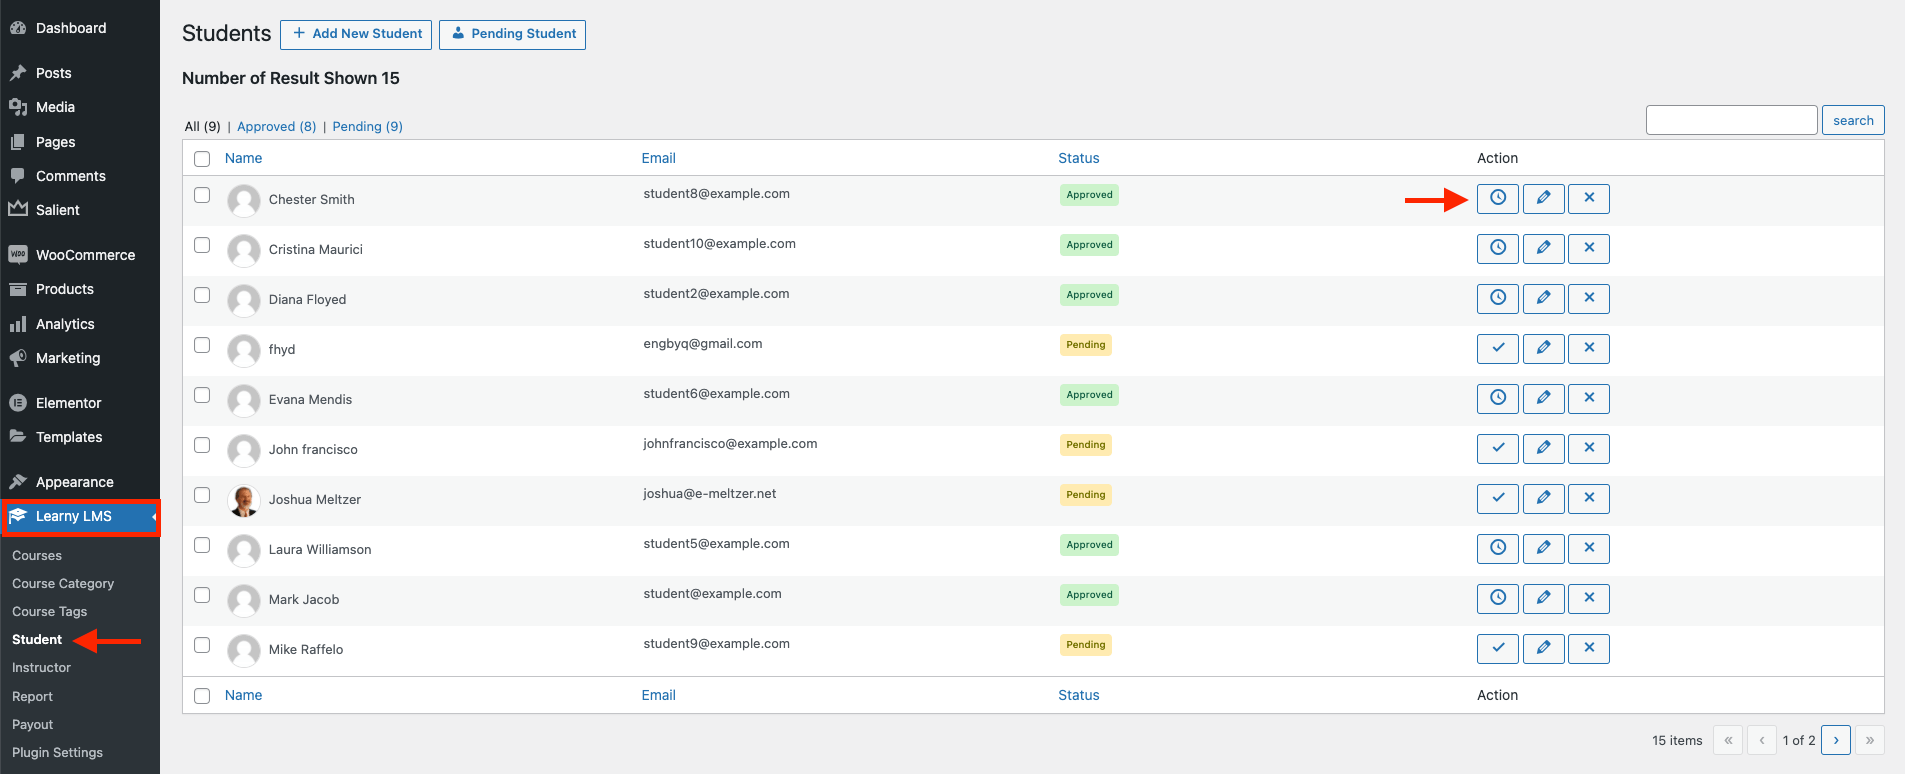
- Click on the "Pending" icon.

Figure 3. Learny LMS Student Pending Icon
You can overview the pending students list from this "Student" option. Also, you can approve a student from the pending situation. For this, you have to follow the steps:
- Select the "Learny LMS" option from the left menu.
- Click on the "Student" option from the sub-menu.
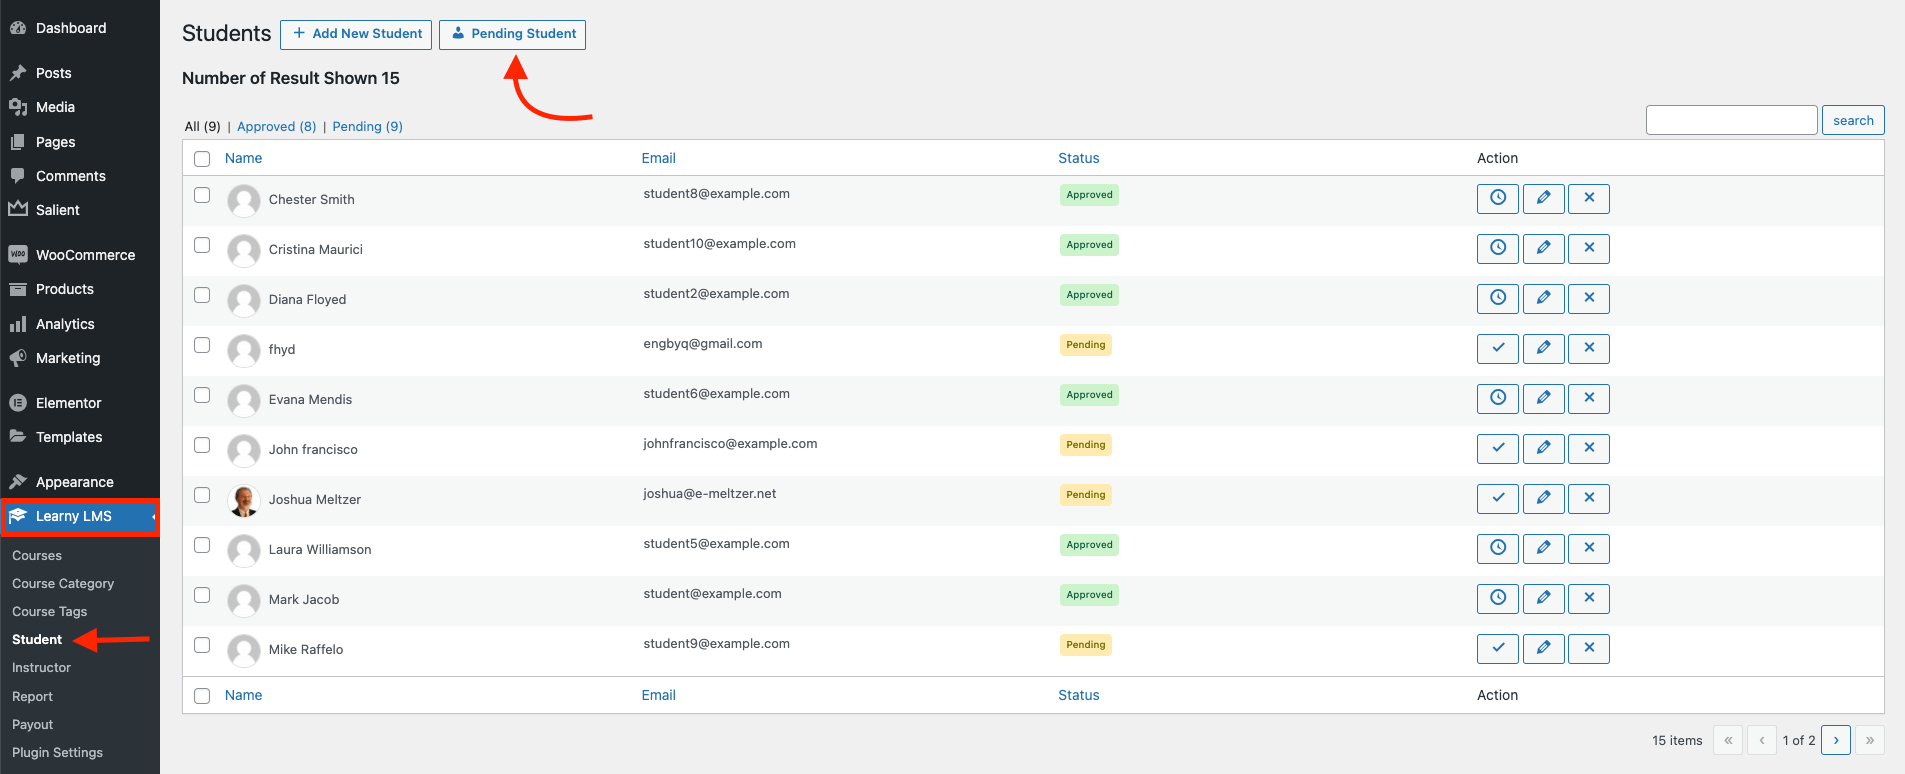
- Select the "Pending Student" button.

Figure 4. Learny LMS Pending Student
- Select a student.
- Click on the "Approved" icon.

Figure 5. Learny LMS Student Approving Icon
Update & Delete account
You can update info or delete a student's account from the "Student" option as an admin. For this, you have to follow the steps below:
- Select the "Learny LMS" option from the left menu.
- Click on the "Student" option from the sub-menu.
Here you can find the "Action" option. In this option, you can see the update and delete icons. To update the information, you have to navigate:
- Select a student.
- Click on the "Update" icon.
- Update required information.
- Click on the "Update User" button.

Figure 6. Learny LMS Student Info Updating Icon
To delete a student's account from your website, you have to navigate:
- Select a student.
- Click on the "Delete" icon.
- Choose the "Yes" button for confirmation.

Figure 7. Learny LMS Student Deleting Icon
Was this article helpful to you?
Contact us and we will get back to you as soon as possible

