Course creation
The instructors can create and sell their courses to the students. They can also update, delete their courses. To create a course, they have to follow the steps below:
- Log in to the site as an instructor.
- Select the "Add New Course" button from the left menu.
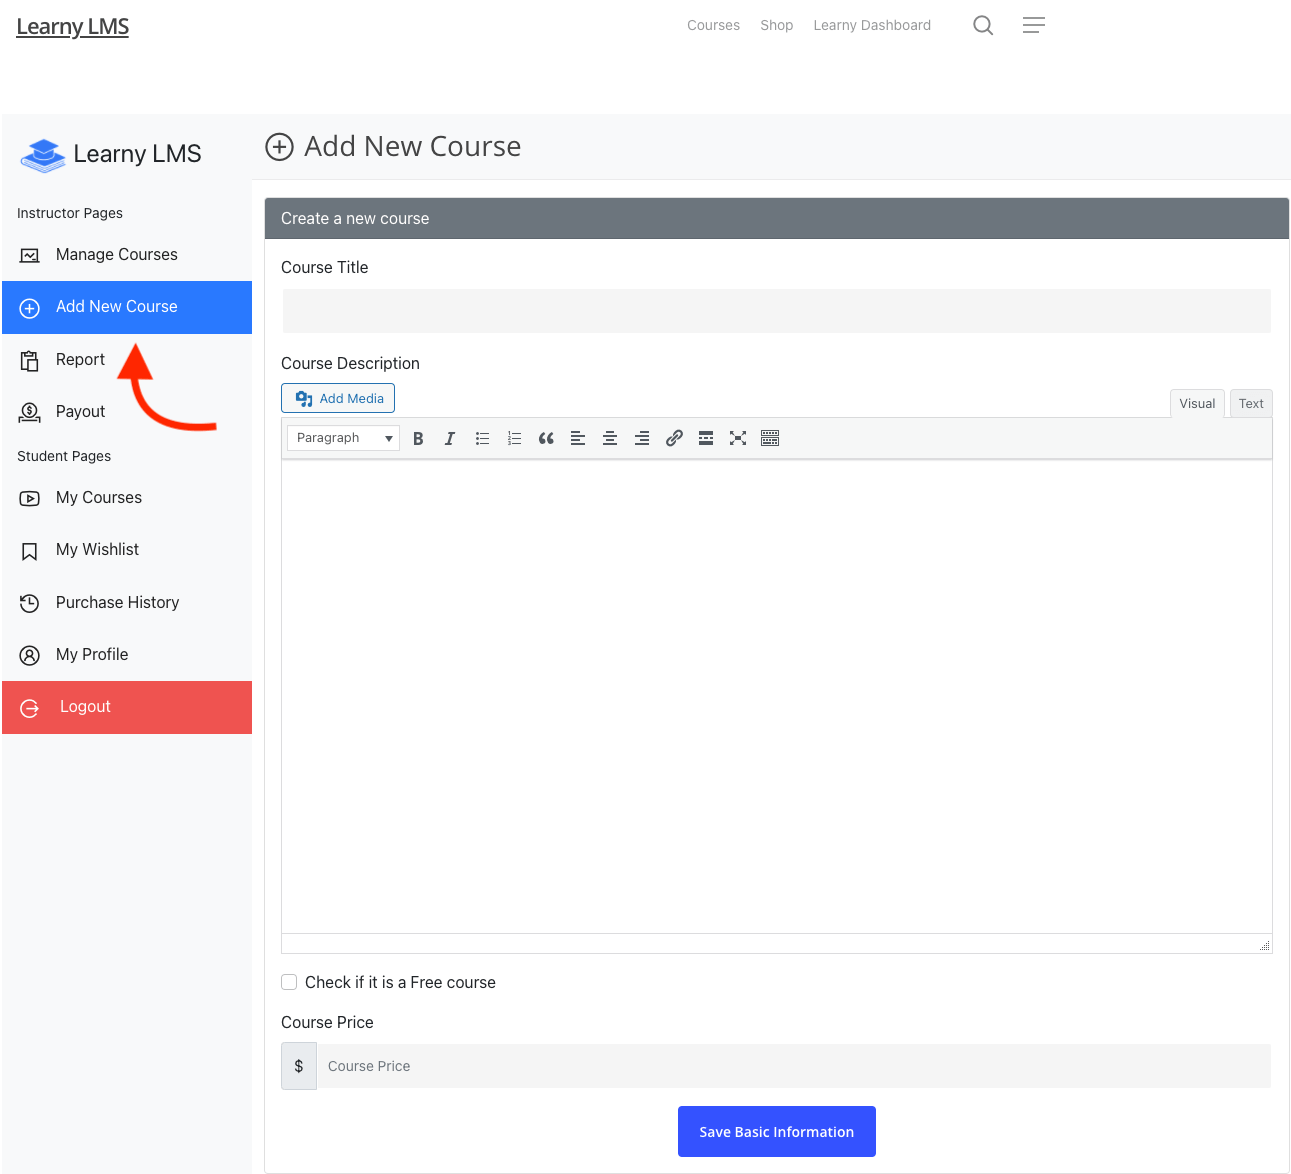
Figure 1. Learny LMS Adding New Course
Now the instructors have to provide several data to create the course. They are:
- Add a course title.
- Add media from your device. (They can add an image, audio, video playlist, etc.)
- If they want to make the course a free course, click on the check-box.
- Provide the course price. (If the course is not free)
- Select the "Save Basic information" button.
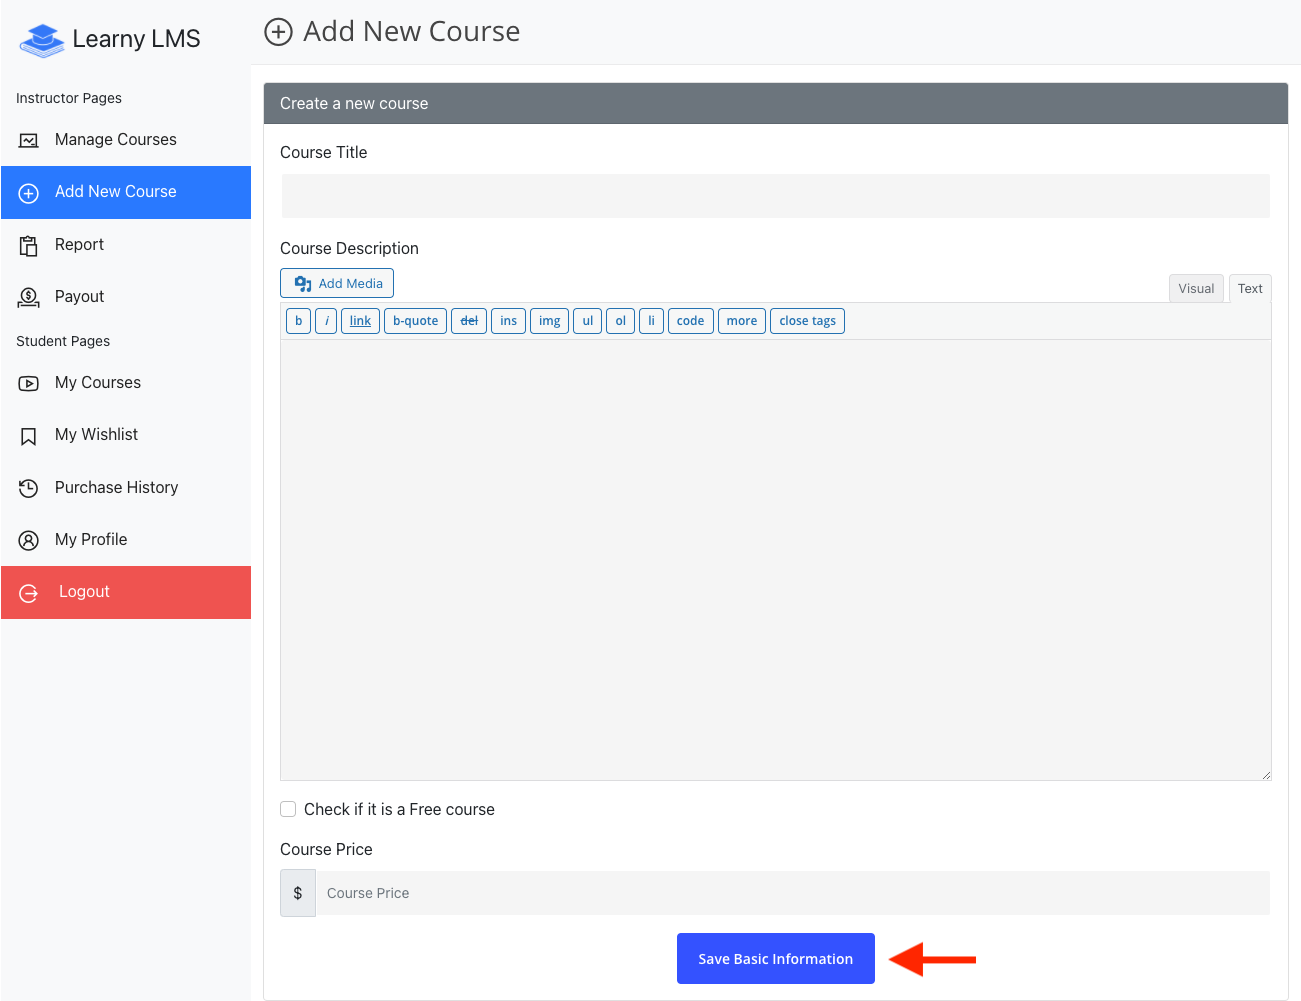
Figure 2. Learny LMS Saving Basic Information-1
After providing basic information, the instructors can manage their course. On this "Manage Courses" menu, they have to select the "Course Curriculum" button.
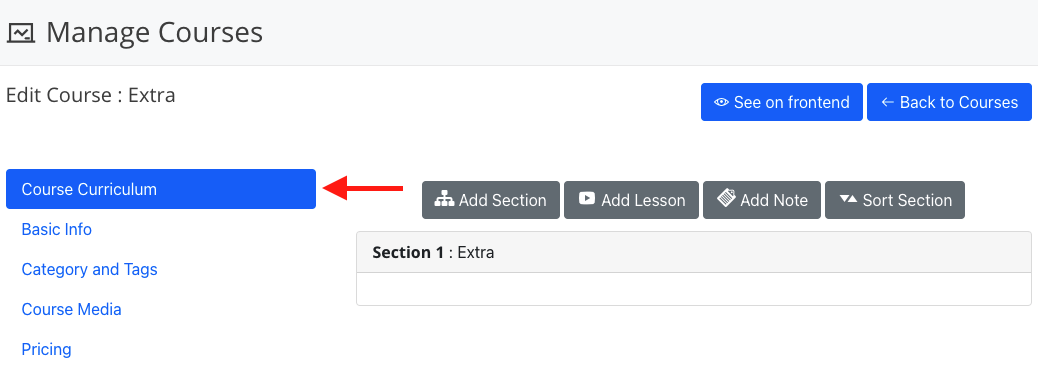
Figure 3. Learny LMS Course Curriculum-1
In this "Course Curriculum" option, they can:
- Add Section > Lessons/Notes
- Sort their course curriculum

Figure 4. Learny LMS Course Curriculum-2
Click on the "Basic info" to add more information about their course. Here they have to provide:
- Add a course title.
- Add media from your device. (They can add an image, audio, video playlist, etc.)
- They can also add an excerpt.
- If they want to consider the course trendy, click on the check-box.
- Set the course requirements. (Use a comma (,) to separate several course requirements)
- Provide the course outcomes. (Use a comma (,) to separate several course requirements)
- Select language. (Course language)
- Set the course difficulty level.
Select the "Save Basic Information" button.
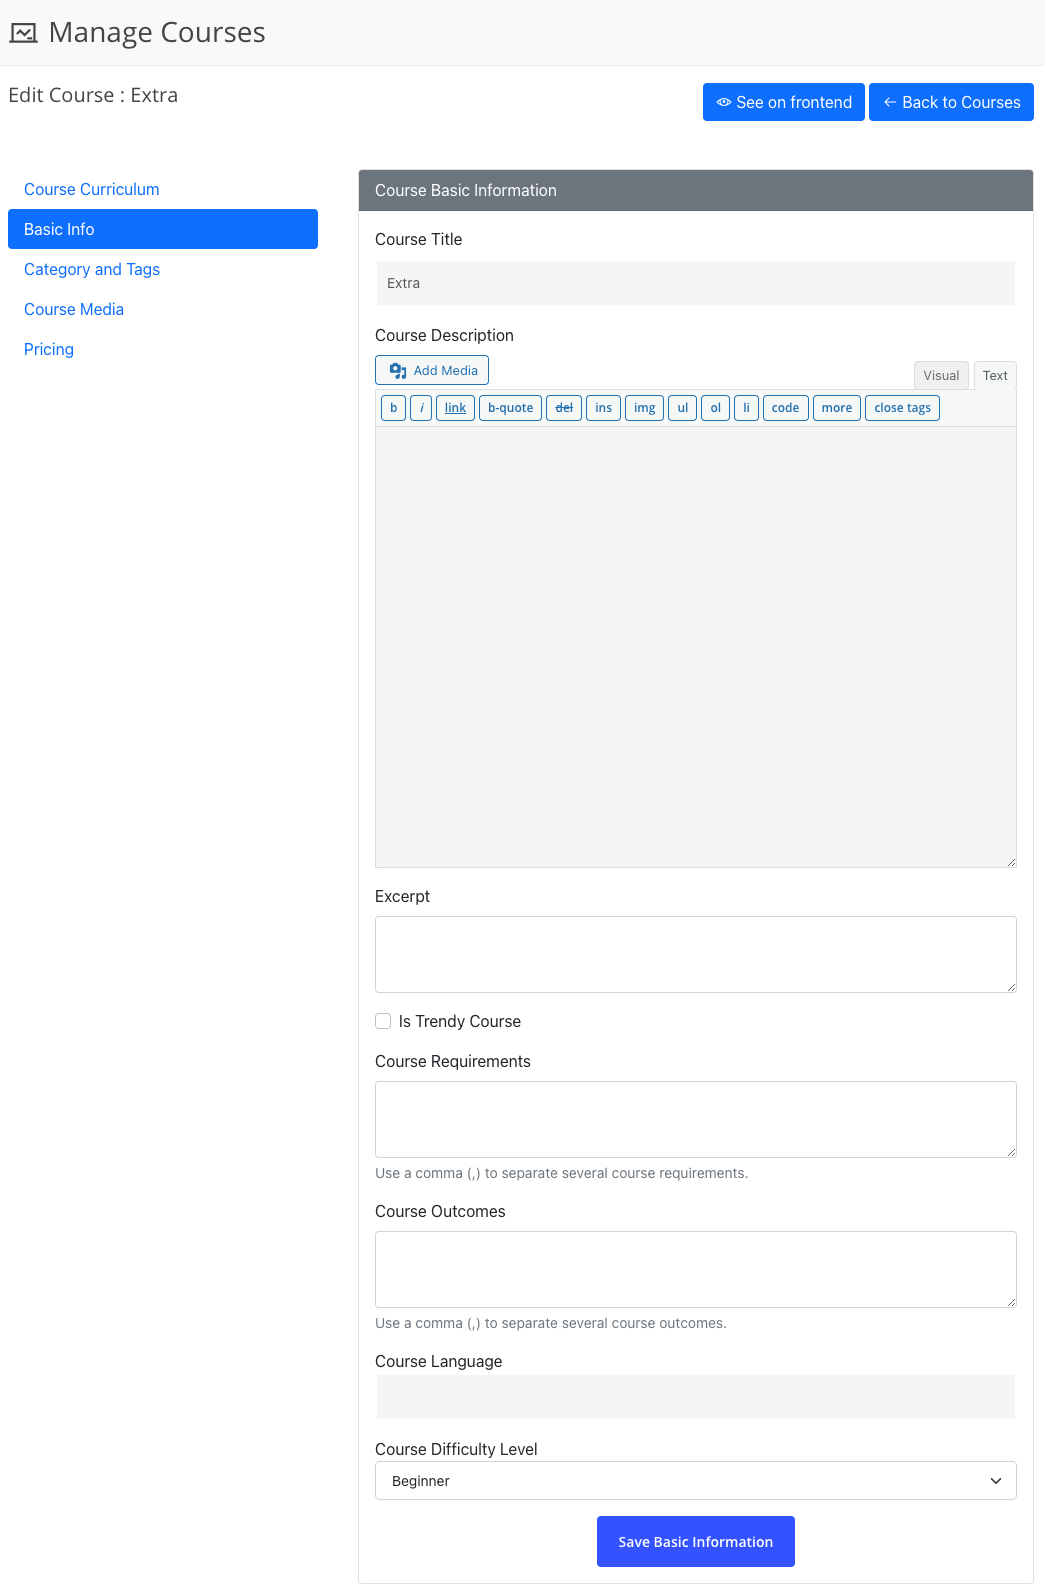
Figure 5. Learny LMS Saving Basic Information-2
They can select the category and tags for their courses and click on the "Save Course Information" button to save the information.
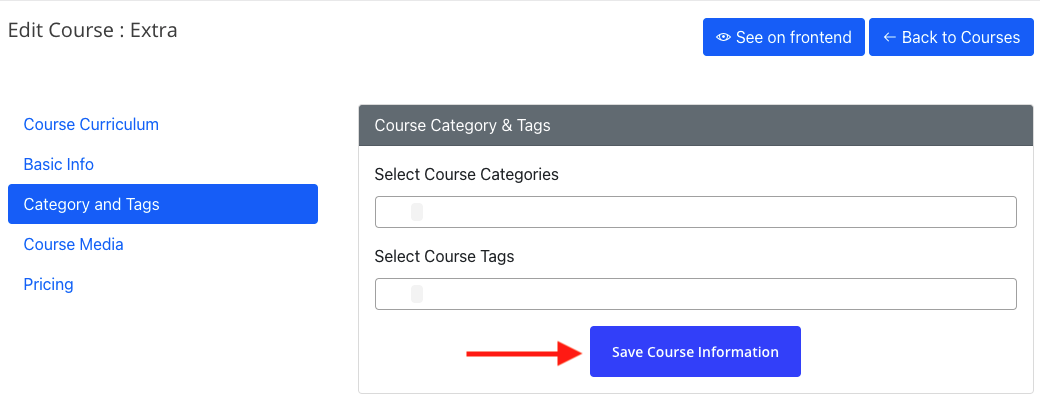
Figure 6. Learny LMS Saving Category & Tags
After adding the course category and tags, the instructors have to select the "Course Media" button. Here, they can:
- Select the course preview provider.
- Add the course preview URL.
- Course banner image (They can add the image from their device)
- Provide course meta description.
- Click on the "Media Information" button to save the course media.
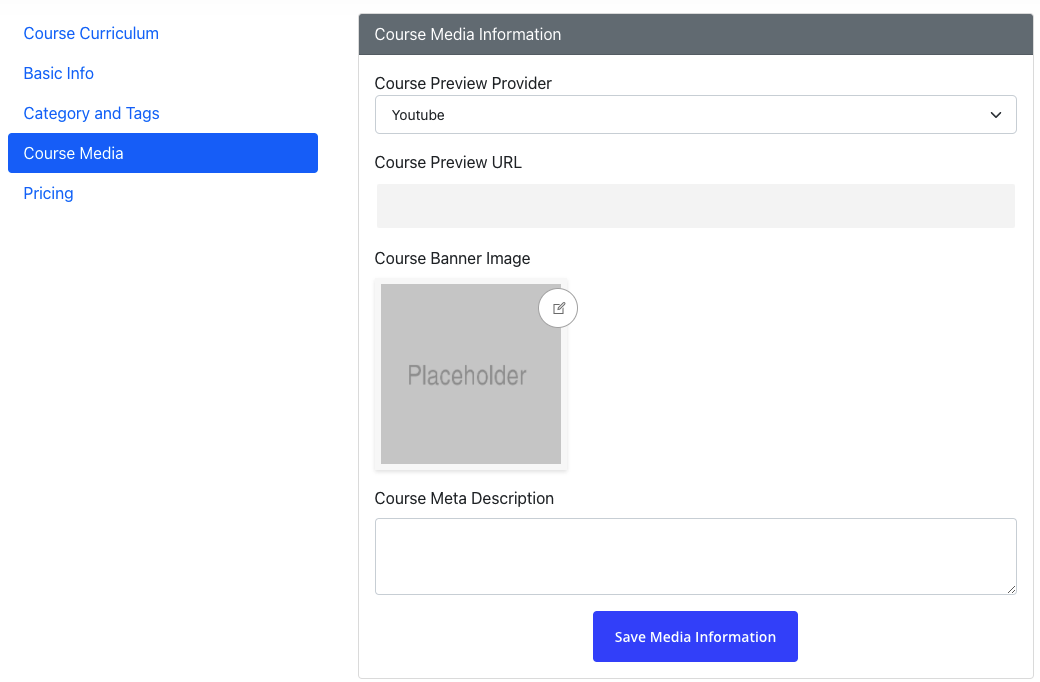
Figure 7. Learny LMS Saving Course Media Information
By following these steps an instructor can create a course on your plugin. the site admin can review their courses and publish the instructor's courses.
The instructor can also update or delete their courses if they want. To update the course they have to navigate:
- Select the "Manage Course" option from the left menu.
- Choose a course.
- Click on the edit icon.
- Update required information.
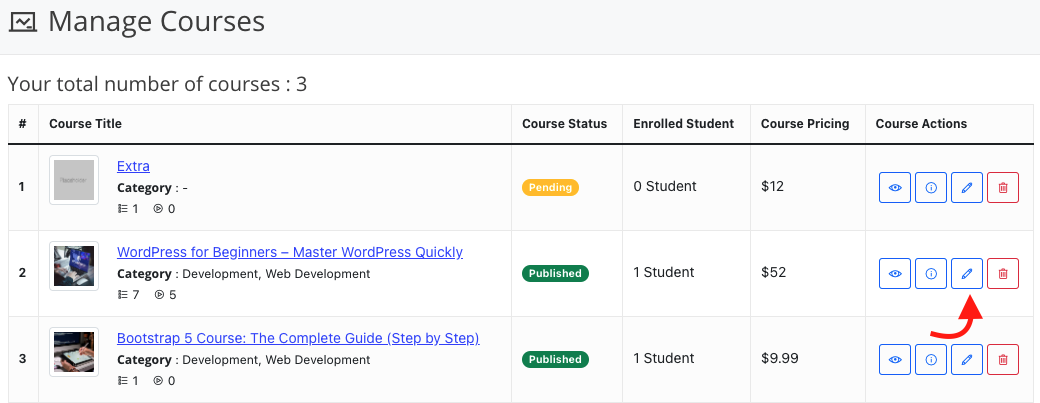
Figure 8. Learny LMS Updating Course
To delete a course, they can follow the steps below:
- Select the "Manage Course" option from the left menu.
- Choose a course.
- Click on the delete icon.
- Select the "Yes" button for confirmation.
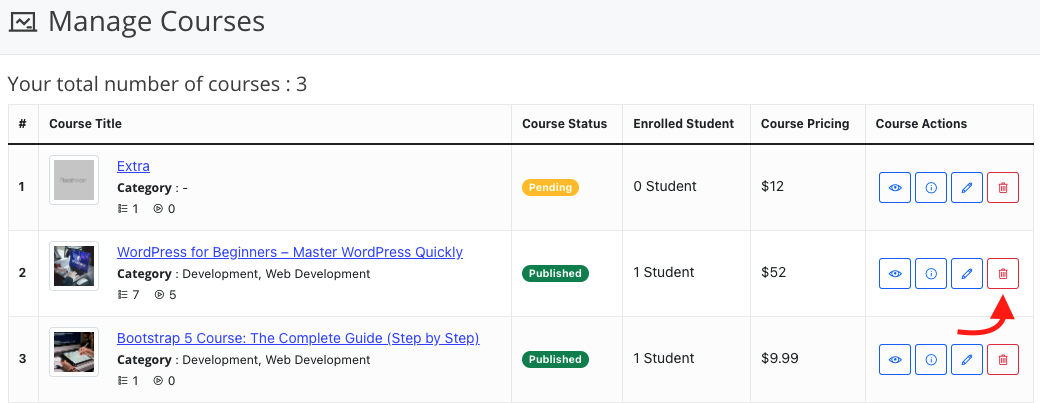
Figure 9. Learny LMS Deleting Course
Was this article helpful to you?
Contact us and we will get back to you as soon as possible

