Admin panel
To take an online live class, you have to configure the Learny LMS settings. For this, you can follow the steps below:
- Log in to the site as admin.
- Click on the "Learny LMS" option from the left menu.
- Select the "Plugin Settings" option from the sub-menu.
- Click on the "Live Class Settings" button.
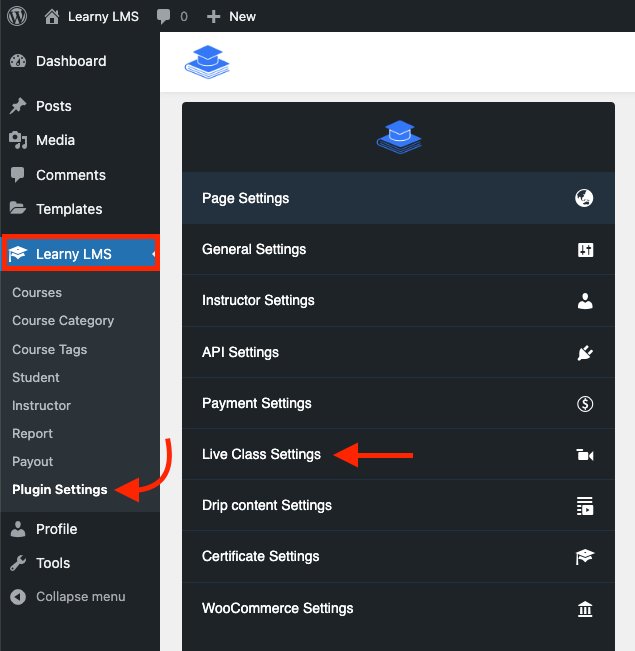
Figure 1. Learny LMS Live Class Settings
- Provide Zoom API keys.
- Provide Zoom Secret Keys.
- Click on the "Update Live Settings" to save your settings.
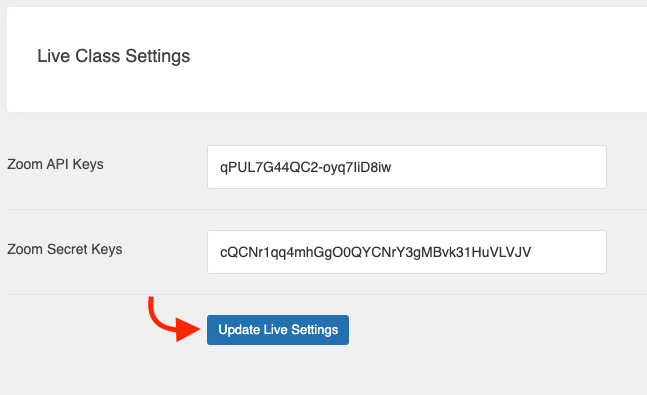
Figure 2. Learny LMS Updating Live Class Settings
Note: To use the Zoom service, you have to install the Zoom streaming service plugin on your WordPress. You can use the Jitsi streaming service without installing any plugin.
To add/take an online live class with your inrolled course students, you can follow the steps below:
- Log in to the site as admin.
- Click on the "Learny LMS" option from the left menu.
- Select the "Courses" option from the sub-menu.
- Click on the "Add new button" button. (If you want to take the live class on your new course.)
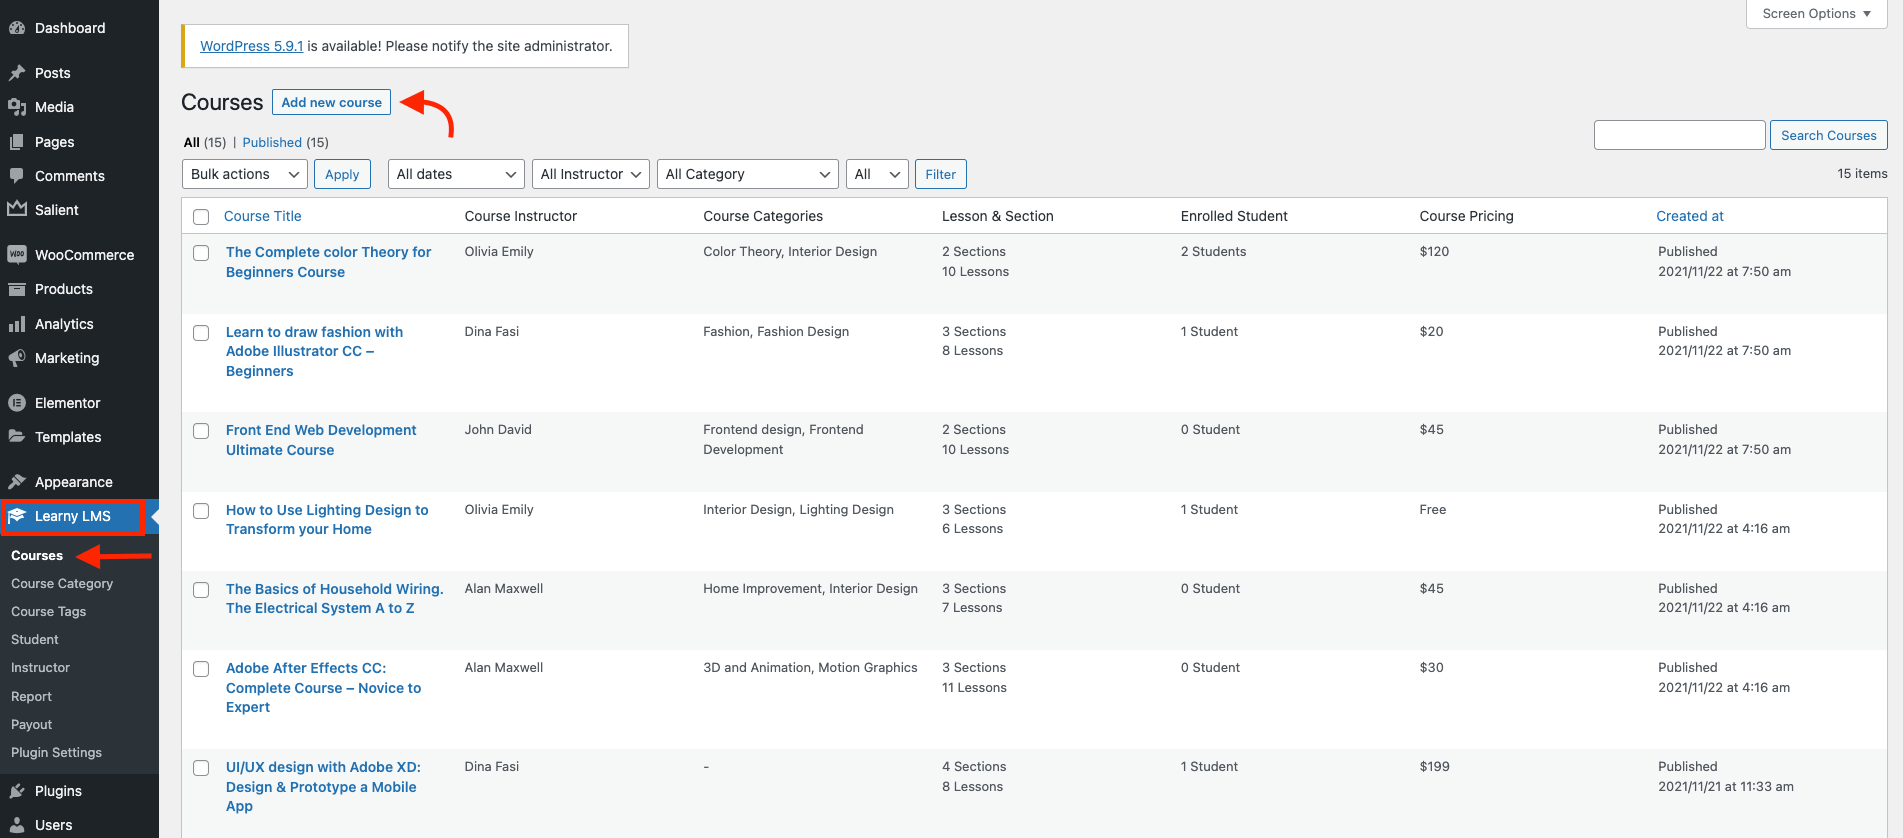
Figure 3. Learny LMS Adding Live Class (New Course)
- Click on the course/ Select the "Edit" button from the course.
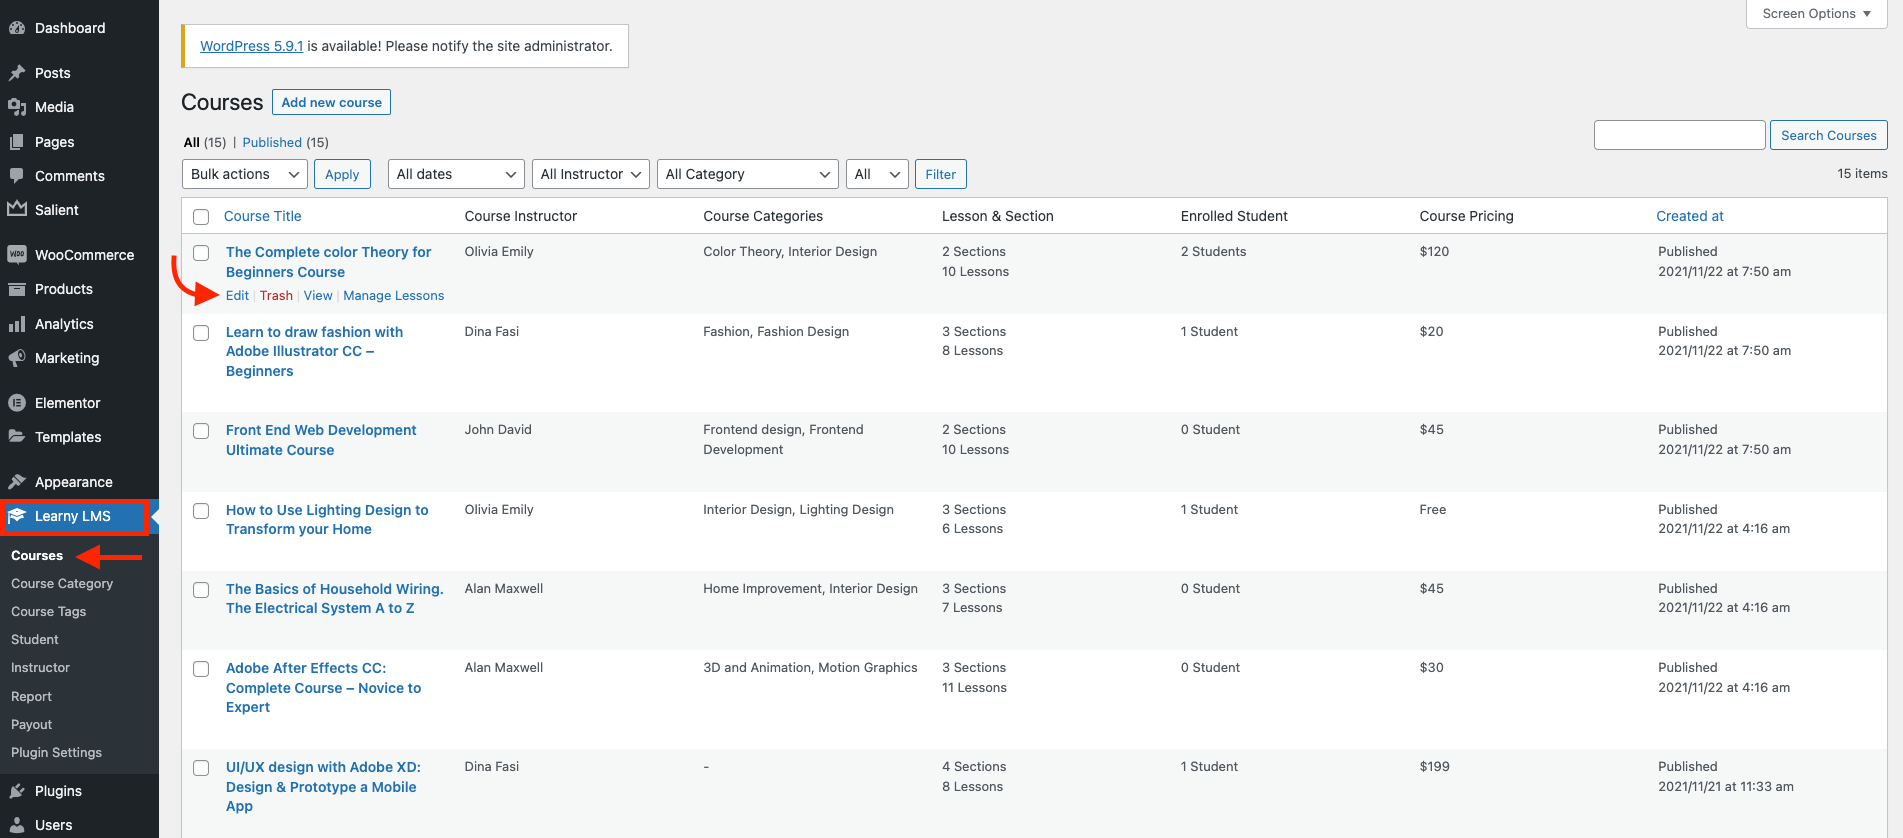
Figure 4. Learny LMS Adding Live Class (Existing Course)
- Navigate to the bottom.
- Select the "Add Live Class" button from the "Live Class" section.
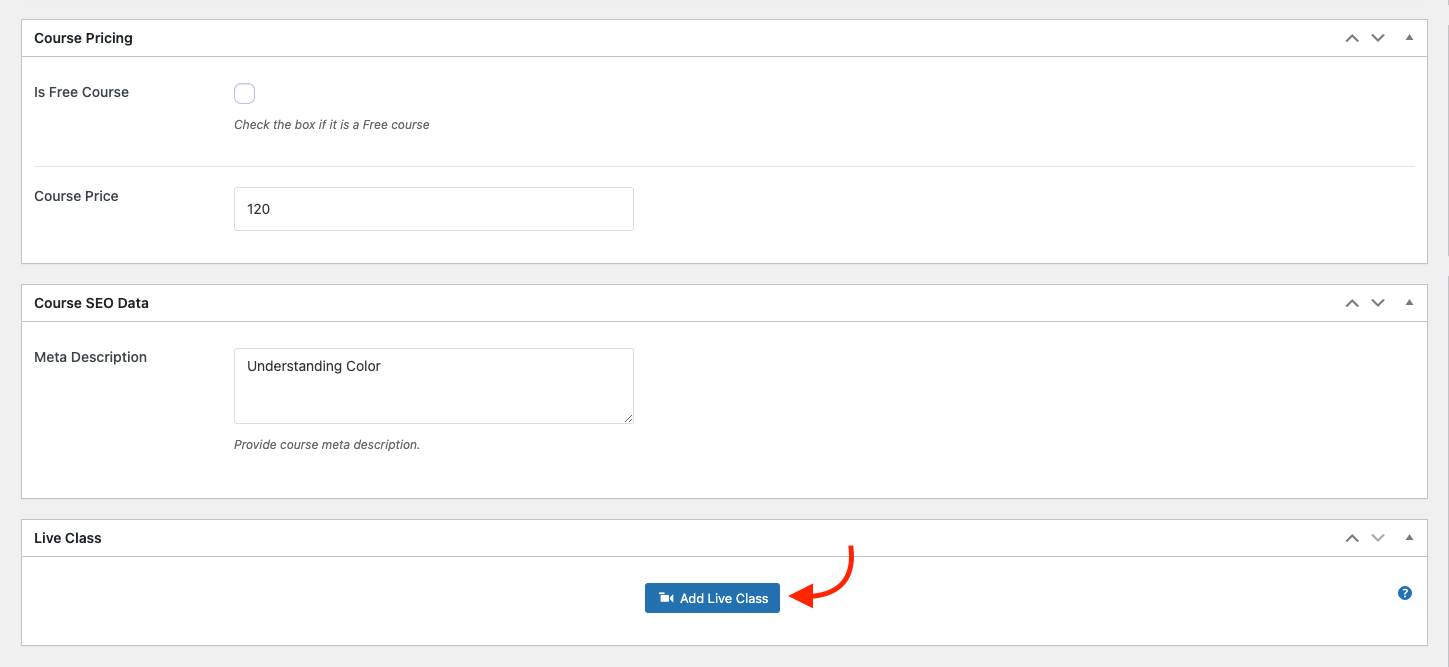
Figure 5. Learny LMS Adding Live Class
- Provide the live class topic.
- Choose a streaming service.
- Set the live class schedule (Date).
- Set the live class schedule (Time).
- Add notes for your enrolled students. (Optional)
- Click on the "Submit" button to save your data.
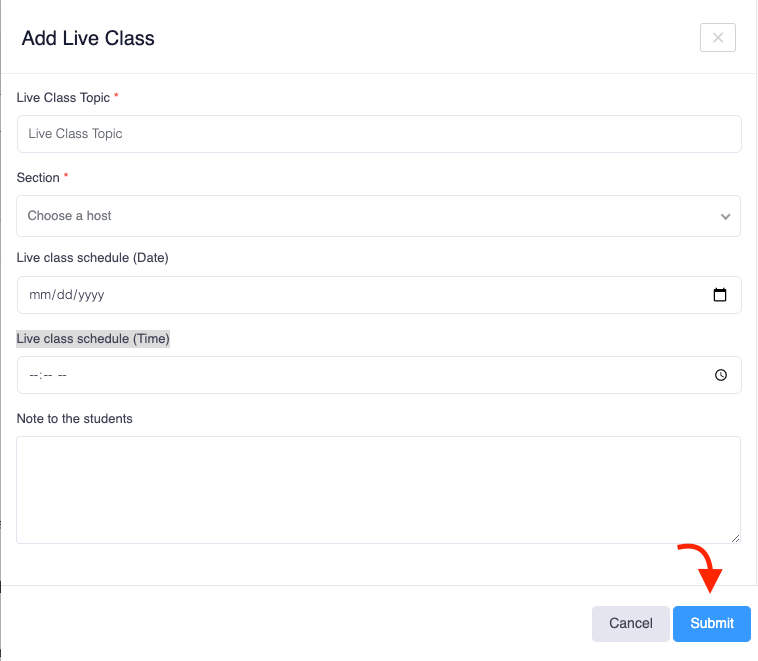
Figure 6. Learny LMS Submitting New Live Class
You can change your class schedule if you want. For this, you can follow the steps below:
- Click on a course/ Select the "Edit" button from the course.

Figure 7. Learny LMS Navigating Live Class Update
- Navigate to the bottom and select the "Live Class" section.
- Select a live class.
- Click on the "Edit" icon.

Figure 8. Learny LMS Live Class Edit/Update Button
- Update required information.
- Click on the "Submit" button to update your data.
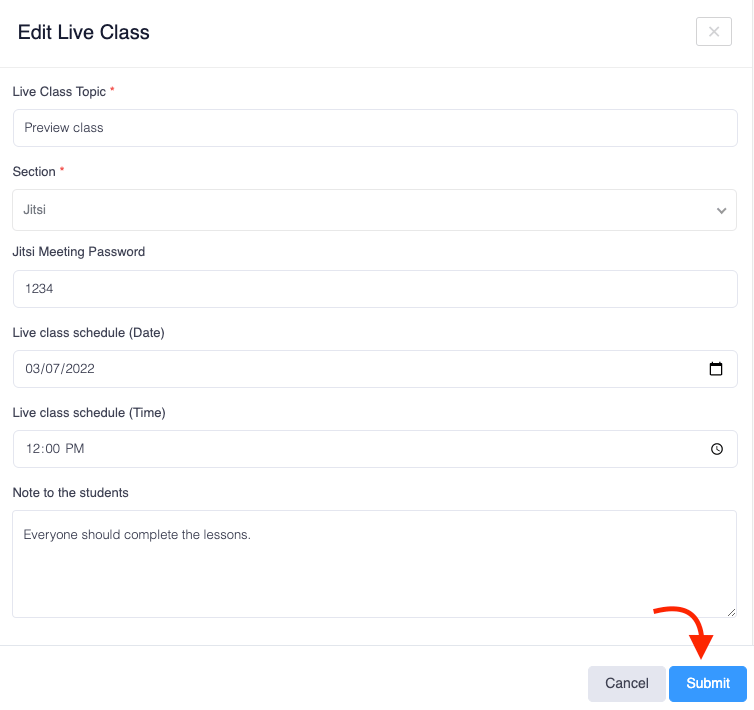
Figure 9. Learny LMS Submitting Edited Live Class
To delete a live class, you can navigate:
- Select a live class.
- Click on the "Delete" icon.

Figure 10. Learny LMS Deleting Live Class
- Click on the "Yes" button for confirmation.
To start your live class, you can follow the steps below:
- Select a live class.
- Click on the "Video" icon.

Figure 11. Learny LMS Starting Online Live Class
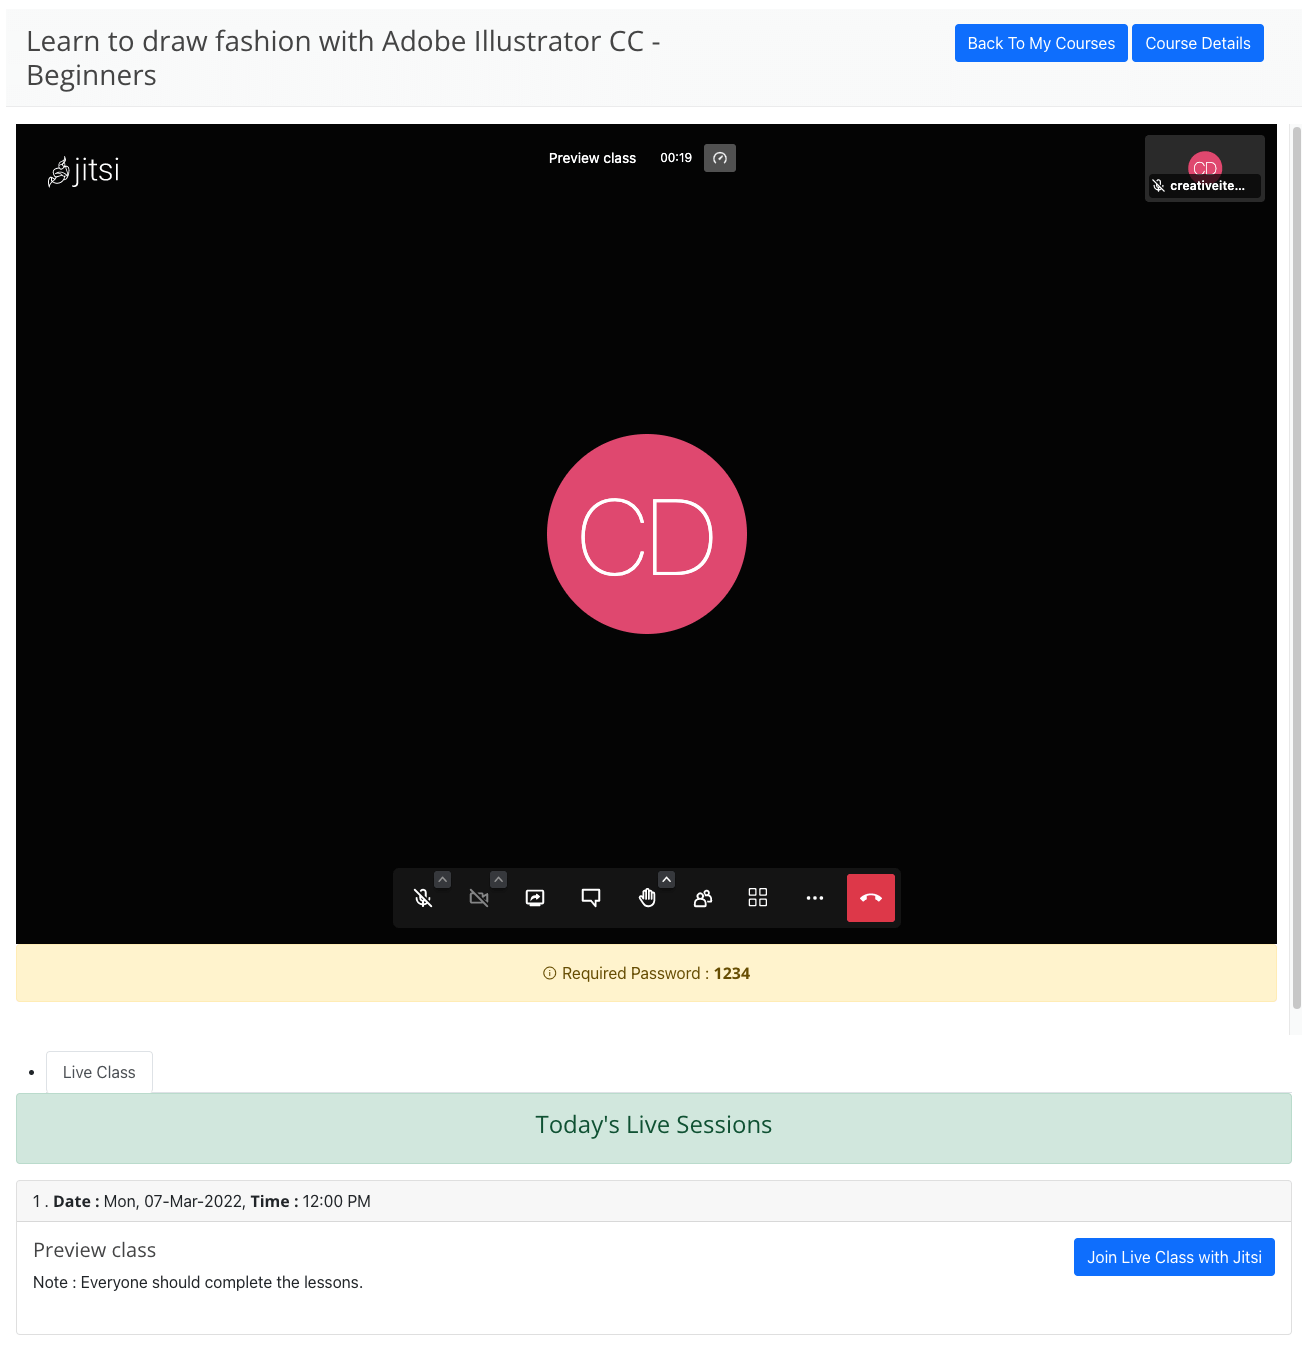
Figure 12. Learny LMS Live Class (Frontend)
Was this article helpful to you?
How can we help?
Contact us and we will get back to you as soon as possible

