Website settings
A superadmin can modify and update the website in this school management system. As a superadmin, you have to follow the steps:
- Log in to the superadmin panel.
- Select the "Settings" option from the left menu.
- Choose the "Website settings" from the sub-menu.
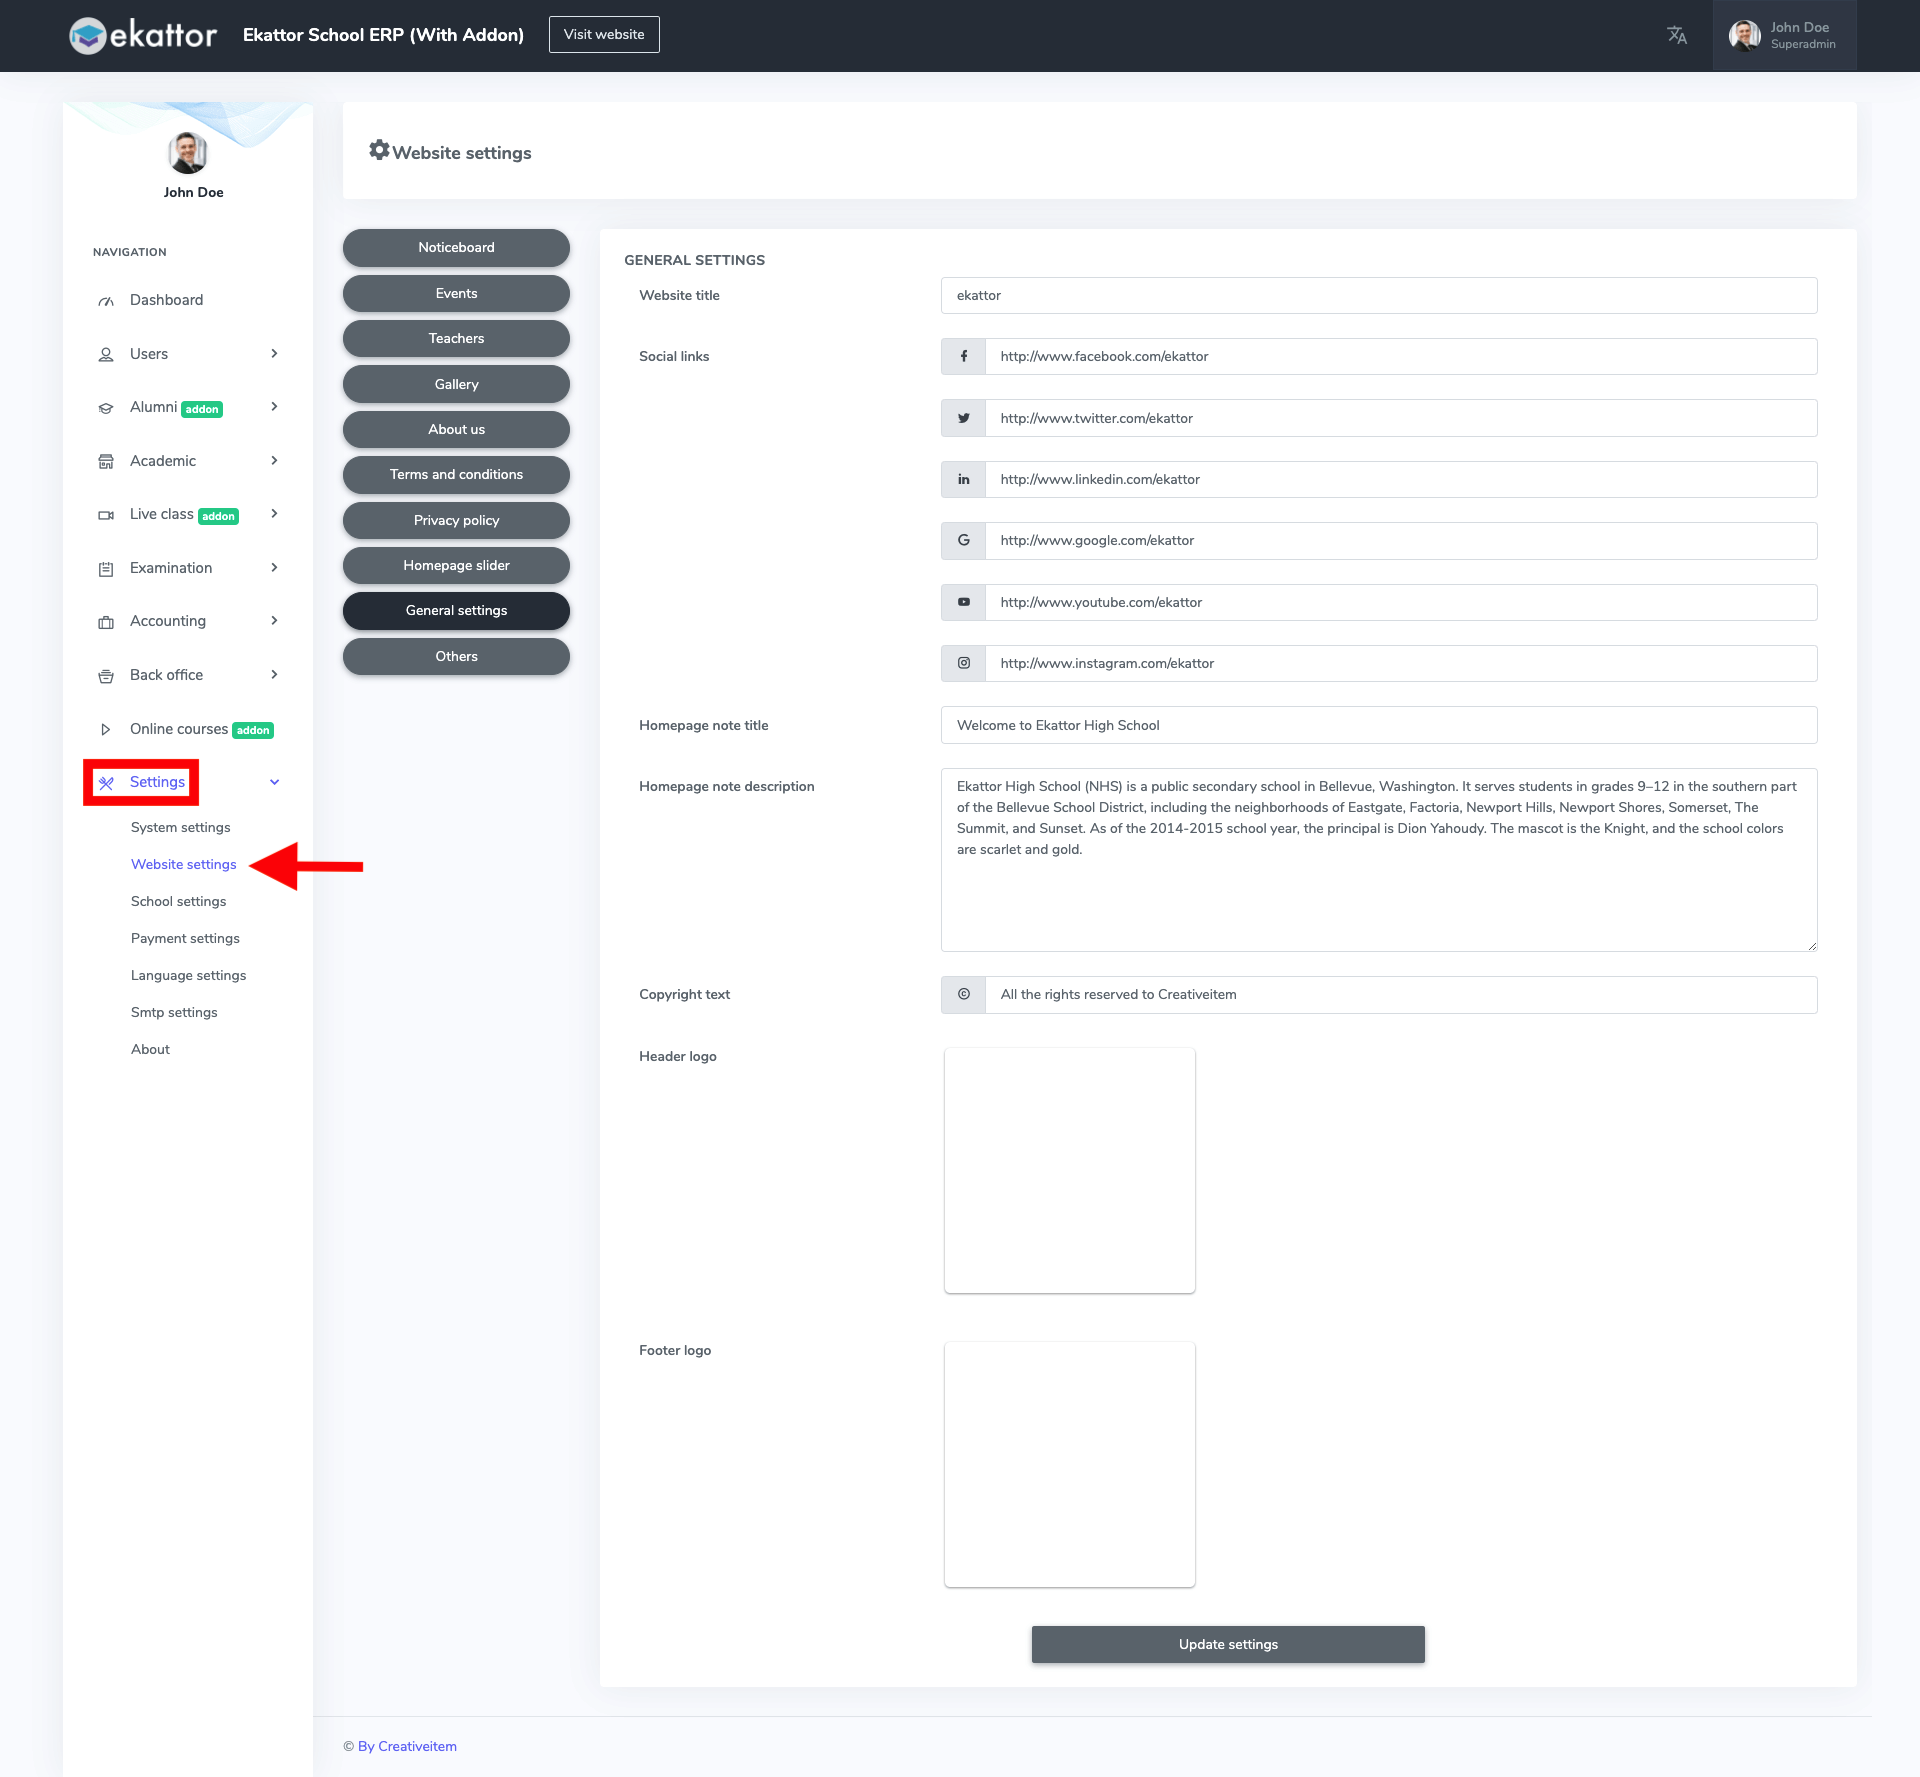
Figure 1. Ekattor ERP Website Settings
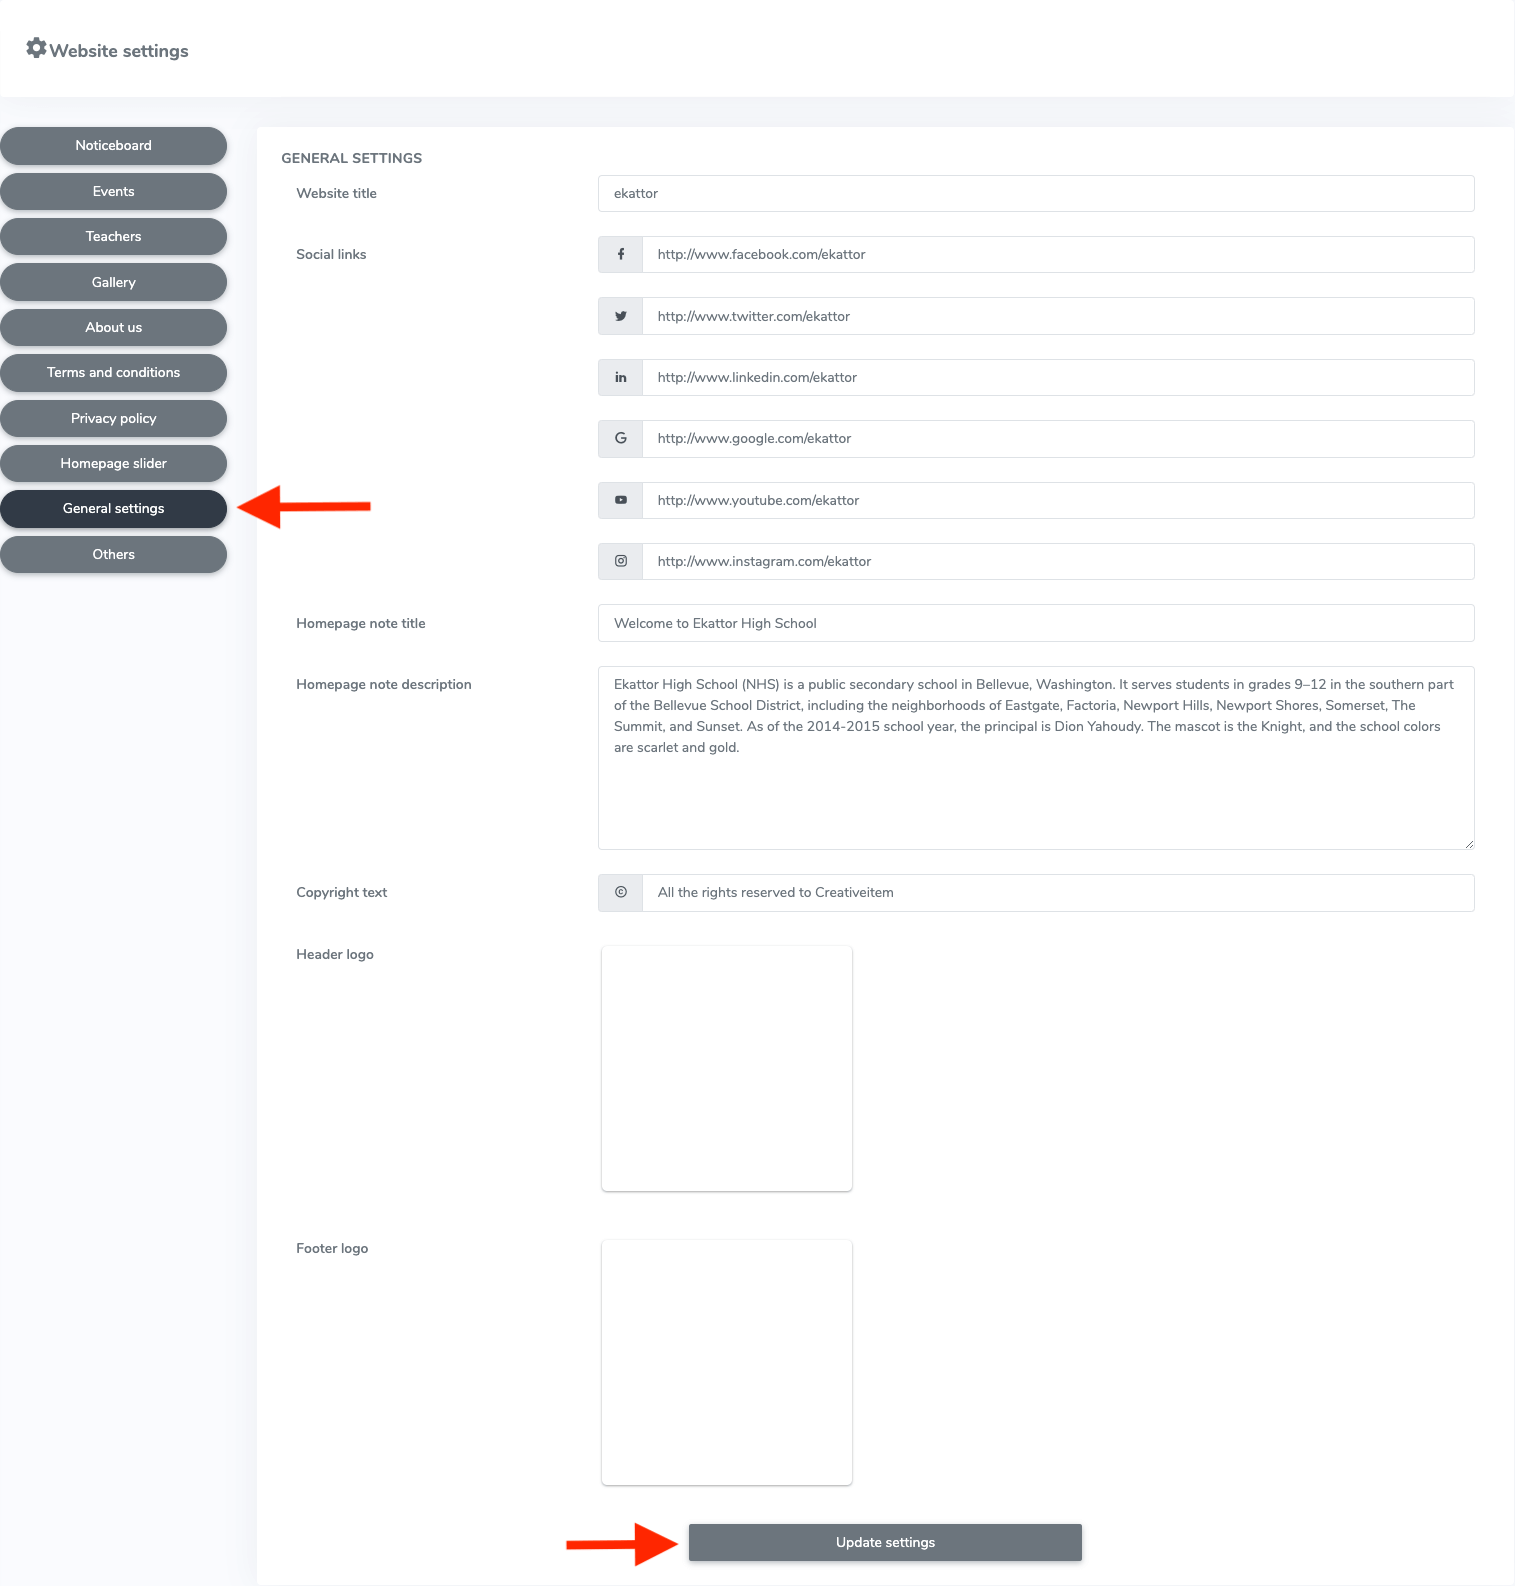
General Settings:
You can update the "General settings." In this settings panel, you can edit:
- Website title
- Social links. Like: Facebook, Twitter, Youtube, Linkedin, Gmail, Instagram.
- Home page note title
- Home page note description
- Copyright text
- Header logo
- Footer logo
After that, select the "Update settings" option to complete your action.
Events:
You can also manage events from this panel. To monitor and control this panel, you have to navigate:
- Log in to the superadmin panel.
- Select the "Settings" option from the left menu.
- Choose the "Website settings" option from the sub-menu.
- Click on the "Events."
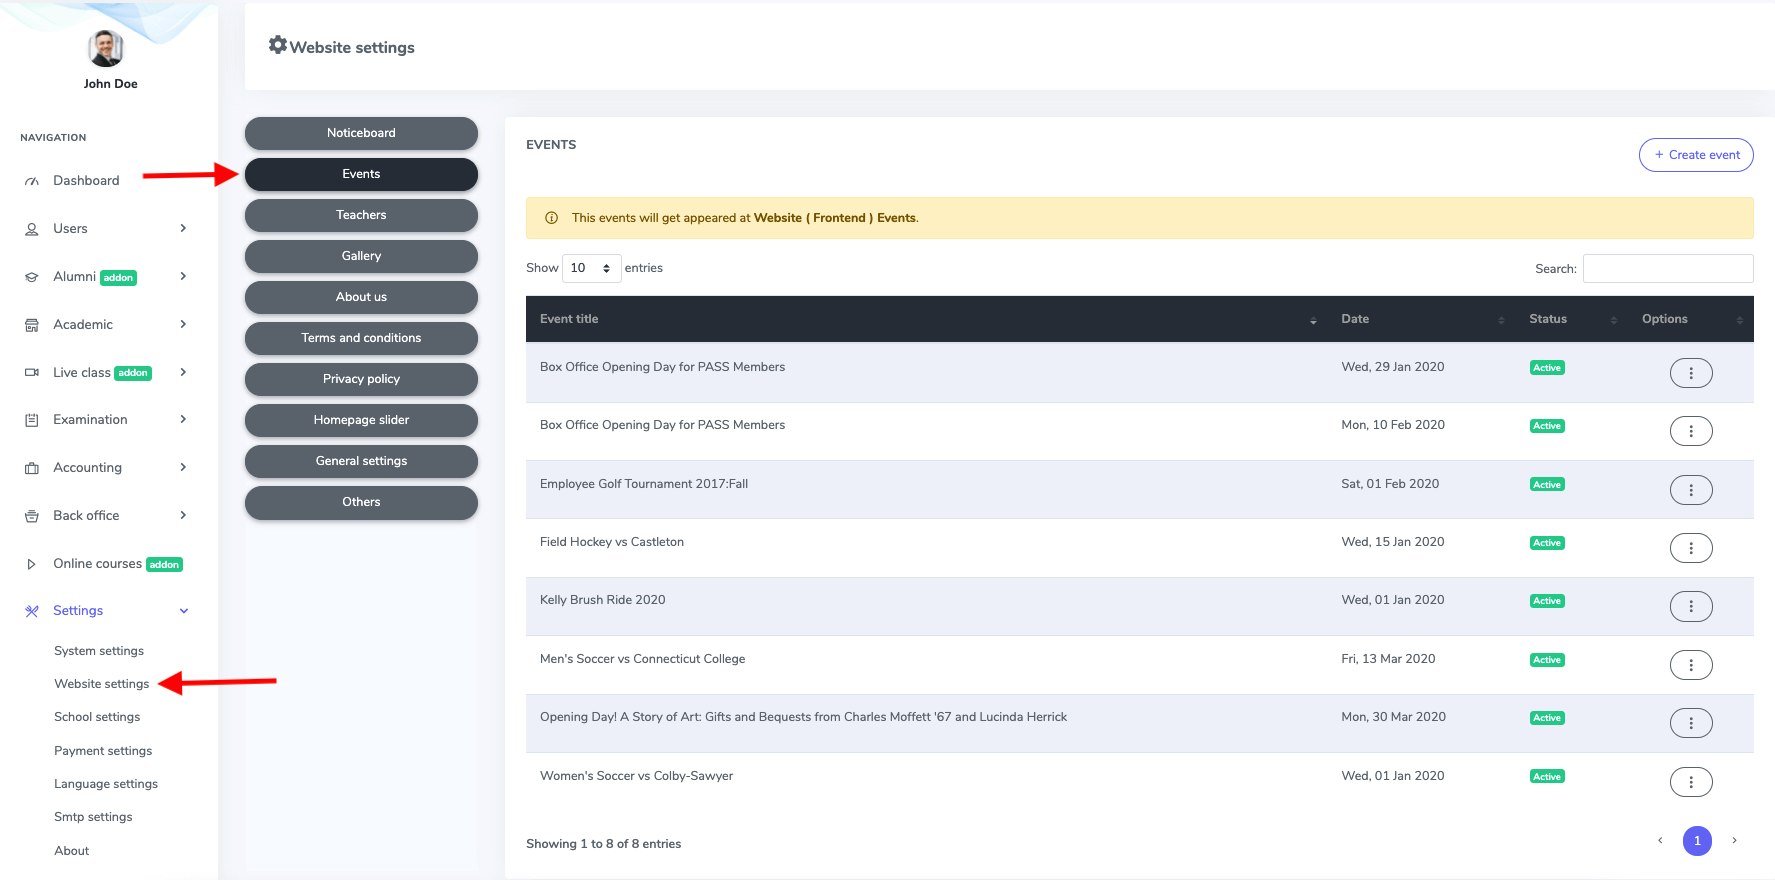
Figure 3. Ekattor ERP Event Settings
To add new events, you have to select the "Create event" button.
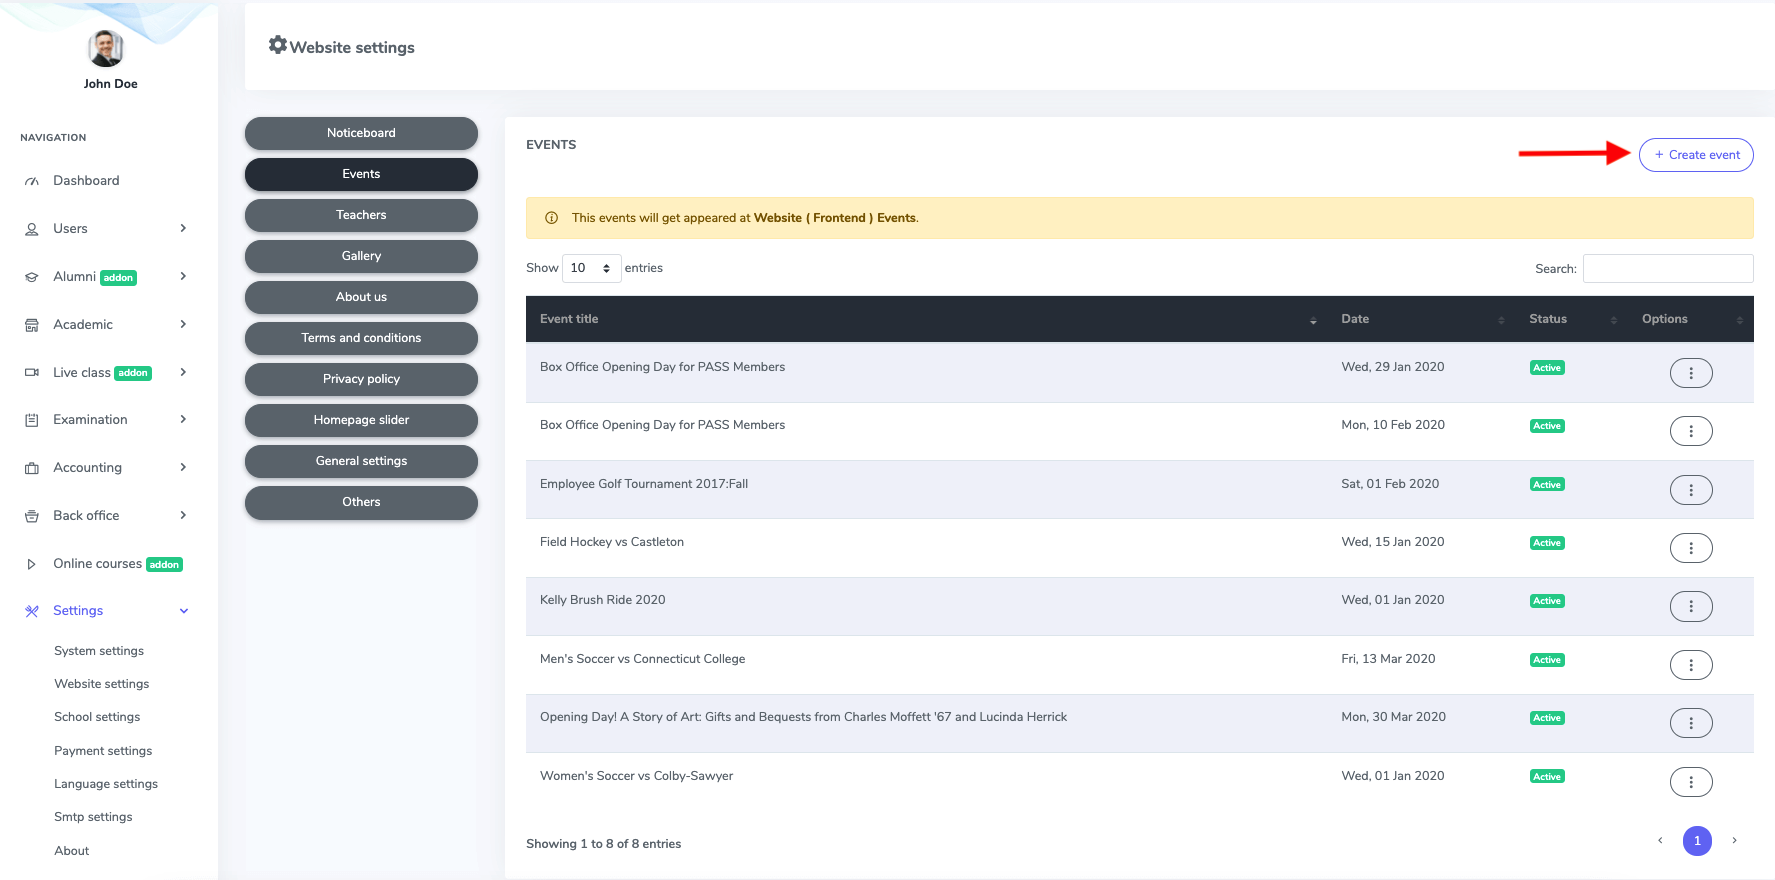
Figure 4. Ekattor ERP Creating Event
After opening the form, you can provide the event title, date, and status. Then select the "Save event" to add the event.
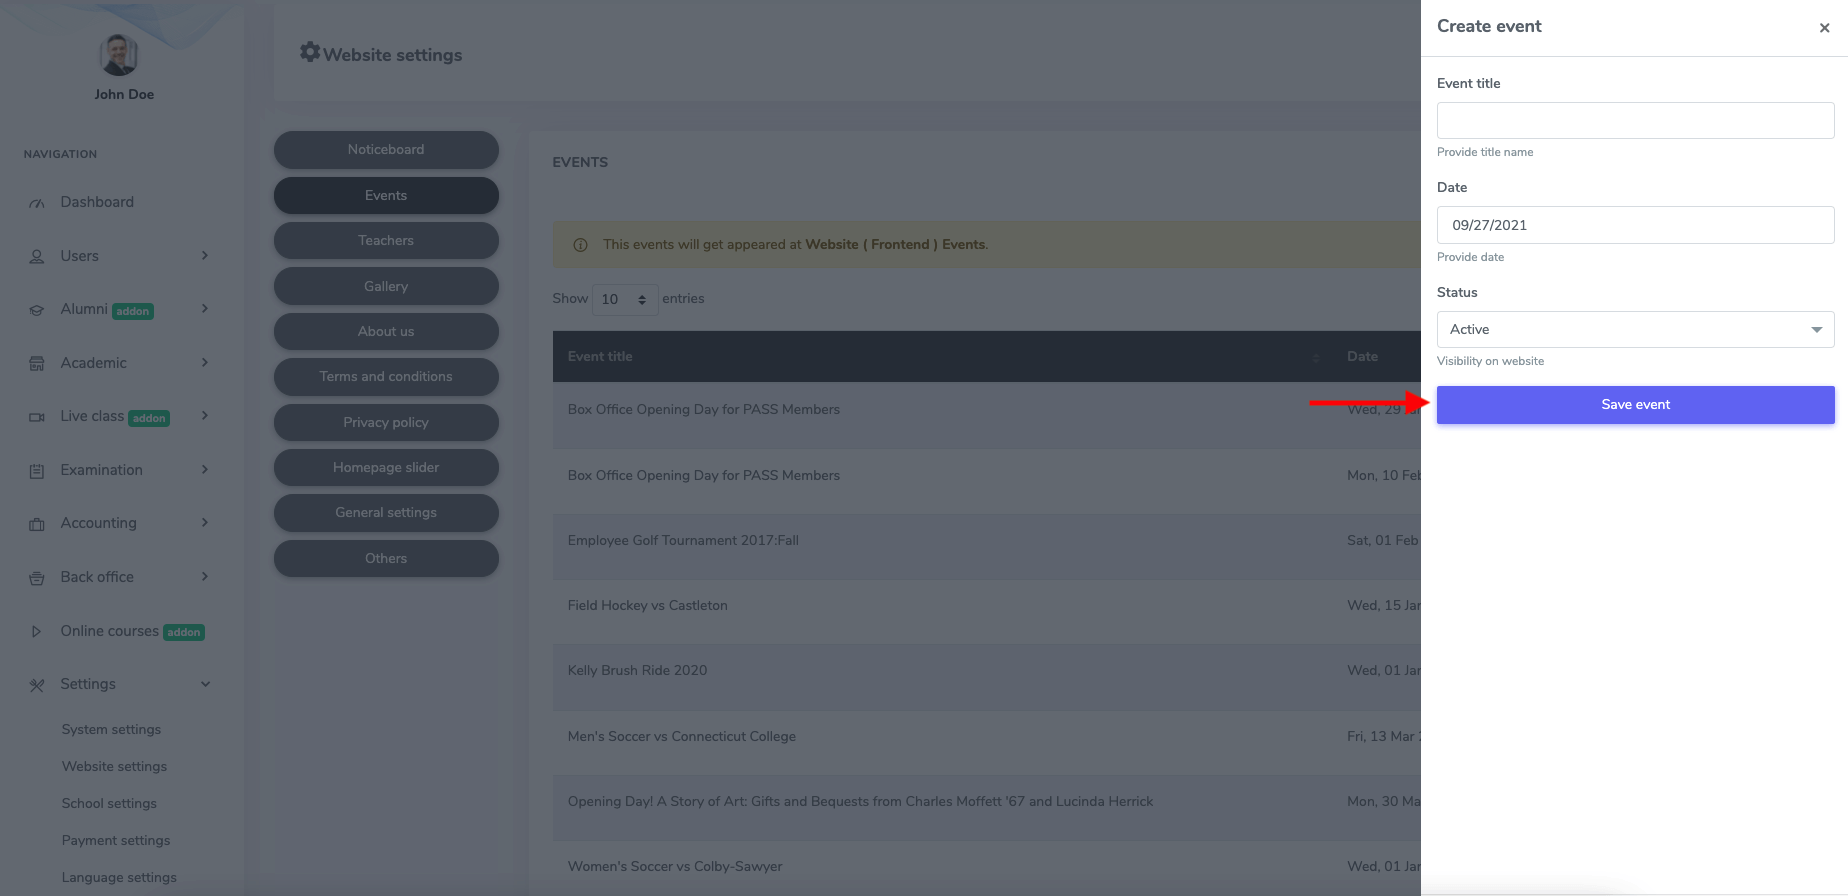
Figure 5. Ekattor ERP Saving New Event
To update the event, you have to follow the steps:
- Select the "Edit" button from "Option."
- Update the required information,
Select the "Save event" button to save your data.
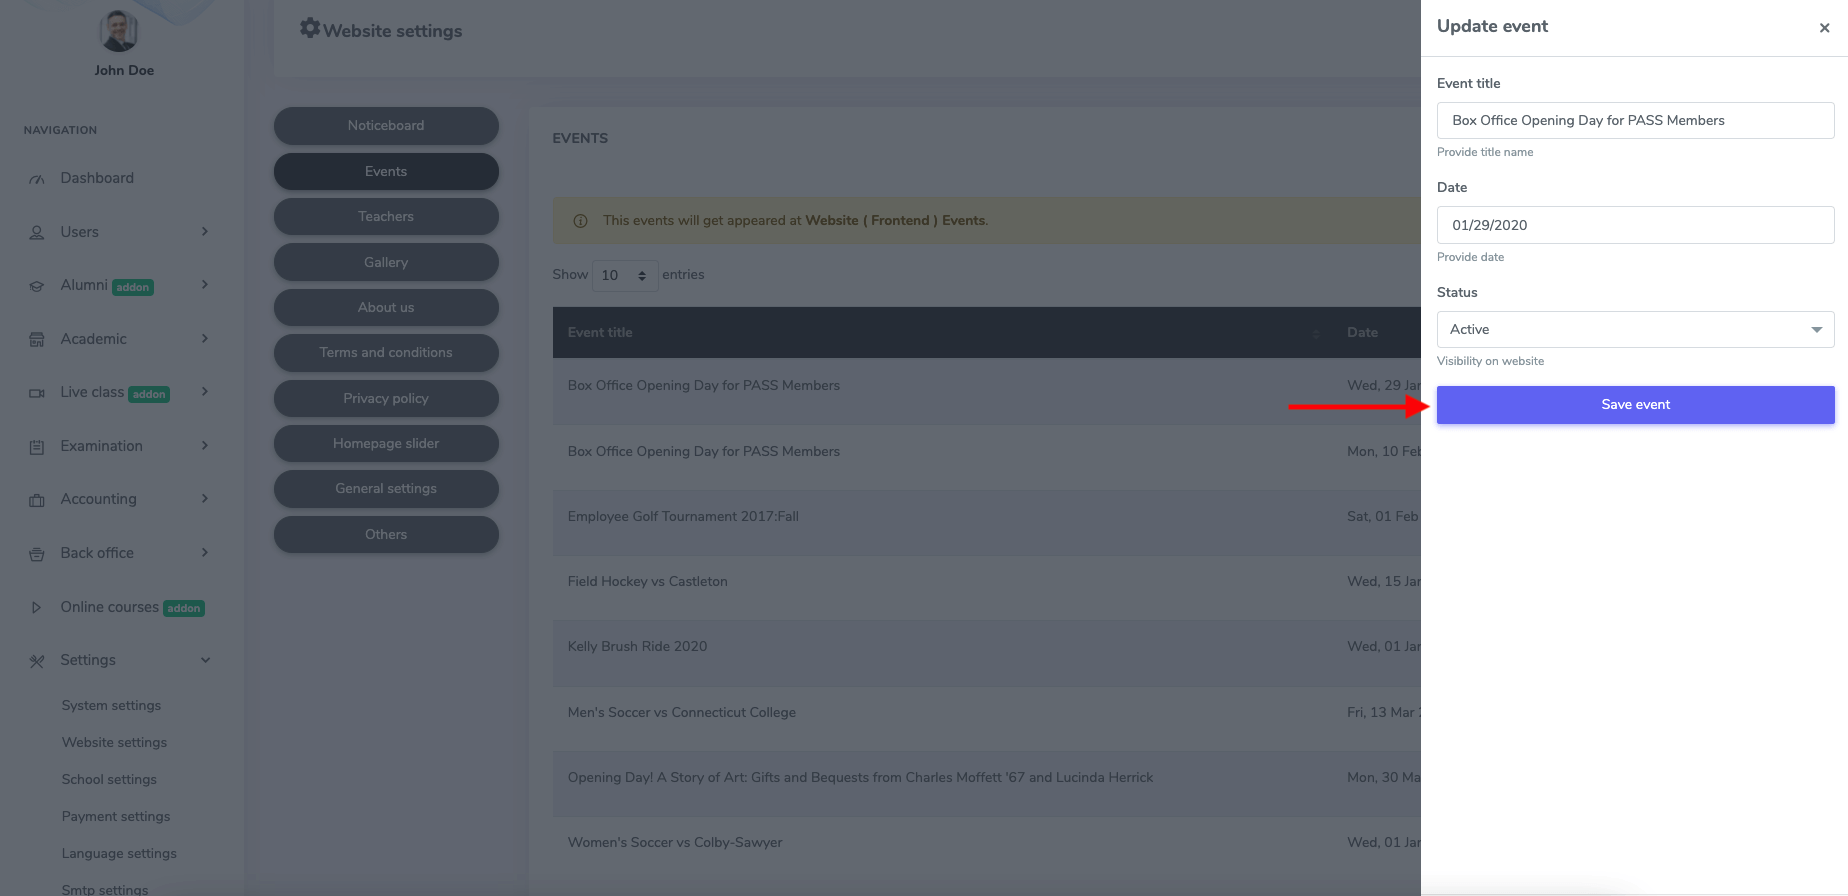
Figure 6. Ekattor ERP Updating Event
To delete an event, you have to select the "Delete" button from "Option." Now, select the "Continue" button for confirmation.
Gallery:
In this panel, you can add, modify and remove the gallery. Superadmin can manage this panel. As a superadmin, you have to follow the steps:
- Log in to the superadmin panel.
- Select the "Settings" option from the left menu.
- Choose the "Website settings" option from the sub-menu.
- Click on the "Gallery."
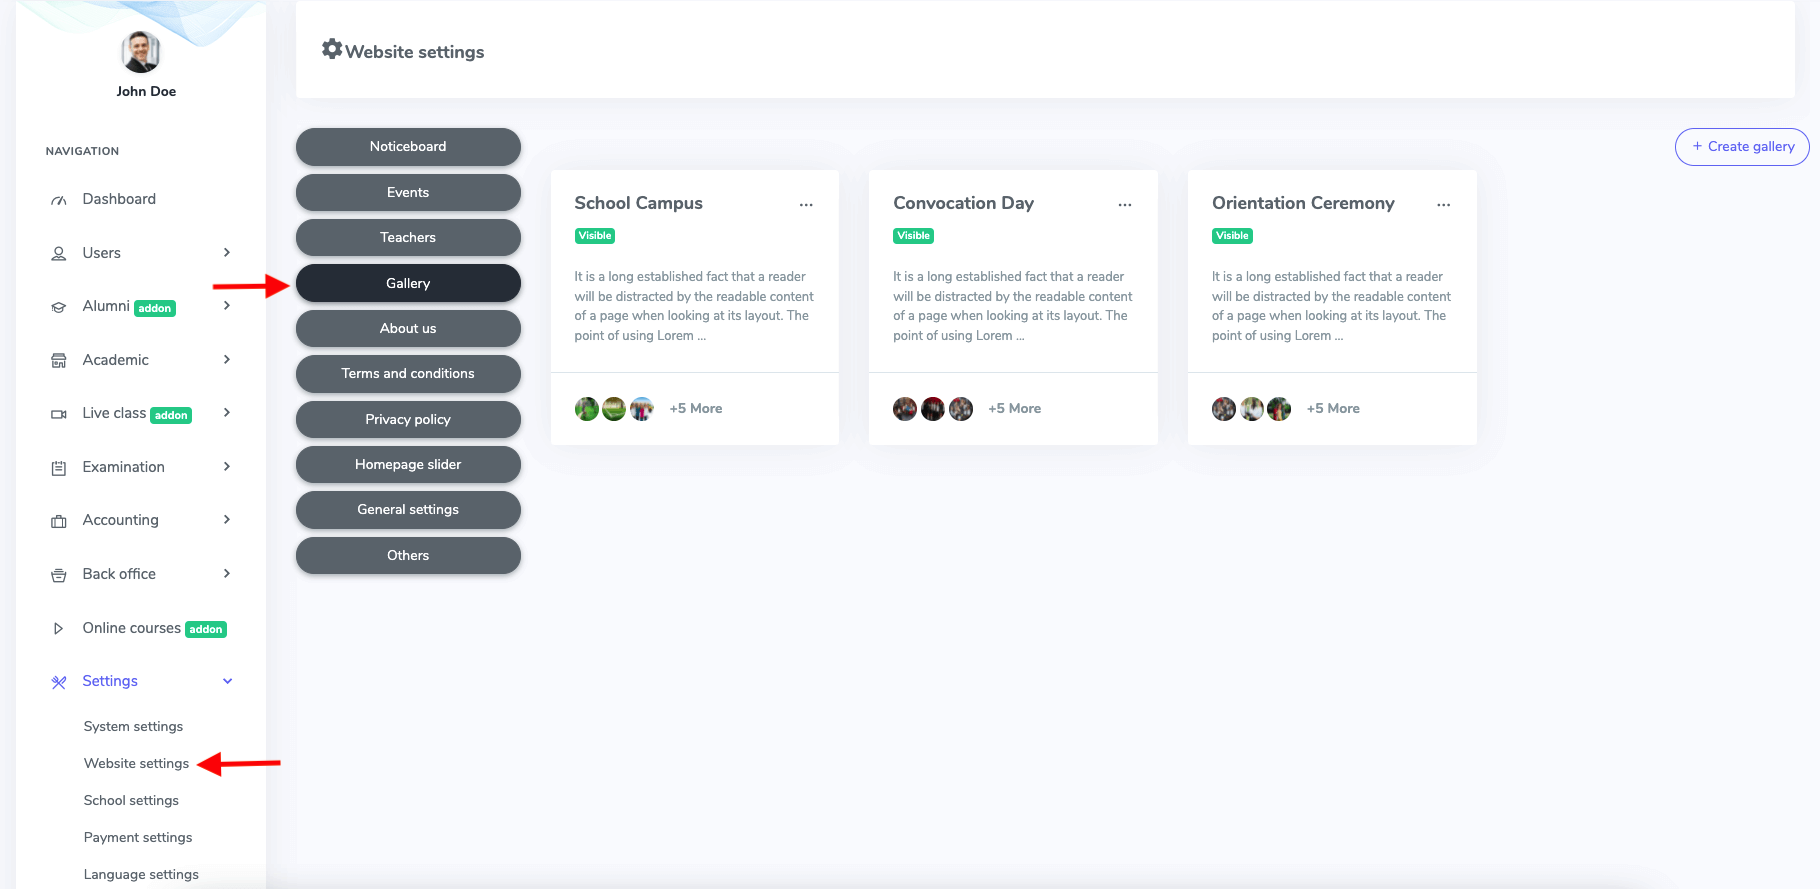
Figure 7. Ekattor ERP Gallery Settings
To add a new gallery, you have to select the "Create gallery" option.
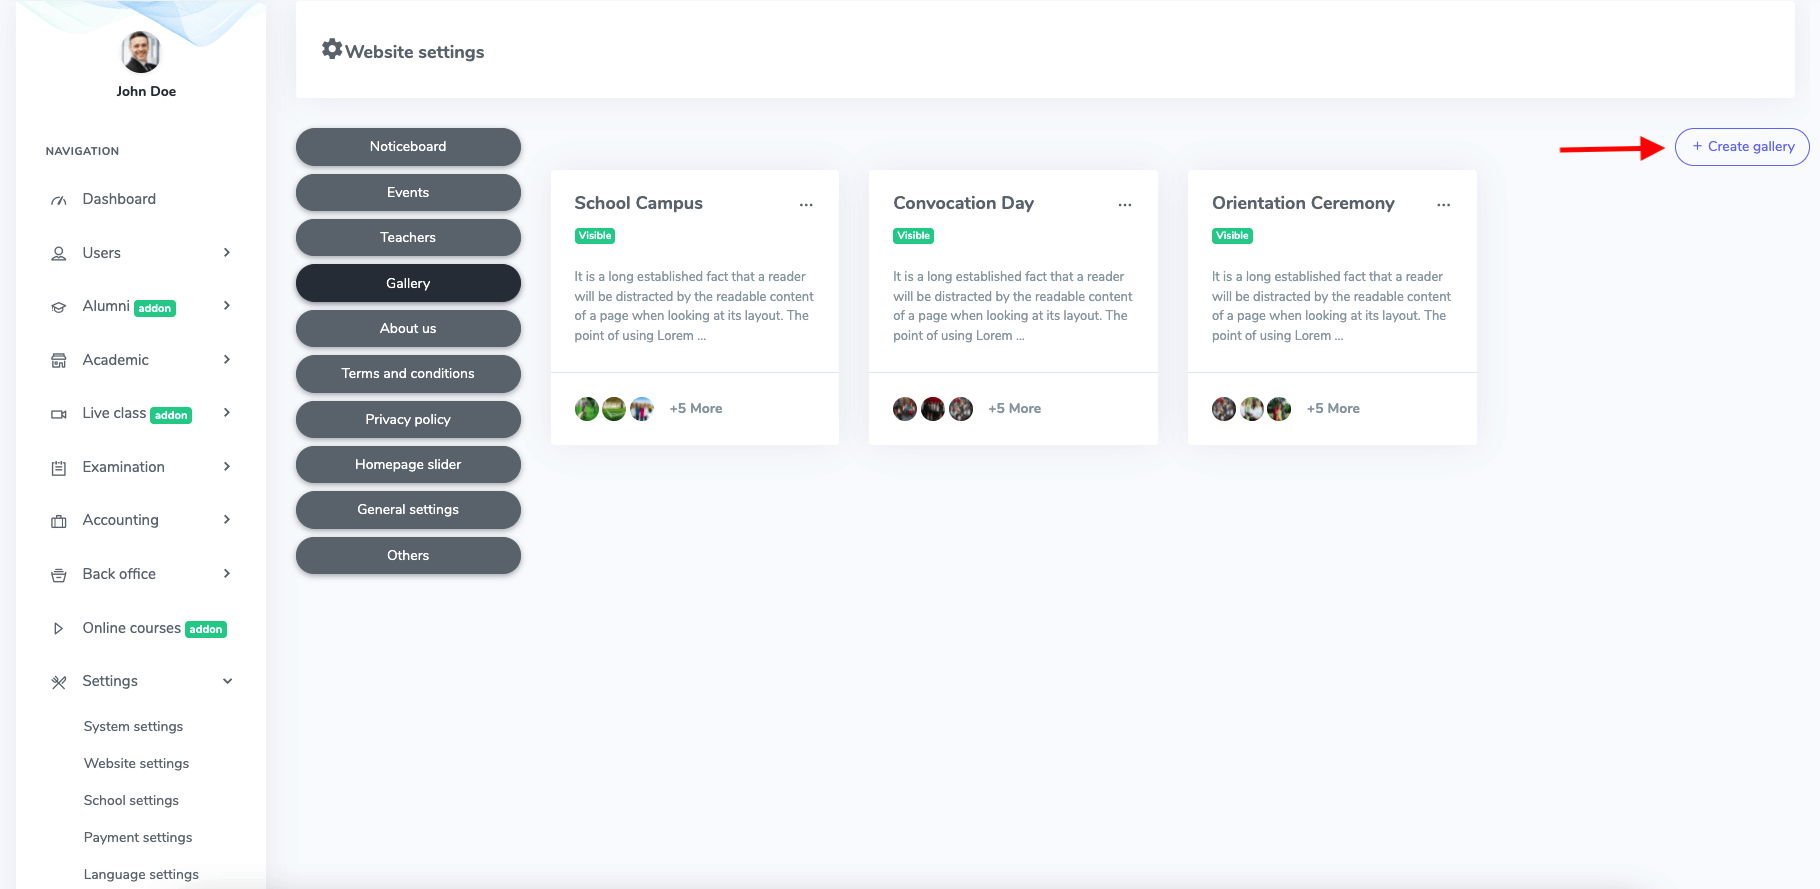
Figure 8. Ekattor ERP Creating Gallery
In this new form, you have to provide:
- Gallery title name
- Description
- Date
- Visibility
- Upload an image
After that, you have to select the "Save gallery" option.
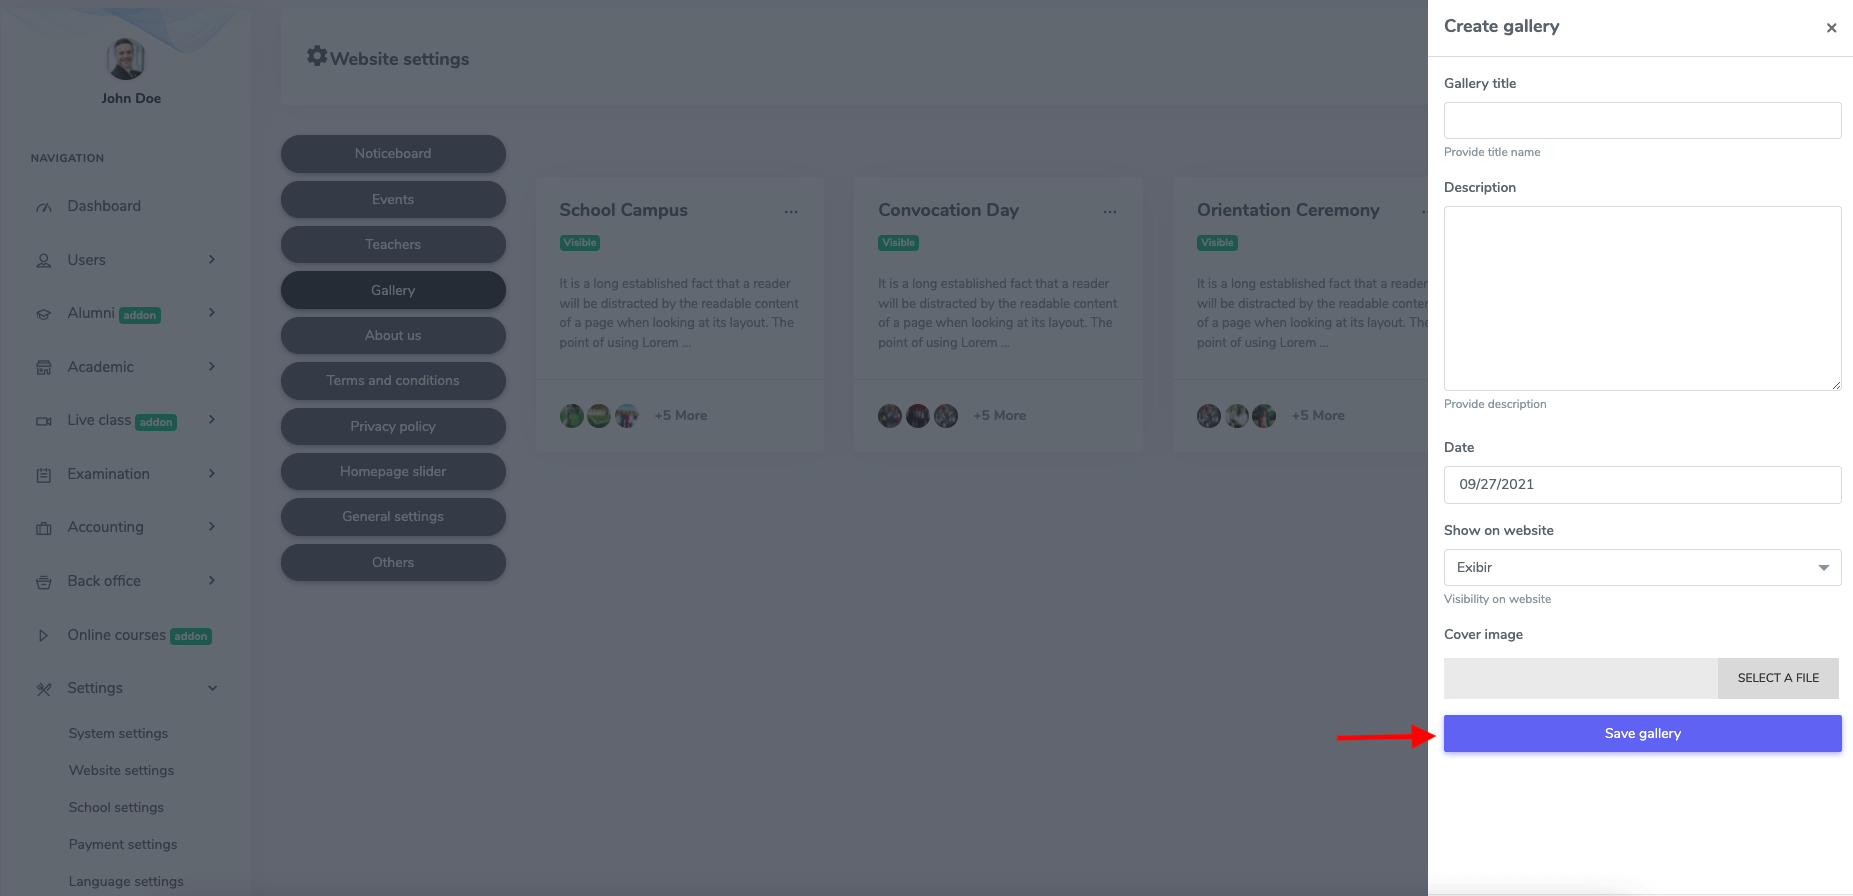
Figure 9. Ekattor ERP Saving New Gallery
To modify or edit the gallery, you have to right-click on the gallery and follow the instruction below:
- Provide the gallery title name
- Description
- Date
- Visibility
- Upload an image
Now select the "Save gallery" option to update your changes.
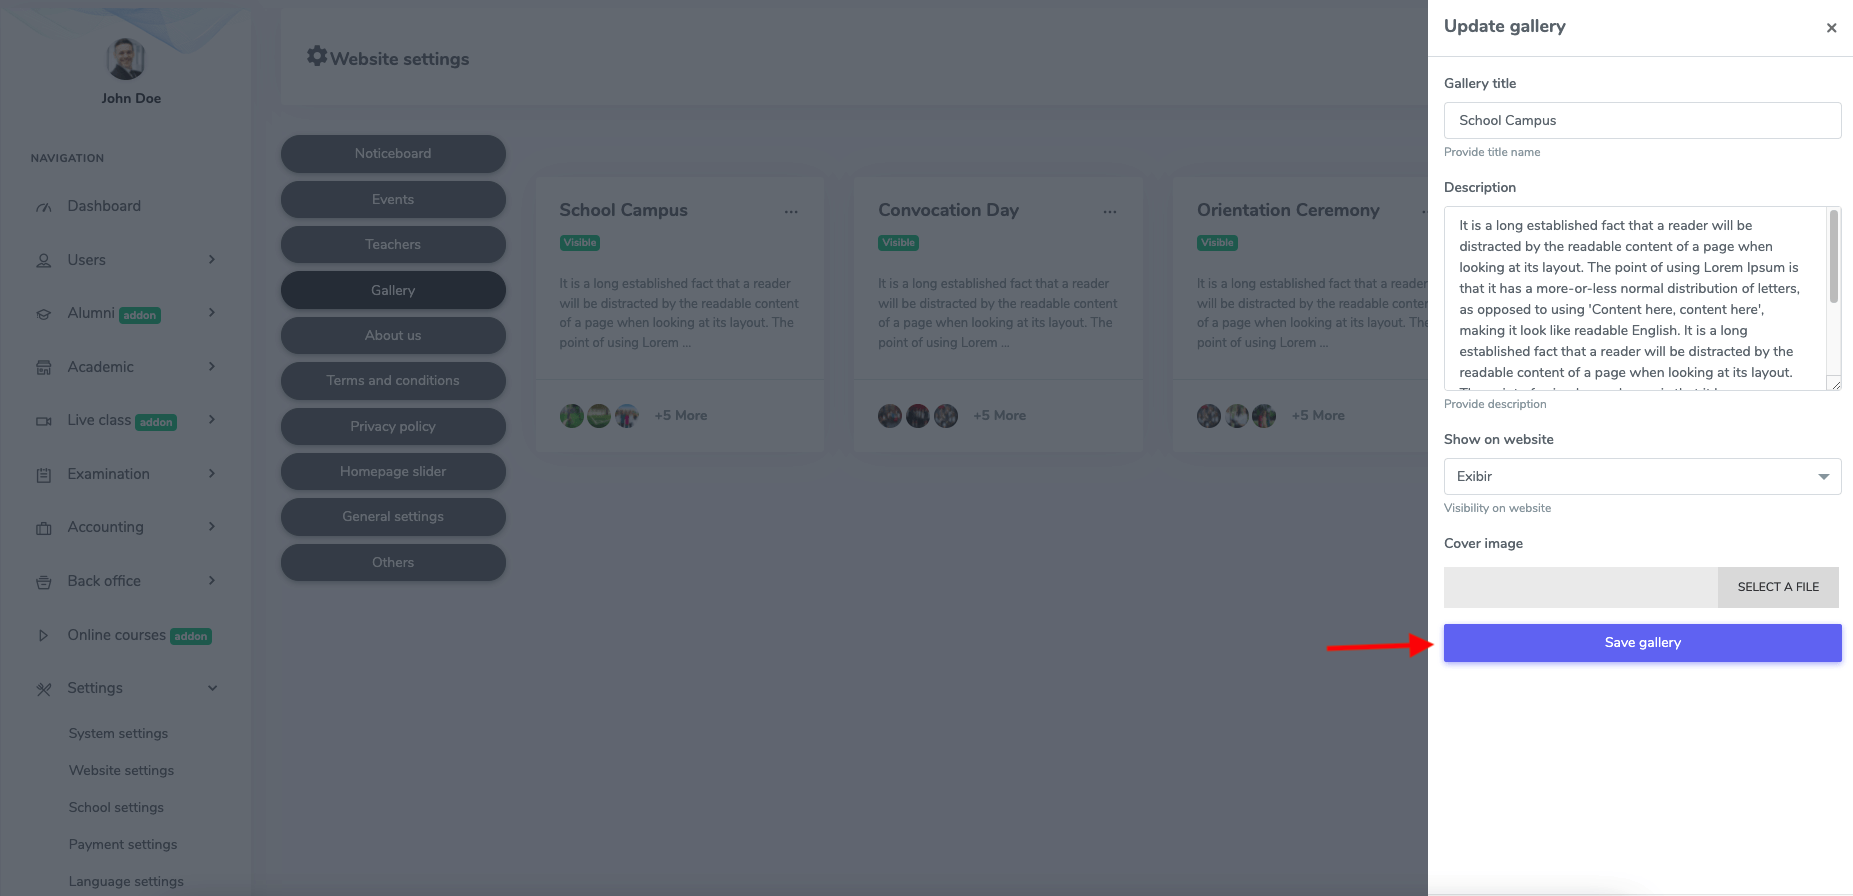
Figure 10. Ekattor ERP Updating Gallery
To delete an event, again, you have to right-click on the gallery. Then, select the "Delete" option and click the "Continue" button for confirmation.
You can see this modification from the frontend of your application gallery.
About us:
As a superadmin, you can update the description and banner in this panel. For this, you have to navigate:
- Log in to the superadmin panel.
- Select the "Settings" option from the left menu.
- Choose the "Website settings" option from the sub-menu.
- Click on the "About us."
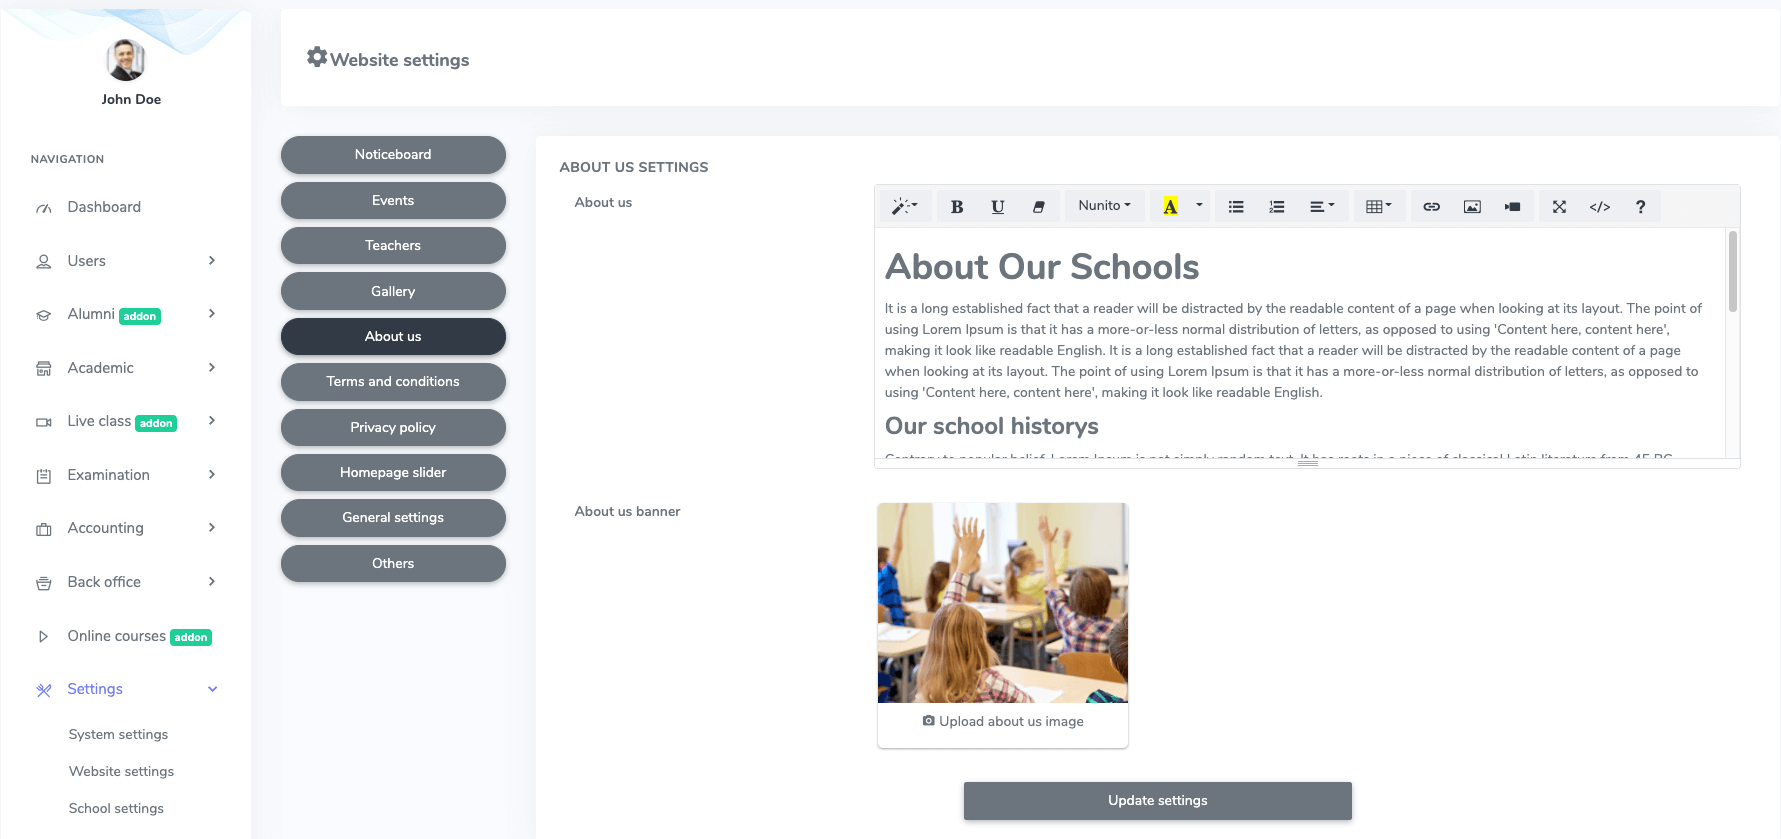
Figure 11. Ekattor ERP About Us-1
In this panel, you can update the description and banner of your school. After that, select the "Update settings" option.
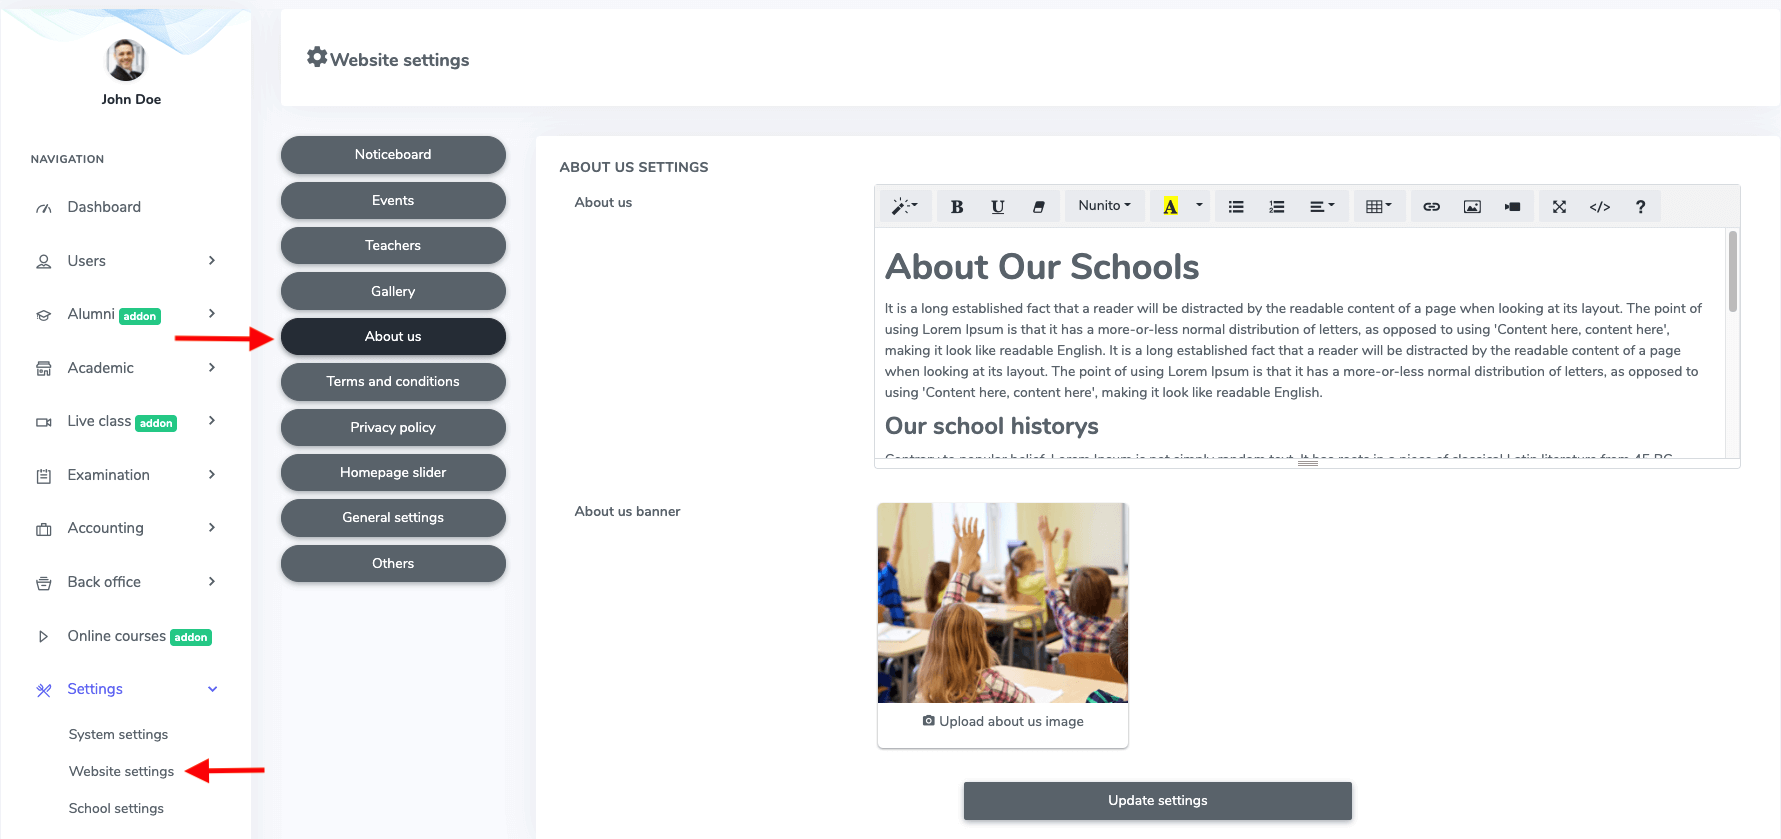
Figure 12. Ekattor ERP About Us-2
Terms and Condition:
To update and change the terms and conditions and details, you have to navigate:
- Log in to the superadmin panel.
- Select the "Settings" option from the left menu.
- Choose the "Website settings" option from the sub-menu.
- Click on the "Terms and conditions."
After that, select the "Update settings" to confirm your action.
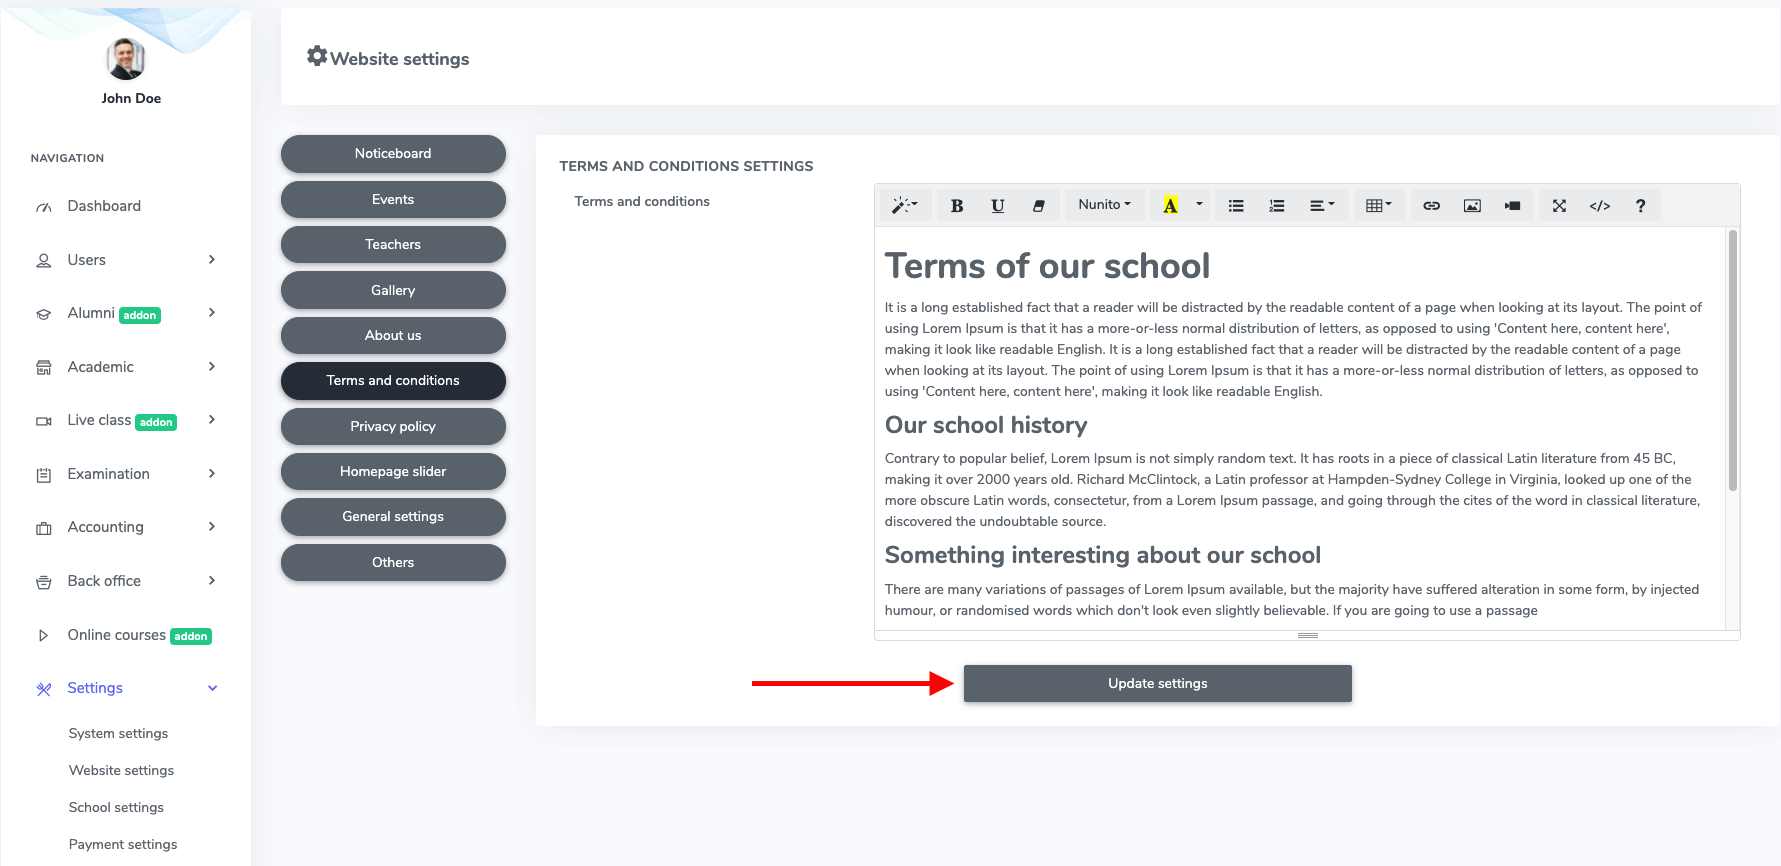
Figure 13. Ekattor ERP Terms & Conditions
Privacy policy:
You can change the privacy policy. For this, you have to follow the steps:
- Log in to the superadmin panel.
- Select the "Settings" option from the left menu.
- Choose the "Website settings" option from the sub-menu.
- Click on the "Privacy policy."
Now, select the "Update settings" to save the data.
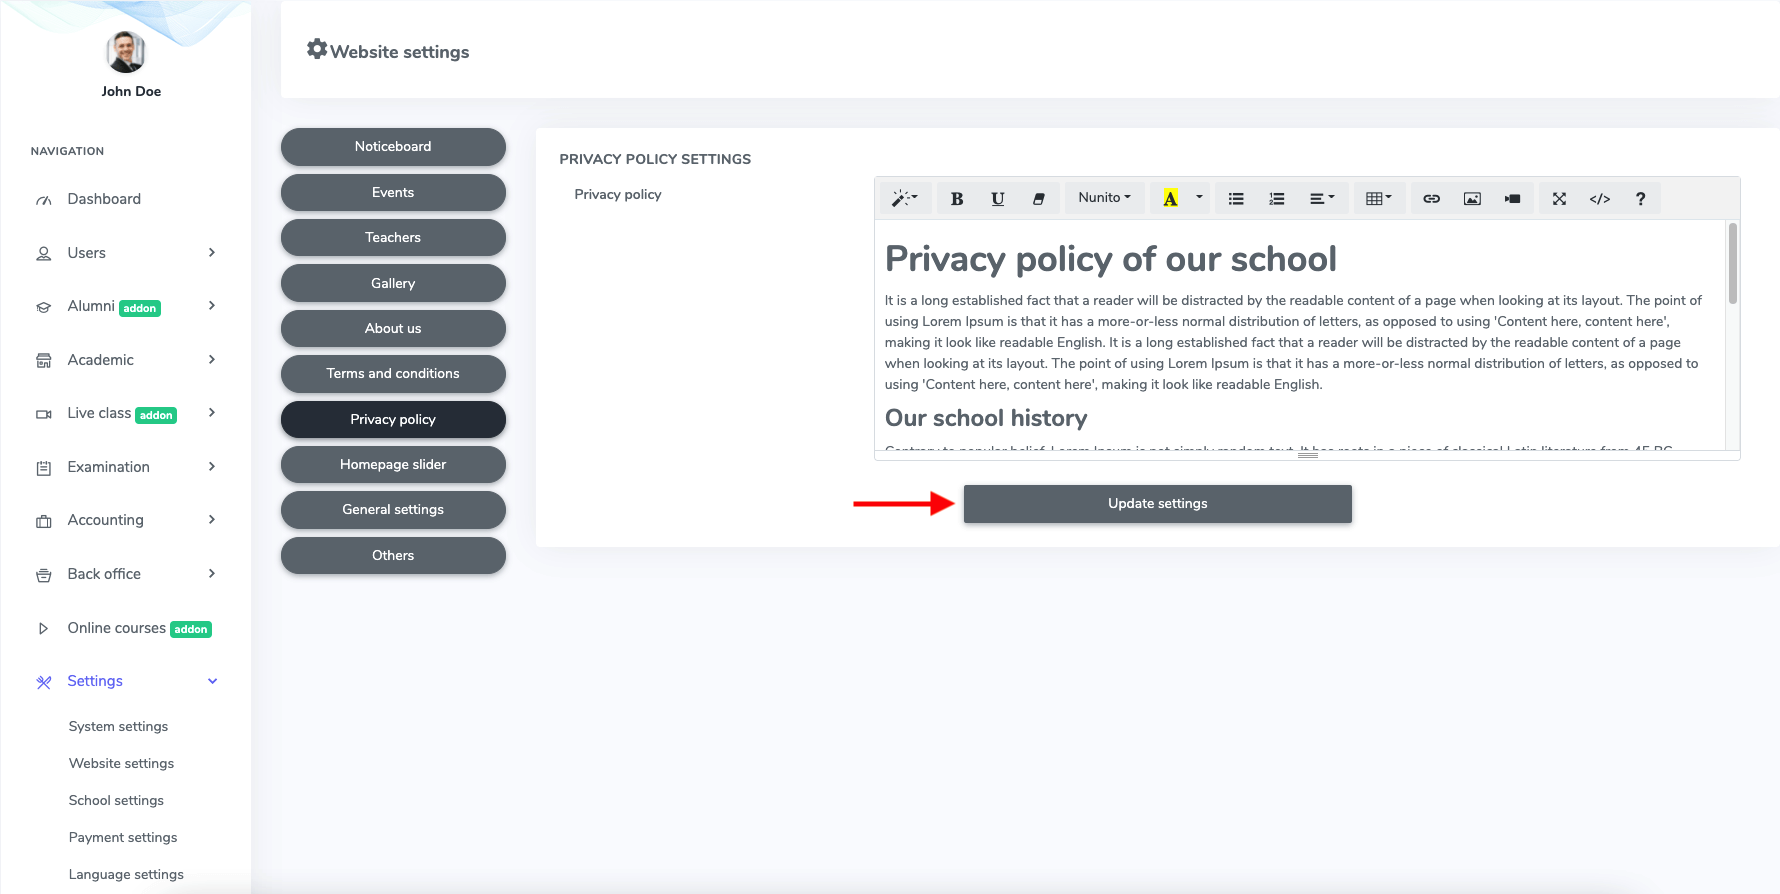
Figure 14. Ekattor ERP Privacy Policy
Home page slider settings:
A superadmin can change the home page settings of Ekattor. Follow the steps below:
- Log in to the superadmin panel.
- Select the "Settings" option from the left menu.
- Choose the "Website settings" option from the sub-menu.
- Click on the "Home page slider."
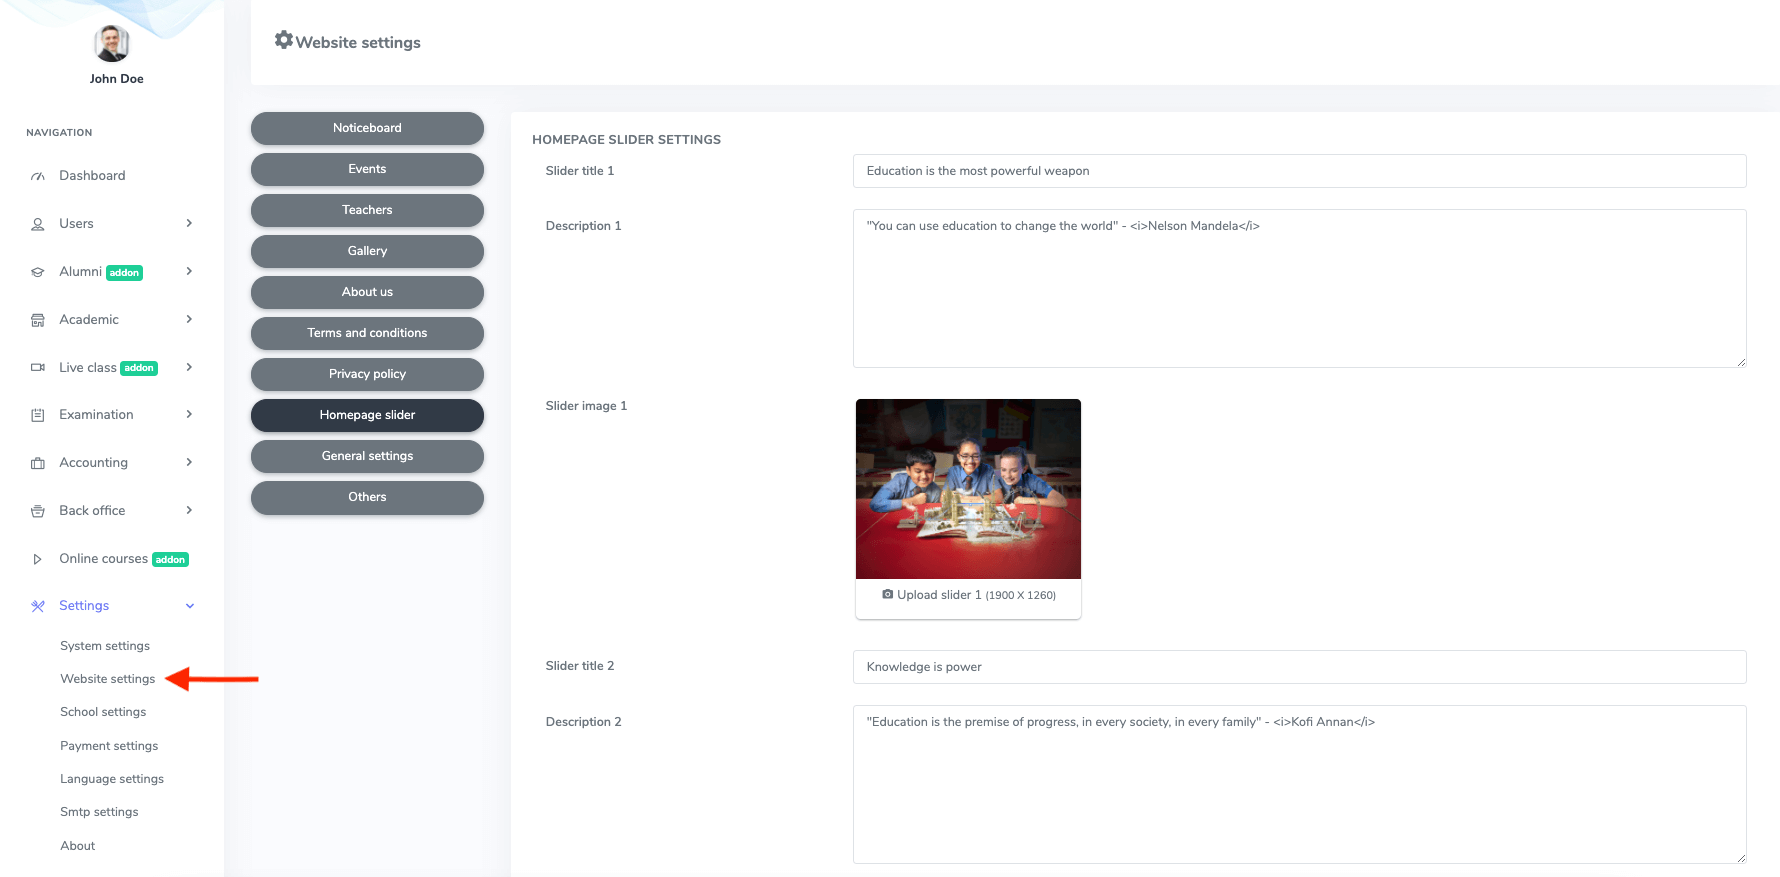
Figure 15. Ekattor ERP Home Page Slider
You can change:
- Slider title
- Description
- Slider image (You can change the image from your device)
After providing the data, select the "Update settings" option for confirmation.
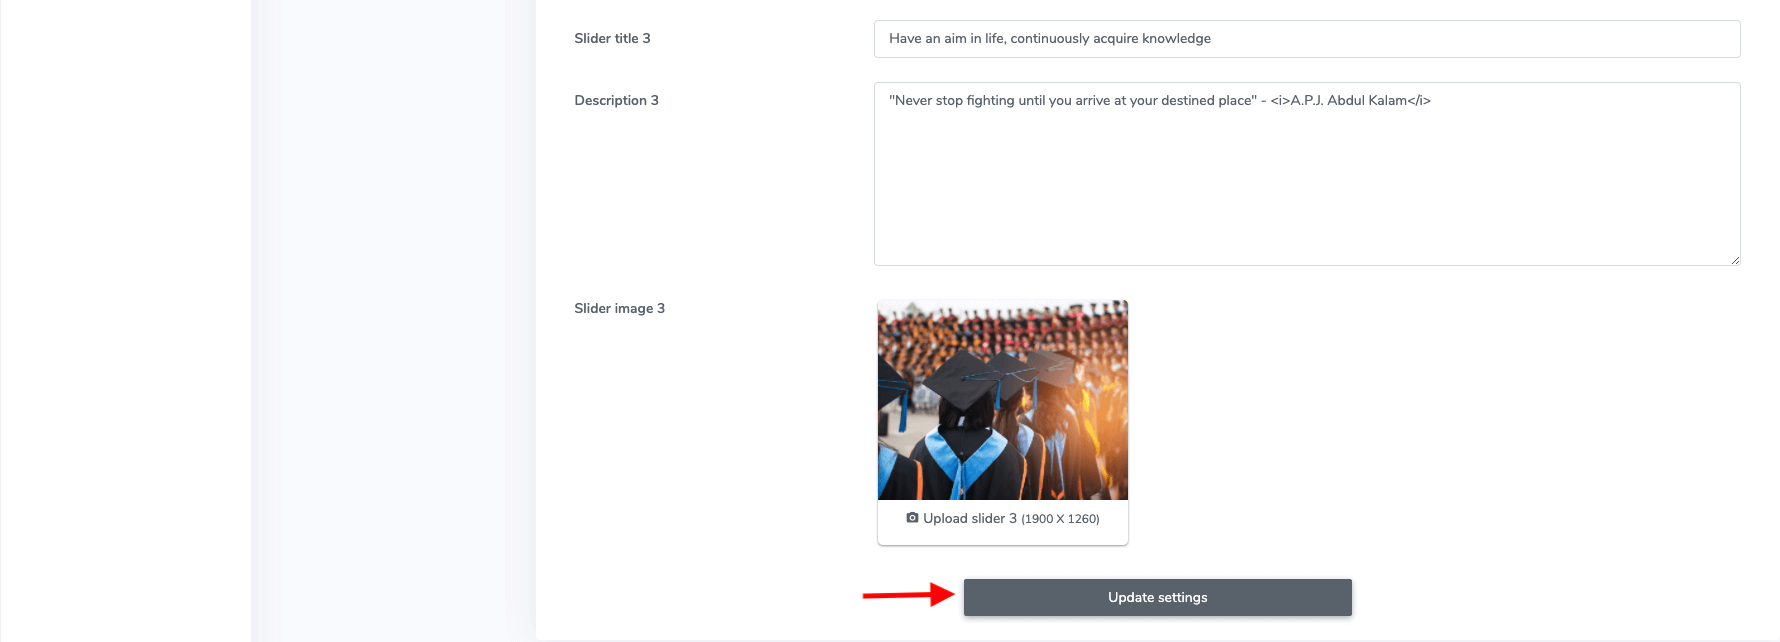
Figure 16. Ekattor ERP Updating Home Page Slider
Others:
As a superadmin, you can change or update the recaptcha settings and logo page banner. For this, you have to navigate:
- Log in to the superadmin panel.
- Select the "Settings" option from the left menu.
- Choose the "Website settings" option from the sub-menu.
- Click on the "Other."
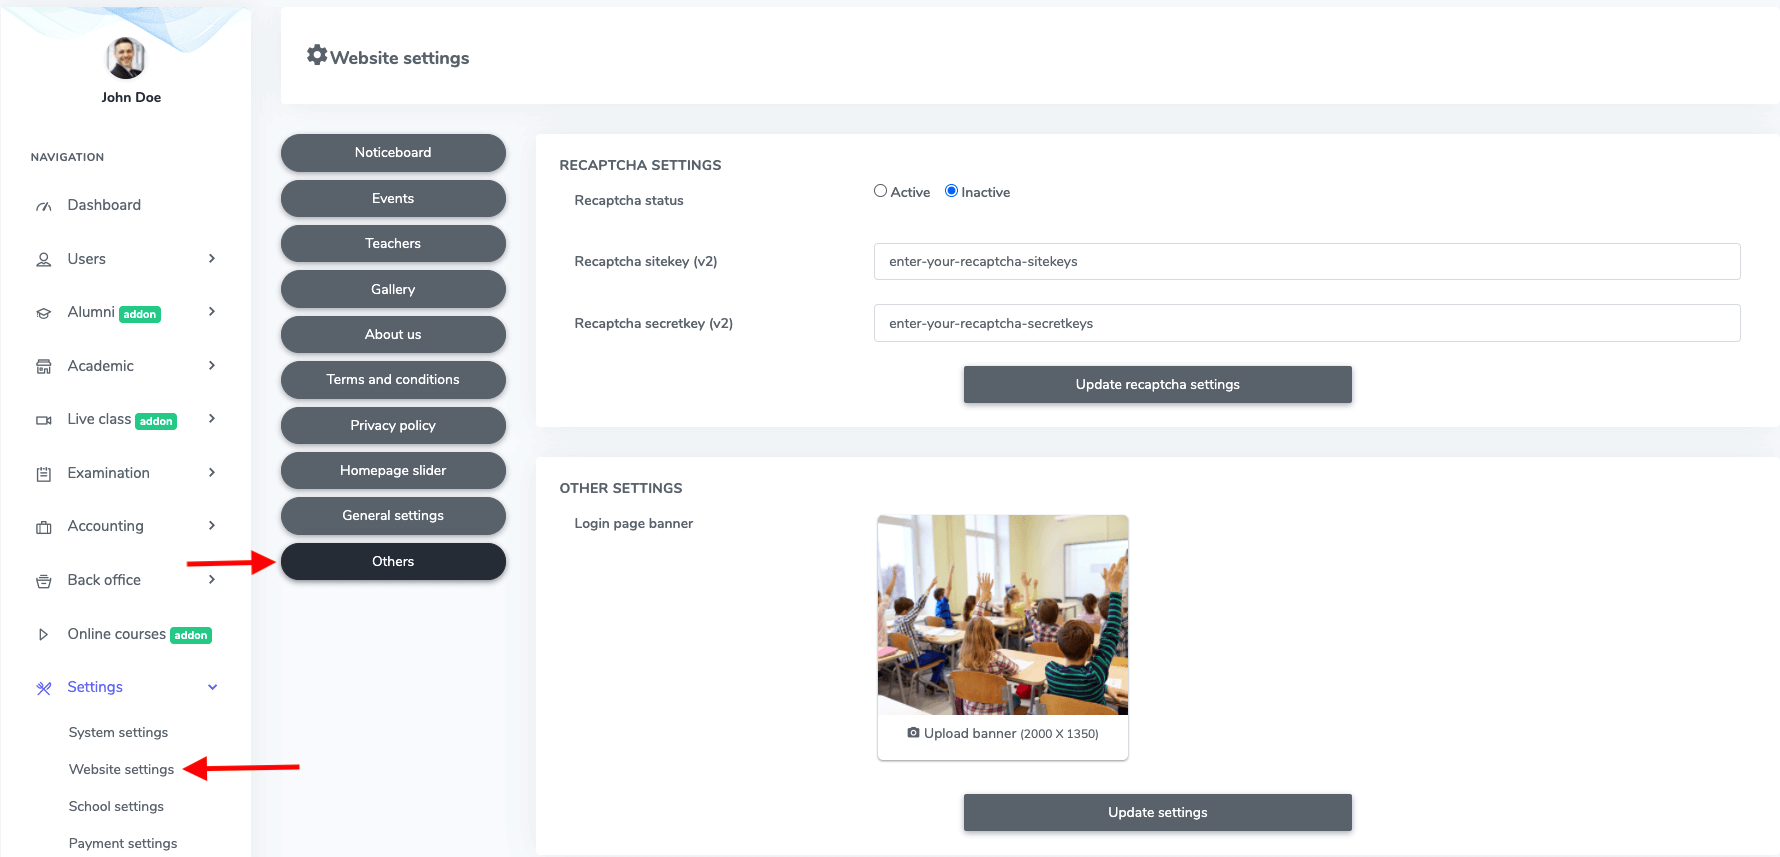
Figure 17. Ekattor ERP Others
As a superadmin, you can change or update the recaptcha settings and logo page banner. For this, you have to navigate:
- Log in to the superadmin panel.
- Select the "Settings" option from the left menu.
- Choose the "Website settings" option from the sub-menu.
- Click on the "Other."
Also, you can provide the required information to update the settings. After that, select the "Update recaptcha settings" option to save your information.
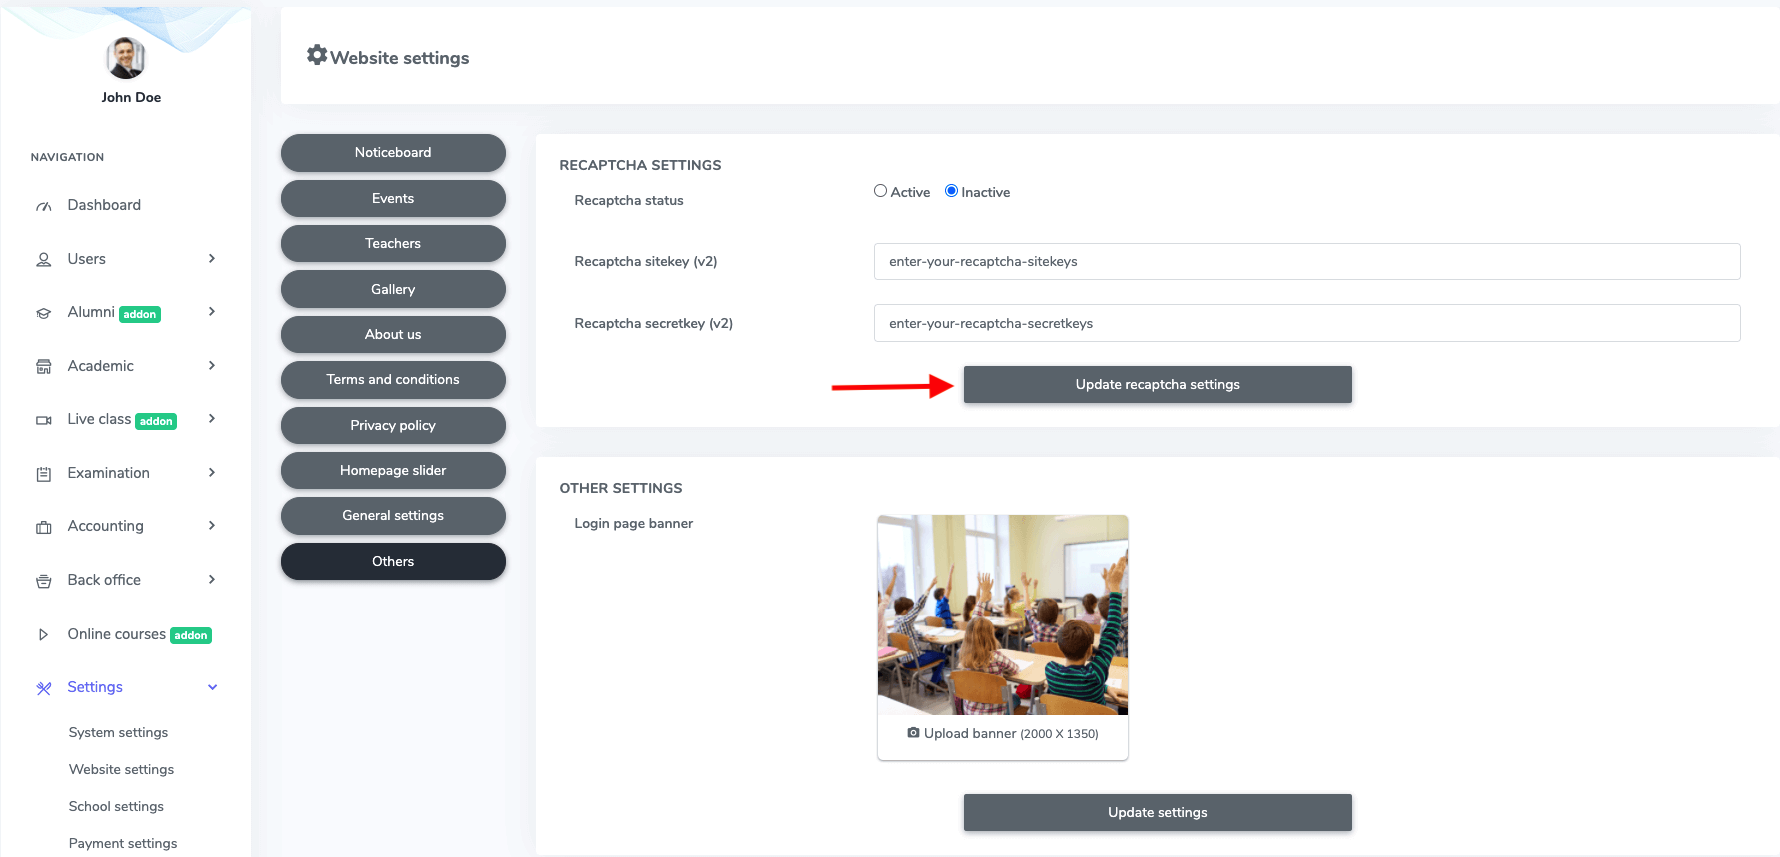
Figure 18. Ekattor ERP Updating RECAPTCHA Settings
To update the logo page banner, you have to select and upload a file from your device, then click the "Update settings" option to confirm your order.
Was this article helpful to you?
Contact us and we will get back to you as soon as possible

