Documentation
-
Introduction
-
Basics
-
Getting Started
-
Managing users
-
Academic activities
-
Exam management
-
Accounting
-
School’s back office
-
Ekattor settings
-
Parent’s Panel
-
Addons
-
Video tutorials
- How to install Ekattor
- How to admit student in Ekattor
- How to take attendance in Ekattor
- How to manage class routine and syllabus in Ekattor
- How to manage class and subject in Ekattor
- How to manage class room and department in Ekattor
- How to manage event calendar in Ekattor
- How to manage exam & marks in Ekattor
-
FAQ
Managing student
After completing the admission process of your students, you can filter student lists, see students and their parent's profile info, and update or delete their data. If you install the Ekattor Student ID Card Addon to your application, you can generate ID cards from here.
Students & their parent's profile info:
To see the student's and their parent's info, you can follow the process below:
- Log in to the application superadmin/admin.
- Select the "Users" button from the left menu.
- Click on the "Student" button from the sub-menu.
- Provide class and section.
- Click on the "Filter" option.
- Select a student from the list.
- Click on the "Option" icon from the selected student.
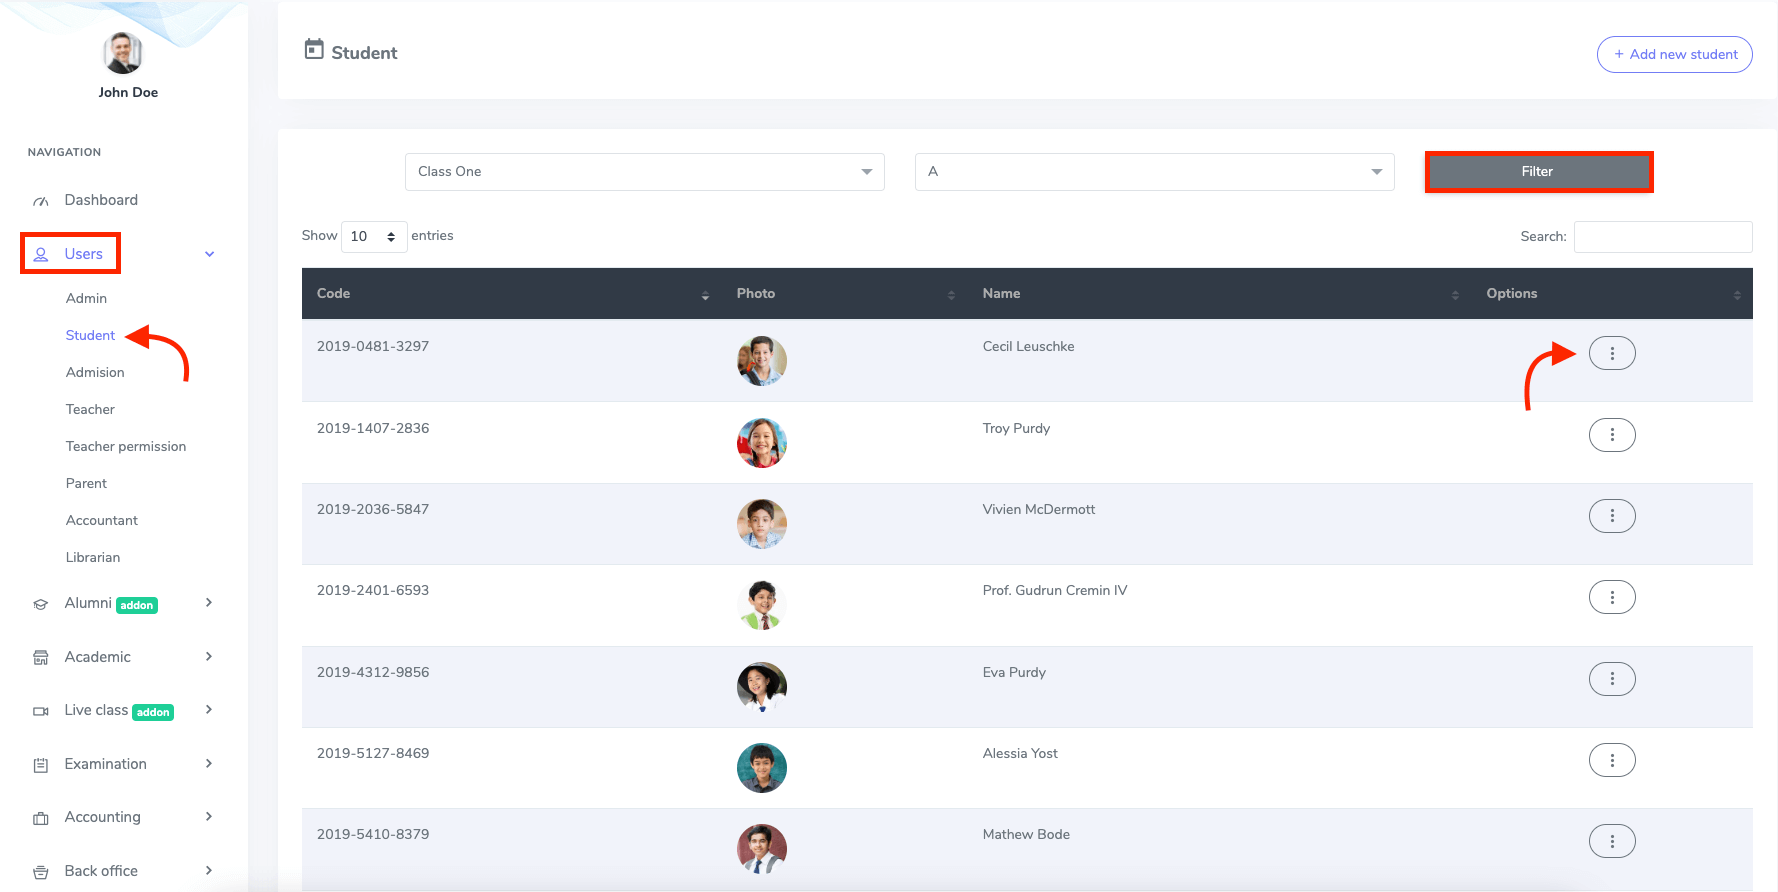
Figure 1. Ekattor ERP Managing Students
- Click on the "Profile" option.
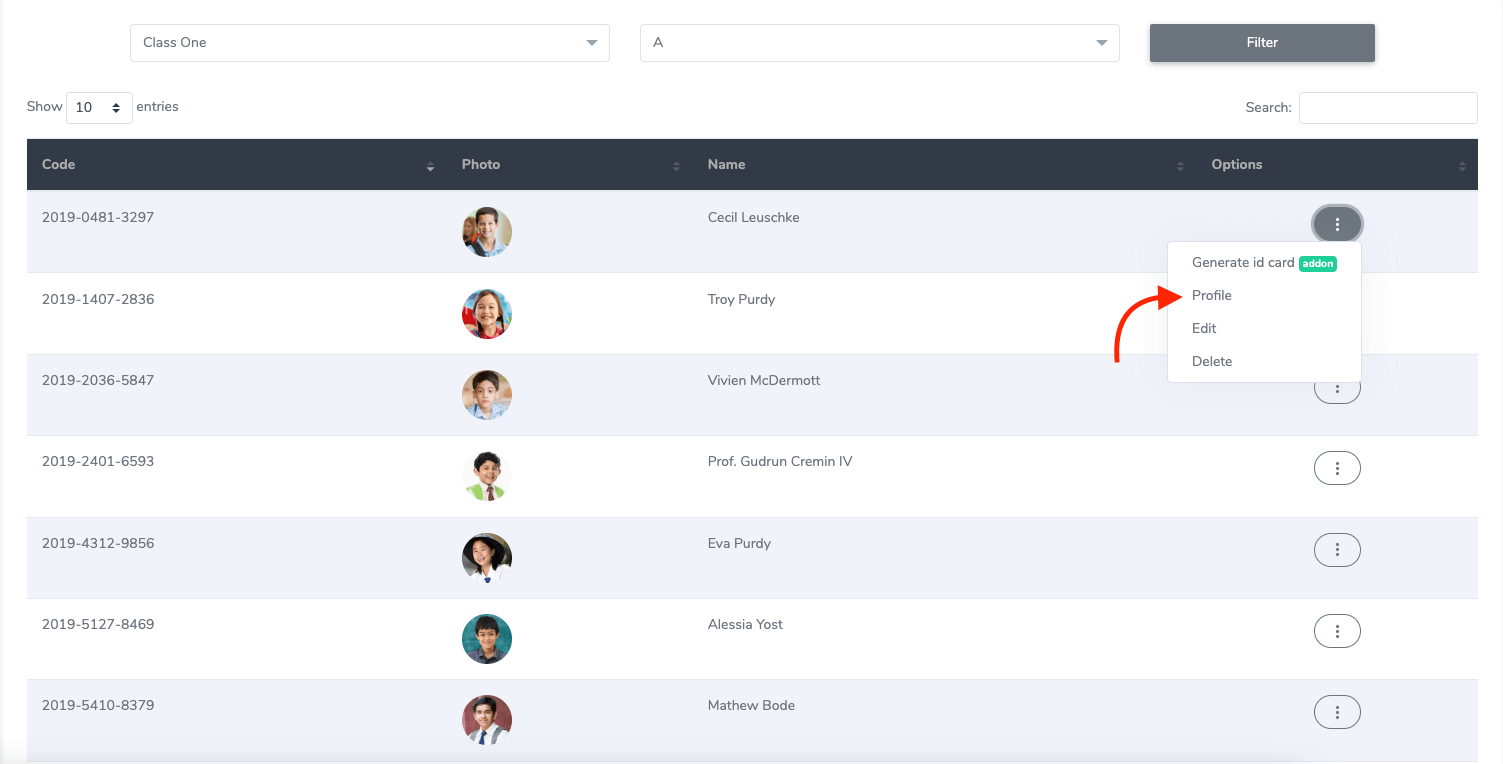
Figure 2. Ekattor ERP Navigating Students Profile
Student's profile
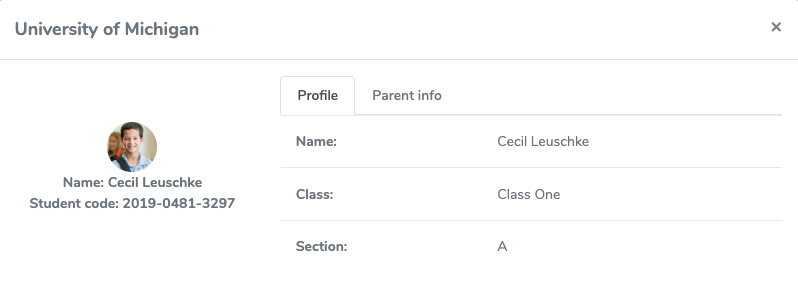
Figure 3. Ekattor ERP Students Profile
Parent's profile
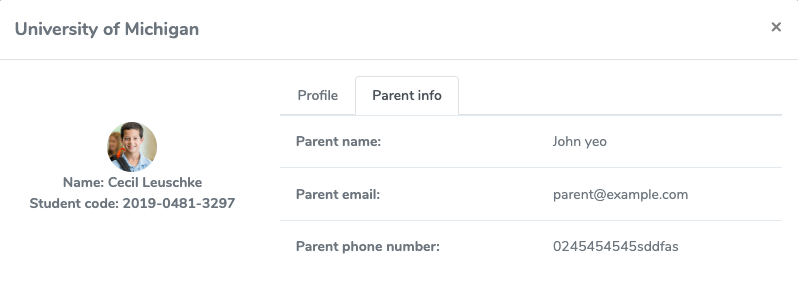
Figure 4. Ekattor ERP Parents Profile
Updating student info:
To update a student's personal information, you can navigate:
- Provide class and section.
- Click on the "Filter" option.
- Select a student from the list.
- Click on the "Option" icon from the selected student.
- Select the "Edit" option.
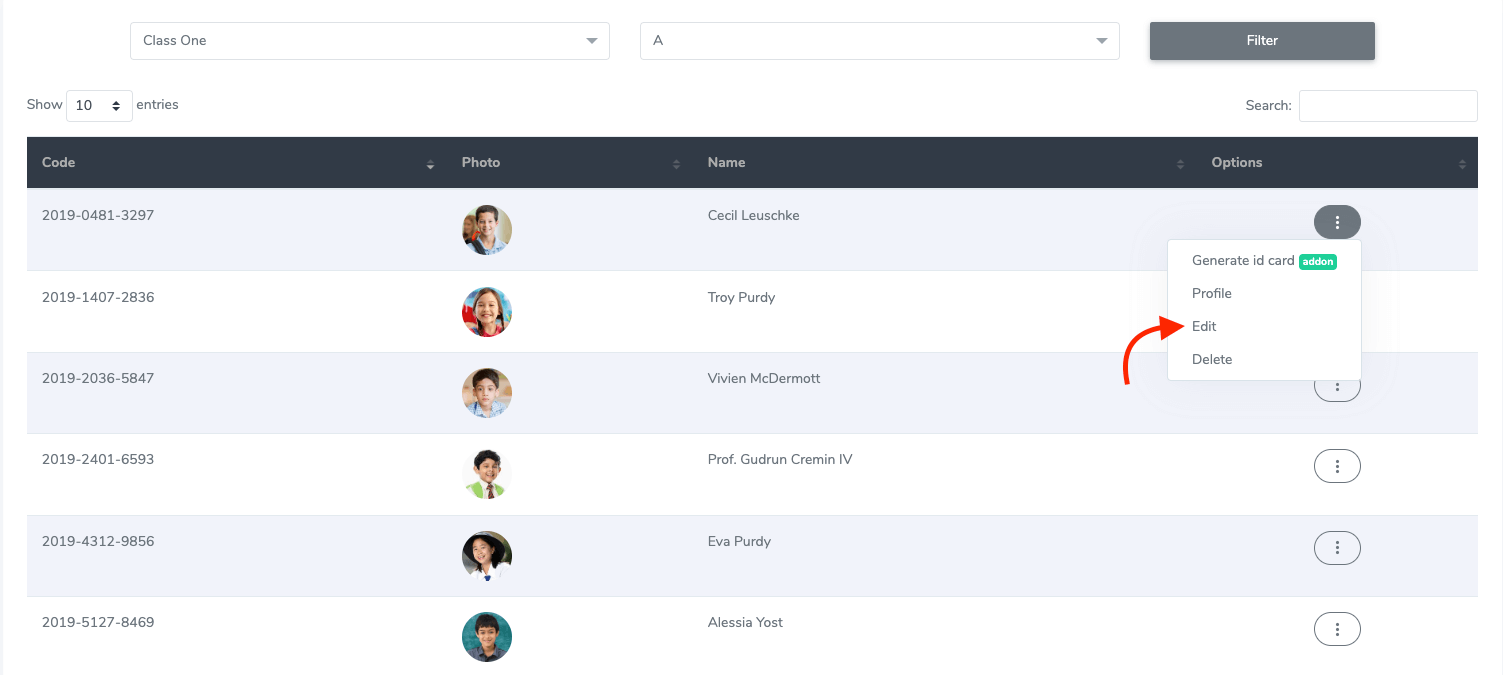
Figure 5. Ekattor ERP Editing Student Profile
- Update required information.
- Click on the "Update student information" button.
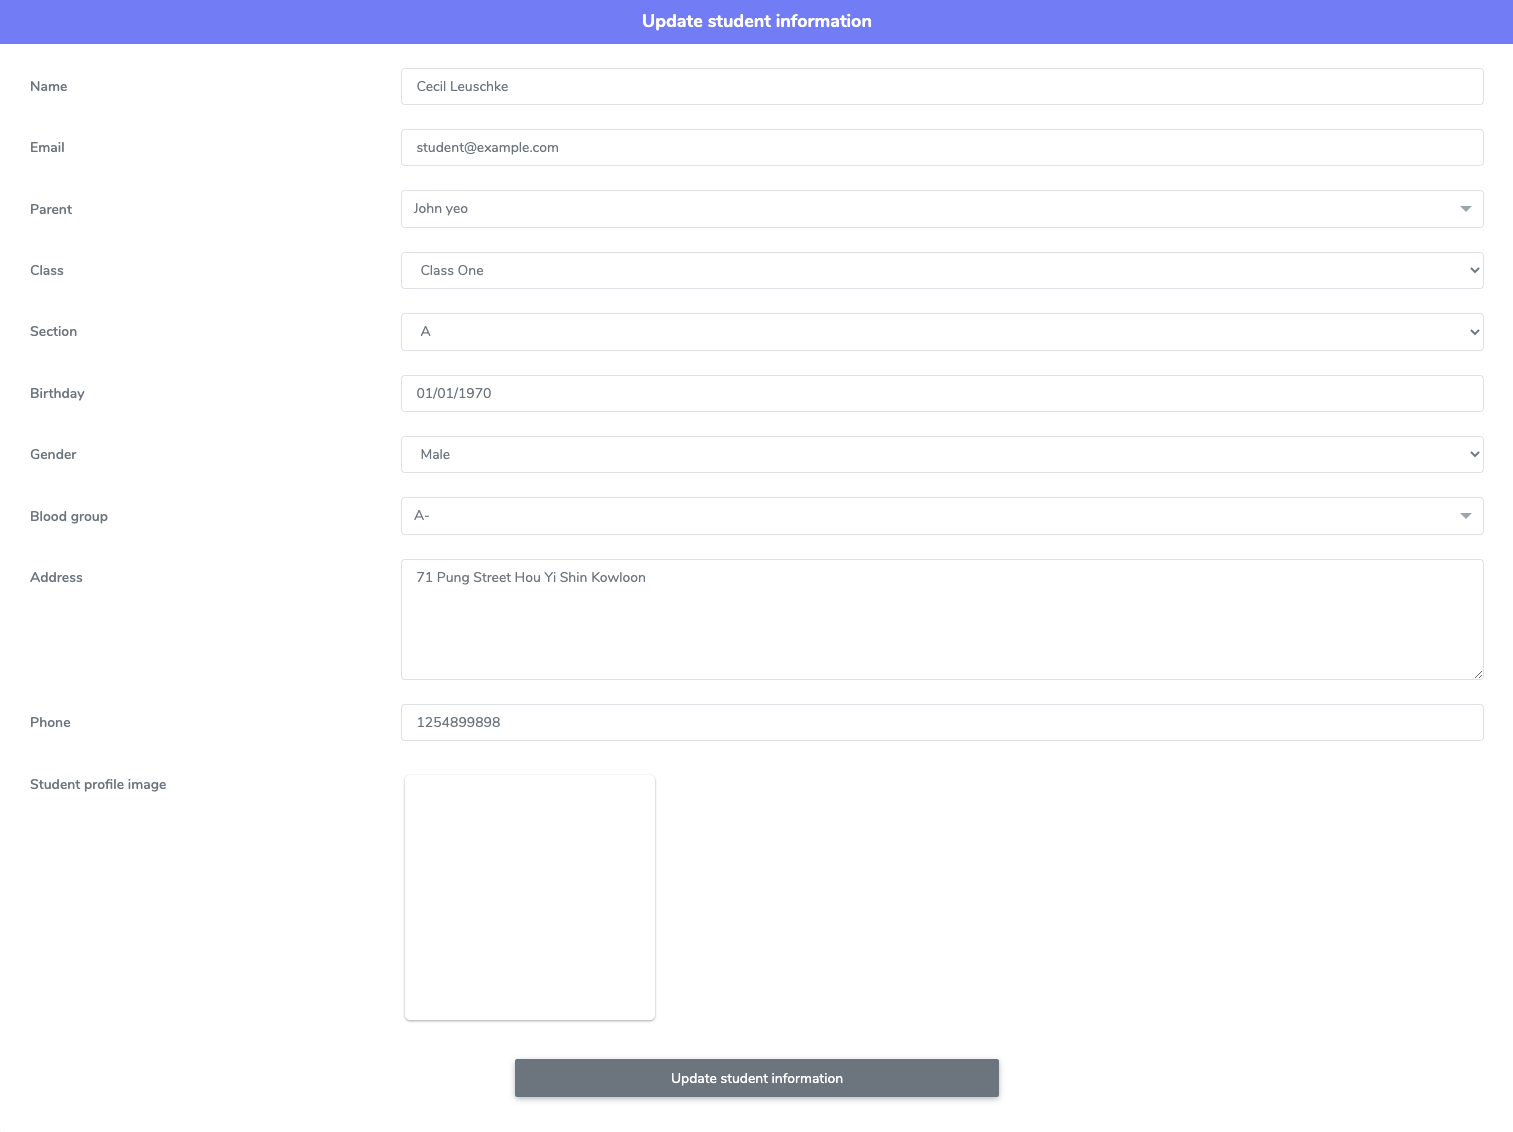
Figure 6. Ekattor ERP Saving Updated Profile
Deleting a student's profile
To delete a student's profile, you can navigate:
- Provide class and section.
- Click on the "Filter" option.
- Select a student from the list.
- Click on the "Option" icon from the selected student.
- Select the "Delete" option.
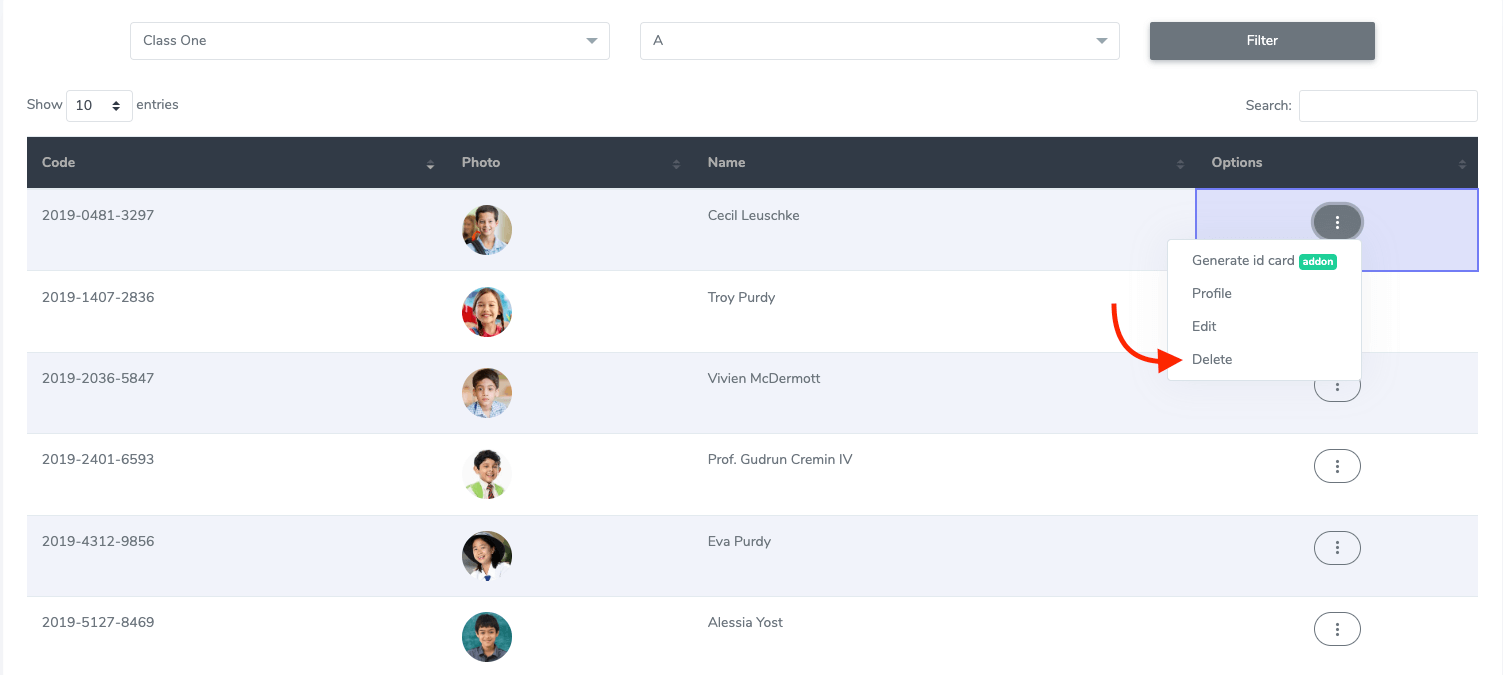
Figure 7. Ekattor ERP Deleting A Profile
- Click on the "Continue" button for confirmation.
Was this article helpful to you?
Contact us and we will get back to you as soon as possible

