Payment Settings
You can configure the payment settings of your website in the Payment Settings option. For updating the payment system, follow the steps below:
-
Login to Academy LMS Laravel with your Admin credentials.
-
Click on Settings and then click on Payment Settings from the drop down menu.

-
Firstly, you have to set up the currency of your system. Click on the field for Select Currency, and choose a currency from the drop-down options

-
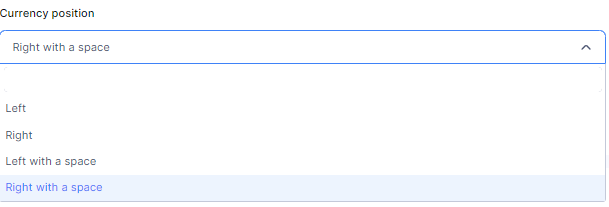
Then, click on the field for Currency position, and choose how you want the formatting of the currency.
-
Click on Update.
-
The currency is updated, and you can proceed with the rest of the payment settings procedure.
You can configure payment settings of the following payment gateways: Paypal, Stripe, Razorpay, Flutterwave and PayTm. To set up the payment gateways, follow the steps below:
-
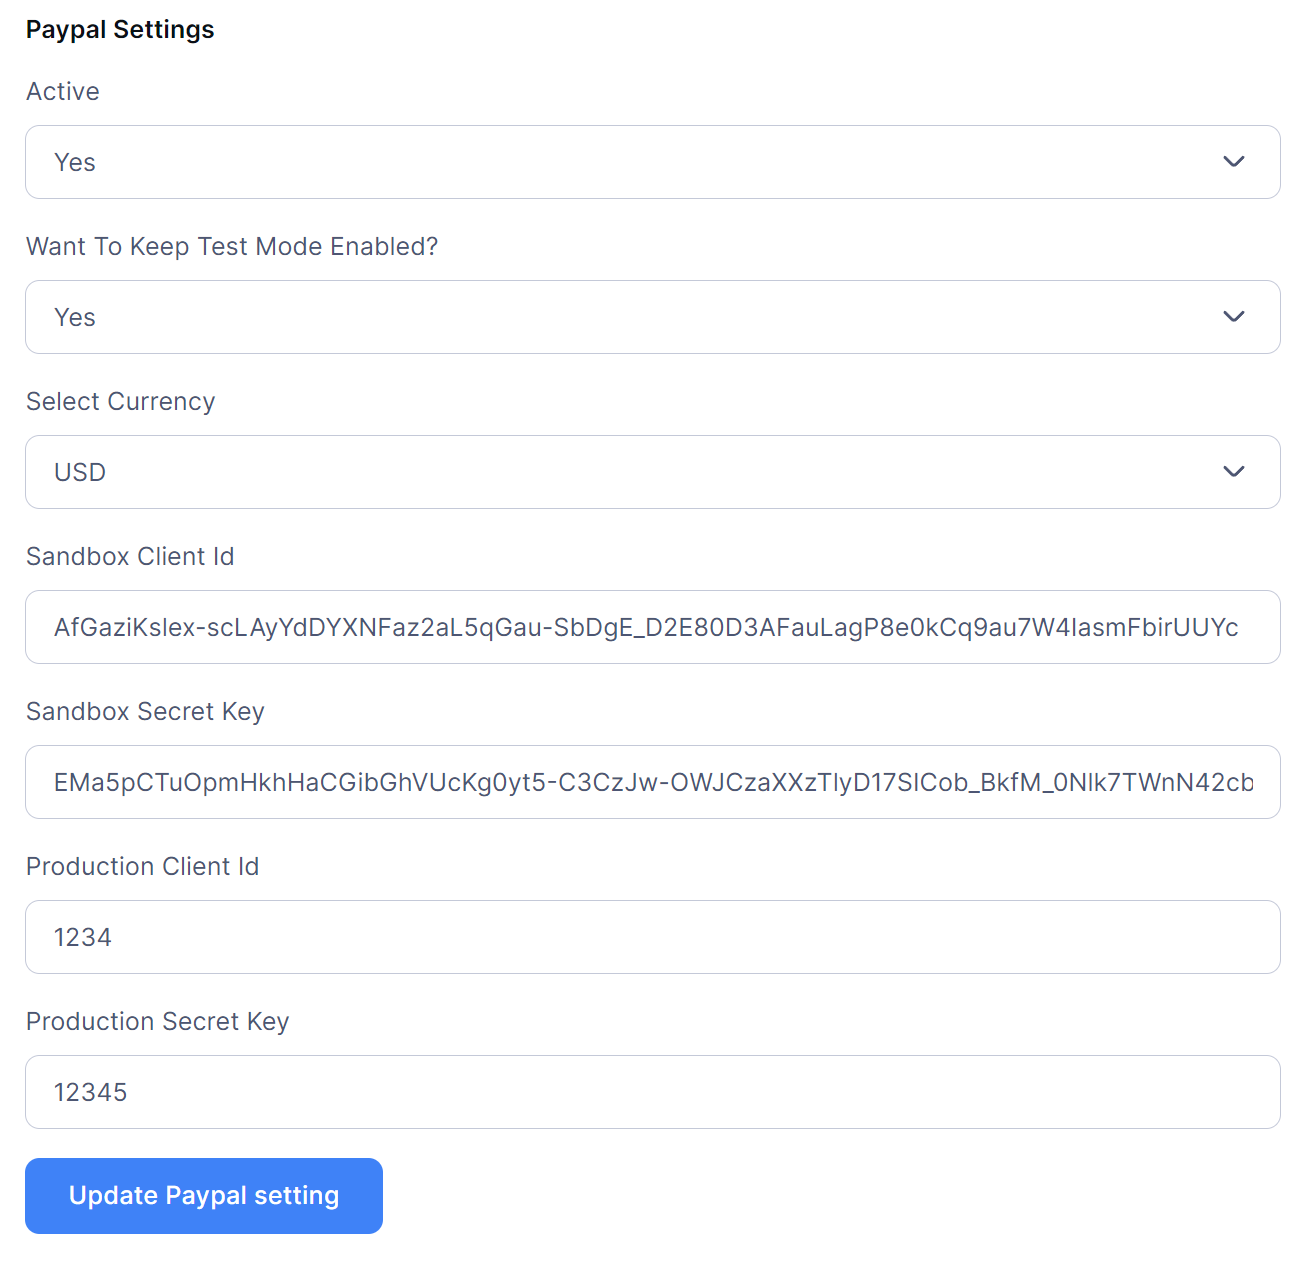
To set up Paypal Settings, follow the steps below:
-
Click on the Active field and choose Yes or No for activating or deactivating the payment gateway.
-
Next, choose yes or no inside the field for Want to keep test mode enabled.
-
Then, click on the field for Select Currency, and select your preferred currency. Your system currency and payment gateway currency must be the same.
-
Then, click on the field for Sandbox_Client_Id and enter the sandbox client id.
-
Then, click on the field for Sandbox_secret_key and enter the sandbox secret key.
-
Then, click on the production_client_id and enter the production client id.
-
Lastly, click on the field for production_secret_key and enter the production secret key.
-
Click on Update Paypal Settings.
-
The settings will be saved.
-
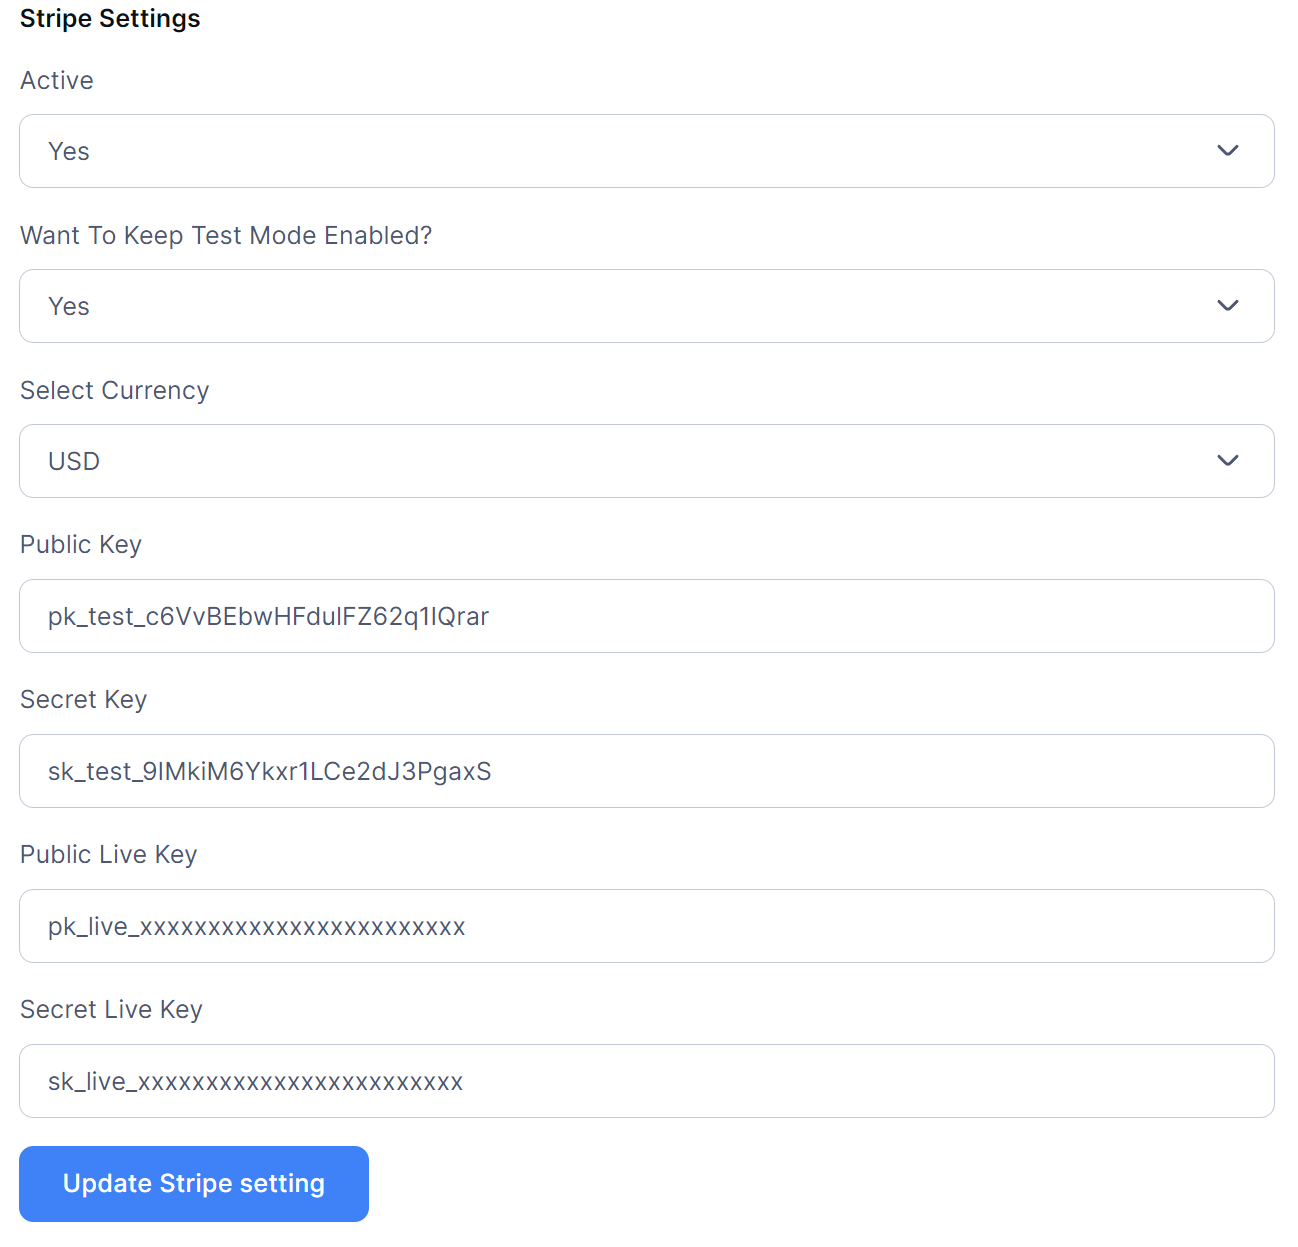
To set up Stripe Settings, follow the steps below:
-
Click on the Active field and choose Yes or No for activating or deactivating the payment gateway.
-
Next, choose yes or no inside the field for Want to keep test mode enabled.
-
Then, click on the field for Select Currency, and select your preferred currency. Your system currency and payment gateway currency must be the same.
-
Then, click on the field for public_key and enter the public key.
-
Next, click on the field for Secret_key and enter the secret key.
-
Then, click on the field for public_live_key and enter the public live key.
-
Lastly, click on the field for secret_live_key and enter the secret live key.
-
Click on Update Stripe Settings.
-
The settings will be saved.
-
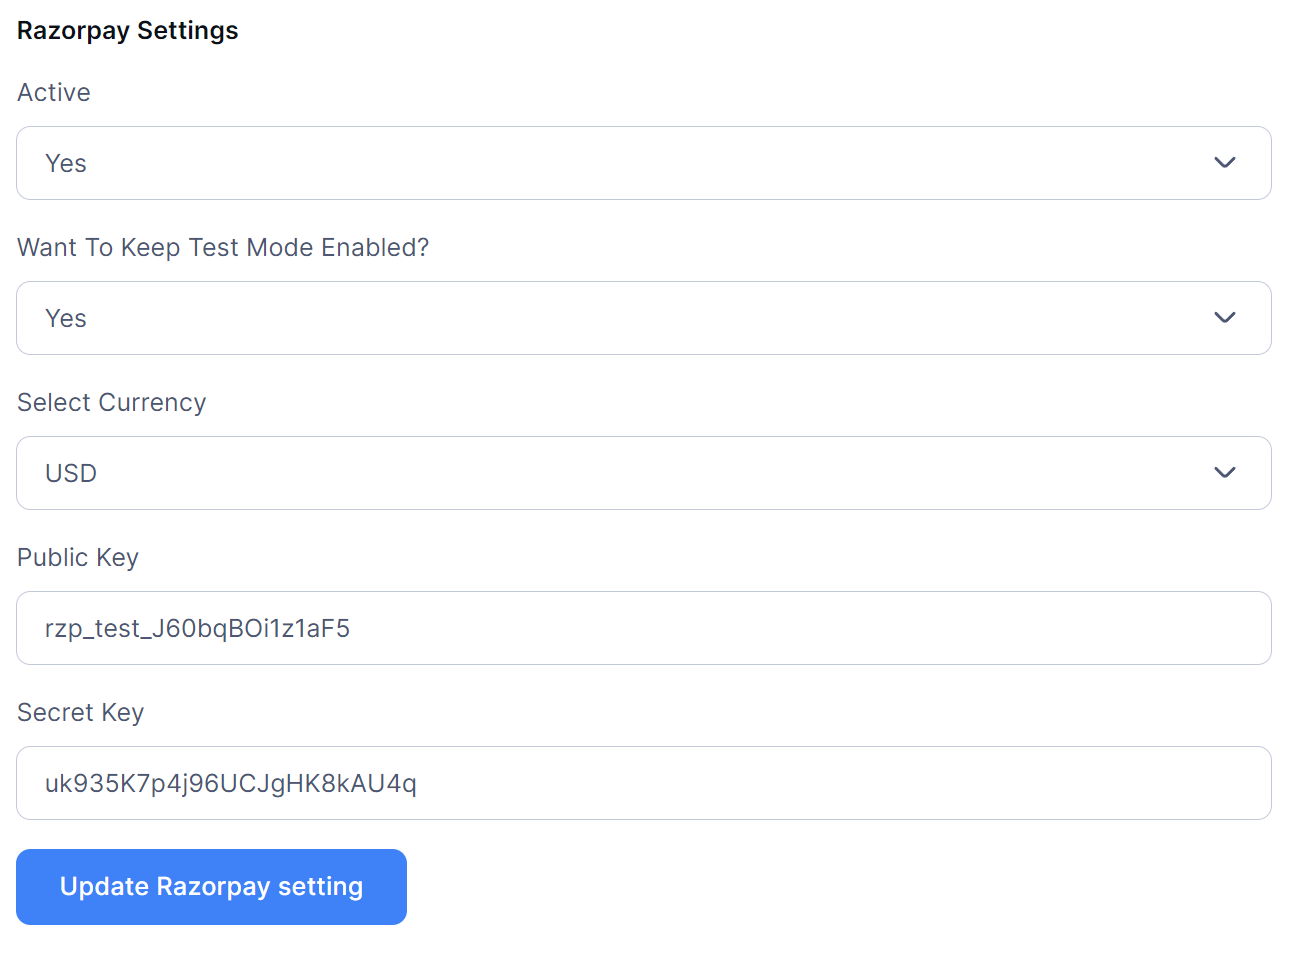
To setup Razorpay, follow the steps below:
-
Click on the Active field and choose Yes or No for activating or deactivating the payment gateway.
-
Next, choose yes or no inside the field for Want to keep test mode enabled.
-
Then, click on the field for Select Currency, and select your preferred currency. Your system currency and payment gateway currency must be the same.
-
Then, click on the field for public_key and enter the public key.
-
Next, click on the field for Secret_key and enter the secret key.
-
Click on Update Razorpay Settings.
-
The settings will be saved.
-
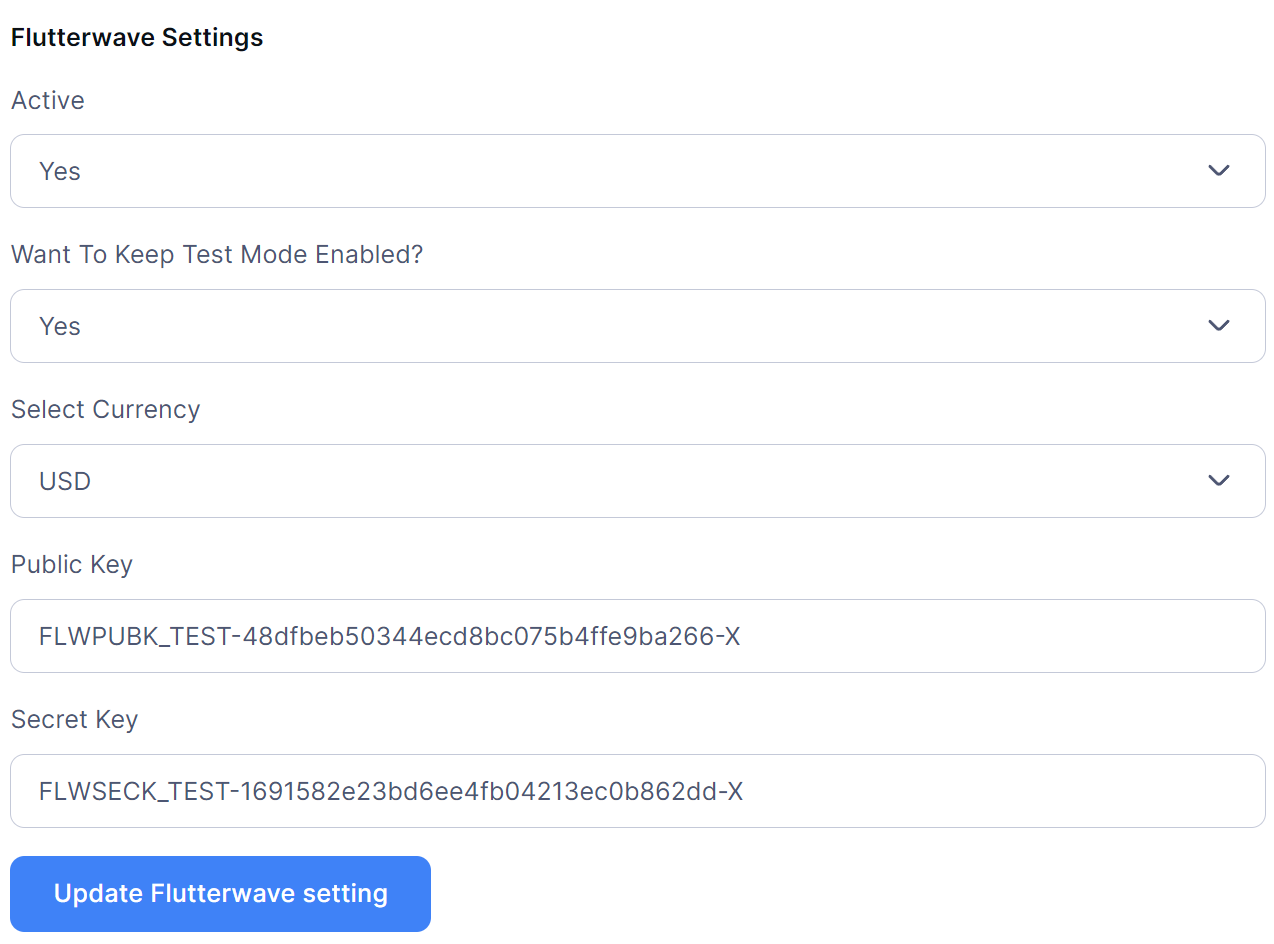
To set up Flutterwave, follow the steps below:
-
Click on the Active field and choose Yes or No for activating or deactivating the payment gateway.
-
Next, choose yes or no inside the field for Want to keep test mode enabled.
-
Then, click on the field for Select Currency, and select your preferred currency. Your system currency and payment gateway currency must be the same.
-
Then, click on the field for public_key and enter the public key.
-
Next, click on the field for Secret_key and enter the secret key.
-
Click on Update Flutterwave Settings.
-
The settings will be saved.
-
To set up PayTm, follow the steps below:

-
Click on the Active field and choose Yes or No for activating or deactivating the payment gateway.
-
Next, choose yes or no inside the field for Want to keep test mode enabled.
-
Then, click on the field for Select Currency, and select your preferred currency. Your system currency and payment gateway currency must be the same.
-
Then, click on the field for public_key and enter the public key.
-
Next, click on the field for Secret_key and enter the secret key.
-
Click on Update Paytm Settings.
-
The settings will be saved.
Was this article helpful to you?
Contact us and we will get back to you as soon as possible

