Multi Admin
In Academy LMS Laravel, you have the flexibility to add multiple admins to manage various aspects of your platform. Distributing responsibilities among multiple admins make daily operations more efficient. Additionally, you can customize permissions for each sub-admin to control access and ensure smooth administration.
Add A Sub Admin
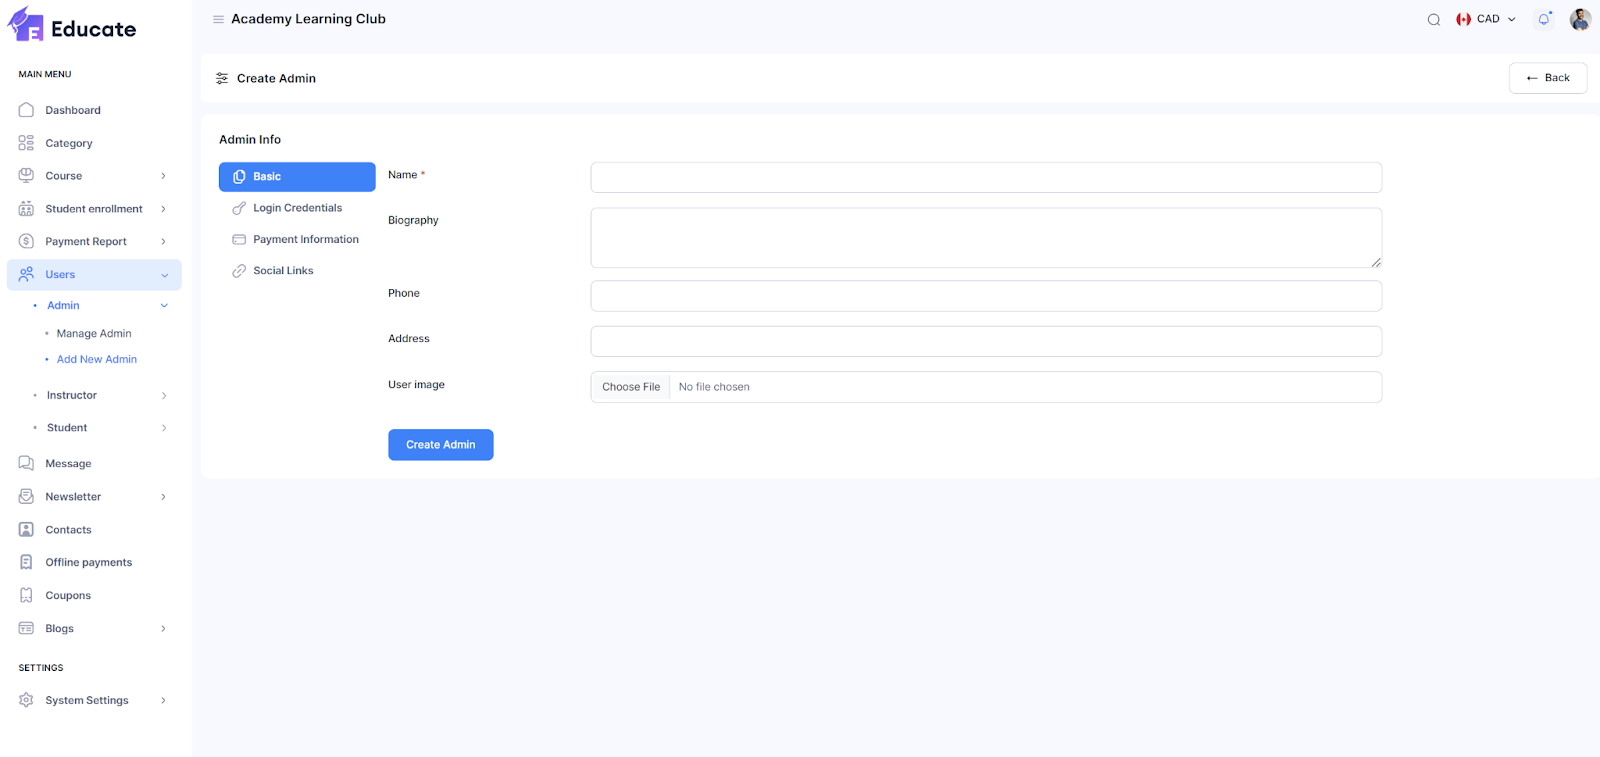
As a root admin, you can add multiple sub-admins to your application, manage their details, and also delete them if needed. To Add A New Admin, follow the steps below:
-
Login to Academy LMS Laravel using your credentials as an admin.
-
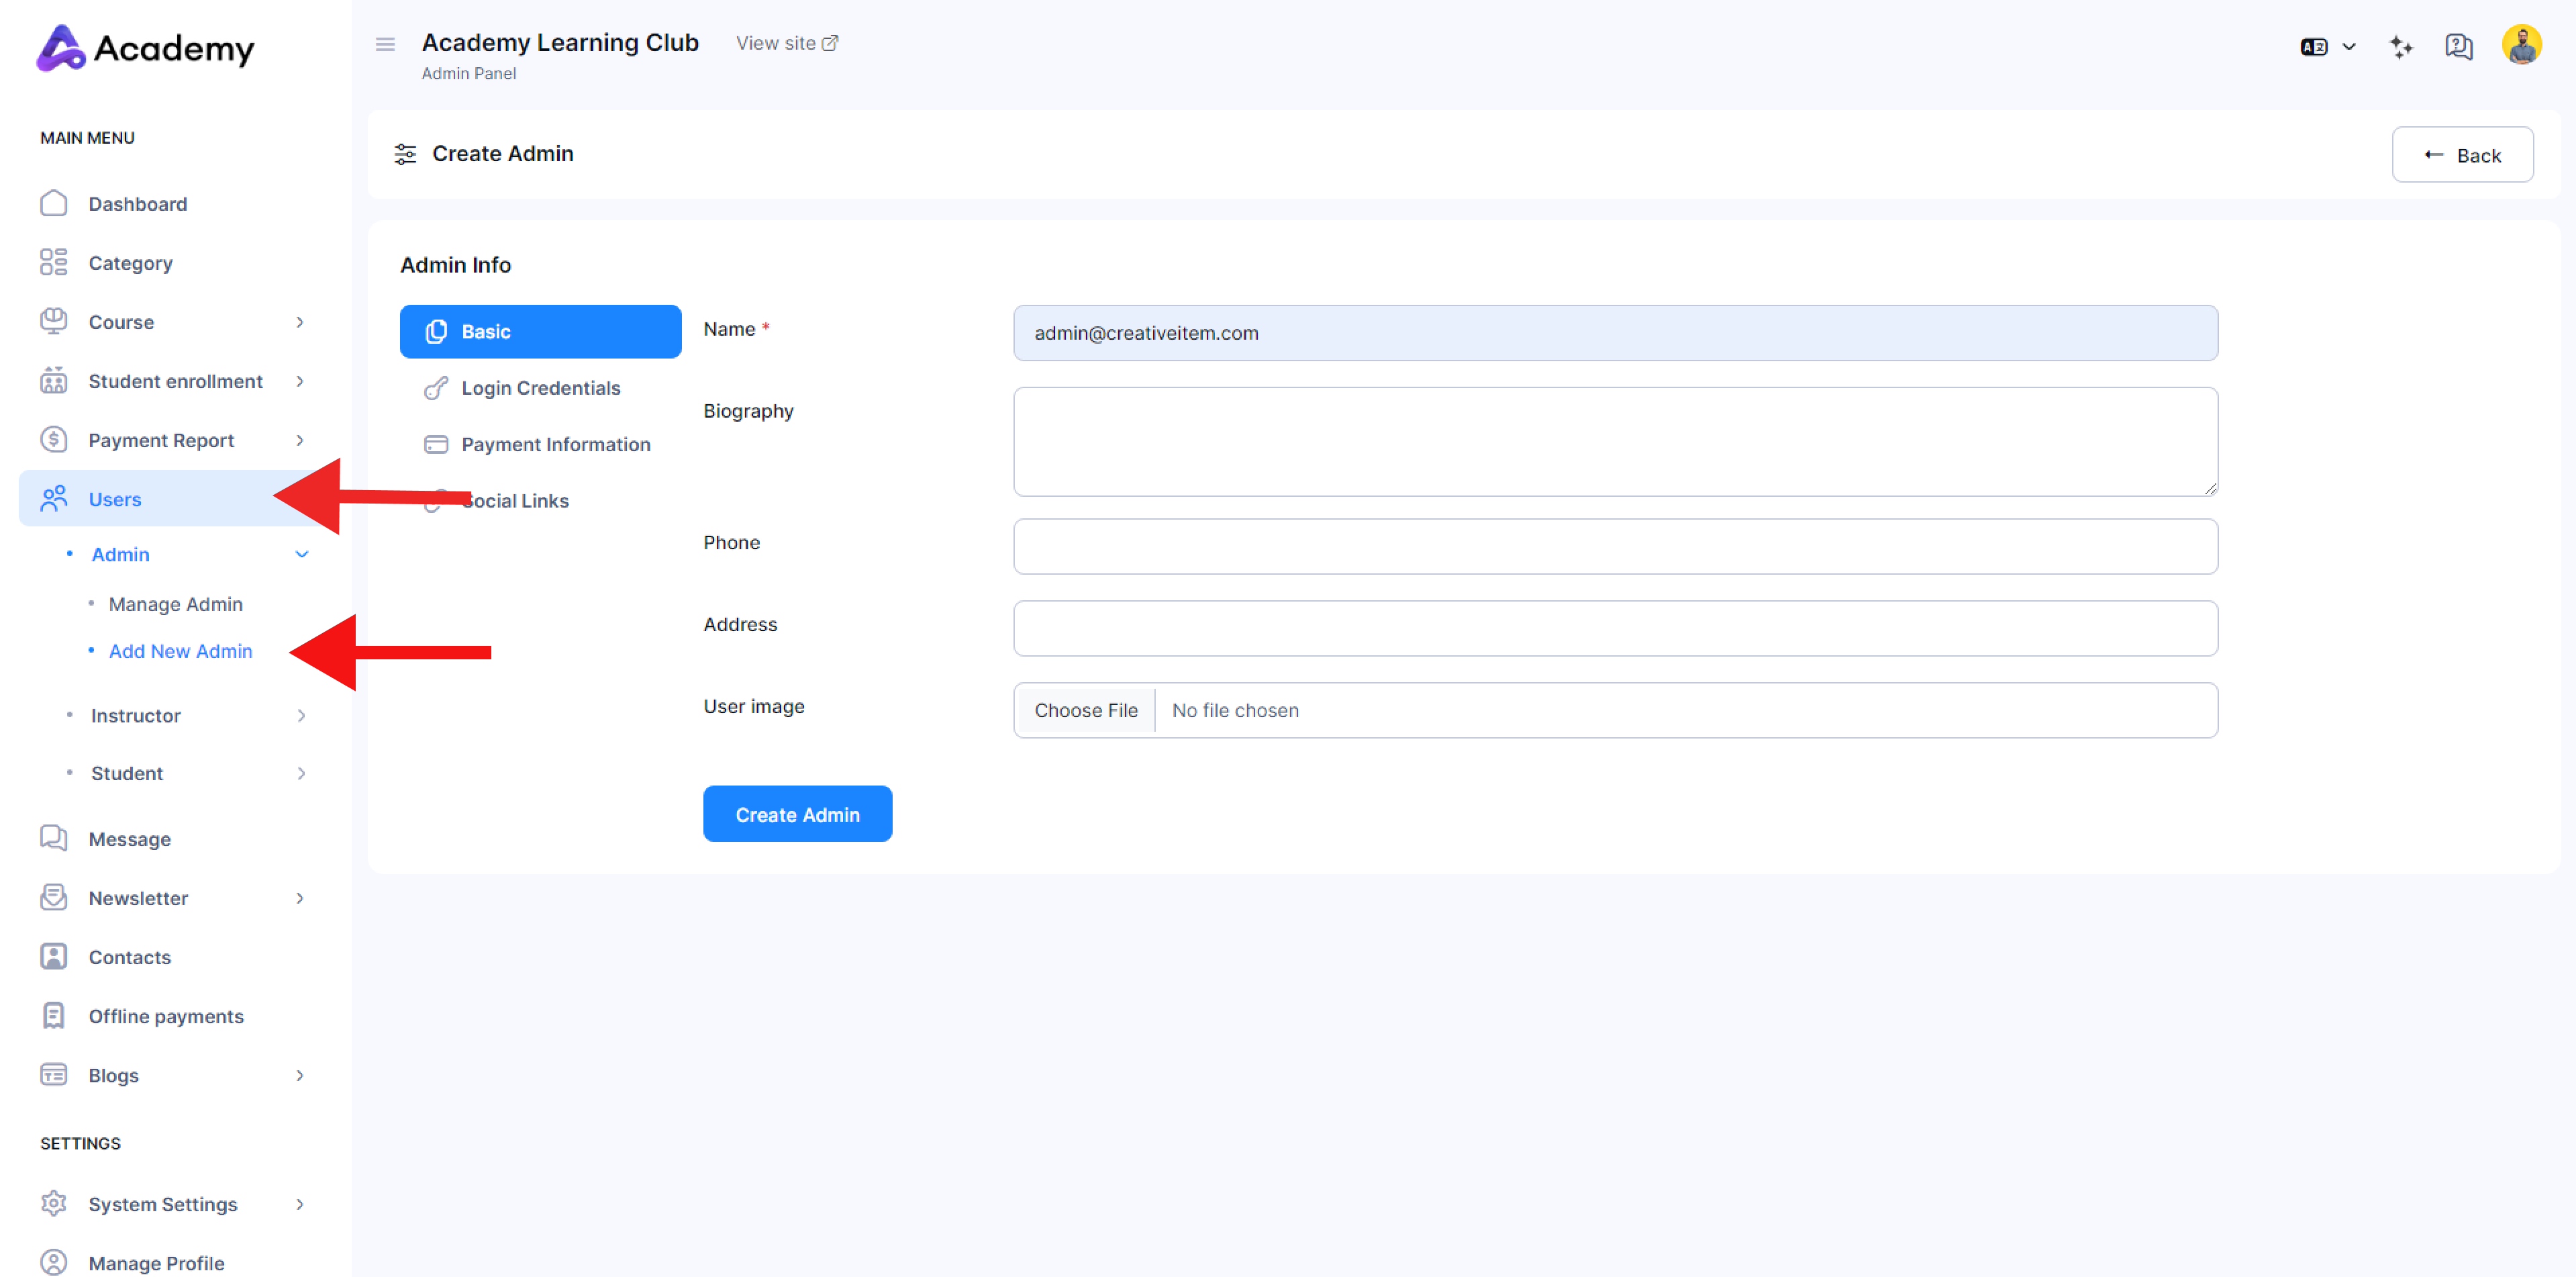
Click on Users from the left navigation bar, and from the drop-down menu choose Add New Admin.
-
An admin creation form will open up in the window.
-
For filling up the basic information, follow the steps below:
-
Click on the empty field for Name and enter the name of the admin.
-
Next, click on the empty field for Biography and provide some biography details about the admin.
-
Next, click on the empty field for Phone and add the phone number of the admin.
-
Next, click on the empty field for Address and add the address of the admin.
-
Next, click on the Choose File button and upload a User image of the admin from your device.
-
Next, you have to fill up the login credentials form.
-
For filling up the login information, follow the steps below:

-
Click on Login Credentials.
-
Then inside the form, click on the empty field for Email, and provide the email of the admin to be added.
-
Next, input the password for the new admin to log in.
-
Next, you have to fill up the payment information form.
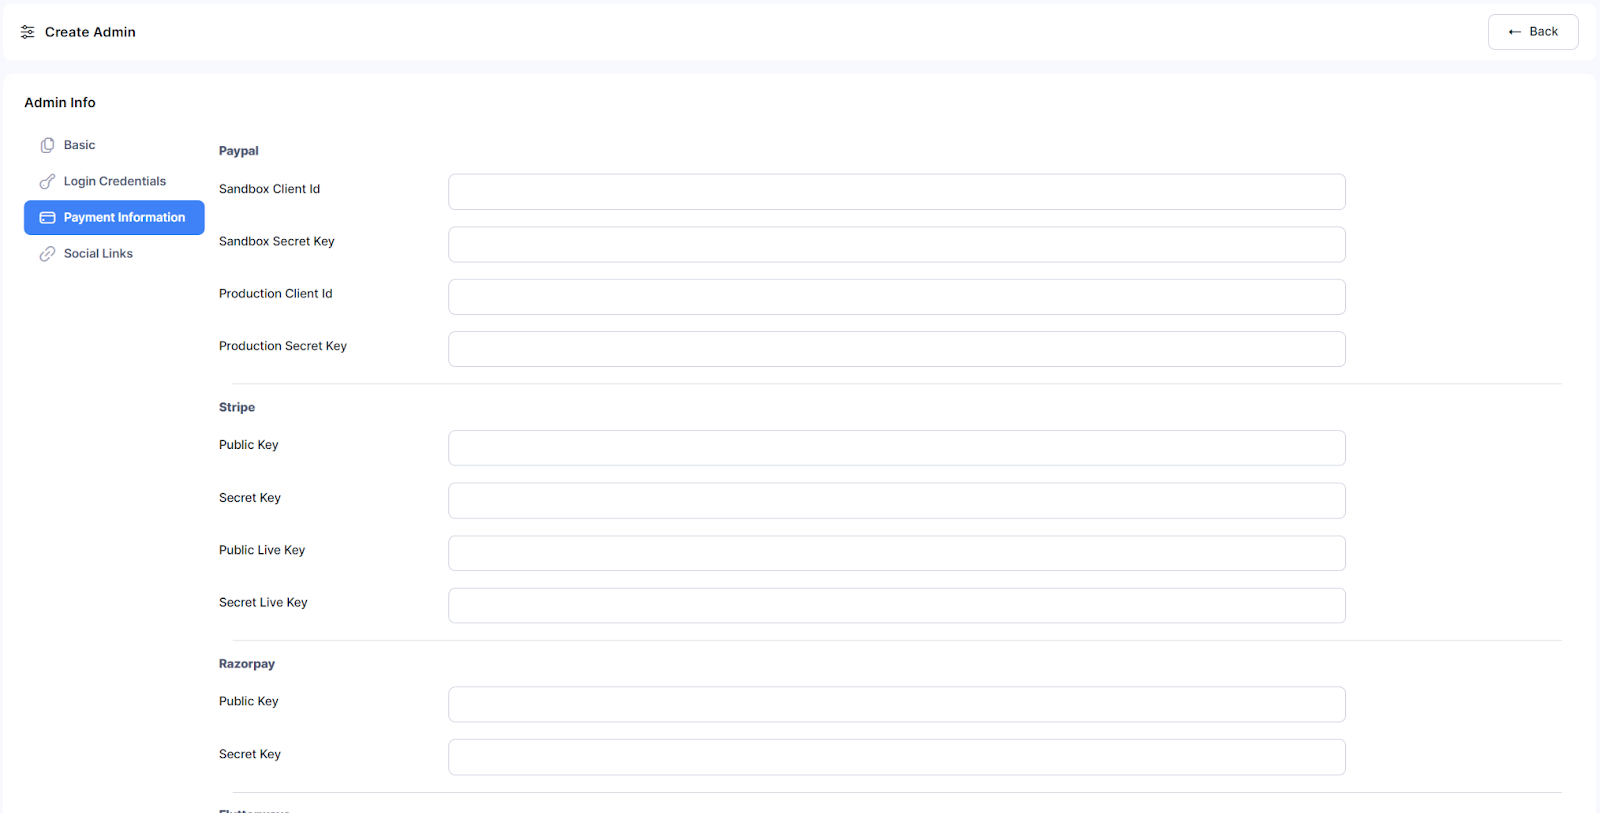
6. For filling up the Payment Information form, follow the steps below:
-
Click on Payment Information.
-
The available payment methods are Paypal, Stripe, Razorpay, Flutterwave and Paytm. You can provide any of the payment method details.
-
For Paypal, provide:
-
Sandbox client Id
-
Sandbox Secret Key
-
Production Client Id
-
Production Secret Key
-
For Stripe, provide:
-
Public Key
-
Secret Key
-
Public Live Key
-
Secret Live Key
-
For Razorpay, provide:
-
Public Key
-
Secret Key
-
For PayTm, provide:
-
Public Key
-
Secret Key
-
Next, you can fill up the details for Social Links.
7. For filling out the Social Links form, follow the steps below:

-
Click on Social Links.
-
Click on the empty field for Facebook and provide the facebook profile link.
-
Next, click on the empty field for Twitter and provide the twitter profile link.
-
Next, click on the empty field for Linkedin and provide the linkedin profile link.
8.Click on Create Admin.
9. The admin will be created.
Manage Admins
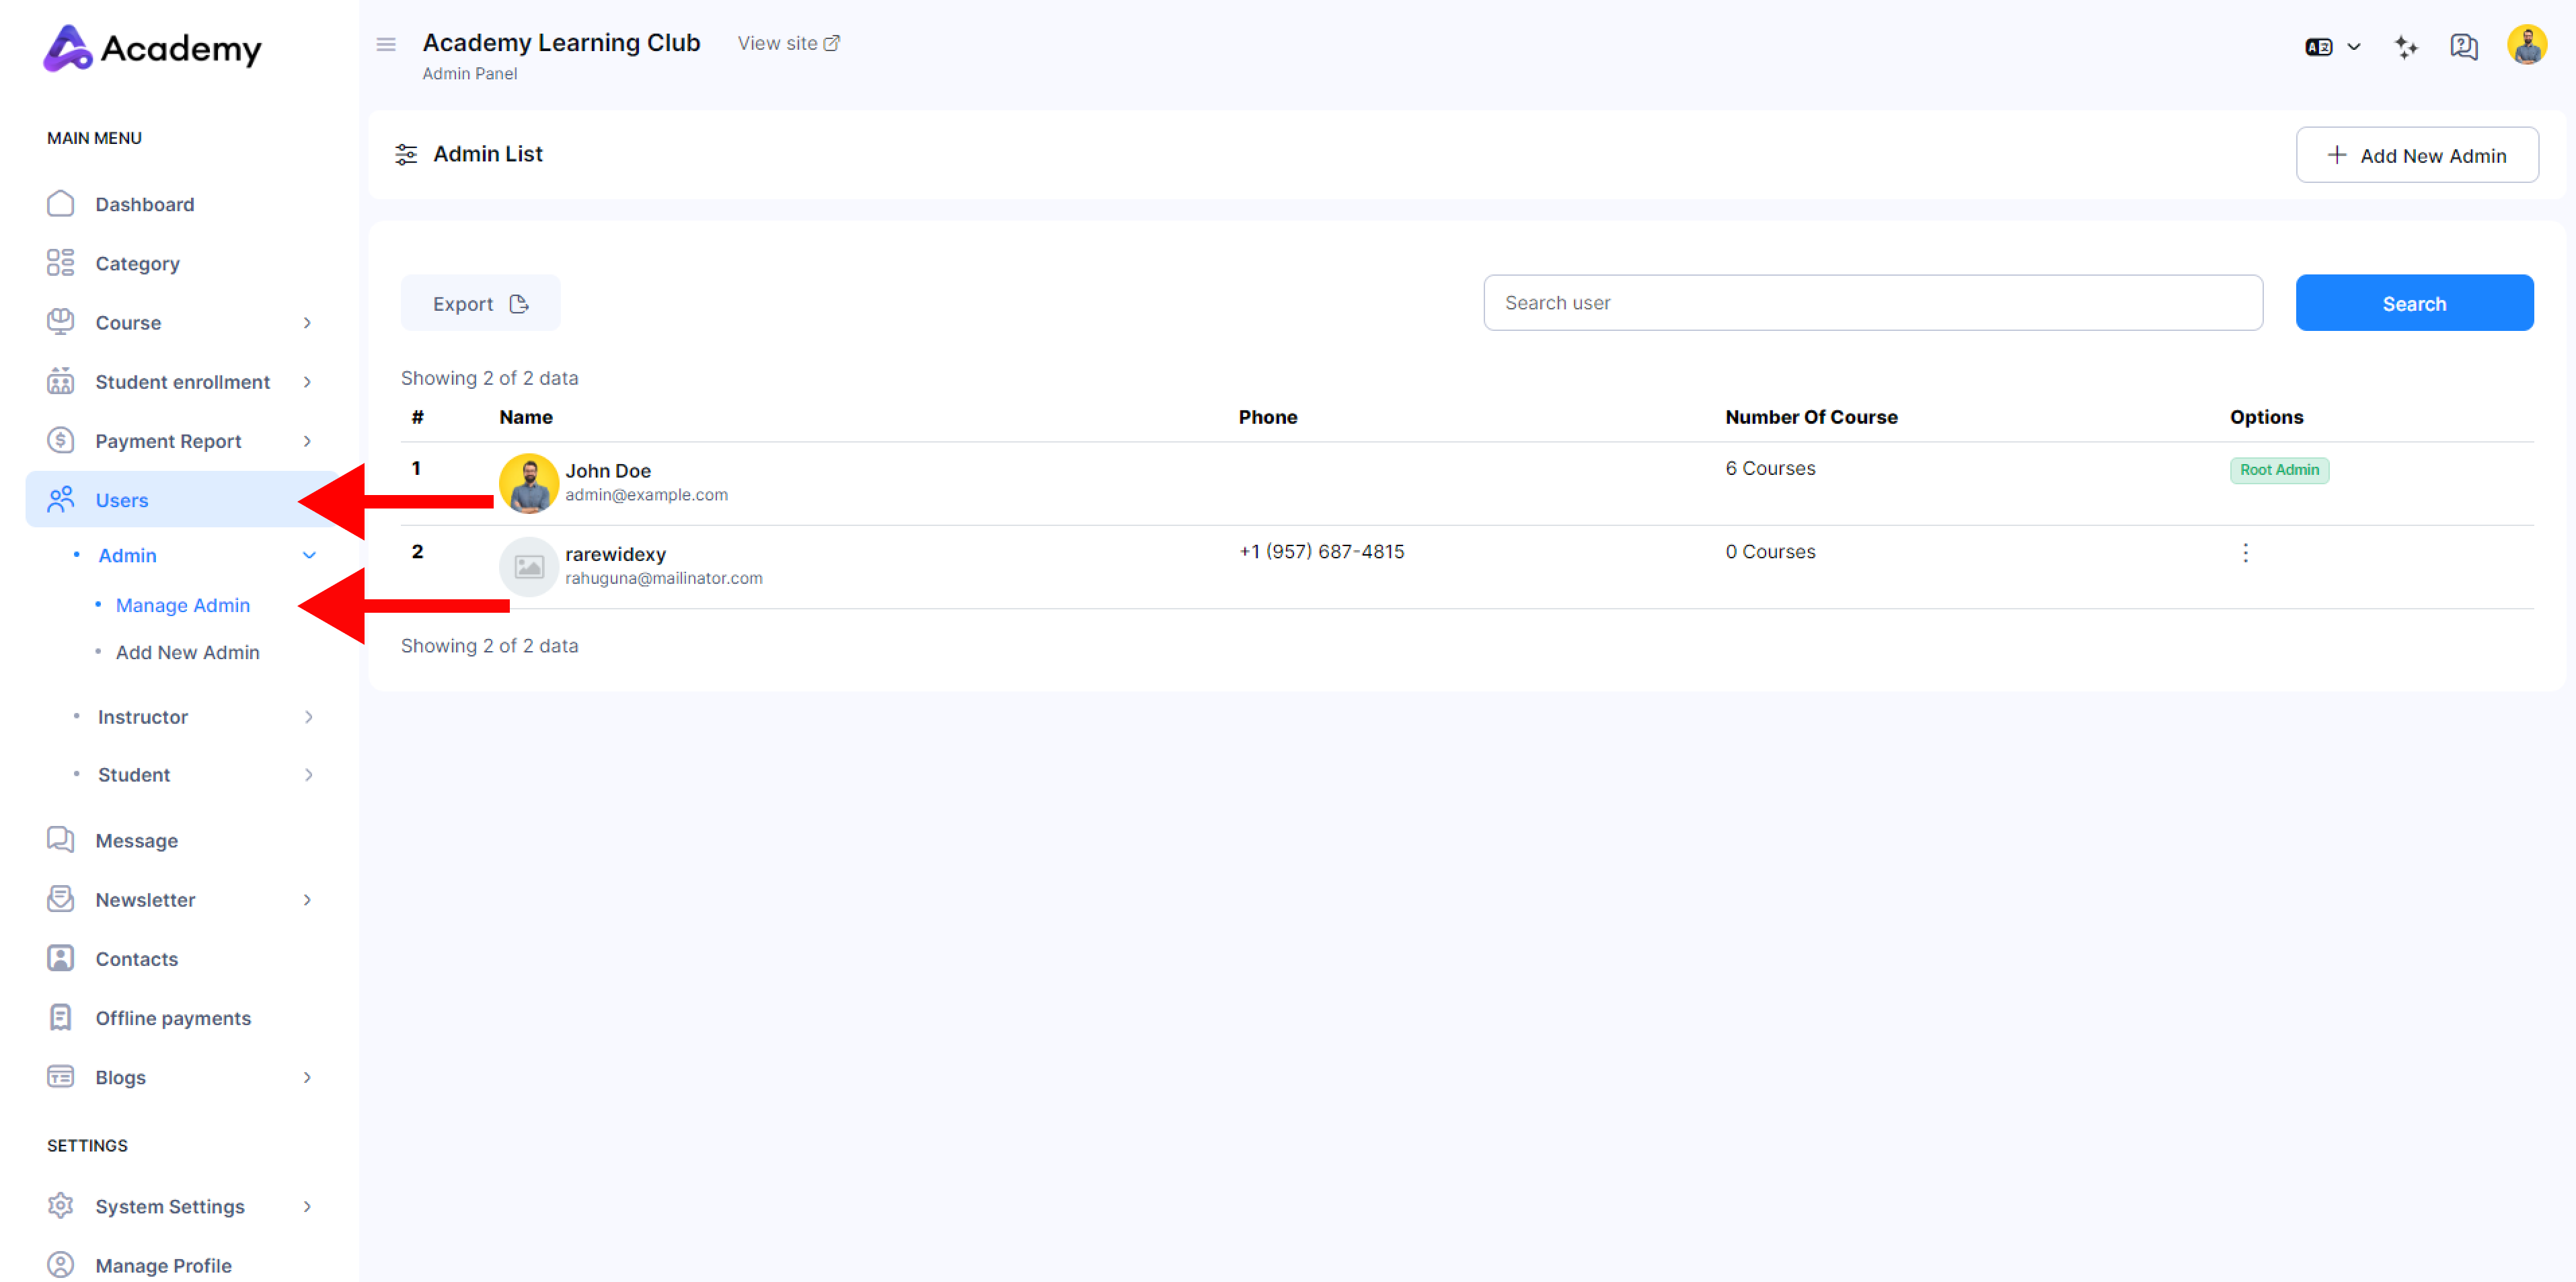
As the root admin, you can manage all the details of the additional admins of your system. Manage the admins of your system by assigning them certain permissions, editing their information or deleting them from the system if needed, by following the steps below:
-
Login to Academy LMS Laravel using your credentials as an admin.
-
Click on Users, then under Admin click on the Manage Admins option.
-
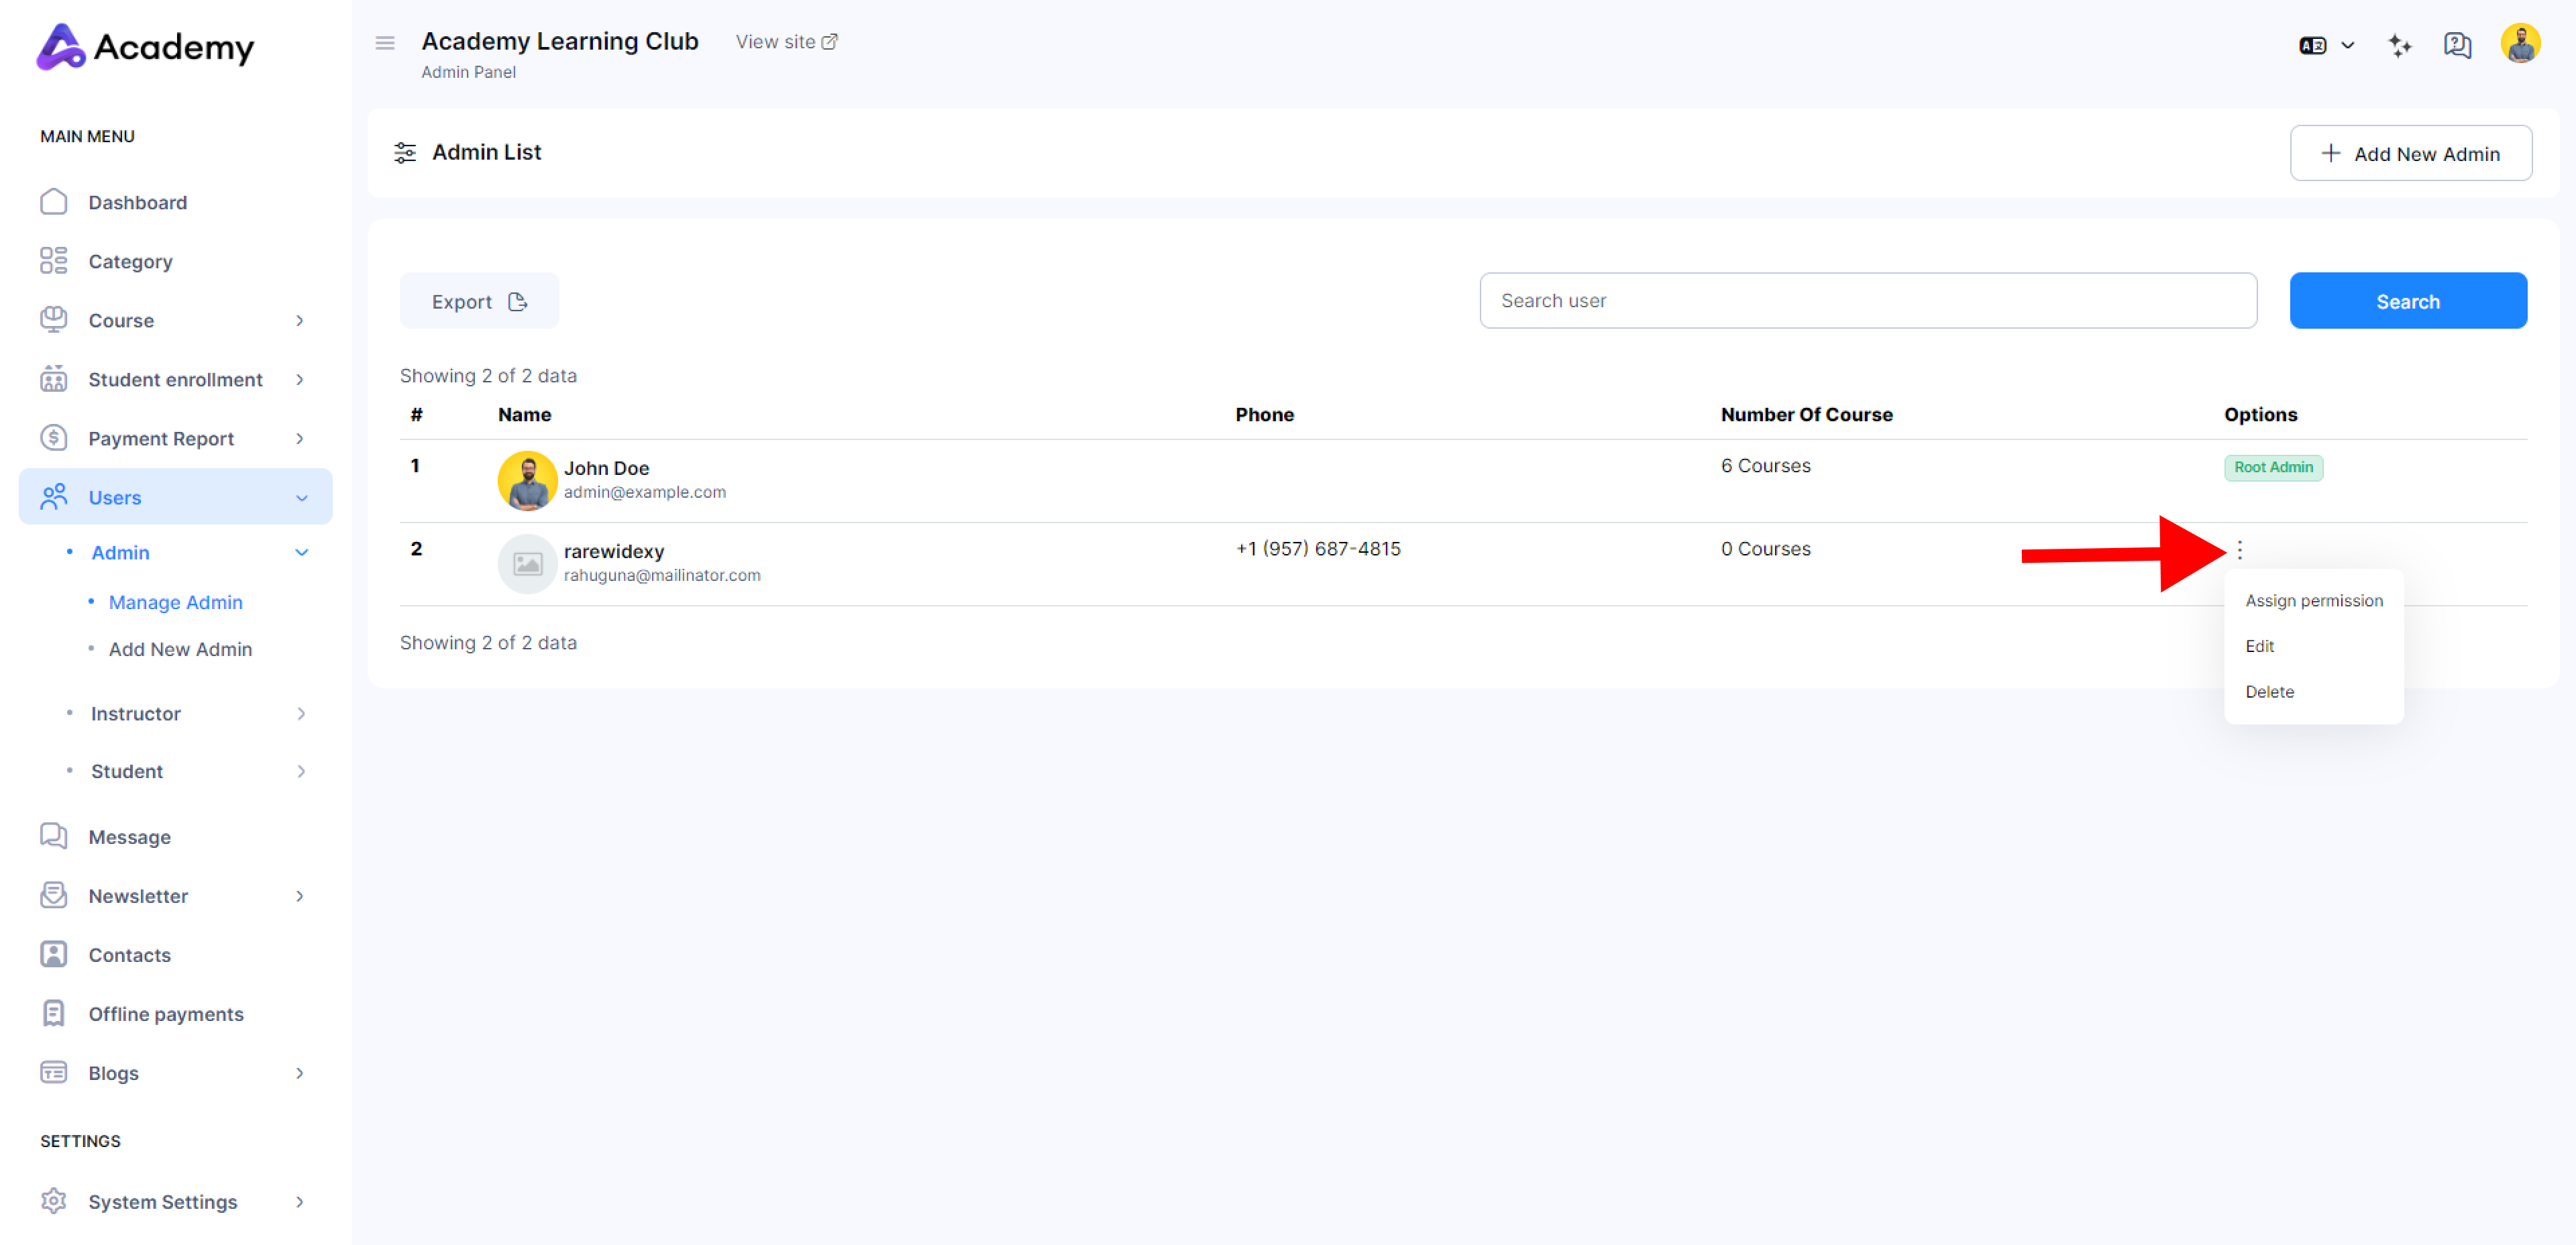
In the next window, a list of the admins will be shown, with their Names, phone numbers, number of courses under their name, and actions that can be taken.
-
If you want to Assign permissions to an admin, follow the steps below:
-
Click on the “:” button beside the selected admin.
-
Then, click on Assign permission.
-
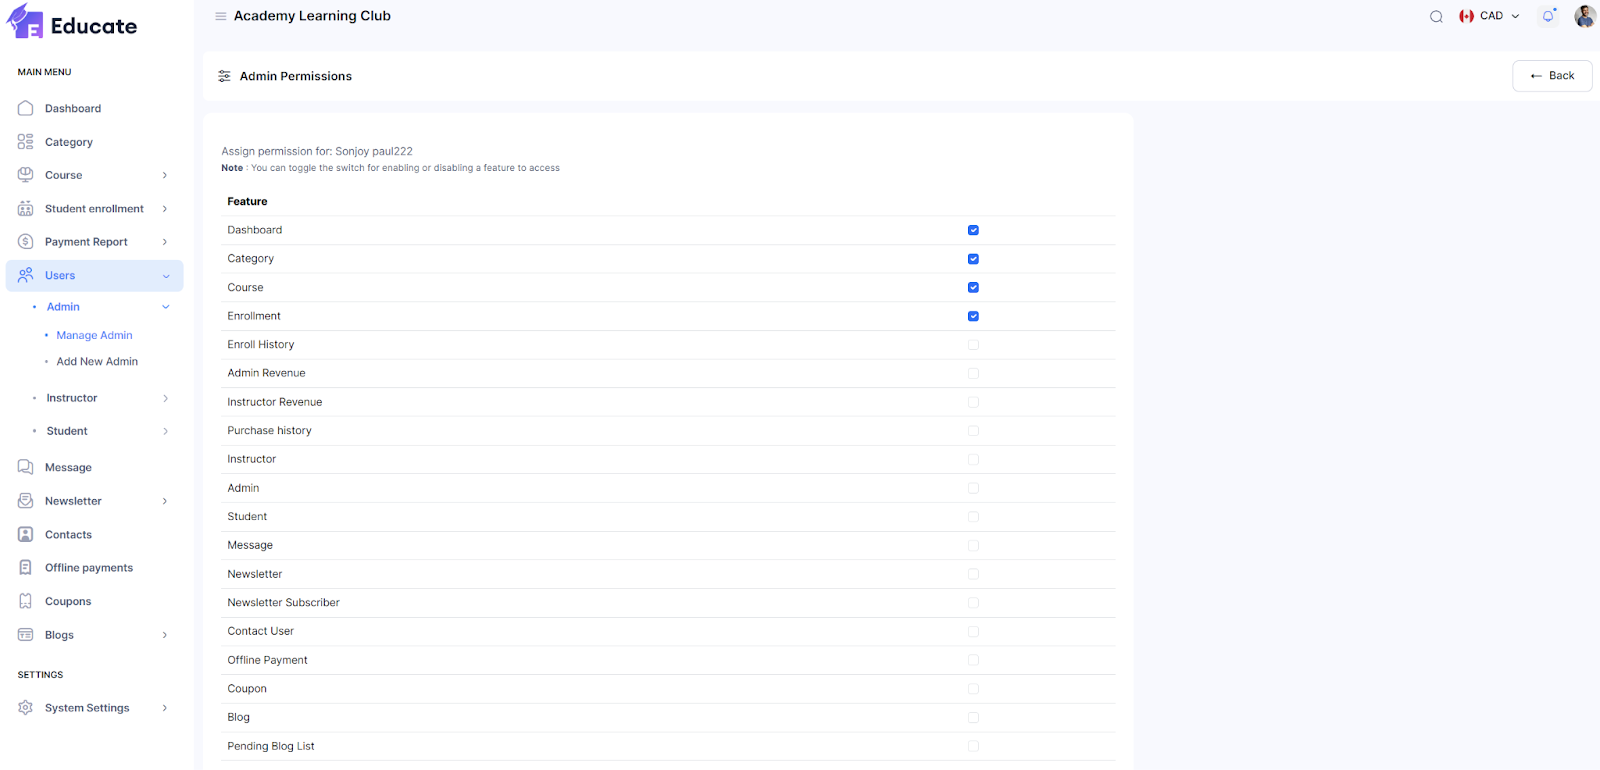
In the next window, you will see all the options that you can assign permissions to the admin. Click on the checkbox for the options that you want to grant permission for, and it will be updated automatically.
-
If you want to Edit the information of an Admin, follow the steps below:

-
Click on “:” and then click on Edit.
-
The information form window for edit admin will open up, and you can edit the necessary information required.
-
Click on Update.
-
The information will be updated.
-
If you want to Delete an admin, click on Delete, and a confirmation window will pop up. Click on Confirm if you wish to proceed, otherwise click Cancel.
Was this article helpful to you?
Contact us and we will get back to you as soon as possible

