How to Manage Marketing
Marketing in GrowUp LMS helps instructors promote their courses. It helps to reach more learners, boost course visibility, and increase enrollments, making it easier to share knowledge and grow your audience effectively.
How to Add a New Blog
- Log in to the Instructor Panel.
- From the Login Menu, select Dashboard.
- Navigate to Marketing from the left menu.
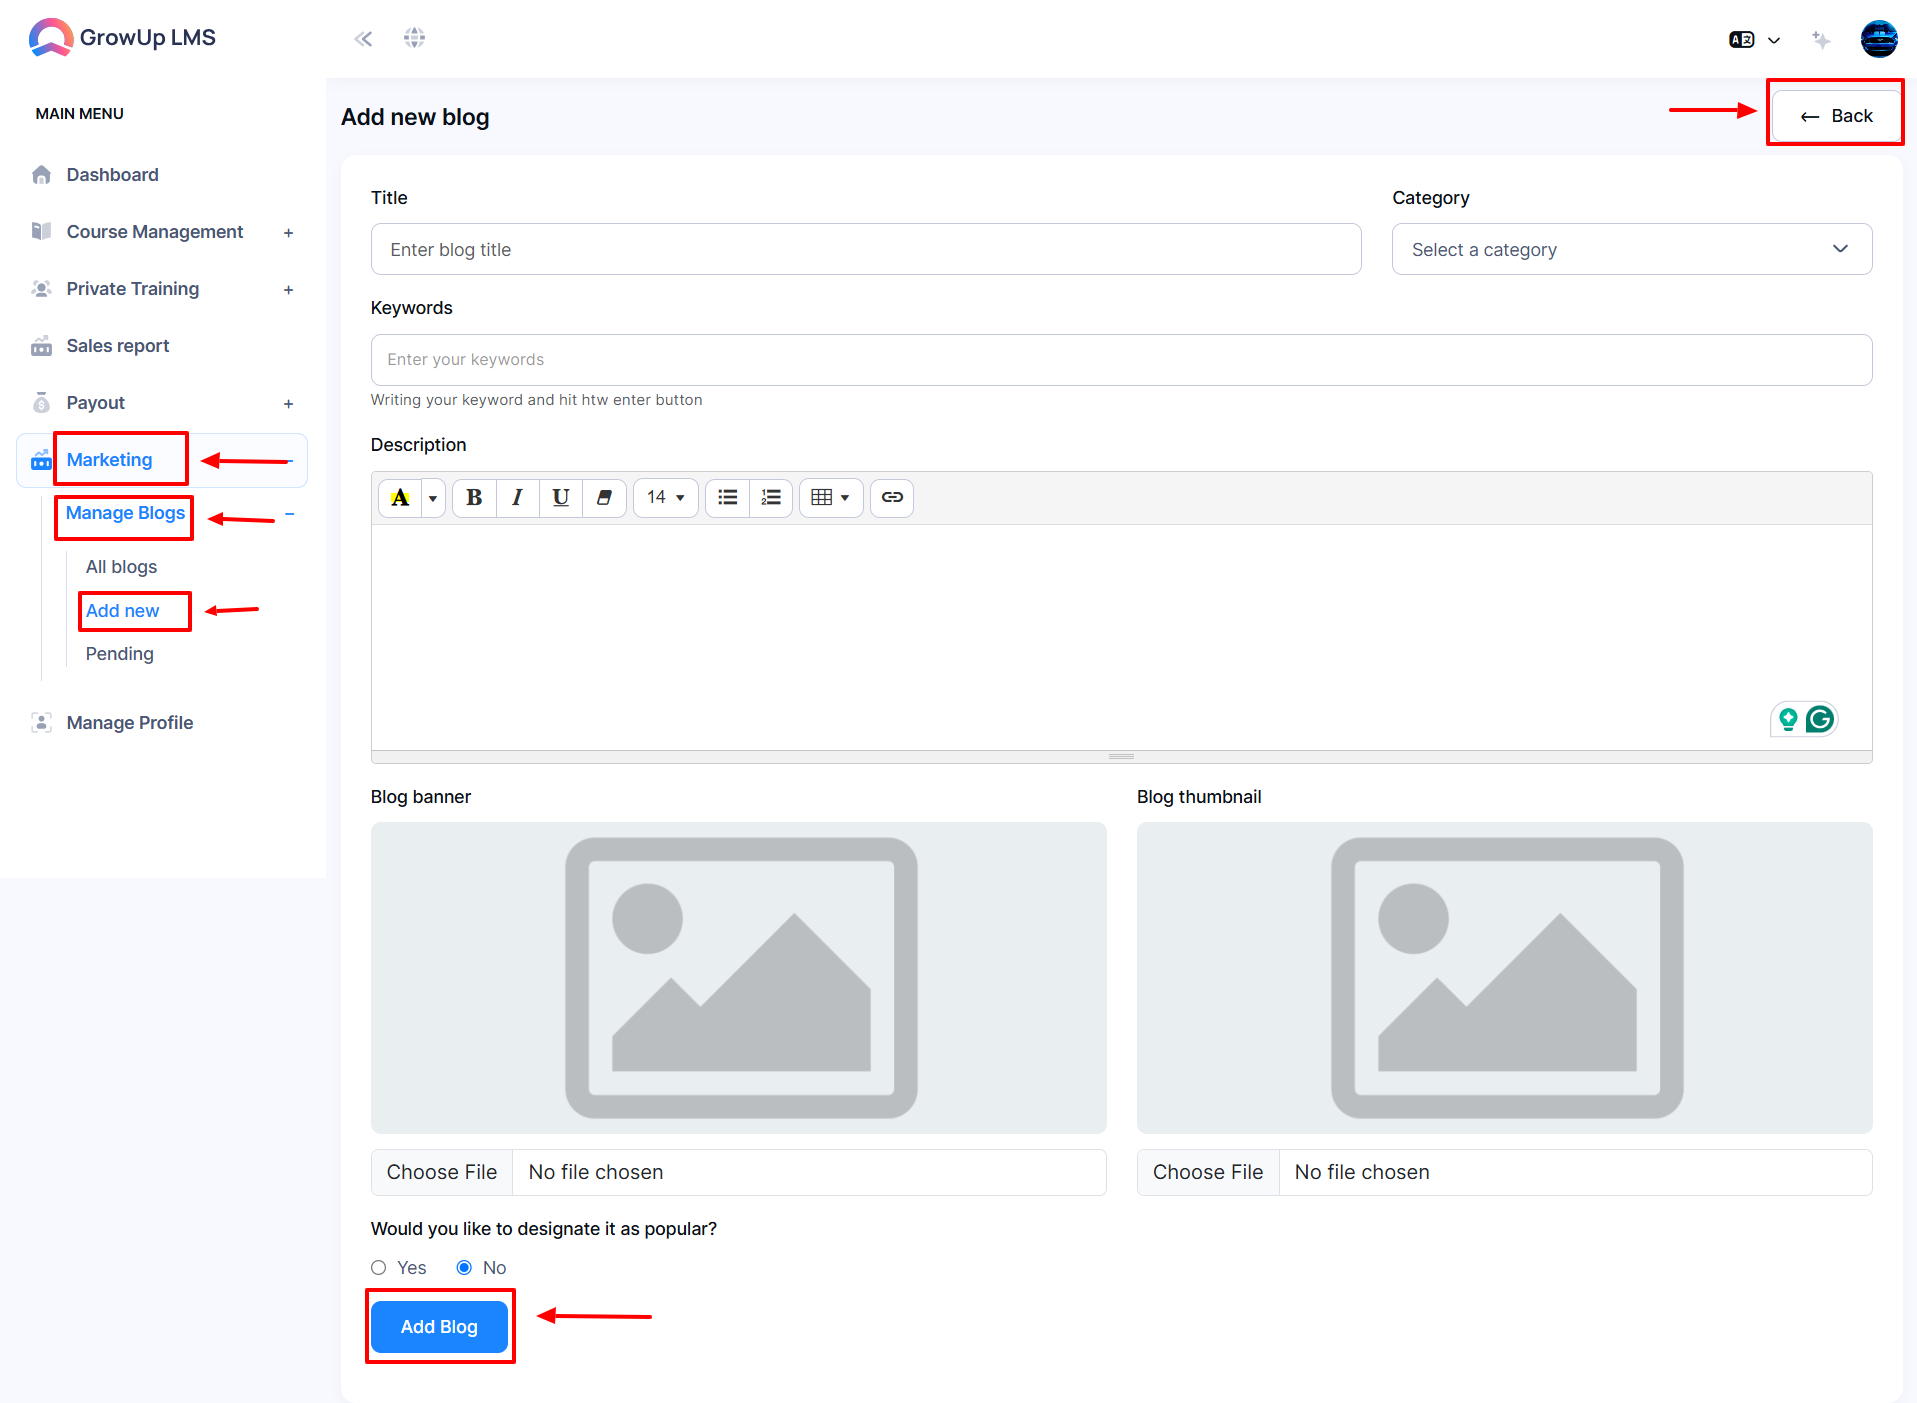
- Under Marketing, click Add New in the sub-menu, or choose the Add New Blog button from the All Blog menu to open the blog entry form.
- Fill out the blog details as follows:
-
-
- Enter the Blog Title in the Title field.
- Select the appropriate Category from the dropdown menu.
- Add relevant Keywords in the Keywords field.
- Provide a detailed Description in the Description field.
- Upload a Blog Banner using the Choose File option.
- Upload a Blog Thumbnail using the Choose File option.
- Use the Radio Button to mark the blog as Popular (Yes or No).
- Once all fields are complete, click Add Blog to save your blog post.
- To resume the previous page click the Back button.
How to Manage All Blog
- Log in to the Instructor Panel.
- From the Login Menu, select Dashboard.
- Navigate to Marketing from the left menu.
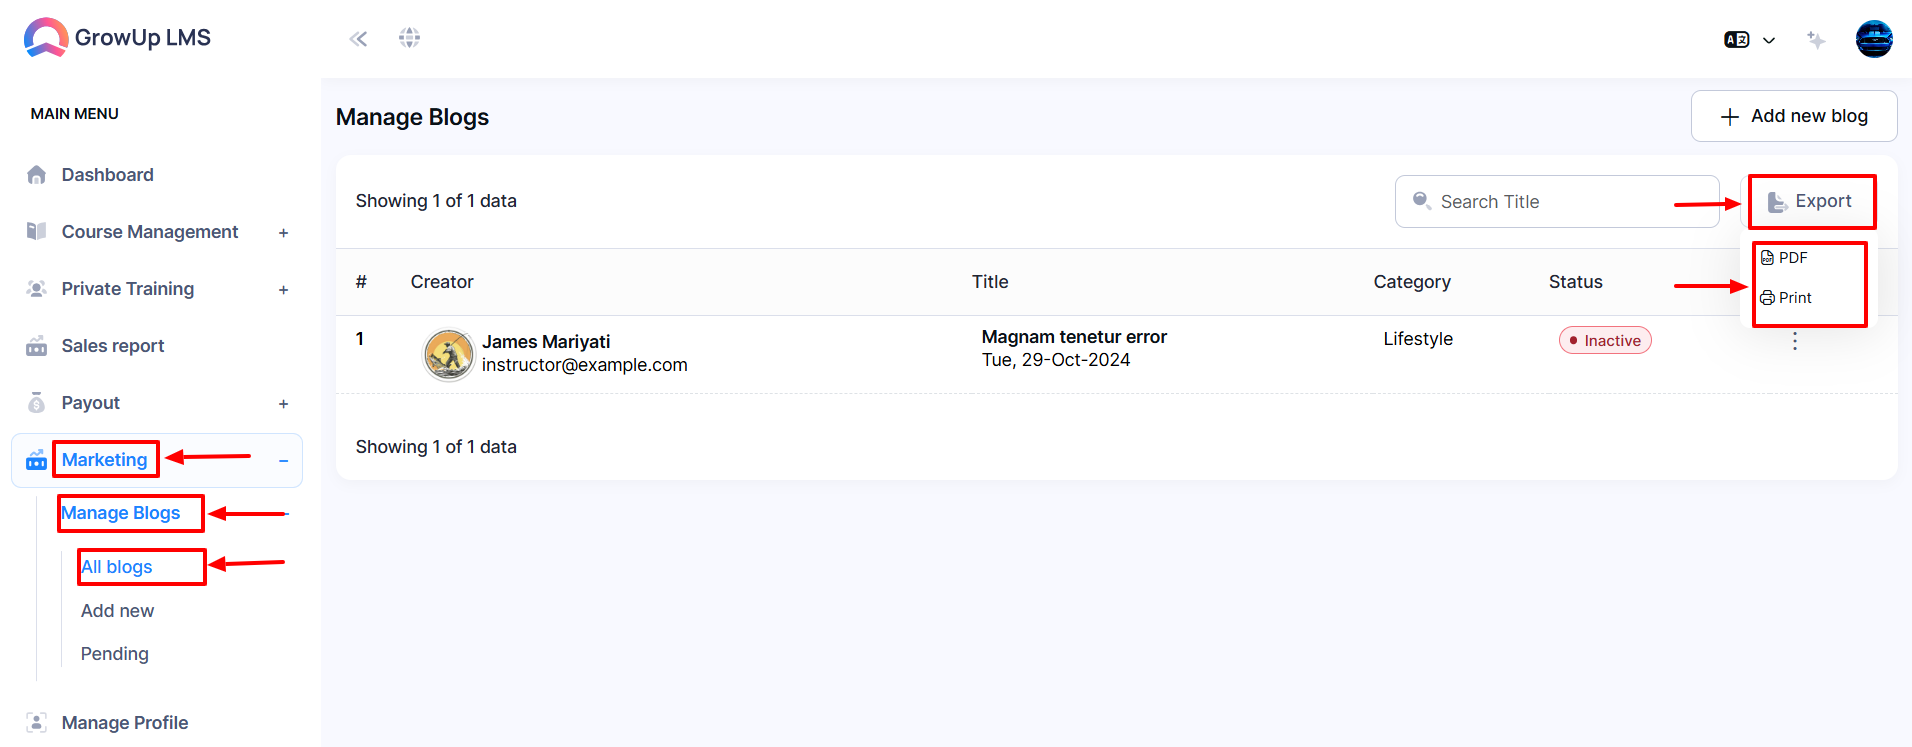
- Click the All Blogs from the left sub-menu.
- Type the Blog Title in the Search option to show the desired blog.
- Click the Export button, and a menu will appear with PDF and Print.
-
- If you click the PDF a file will be downloaded automatically.
- If you click the Print a print option will be open.
How to Edit Blog
- Log in to the Instructor Panel.
- From the Login Menu, select Dashboard.
- Navigate to Marketing from the left menu.
- Click the All Blogs from the left sub-menu.
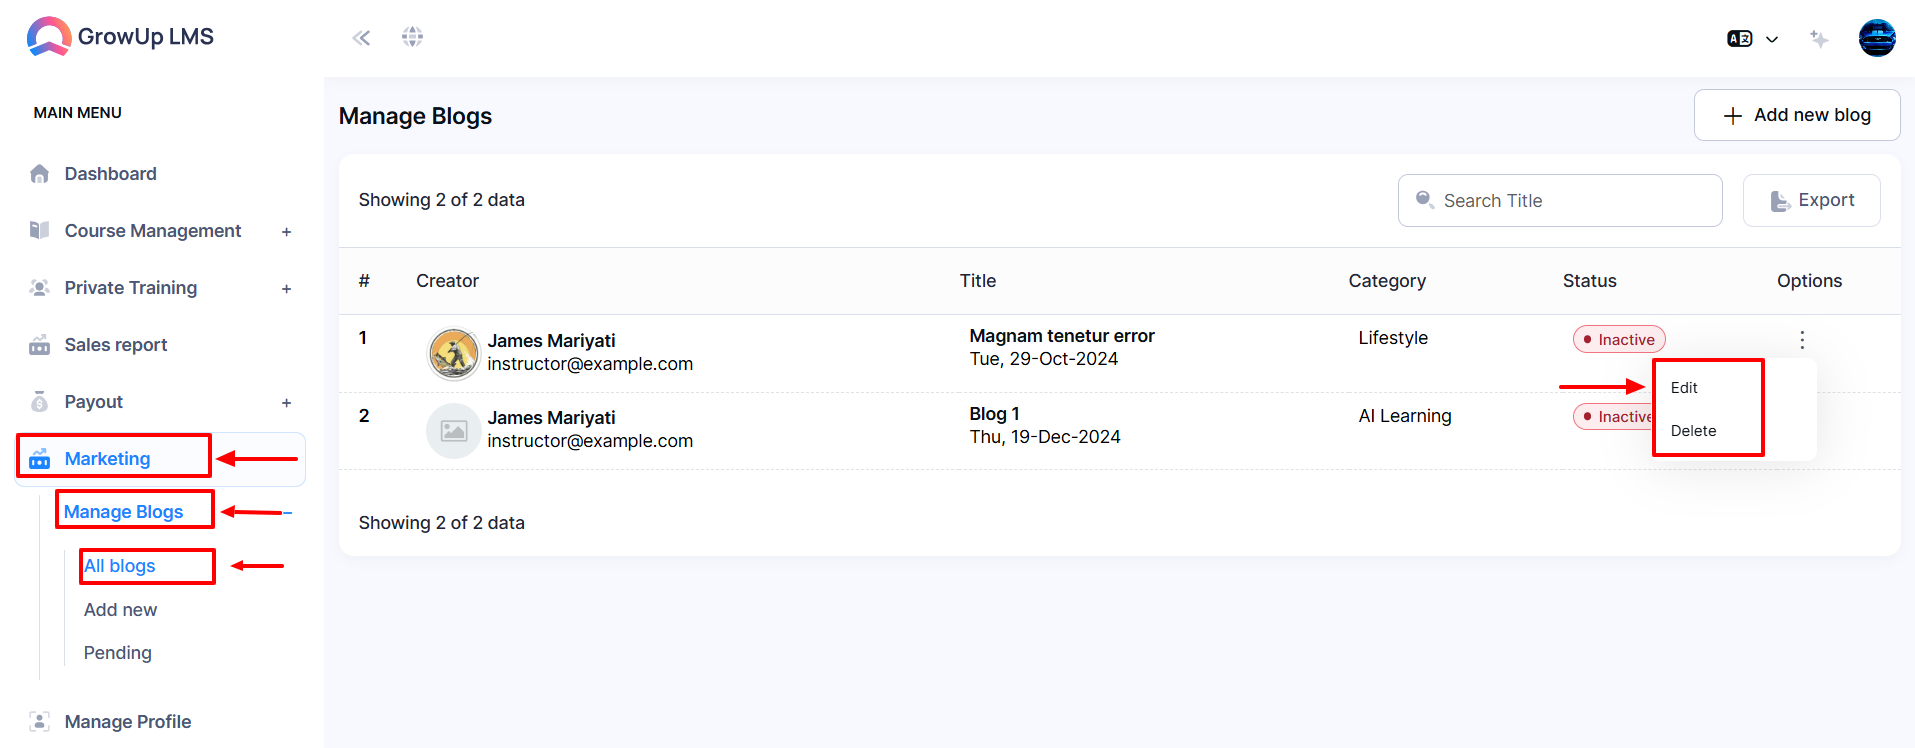
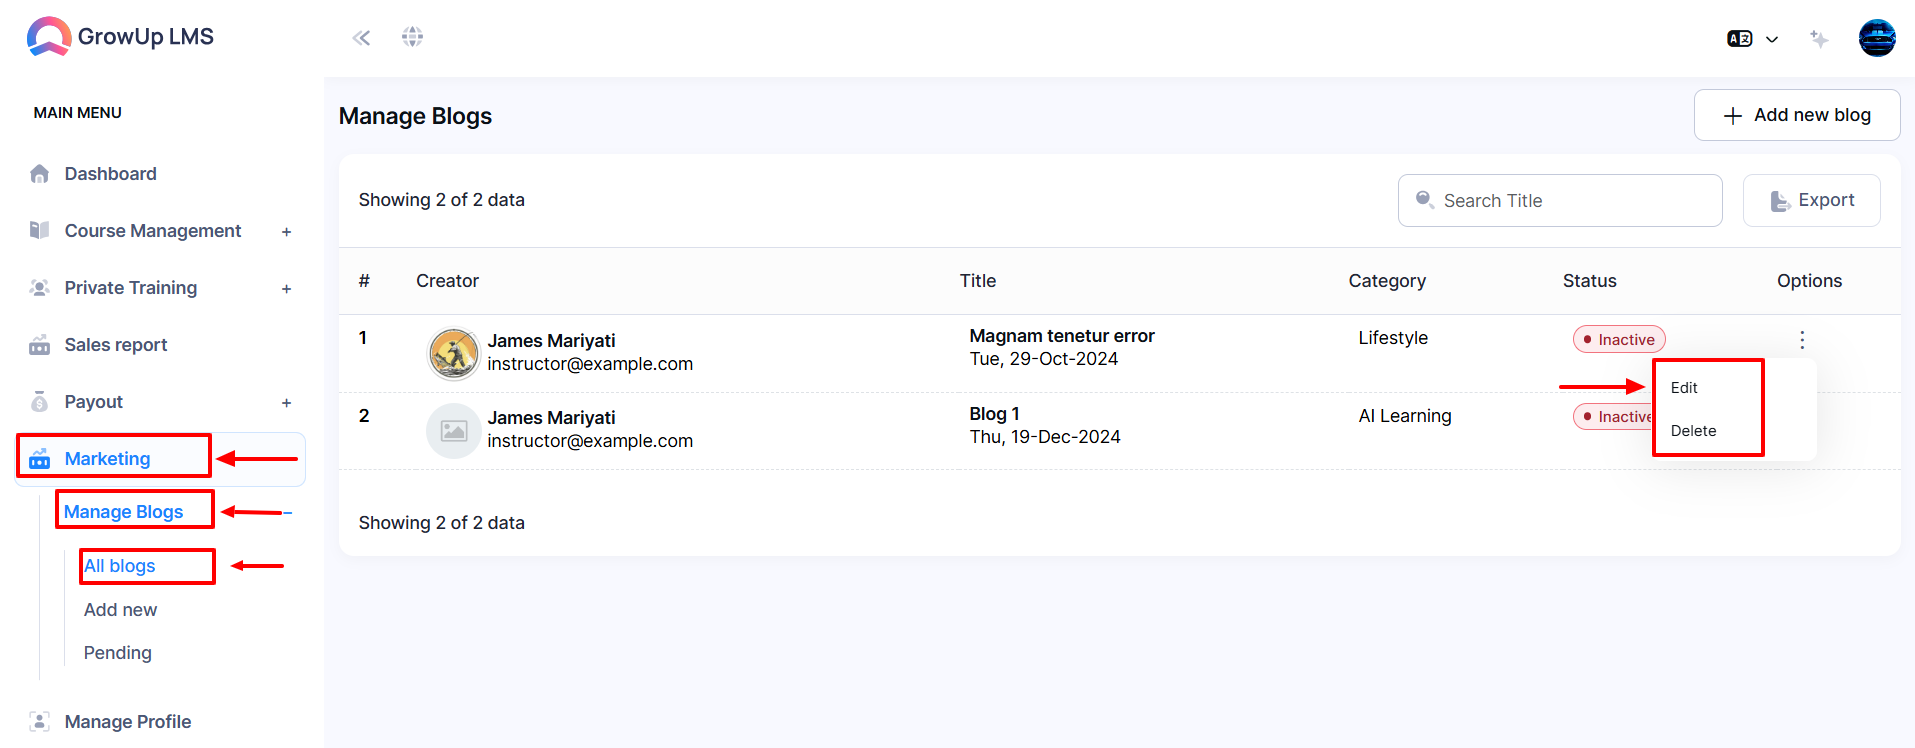
- In the Options menu, click the three dots to open a dropdown with Edit and Delete options.
- Click Edit to open a new window to modify the Title and Sub-Title.
- After making changes, click Update Category to save the information.
How to Delete Blog
- Log in to the Instructor Panel.
- From the Login Menu, select Dashboard.
- Navigate to Marketing from the left menu.
- Click the All Blogs from the left sub-menu.
- In the Options menu, click the three dots to open a dropdown with Edit and Delete options.
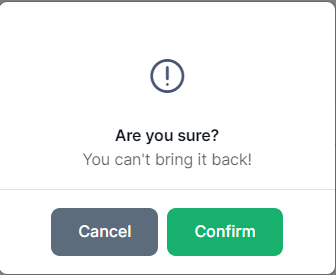
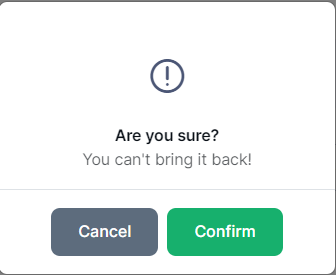
- Click the Delete a new confirmation window will open.
- Once you click the Confirm button date will be permanent. Note Date will never back be again.
How to Manage Pending Blog
- Log in to the Instructor Panel.
- From the Login Menu, select Dashboard.
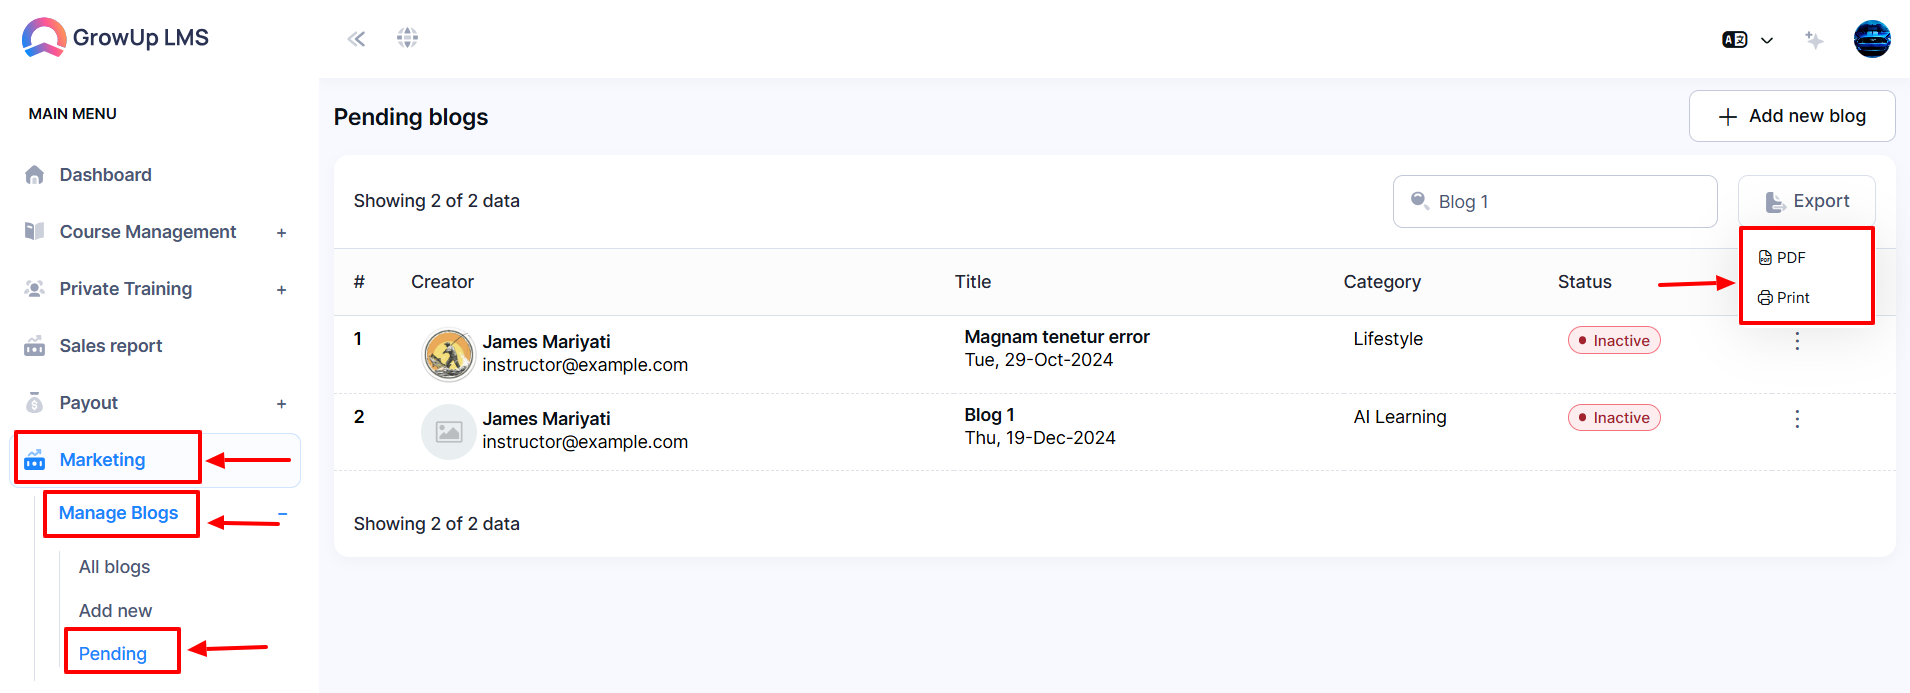
- Navigate to Marketing from the left menu.
- Click the Manage Blogs from the left sub-menu.
- Finally, choose the Pending from the left sub-menu.
- Type the Blog Title in the Search option to show the desired blog.
- Click the Export button, and a menu will appear with PDF and Print.
-
- If you click the PDF a file will be downloaded automatically.
- If you click the Print a print option will be open.
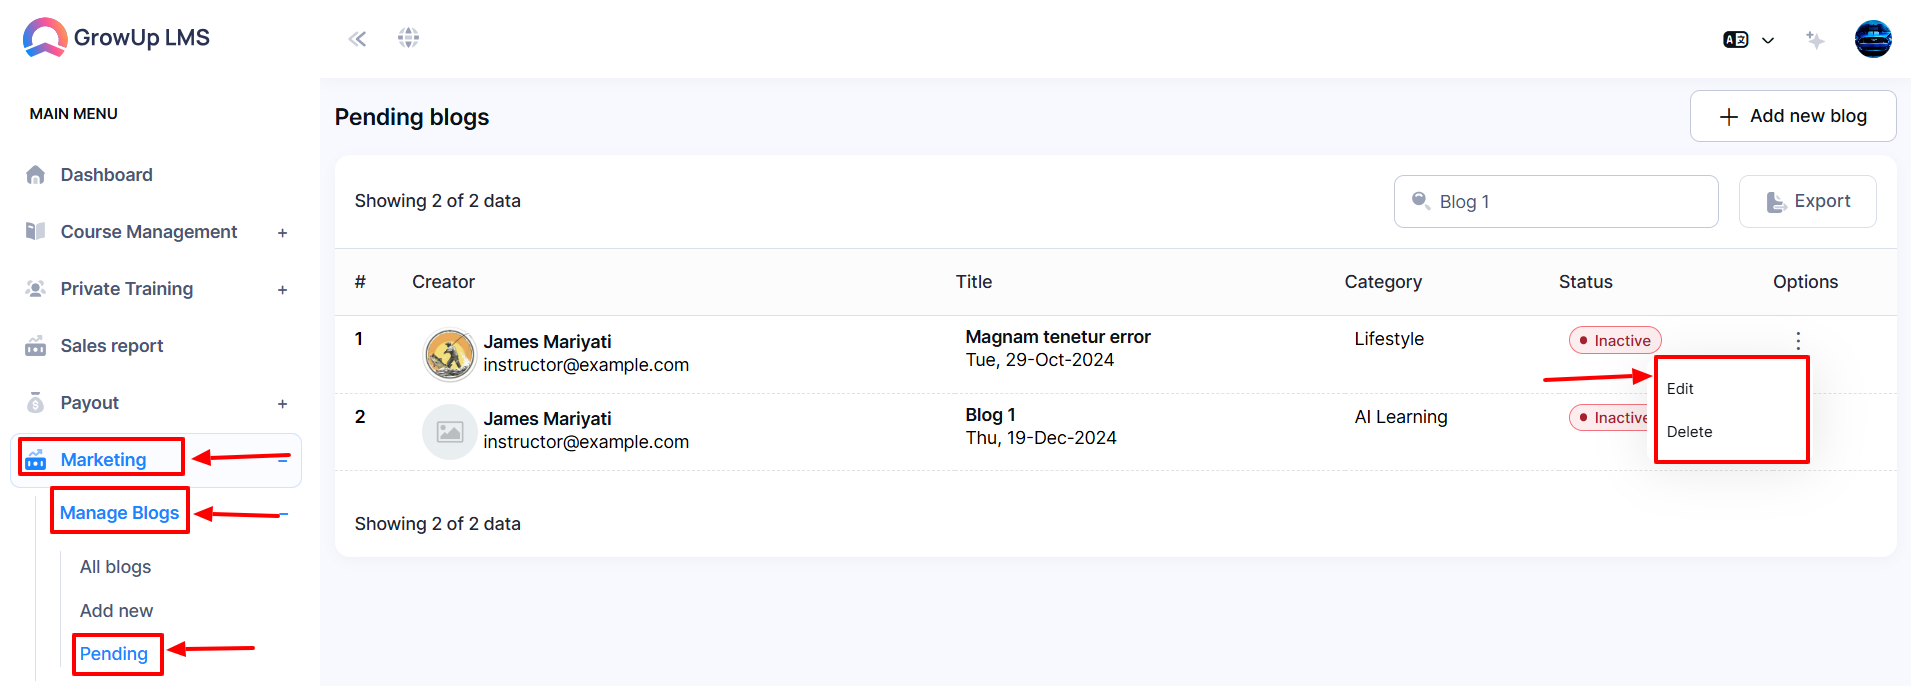
- In the Options menu, click the three dots to open a dropdown with Edit and Delete options.
- Click Edit to open a new window to modify the Title and Sub-Title.
- After making changes, click Update Pending to save the information.
How to Delete Pending Blog
- Log in to the Instructor Panel.
- From the Login Menu, select Dashboard.
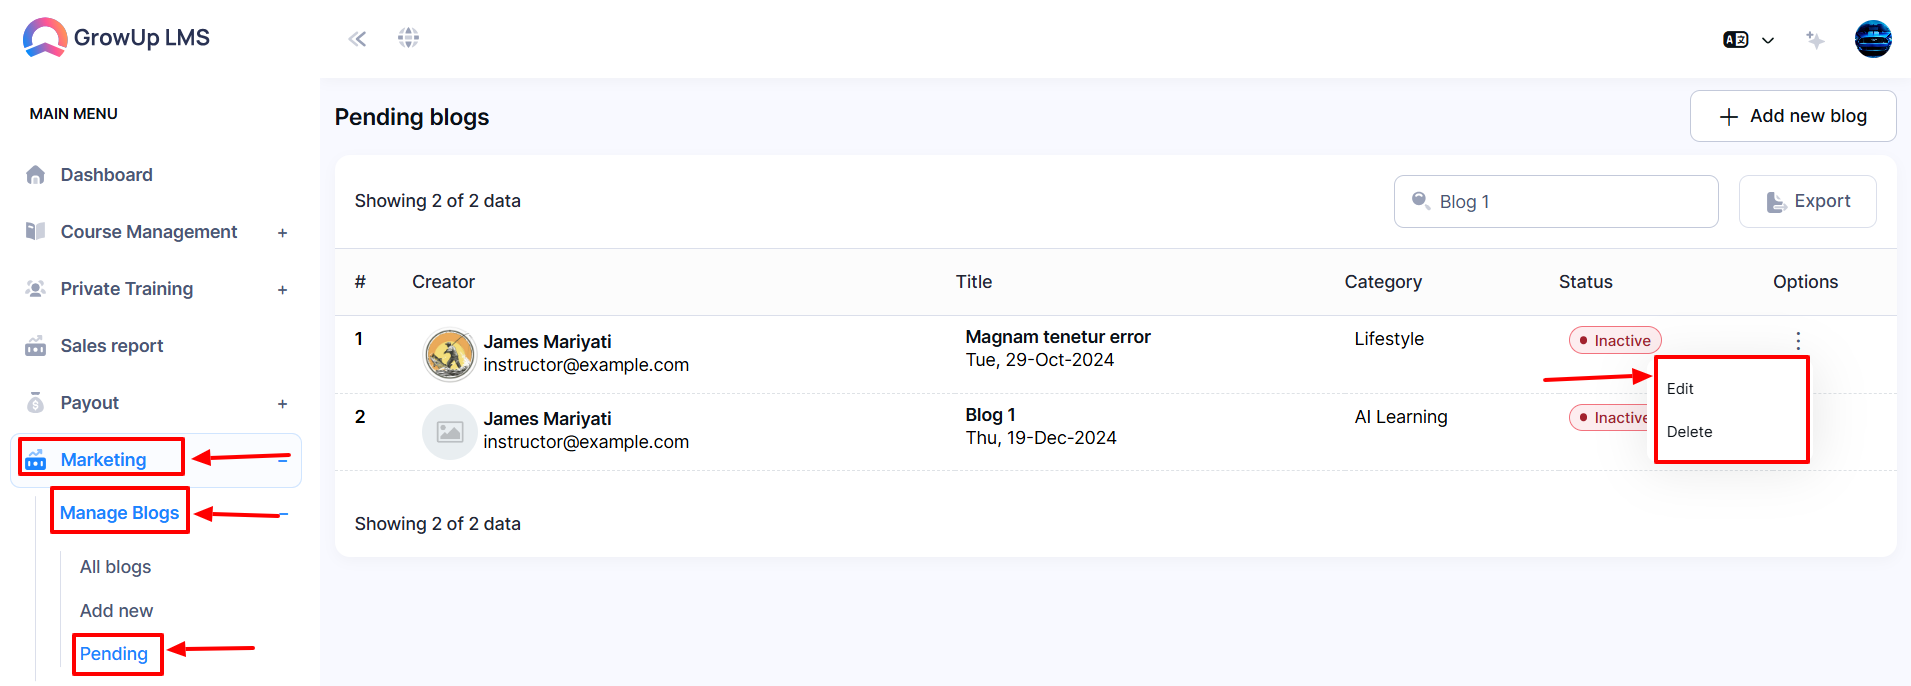
- Navigate to Marketing from the left menu.
- Click the Manage Blogs from the left sub-menu.
- Finally, choose the Pending from the left sub-menu.
- In the Options menu, click the three dots to open a dropdown with Edit and Delete options.
- Click the Delete a new confirmation window will open.
- Once you click the Confirm button date will be permanent. Note Date will never back be again.
Was this article helpful to you?
How can we help?
Contact us and we will get back to you as soon as possible
