How to Manage Live Courses
Manage Live Course in a GrowUp LMS allows instructors to organize and control live classes. Instructors can update course details, schedule sessions, monitor attendance, and manage recordings. This feature ensures smooth delivery of live lessons, helping instructors provide an effective and interactive learning experience for students.
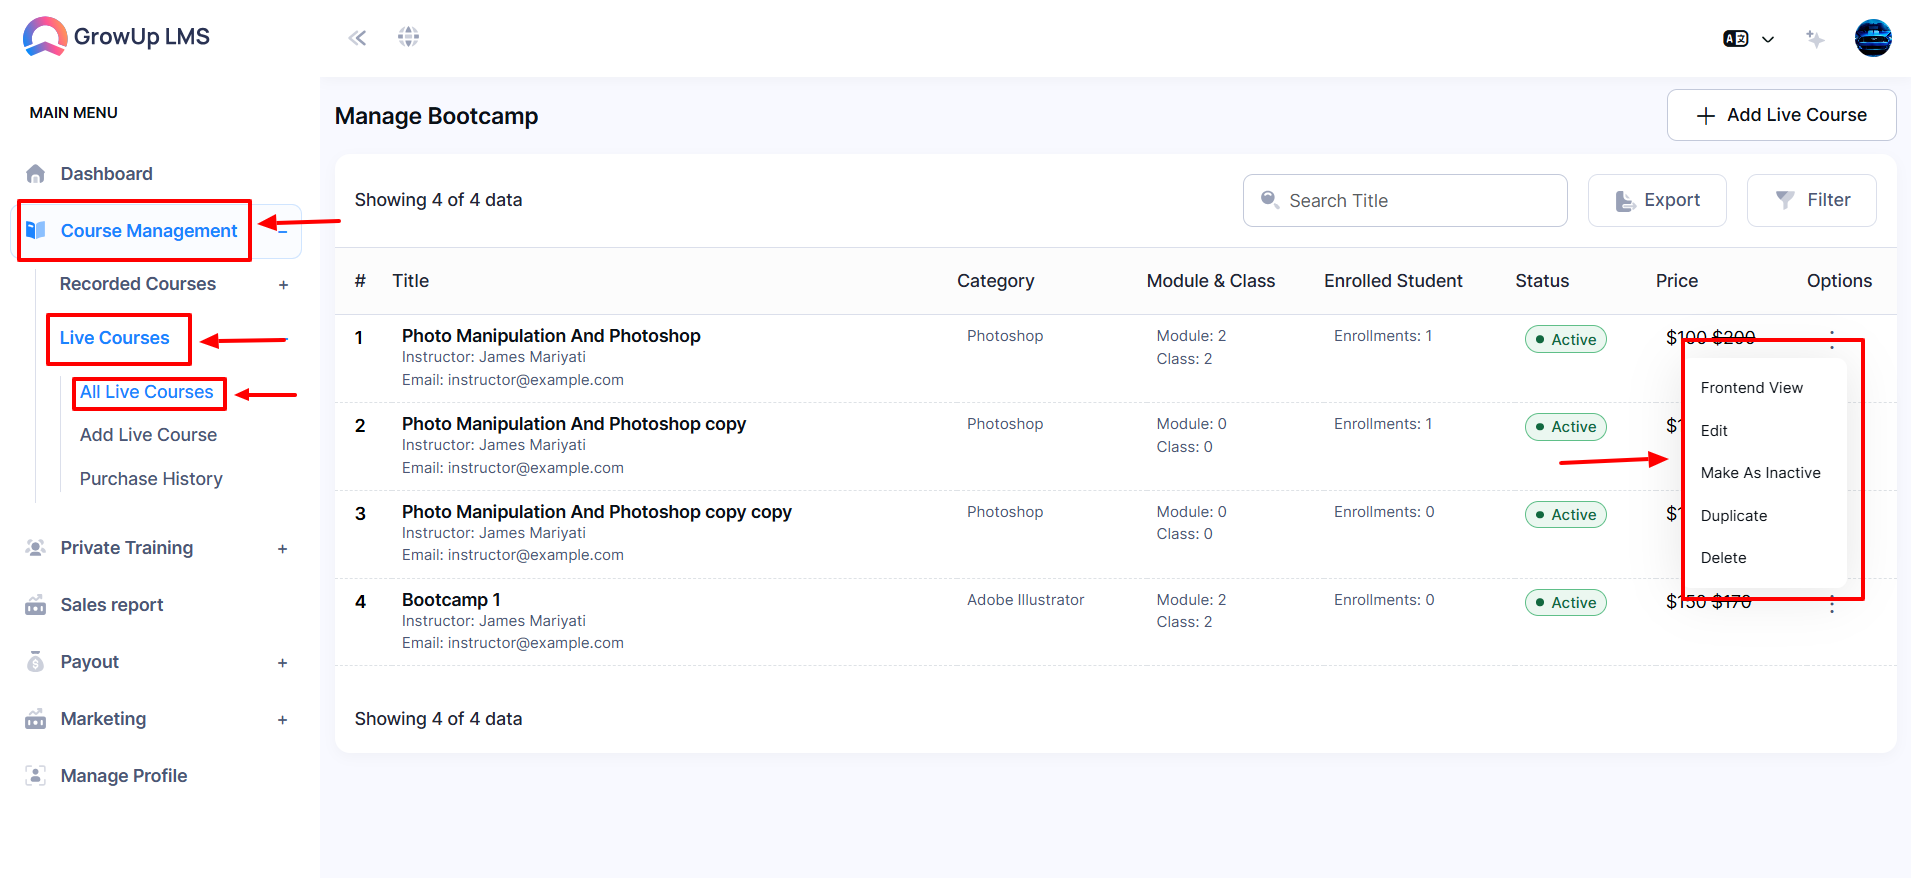
- Click the Options button to manage Courses.
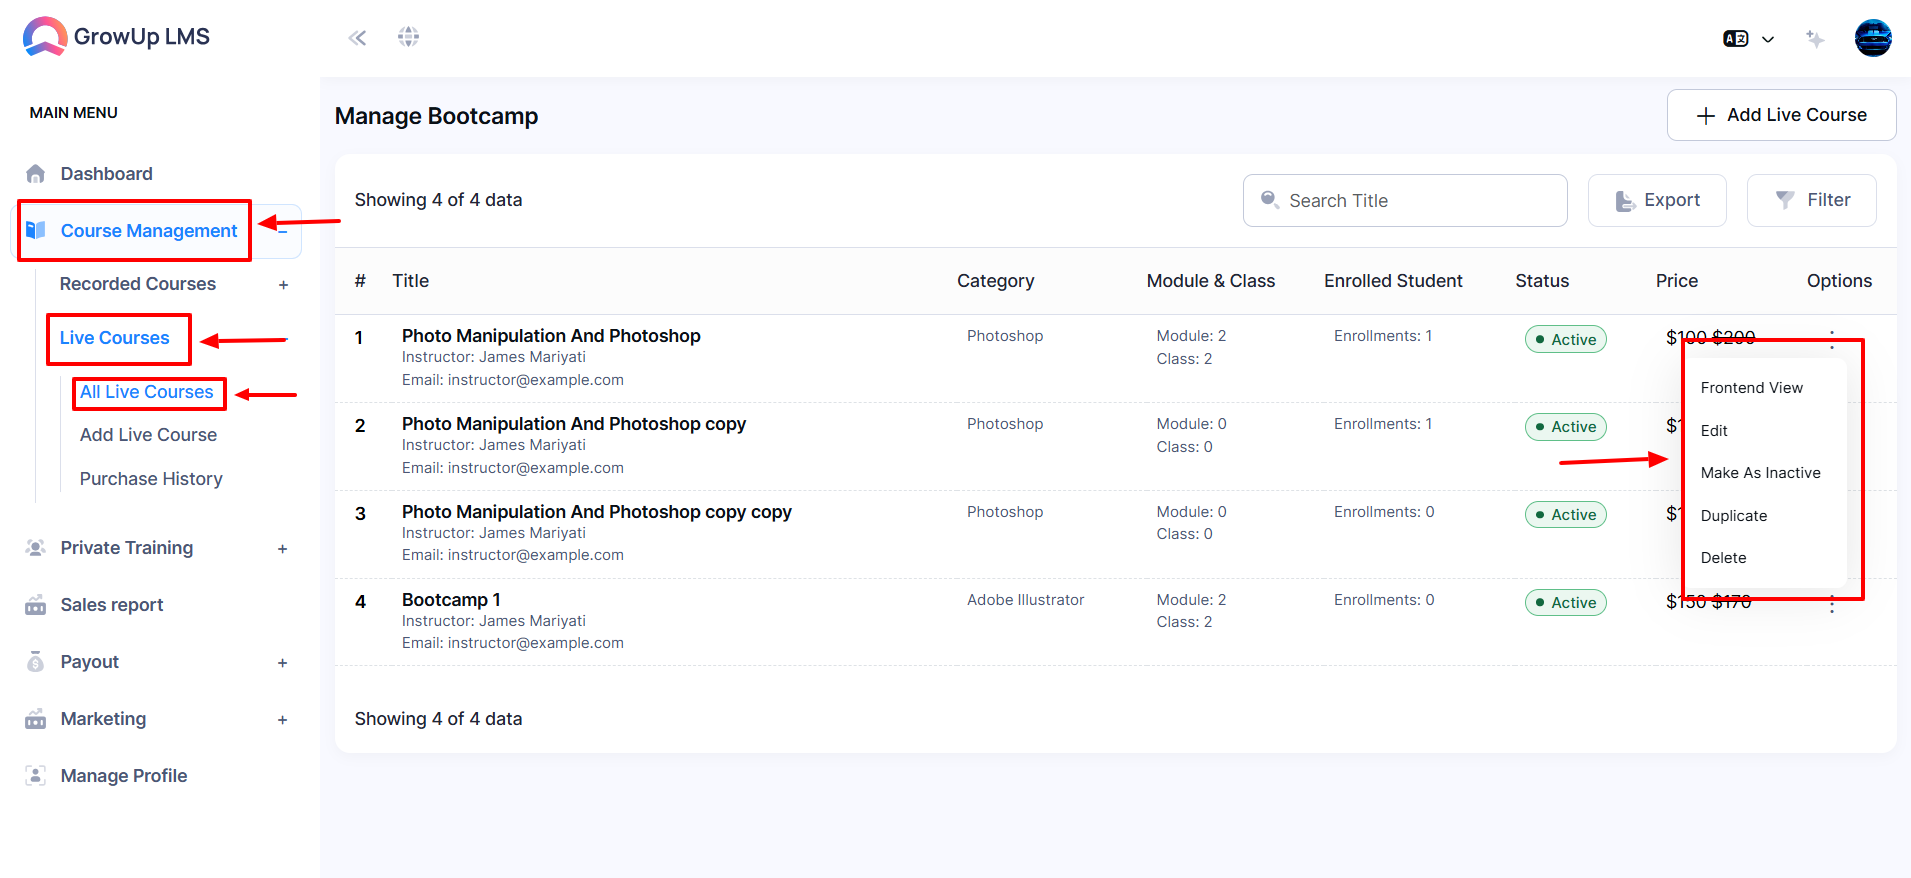
- When you click the Options button with three dots, a menu with the following options pops up: Frontend View, Edit, Make As Inactive, Duplicate, and Delete.
How to Frontend View
- Log in to the Instructor Panel.
- Click the Dashboard from the login menu.
- In the left menu, go to Course Management.
- Then, select Live Courses.
- Finally, Choose All Live Courses.
- Click the three dots from the Options and a menu will pop up.
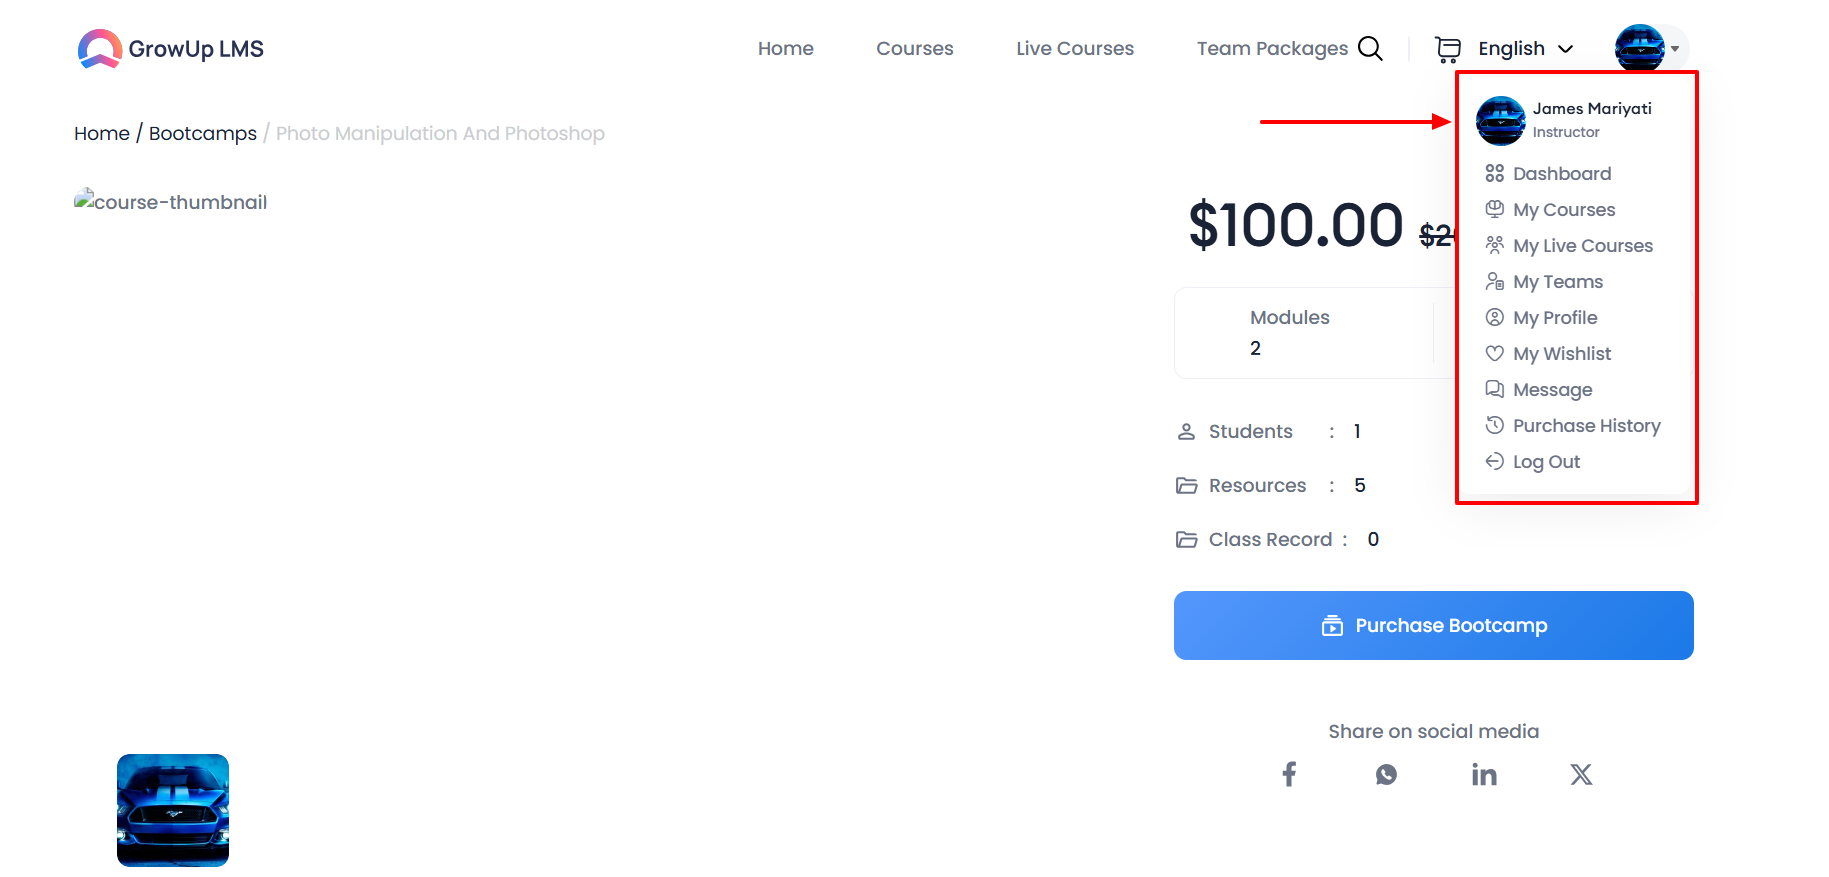
- If you click Frontend View the Options window will pop up.
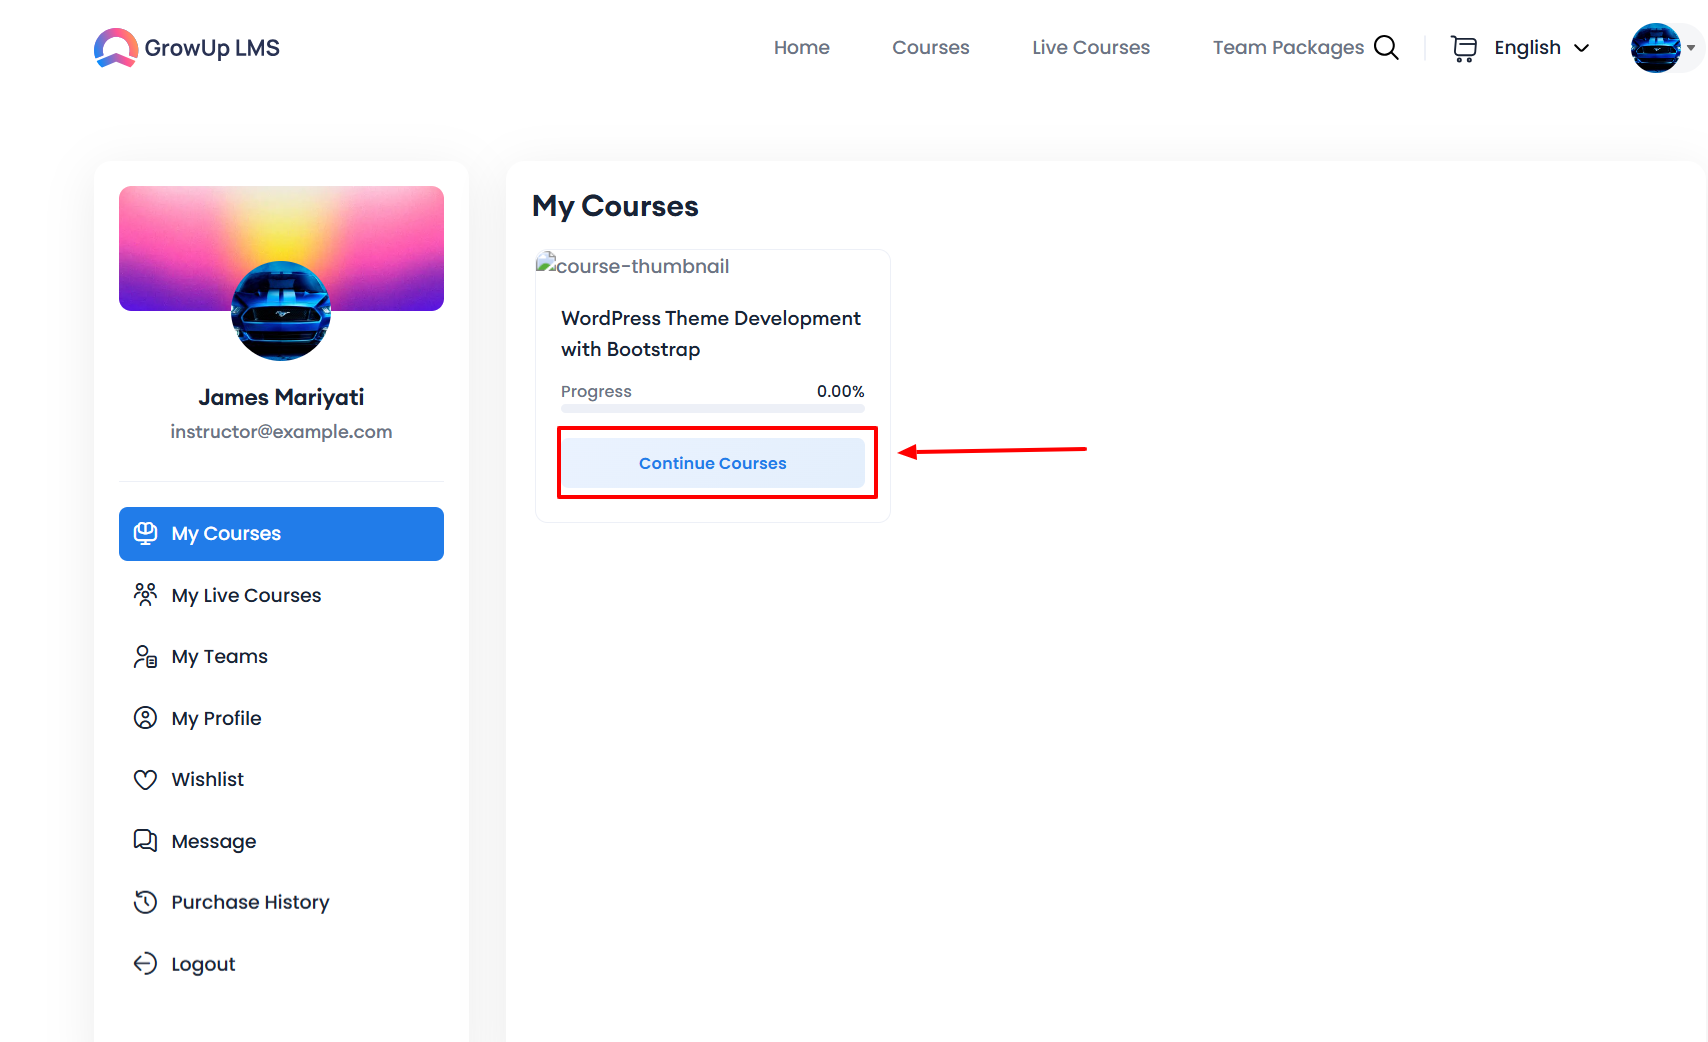
- Click the login menu a new window will pop up My Courses.
- Choose My Courses you will find your course list.
- You can start the course by clicking Continue Courses.
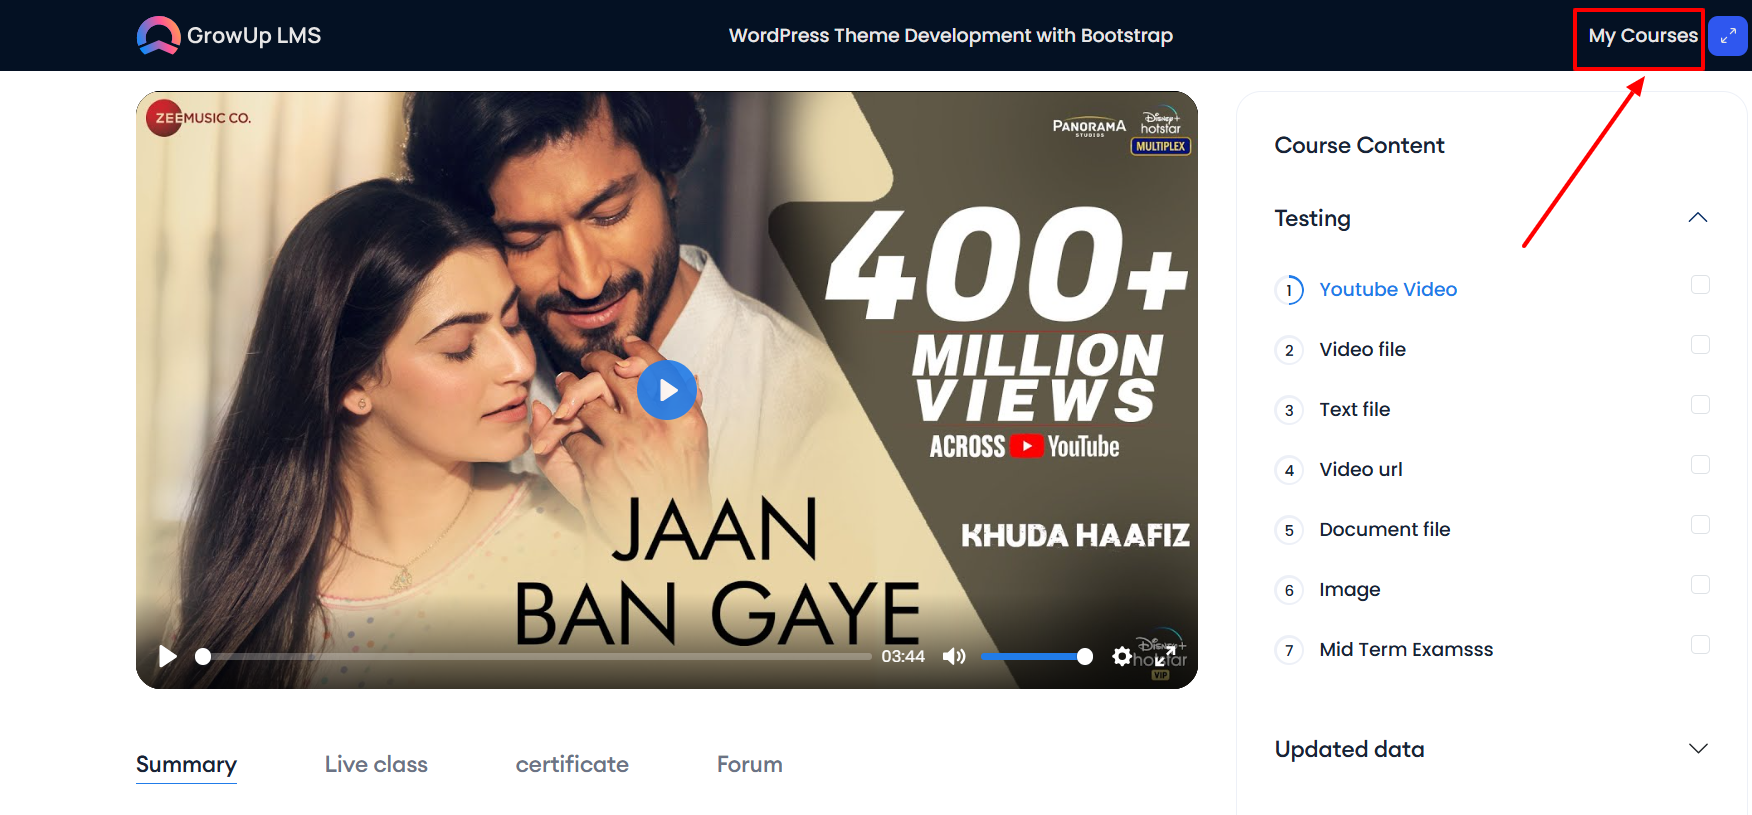
- Return to the previous page by clicking My Courses.
How to Edit Live Course
- Log in to the Instructor Panel.
- Click the Dashboard from the login menu.
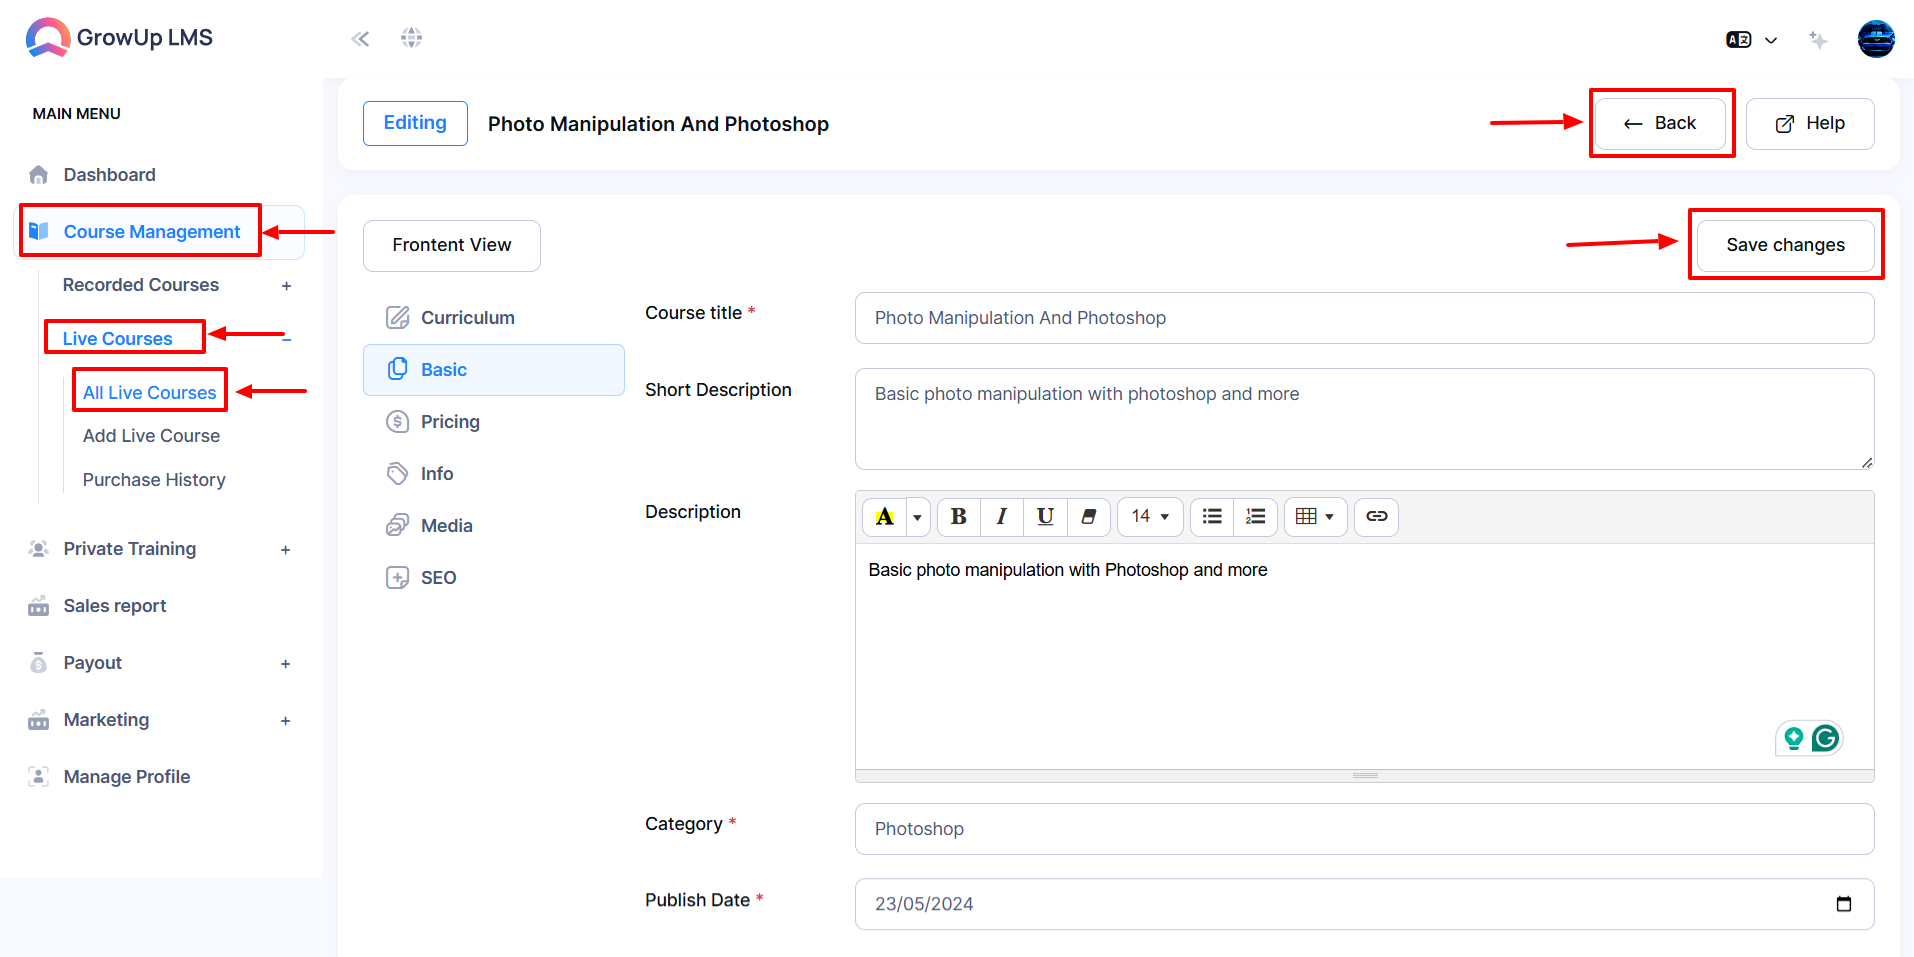
- In the left menu, go to Course Management.
- Then, select Live Courses.
- Finally, Choose All Live Courses.
- Click the three dots from the Options or click on the Course Title, and a menu will pop up.
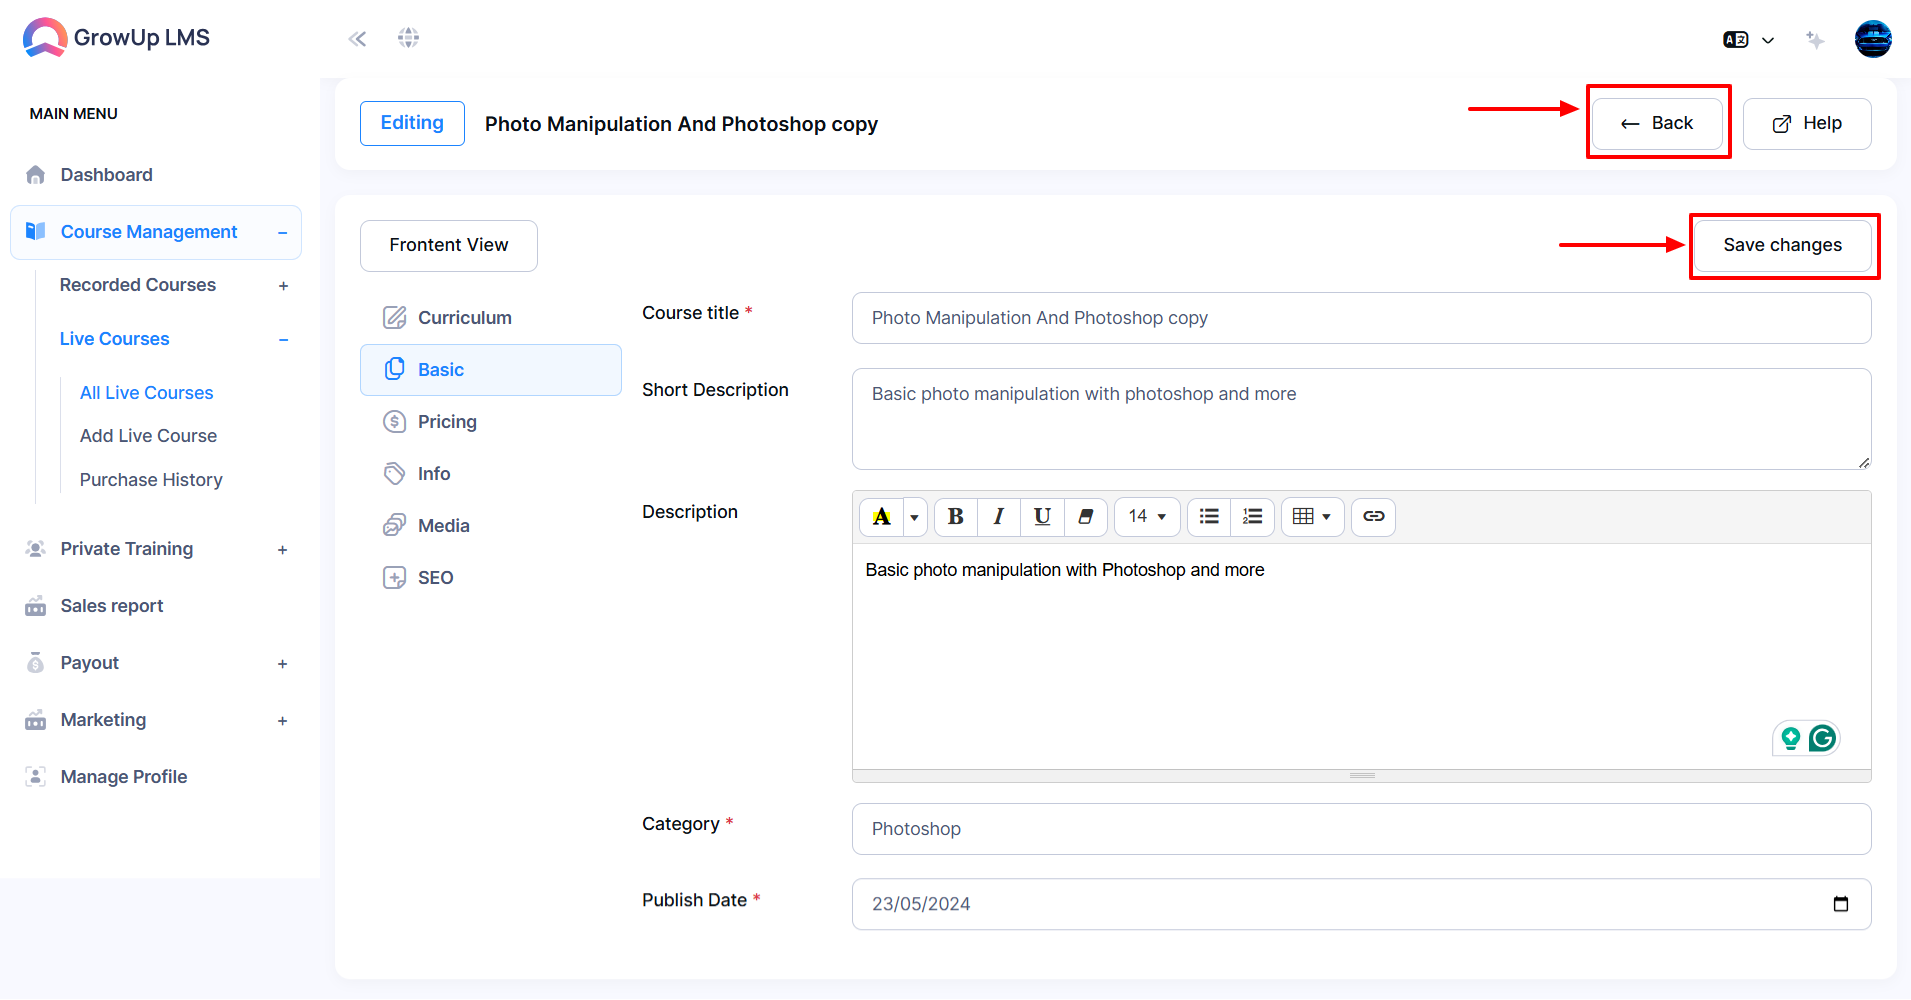
- Select Edit to open the editing window.
- Update the course details as follows:
-
- Enter the Course Title in the Title field.
- Provide a Short Description in the Short Description field.
- Add the full Description in the Description field.
- Choose a Category from the dropdown menu.
- Select the Publish Date from its dropdown calendar
- Once you complete all, click Save Changes to update and save the course information.
- Return to the previous page and click the Back button.
How to Make As Inactive
- Log in to the Instructor Panel.
- Click the Dashboard from the login menu.
- In the left menu, go to Course Management.
- Then, select Live Courses.
- Finally, Choose All Live Courses.
- Click the three dots from the Options and a menu will pop up.
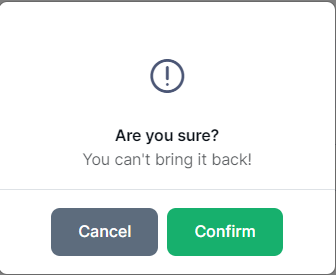
- Select Make As Inactive a confirmation window will pop up.
- If you click Confirm the course will appear as Inactive otherwise Cancel.
How to Duplicate Live Course
- Log in to the Instructor Panel.
- Click the Dashboard from the login menu.
- In the left menu, go to Course Management.
- Then, select Live Courses.
- Finally, Choose All Live Courses.
- Click the three dots from the Options and a menu will pop up.
- Select Duplicate a confirmation window will pop up.
- Once you click Confirm an entry form will appear.
- Update the course details as follows:
-
- Enter the Course Title in the Course Title field.
- Provide a Short Description in the Short Description field.
- Add the full Description in the Description field.
- Choose a Category from the dropdown menu.
- Select the Publish Date from its dropdown calendar
- Once you complete all, click Save Changes to update and save the course information.
- Return to the previous page and click the Back button.
How to Delete Live Courses
- Log in to the Instructor Panel.
- Click the Dashboard from the login menu.
- In the left menu, go to Course Management.
- Then, select Live Courses.
- Finally, Choose All Live Courses
- Click the three dots from the Options and a menu will pop up.
- Select Delete a confirmation window will pop up.
- Once you click Confirm the course will be deleted permanently and never back again.
Was this article helpful to you?
How can we help?
Contact us and we will get back to you as soon as possible
