How to Manage Certificate Settings
Certificate settings allow businesses to create and customize certificates for course completion. Design certificates with fields like student name, course title, completion date, and company logo. These settings ensure professional certification for learners, enhancing credibility and brand recognition while motivating course participants.
- Log in to the Admin Panel.
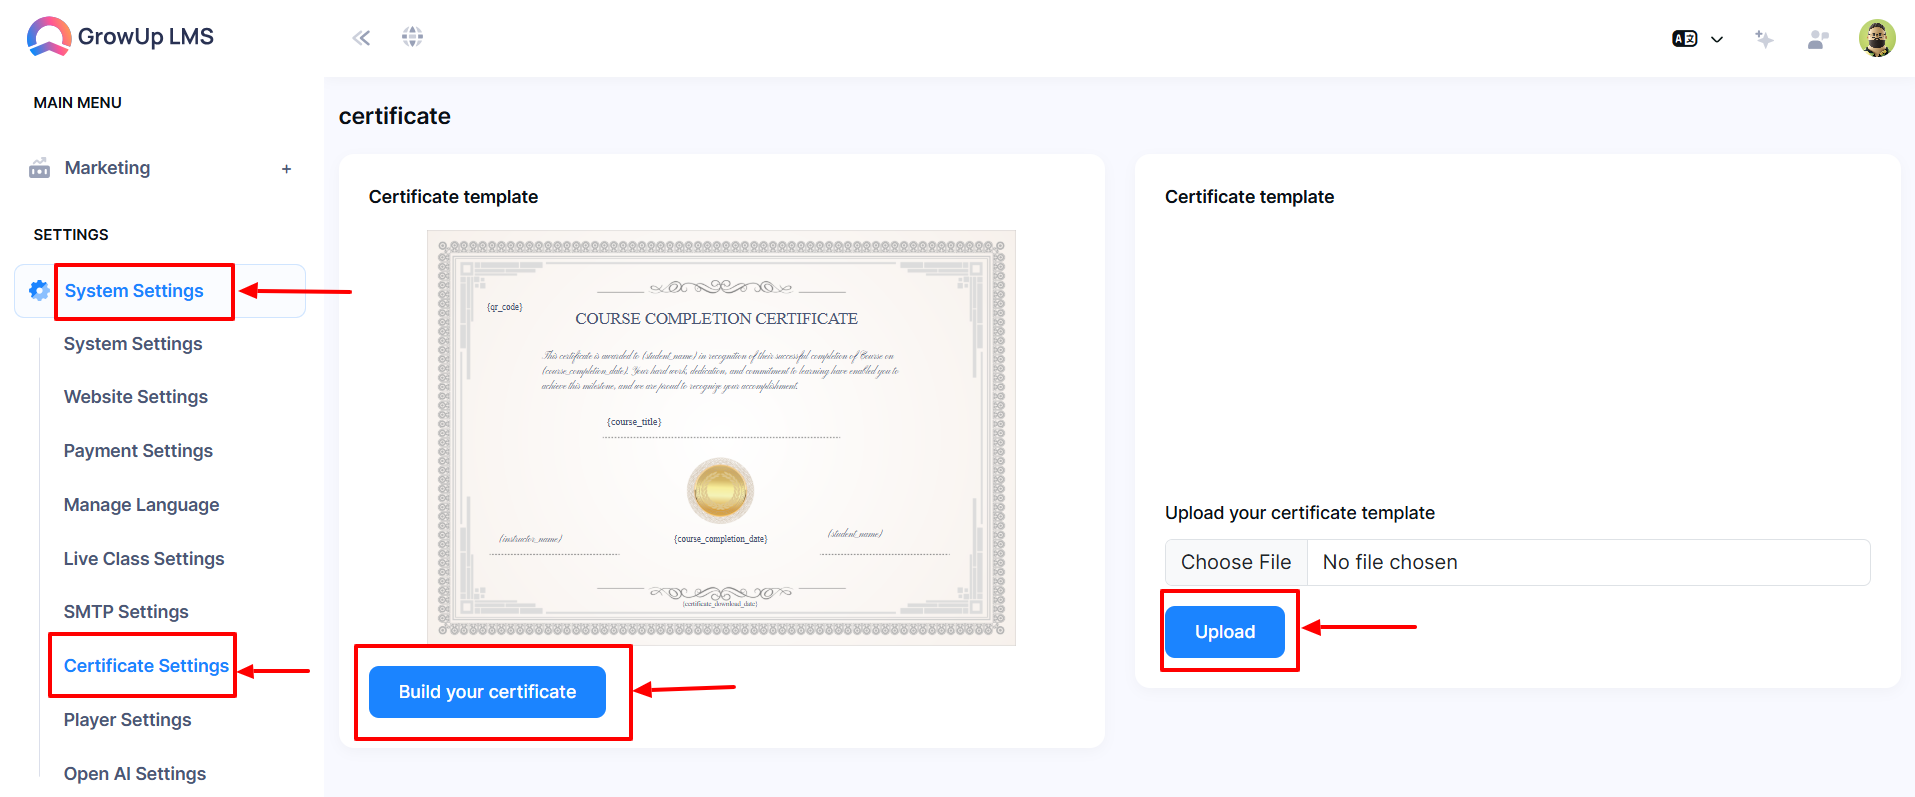
- Navigate to System Settings from the left menu.
- Select Certificate Settings from the sub-menu to open the configuration form.
- Choose one of the following options:
-
- Click Build Your Certificate to create a custom certificate.
- Click Upload to upload a pre-designed certificate template.
How to Build Your Certificate
- Log in to the Admin Panel.
- Navigate to System Settings from the left menu.
- Select Certificate Settings from the sub-menu to open the configuration form.
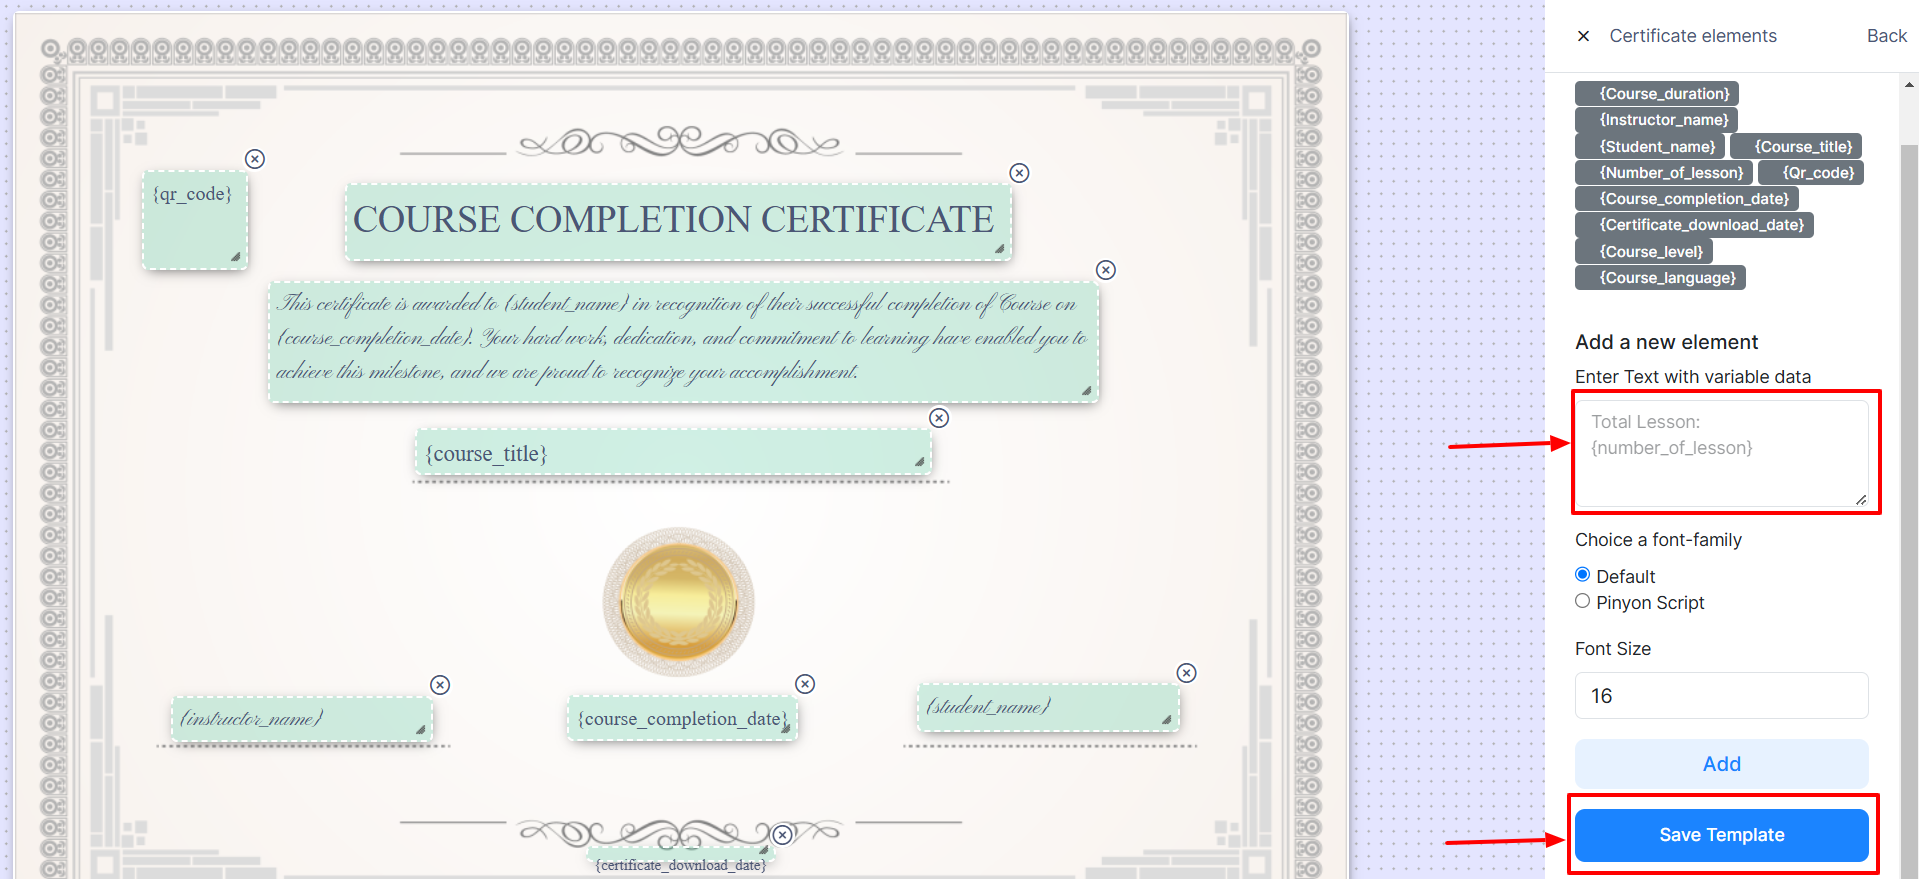
- Click Build Your Certificate to access the certificate builder interface.
- Add variable data, adjust fonts and font sizes, and position variables as needed on the certificate layout.
- Once editing is complete, click Save Template to save your changes.
How to Upload Template
- Log in to the Admin Panel.
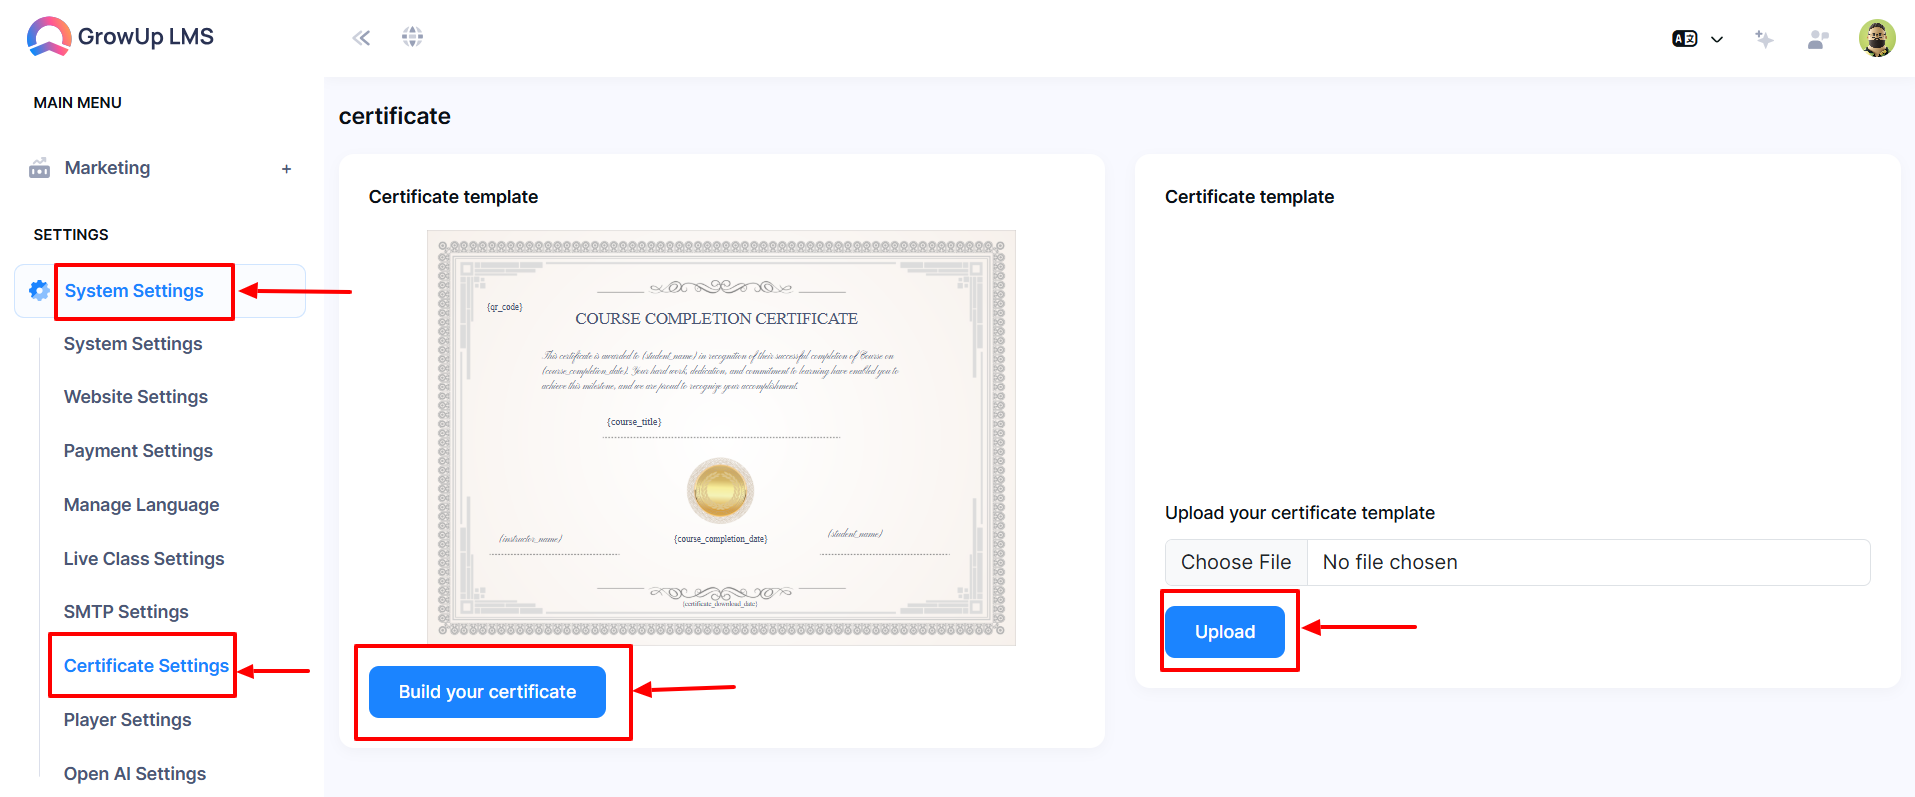
- Navigate to System Settings from the left menu.
- Select Certificate Settings from the sub-menu to open the configuration form.
- Click Choose File to select the certificate template you want to upload.
- Click Upload to upload the selected template.
Was this article helpful to you?
How can we help?
Contact us and we will get back to you as soon as possible


