How to Manage Add a Listing
In Atlas Laravel, Agents play a key role in growing your business. Agents play a vital role in managing listings, handling inquiries, and providing expert support. Agents enhance customer experiences and streamline operations. Also, agents drive sales, positioning your business as professional, reliable, and ready for success.
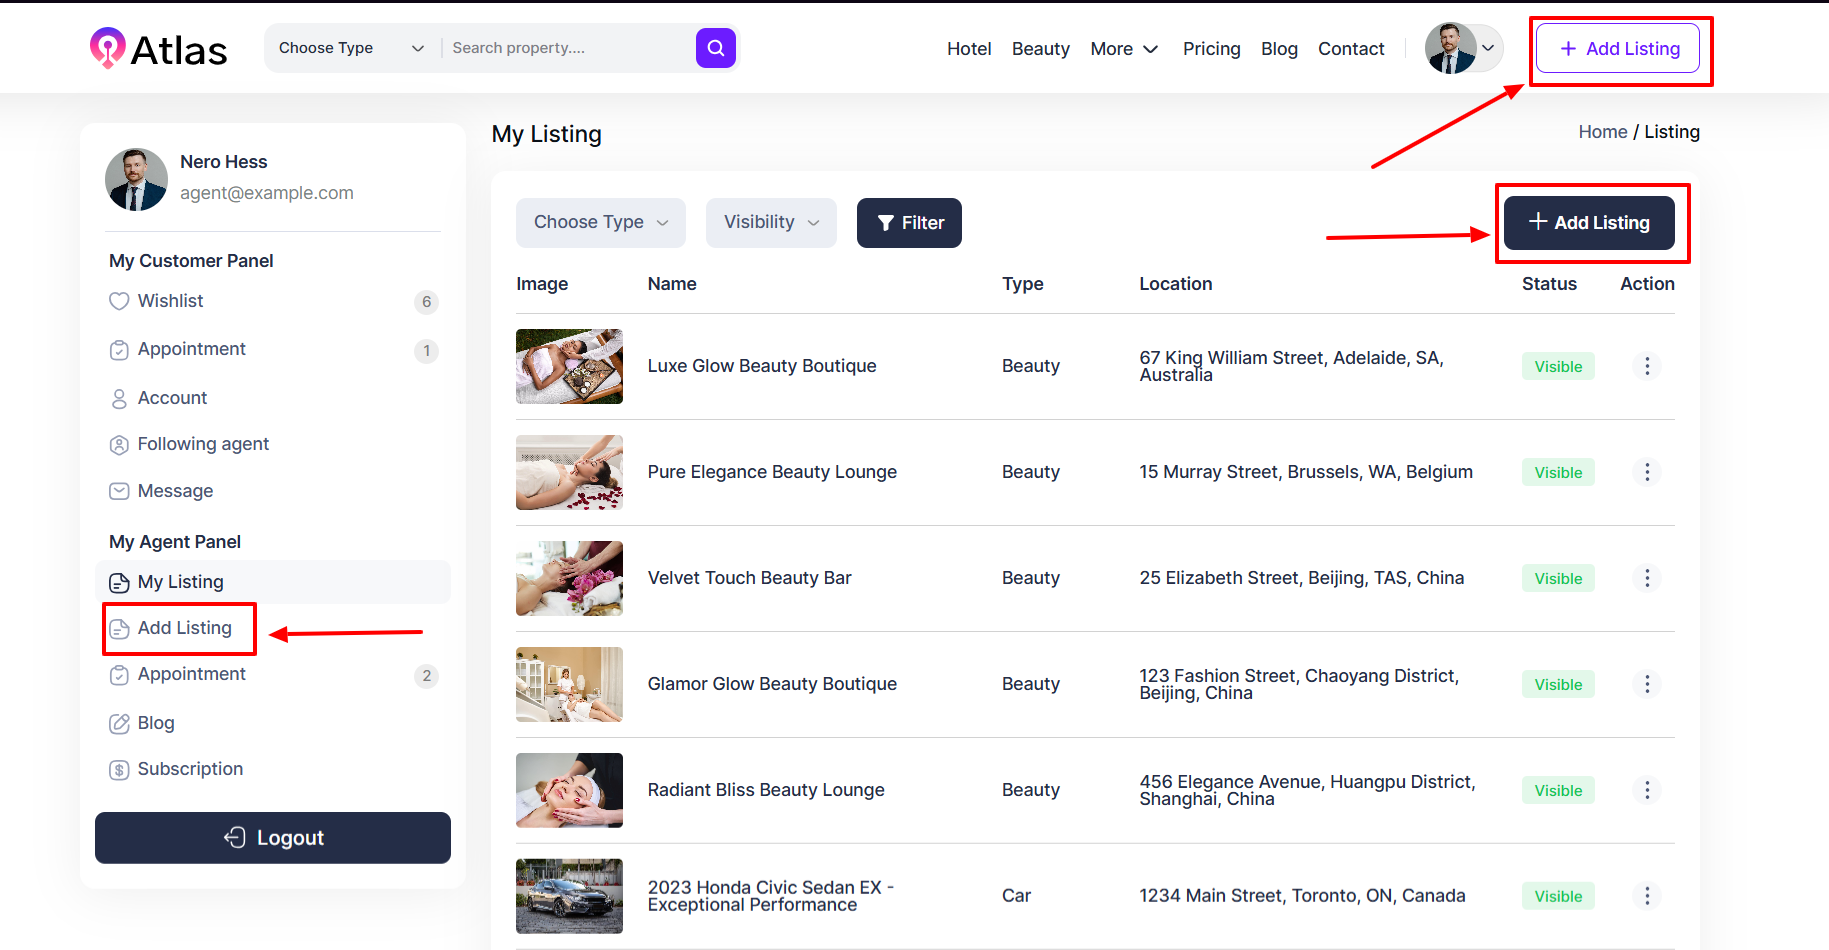
- Log in to the Agent from the Agent Panel.
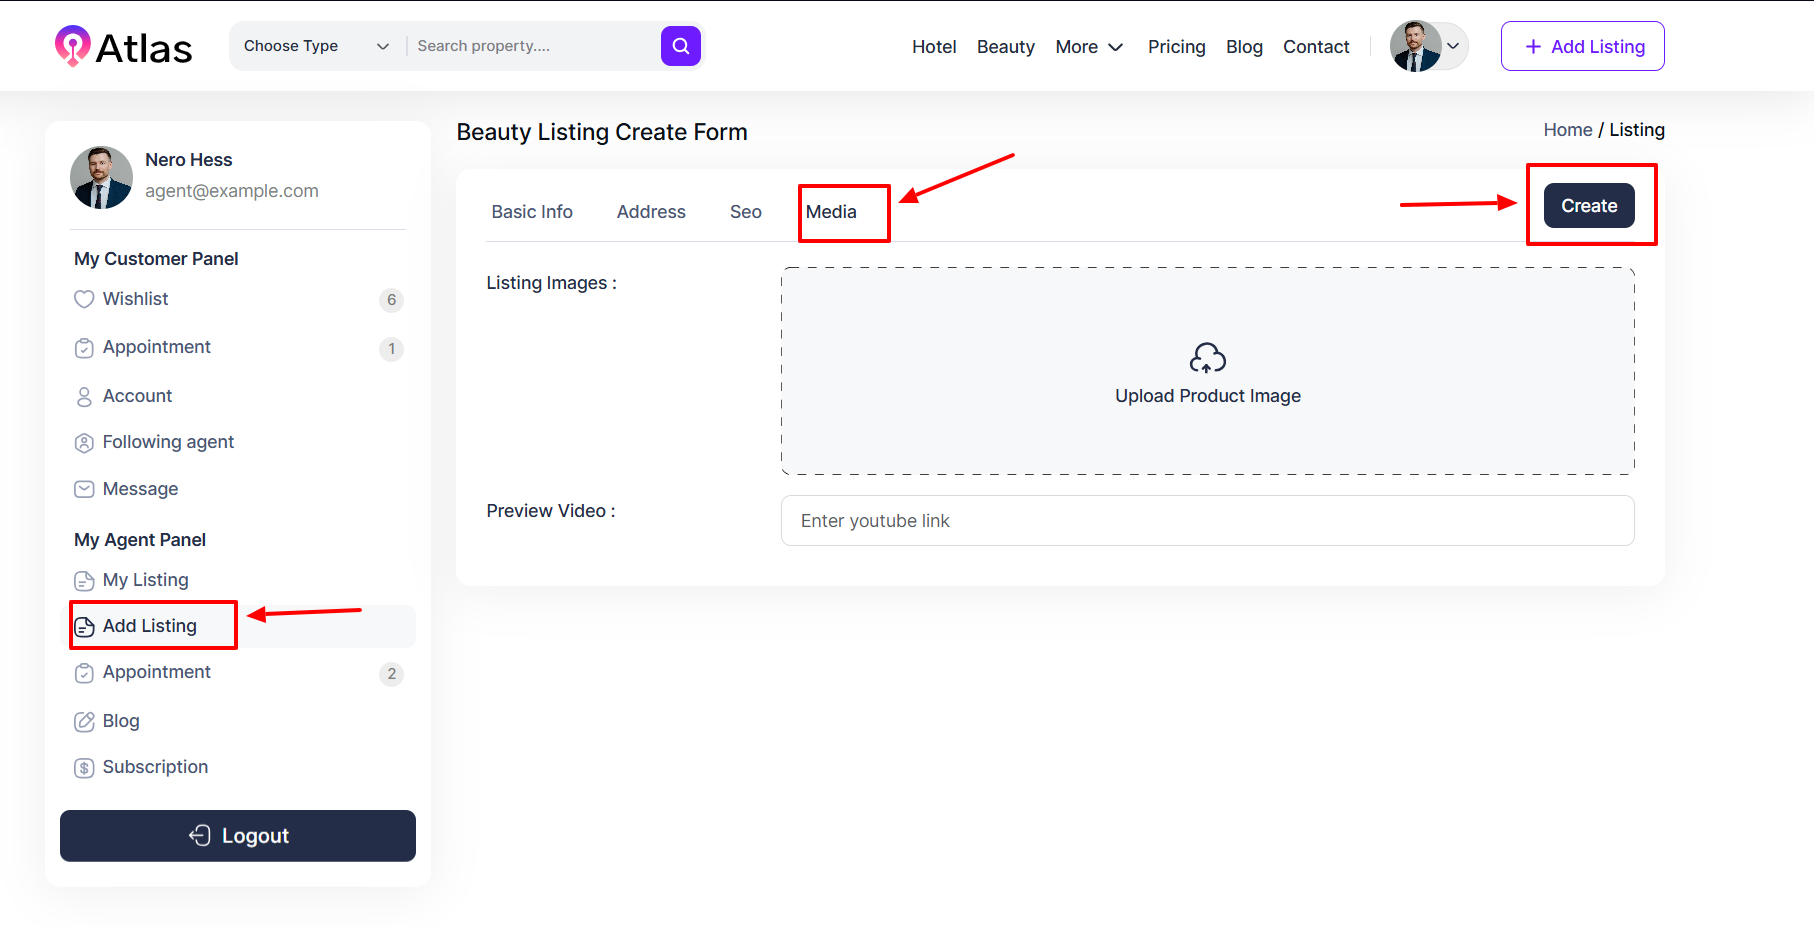
- Click the Add Listing button from the left menu an entry menu will pop up.
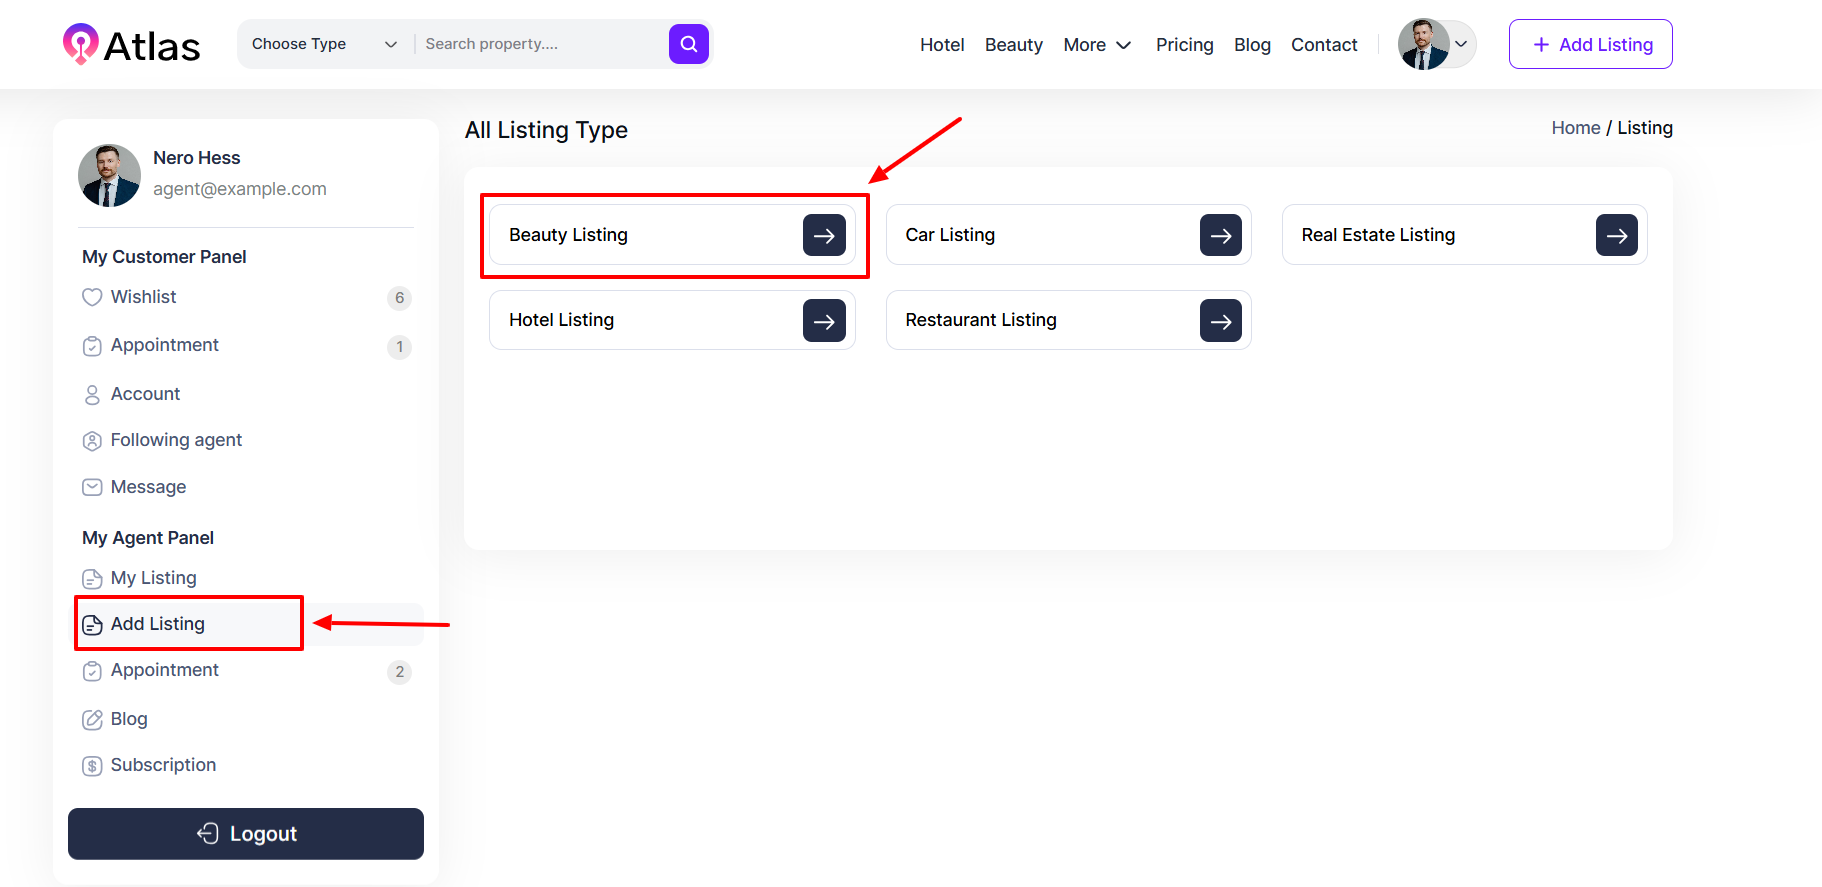
- Choose the Listing Type and click an entry form that will pop up.
- Fill in the required information in the format.
- Finally, click Create to save the new listing with all the provided details.
- Note: The same procedure will apply to Cars, Real Estate, Hotels, and Restaurants.
Example Beauty Listing.
- Click the Beauty Listing an entry form will appear.
- Click the Basic Info Tab:
- Fill out the required fields:
-
- Listing Title: Add the listing title.
- Category: Select the category from the dropdown menu.
- Visibility: Choose the visibility from the dropdown menu.
- Type: Select type from the dropdown menu.
- Description: Provide the desired description.
- Enter the Latitude and Longitude values in their respective fields.
-
- Finally, click the Create button to save the provided information.
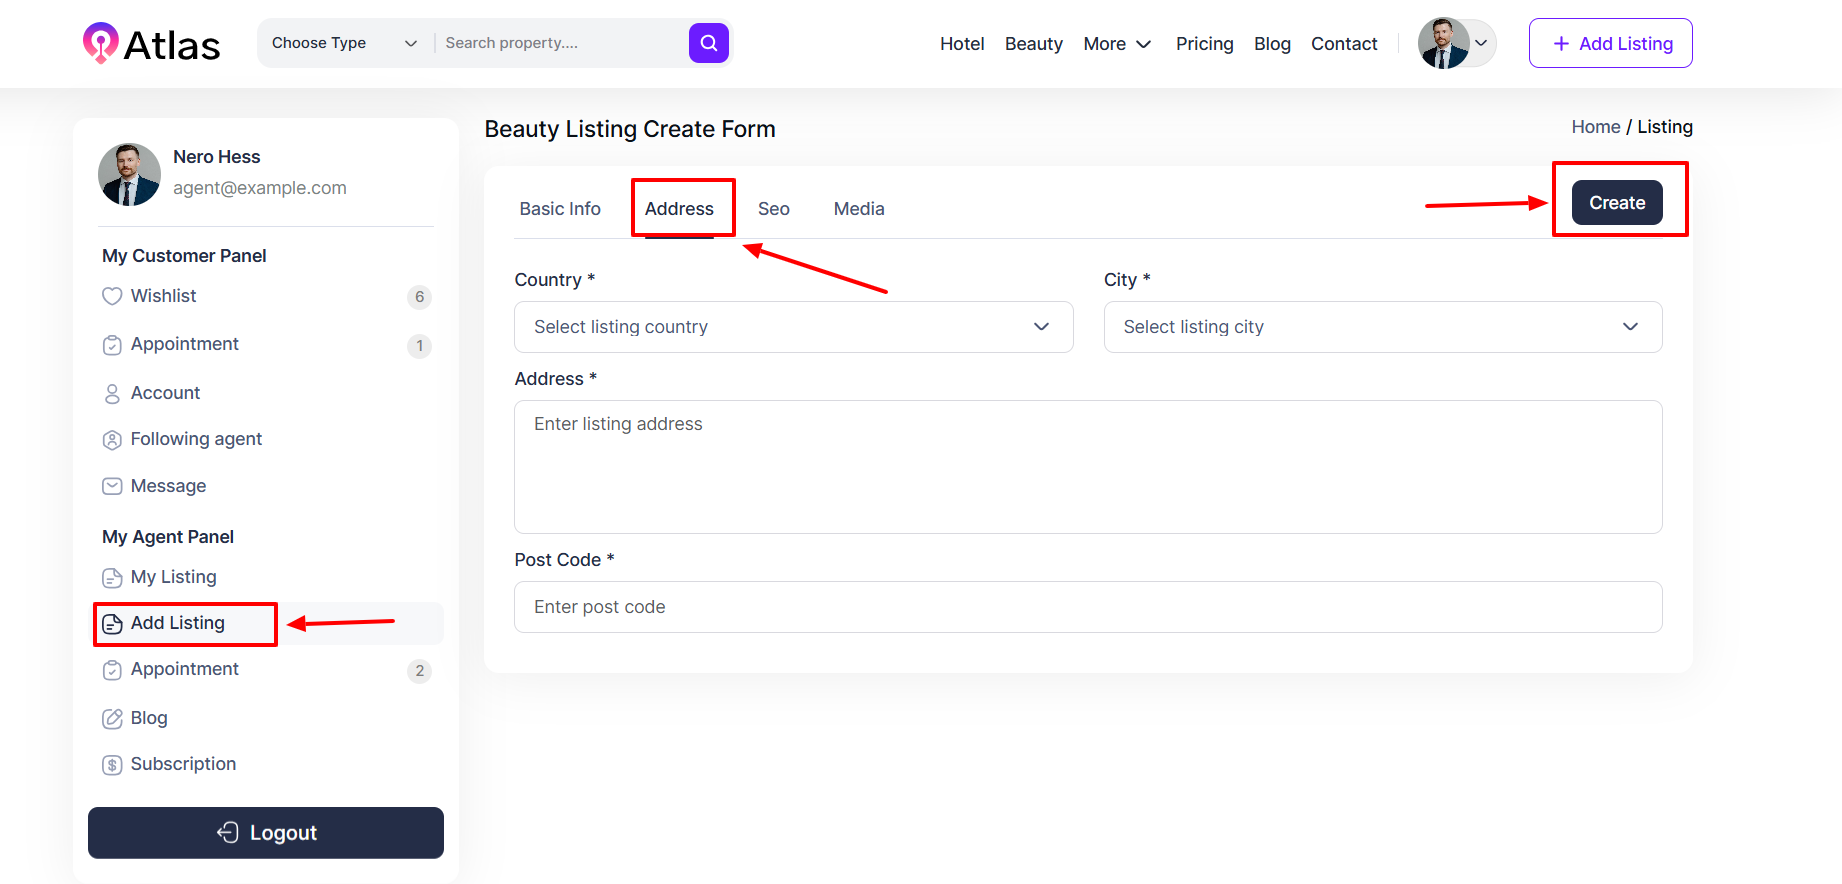
Click the Address Tab:
Fill out the required fields:
-
- Country: Select the Country from the dropdown menu.
- City: Select the desired City from the dropdown menu.
- Address: Type the address details in the address field.
- Post Code: Provide post code.
Finally, click the Create button to save the provided information.
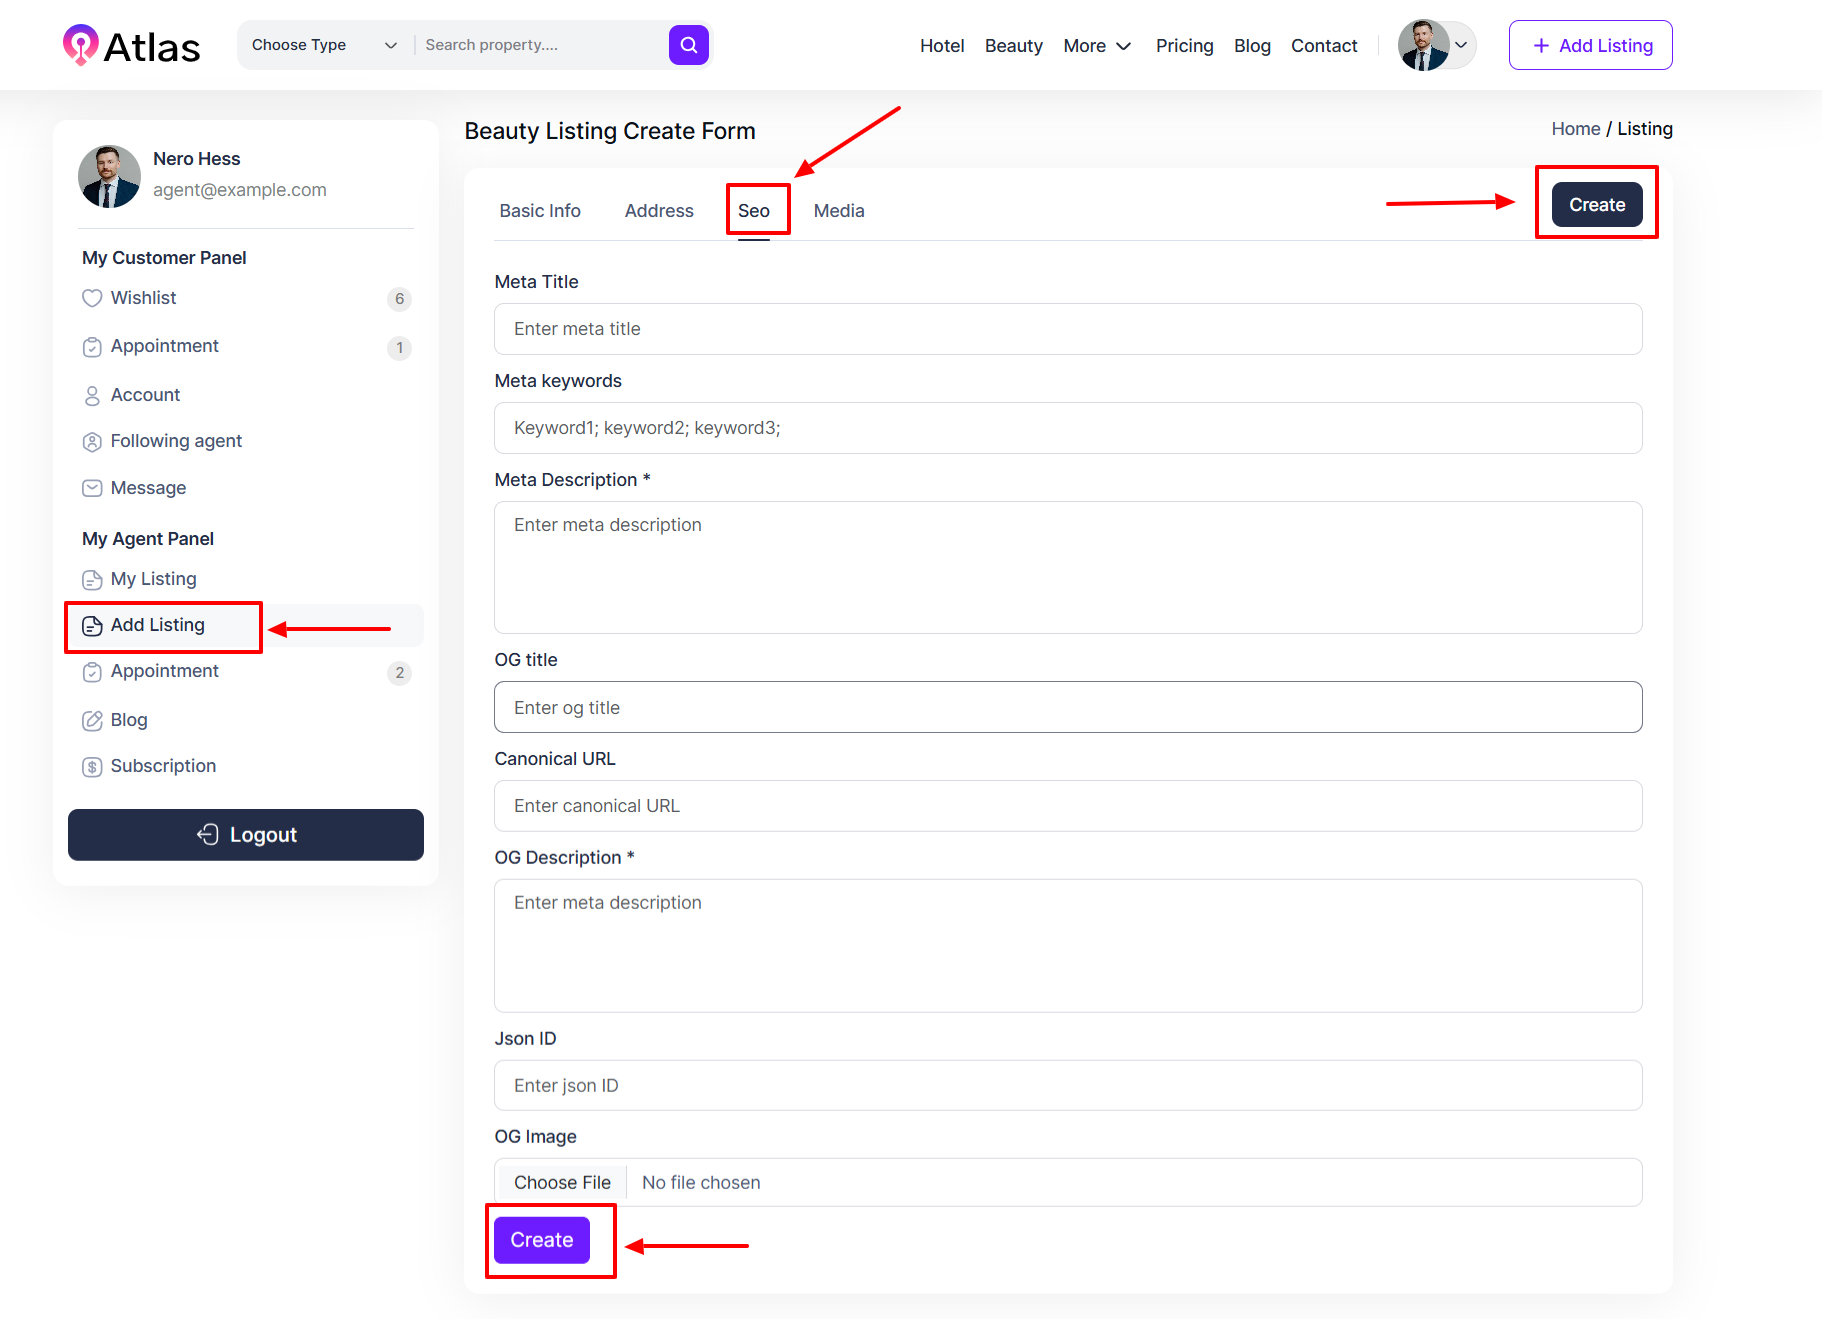
- Click the SEO Tab:
- Fill out the required fields:
-
- Meta Title: Enter the Meta Title in the designated field.
- Meta Keywords: Type the Meta Keywords in the appropriate box.
- Meta Description: Fill out the Meta Description field as desired.
- Meta Robot: Set the Meta Robot settings in the applicable field.
- Canonical URL: Provide the Canonical URL in the designated field.
- Custom URL: Enter the Custom URL if applicable.
- OG Title: Type the Open Graph (Og) Title field.
- Og Description: Fill in the Og Description as required.
- Og Image: Upload an Og Image using the Choose file button.
- Json ID: Put the JSON ID in the respective field.
-
- Finally, click Create to save the provided information.
- Click the Media Tab:
- Fill out the required field:
-
- Listing Image: Upload a related image.
- Preview Video: Provide video link.
-
- Finally, click Create to save the provided information.

Was this article helpful to you?
How can we help?
Contact us and we will get back to you as soon as possible

