How to Manage My Listing
In Atlas Laravel, My Listing helps businesses manage their property or service listings effortlessly. Add, edit, or update details to keep them fresh. This feature boosts visibility, attracts customers, and supports business growth effectively.
Log in to the Agent from the Agent Panel.
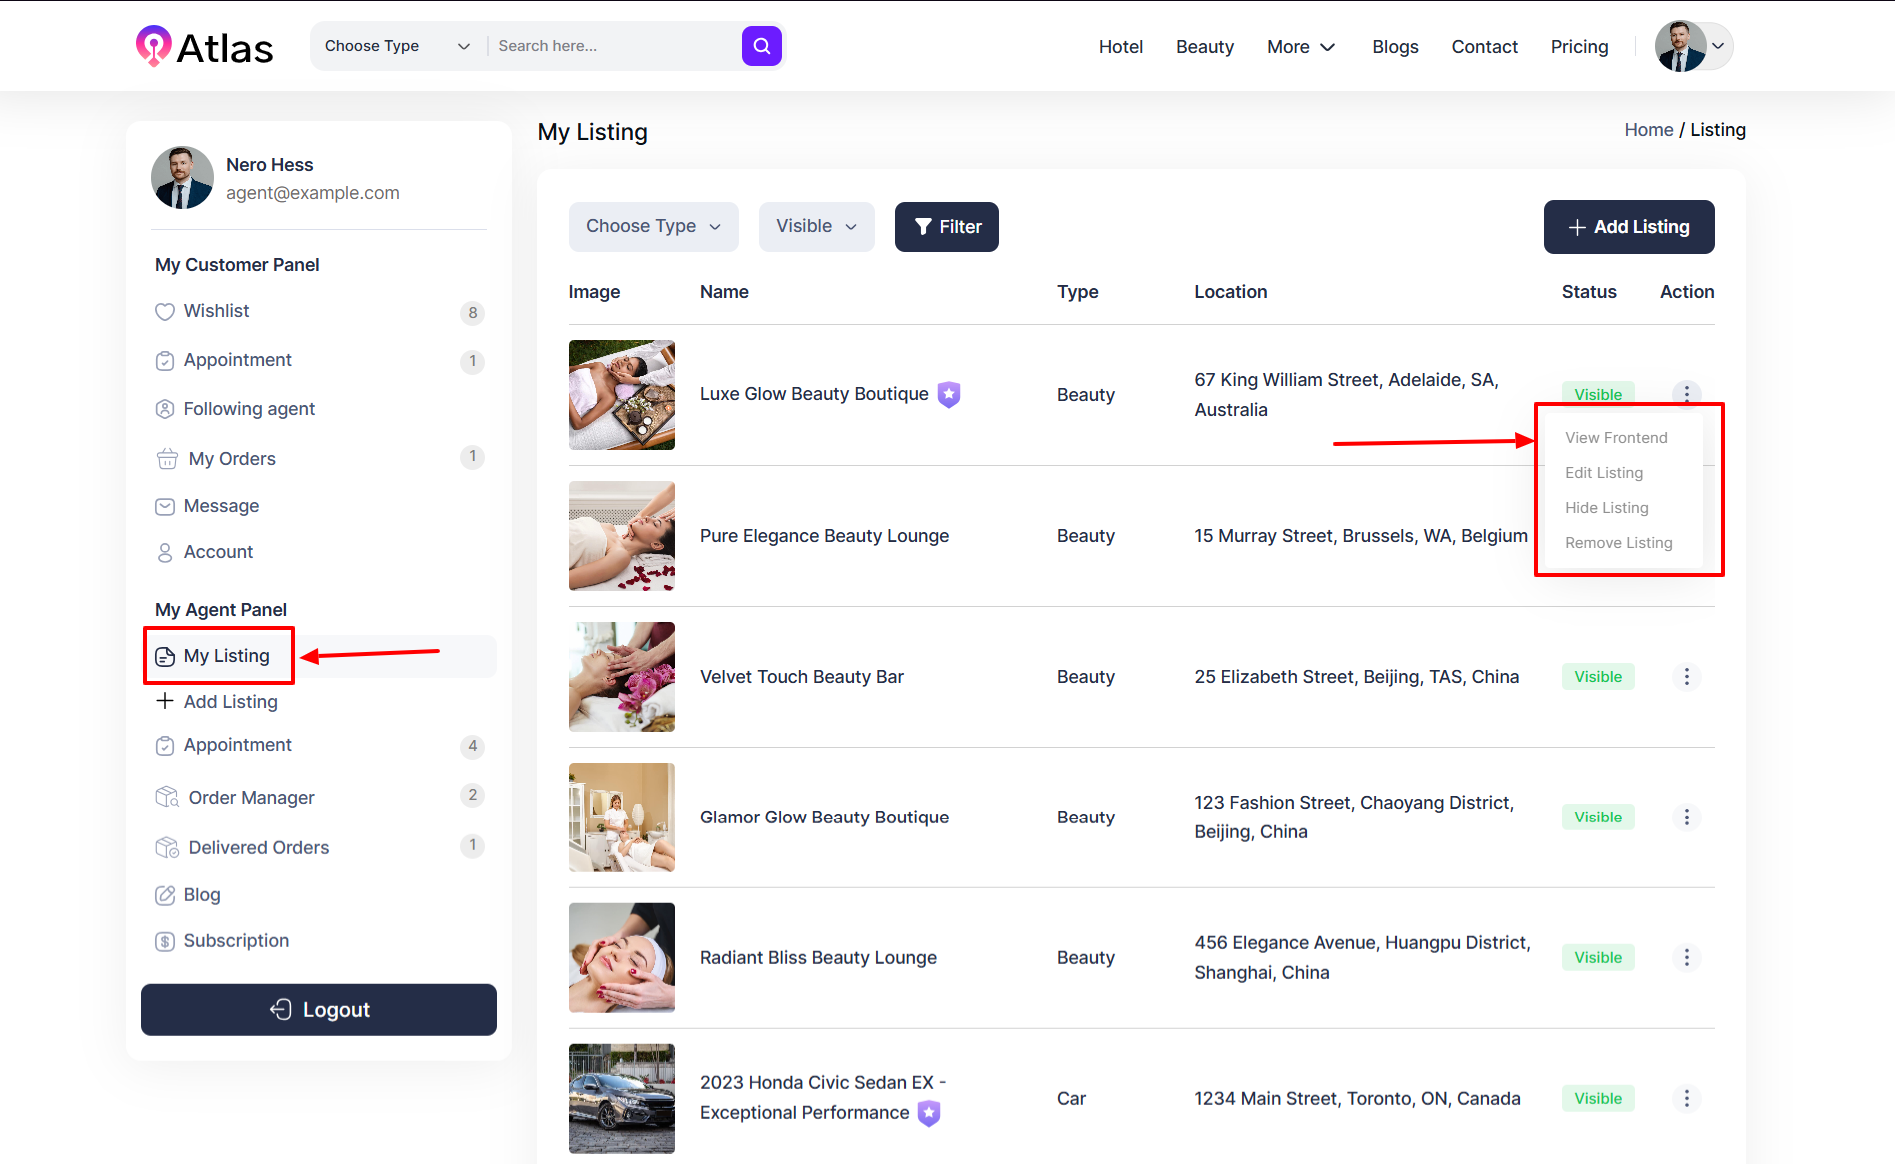
Navigate to My Listing from the left menu a window will pop up.
Click the Action button (three dots) to open a menu with the options: View Frontend, Edit Listing, Hide Listing, and Remove Listing Tabs.
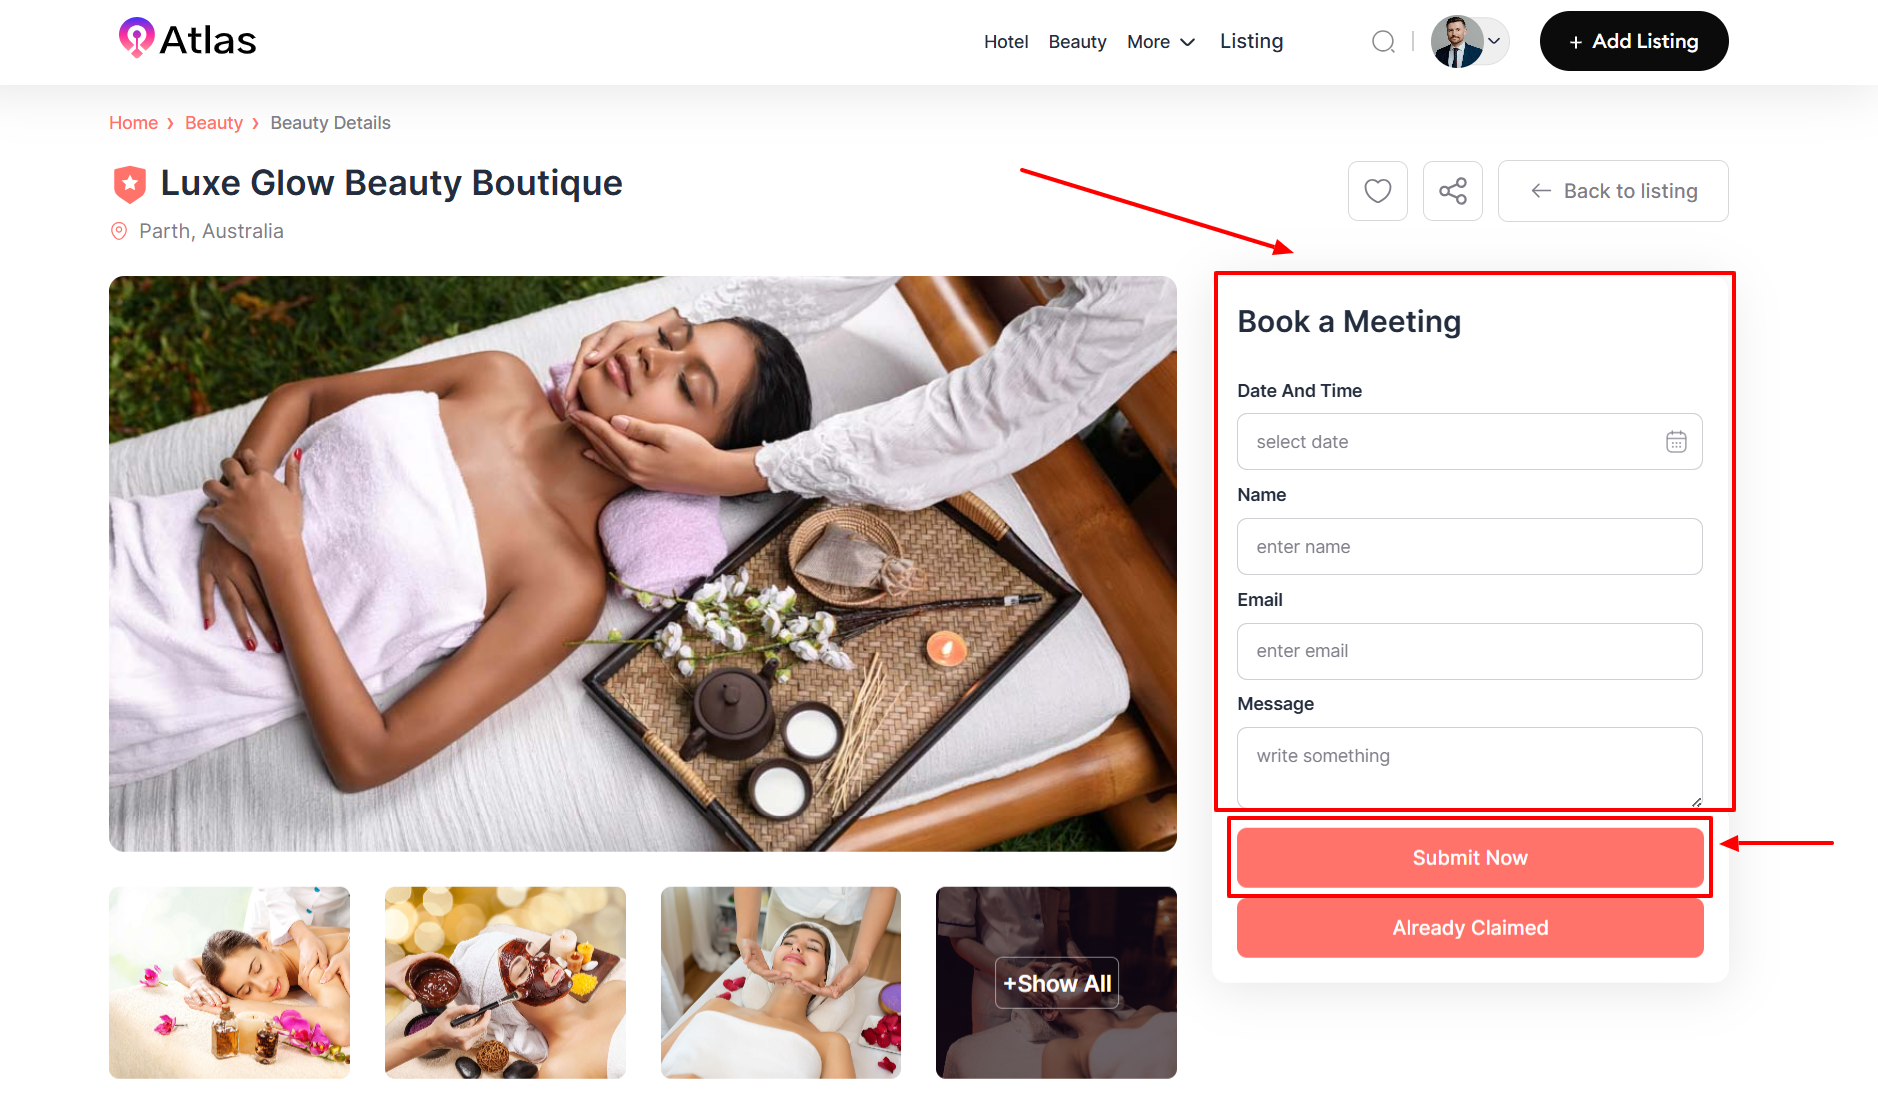
- Select View Frontend to open the entry form.
- Fill out the required fields:
-
- Date and Time: Select date and time from the drop-down calendar.
- Name: Enter your full Name.
- Email: Type your email address.
- Message: Type your decided message.
-
- Finally, click the Submit Now button to save the provided information.

Select Edit Listing to open the entry form with Basic Info, Services, Open Time, Team Members, Address, SEO, Media, and Shop Tabs.
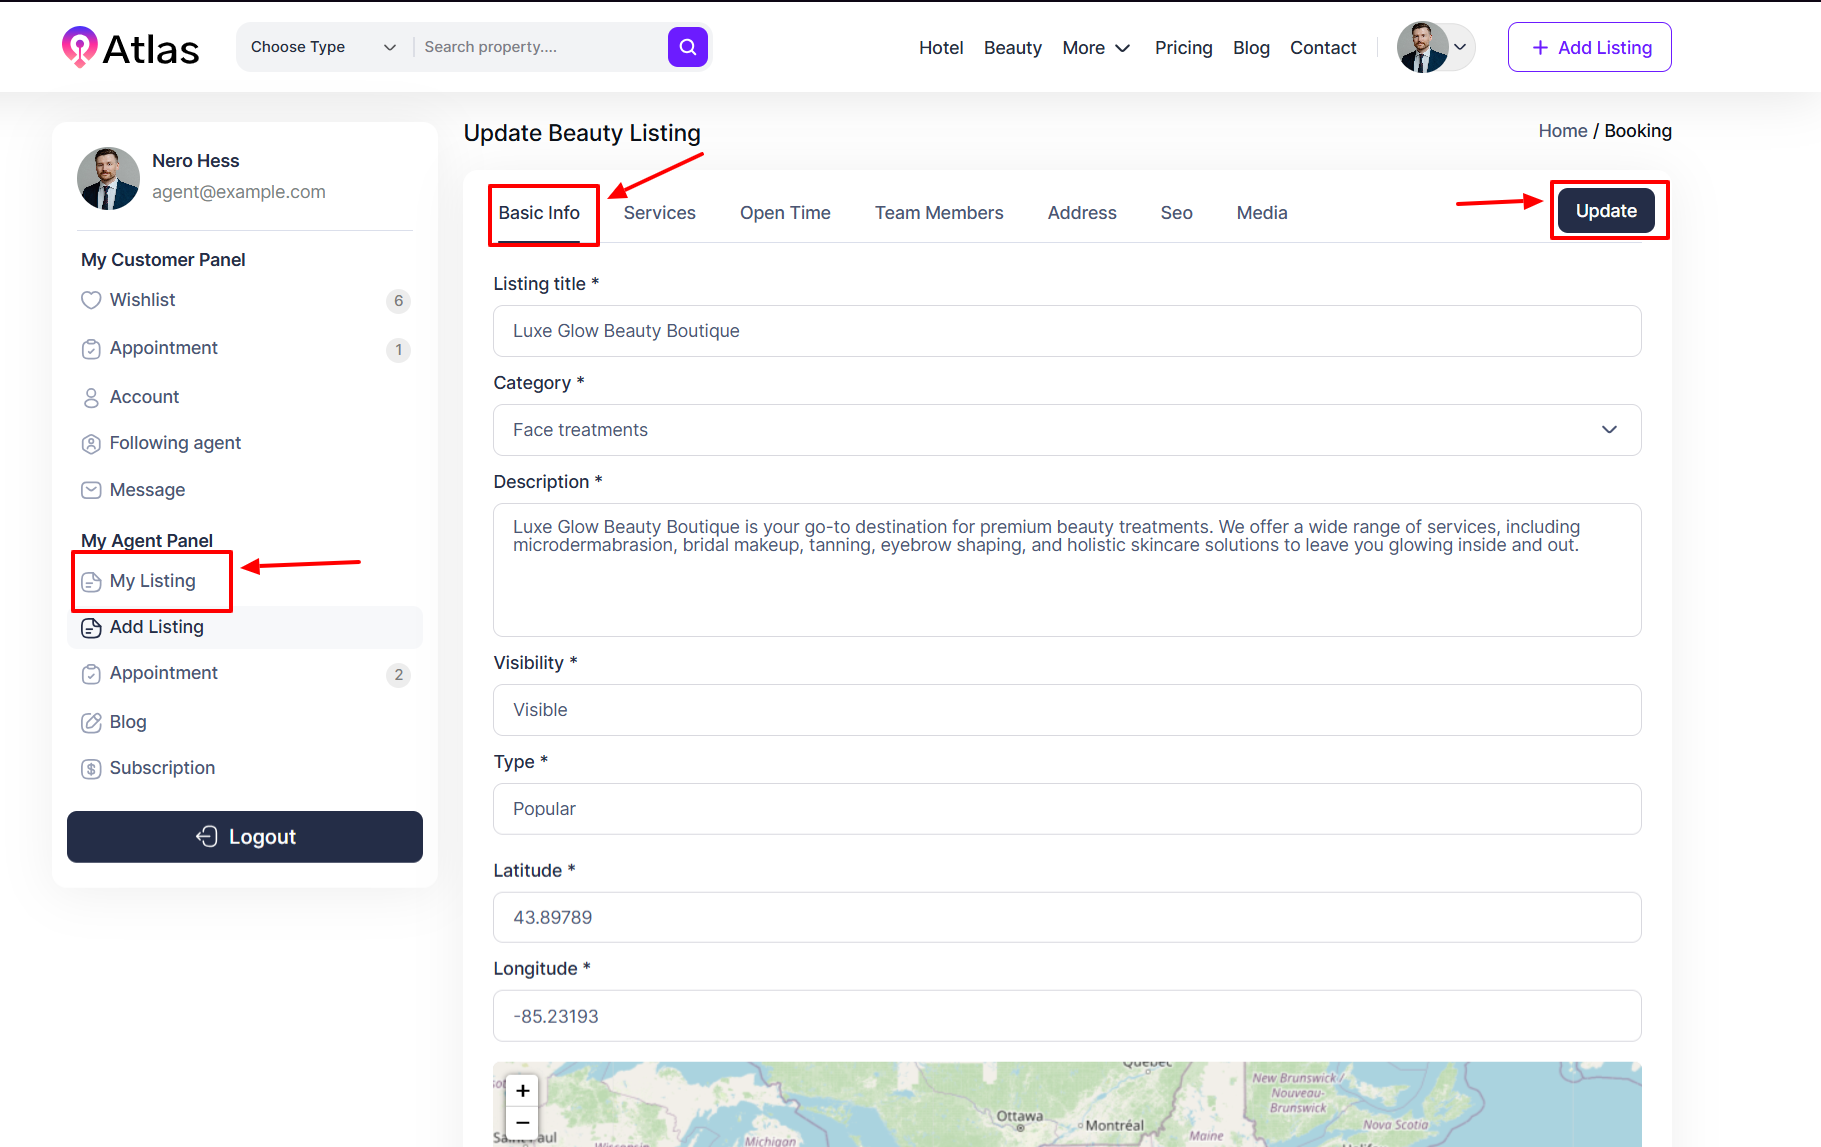
- In the Basic Info Tab:
- Fill out the required fields:
-
- Listing Title: Enter the listing title in the field.
- Category: Select Category from the category dropdown menu.
- Description: Enter the desired description in the Description field.
- Visibility: Choose the desired option from the Visibility dropdown.
- Type: Select the appropriate listing type from the Type dropdown.
- Latitude: Input the latitude values in the respective field
- Longitude: Input the longitude values in their respective fields.
-
- Finally, click the Update button to save the provided information.
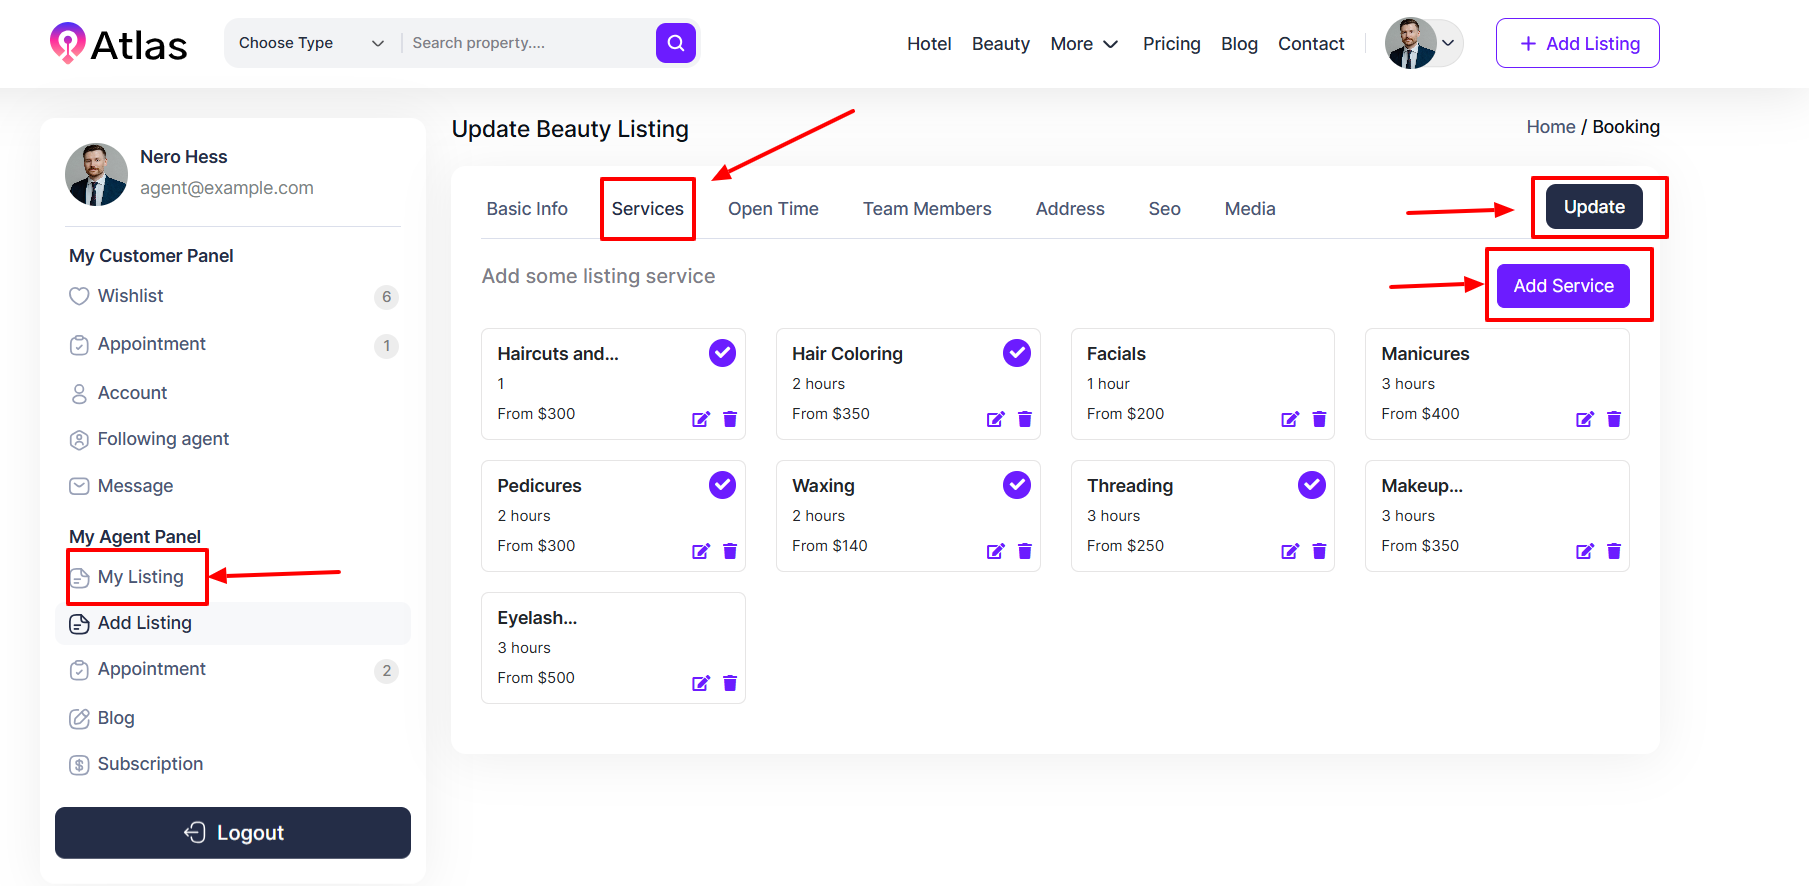
- Select the Services Tab:
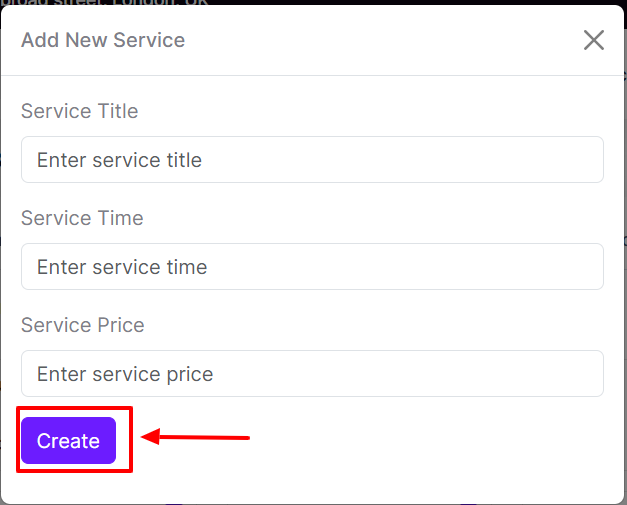
- Click the Add Service tab to open the entry form.
- Fill out the required fields:
-
- Service Title: Enter the service name in the Service Title field.
- Service Time: Specify the duration in the Service Time field.
- Service Price: Enter or select the price in the Service Price field or dropdown.
-
- Click the Create button to save the service details.
-
-
- Finally, click the Update button to save the provided information.
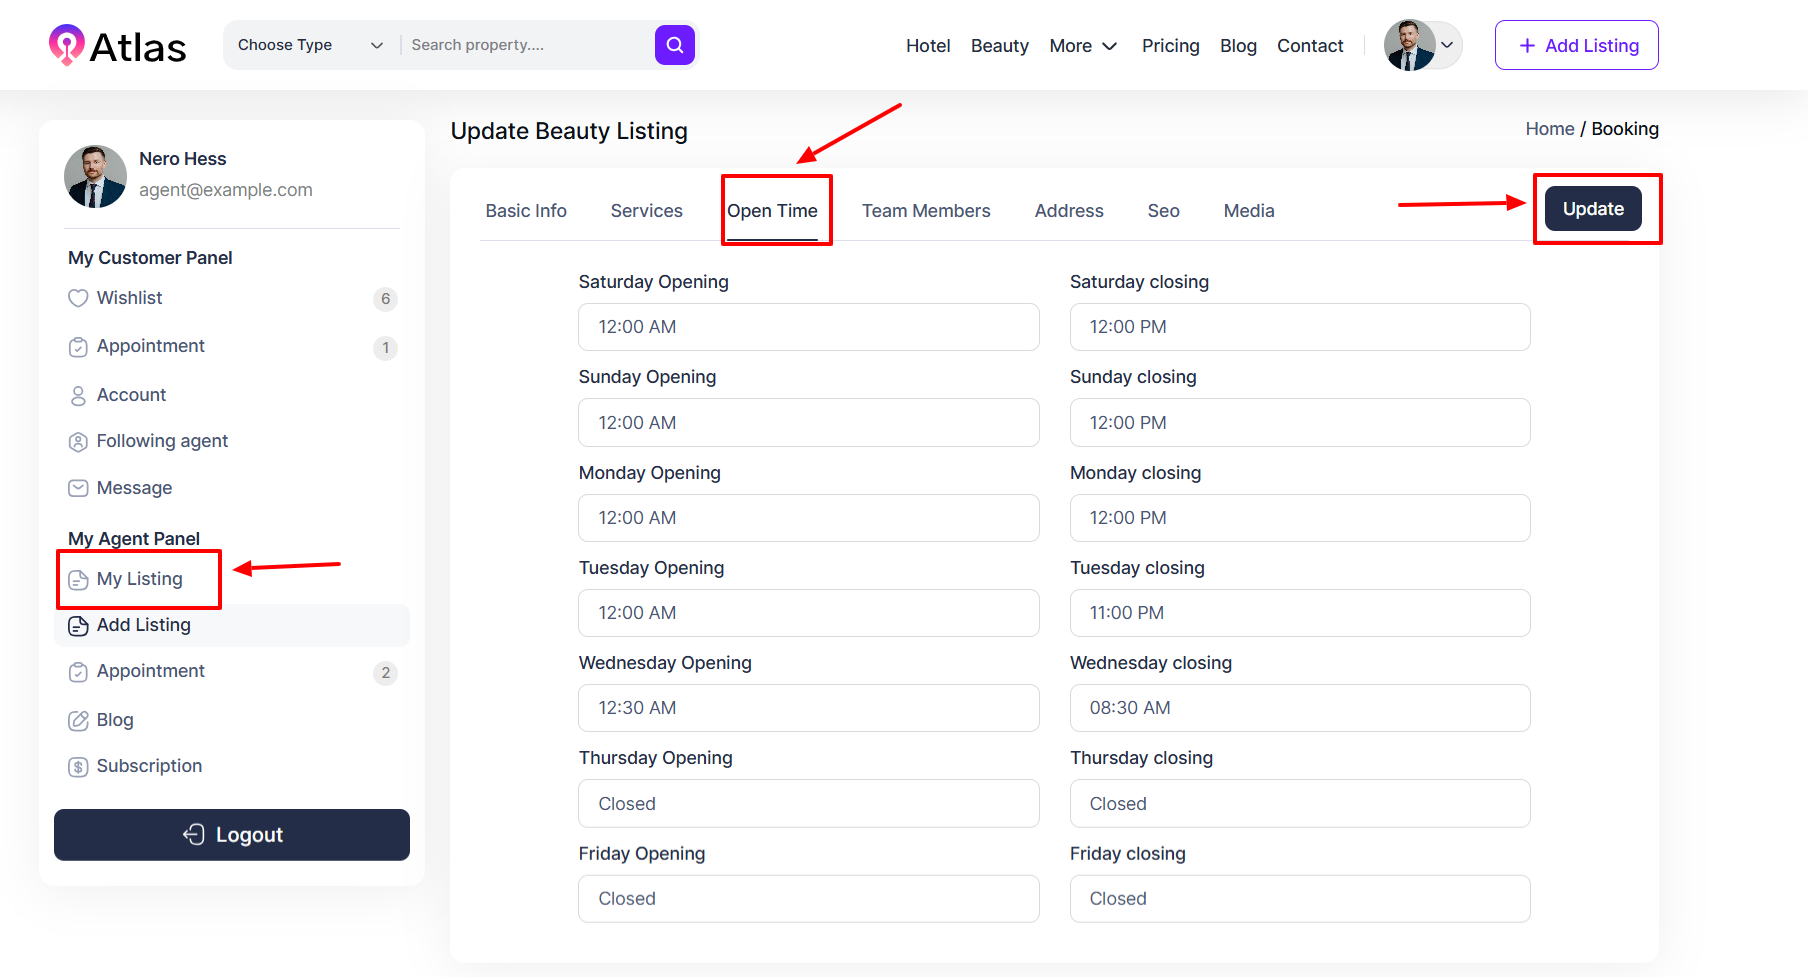
- Select the Opening Time Tab:
- Click the Opening Time tab an entry for will appear.
- Fill out the required fields:
-
- Saturday Opening: Select the opening time from the dropdown menu.
- Saturday Closing: Select the closing time from the dropdown menu.
-
- Similarly, input the date from Saturday to Friday.
-
-
- After entering all required information, click the Update button to save the details.
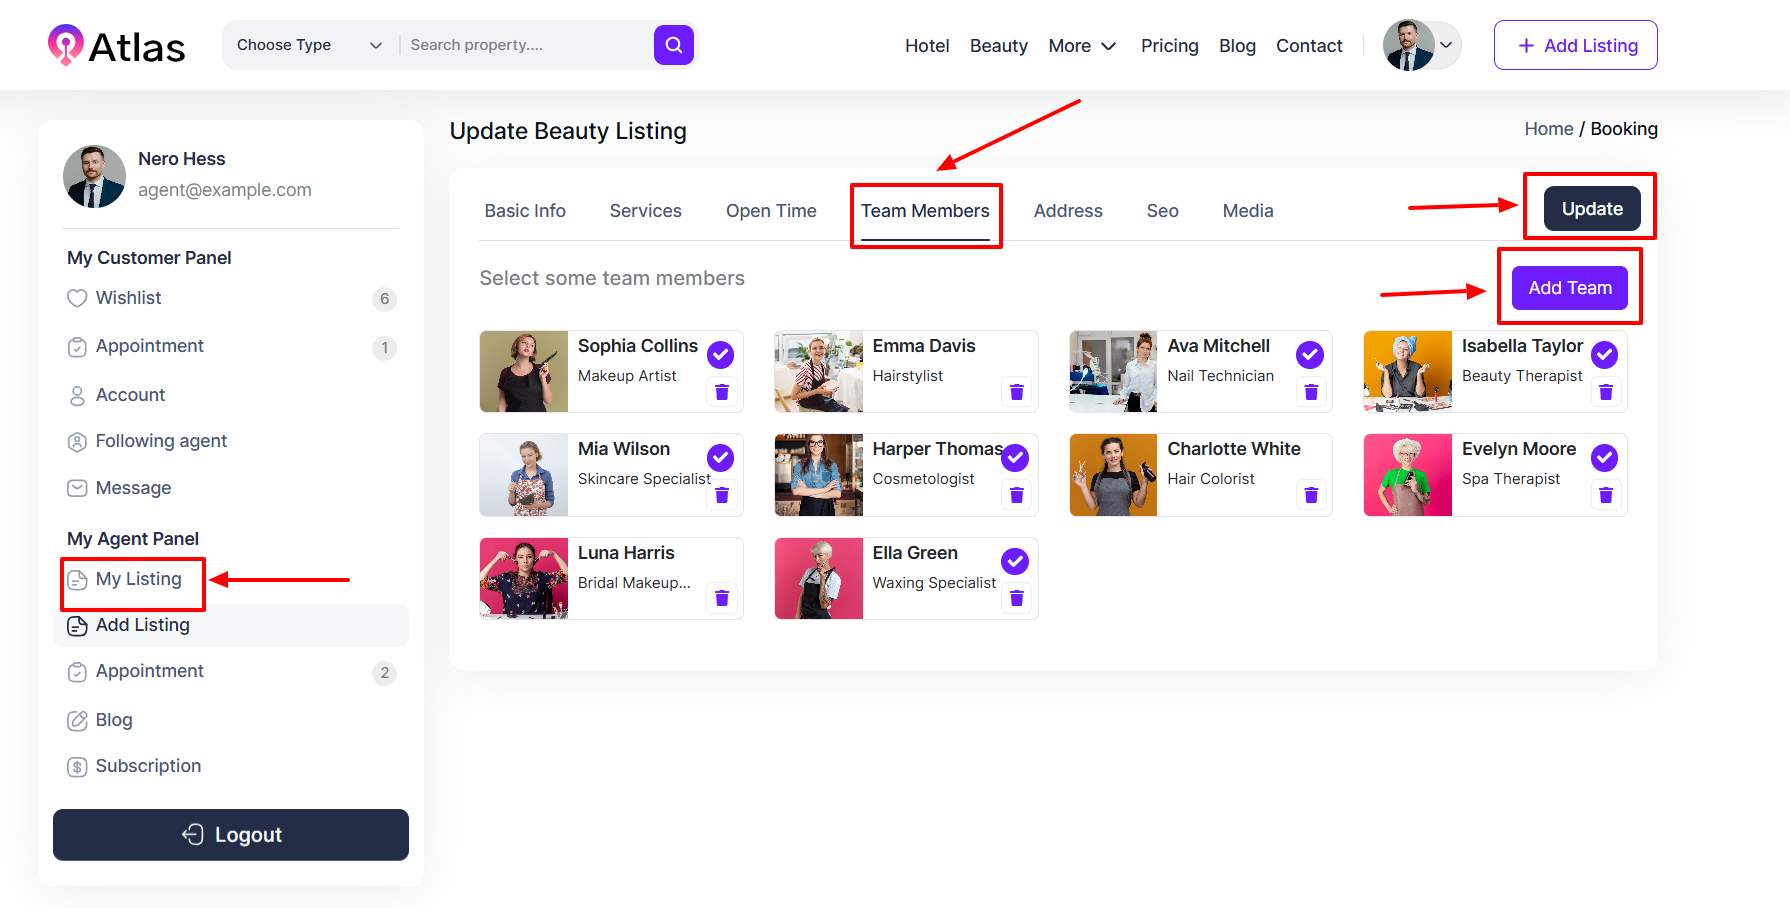
- In the Team Members tab:
- Click Add Team to open a new entry form:
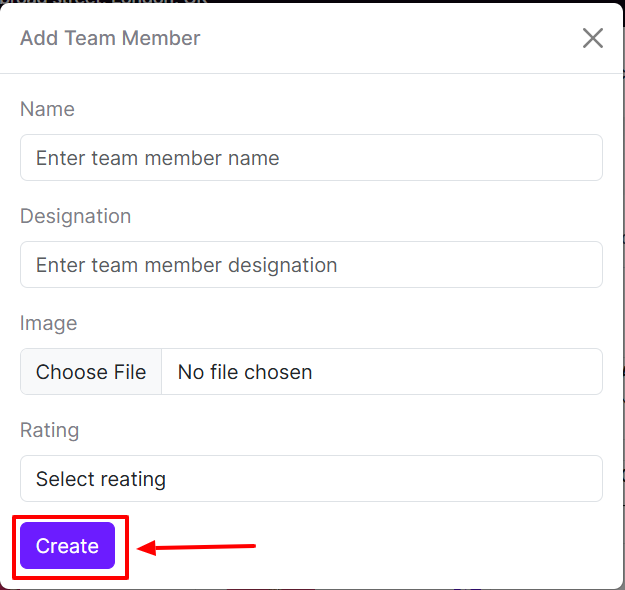
- Fill out the required fields:
-
- Name: Enter the team member’s name in the Name field.
- Designation: Enter the designation in the Designation field.
- Image: Upload a relevant image by clicking Choose File in the Image section.
- Rating: Select a rating from the Rating dropdown menu.
-
- Finally, click the Create button to save the details information.
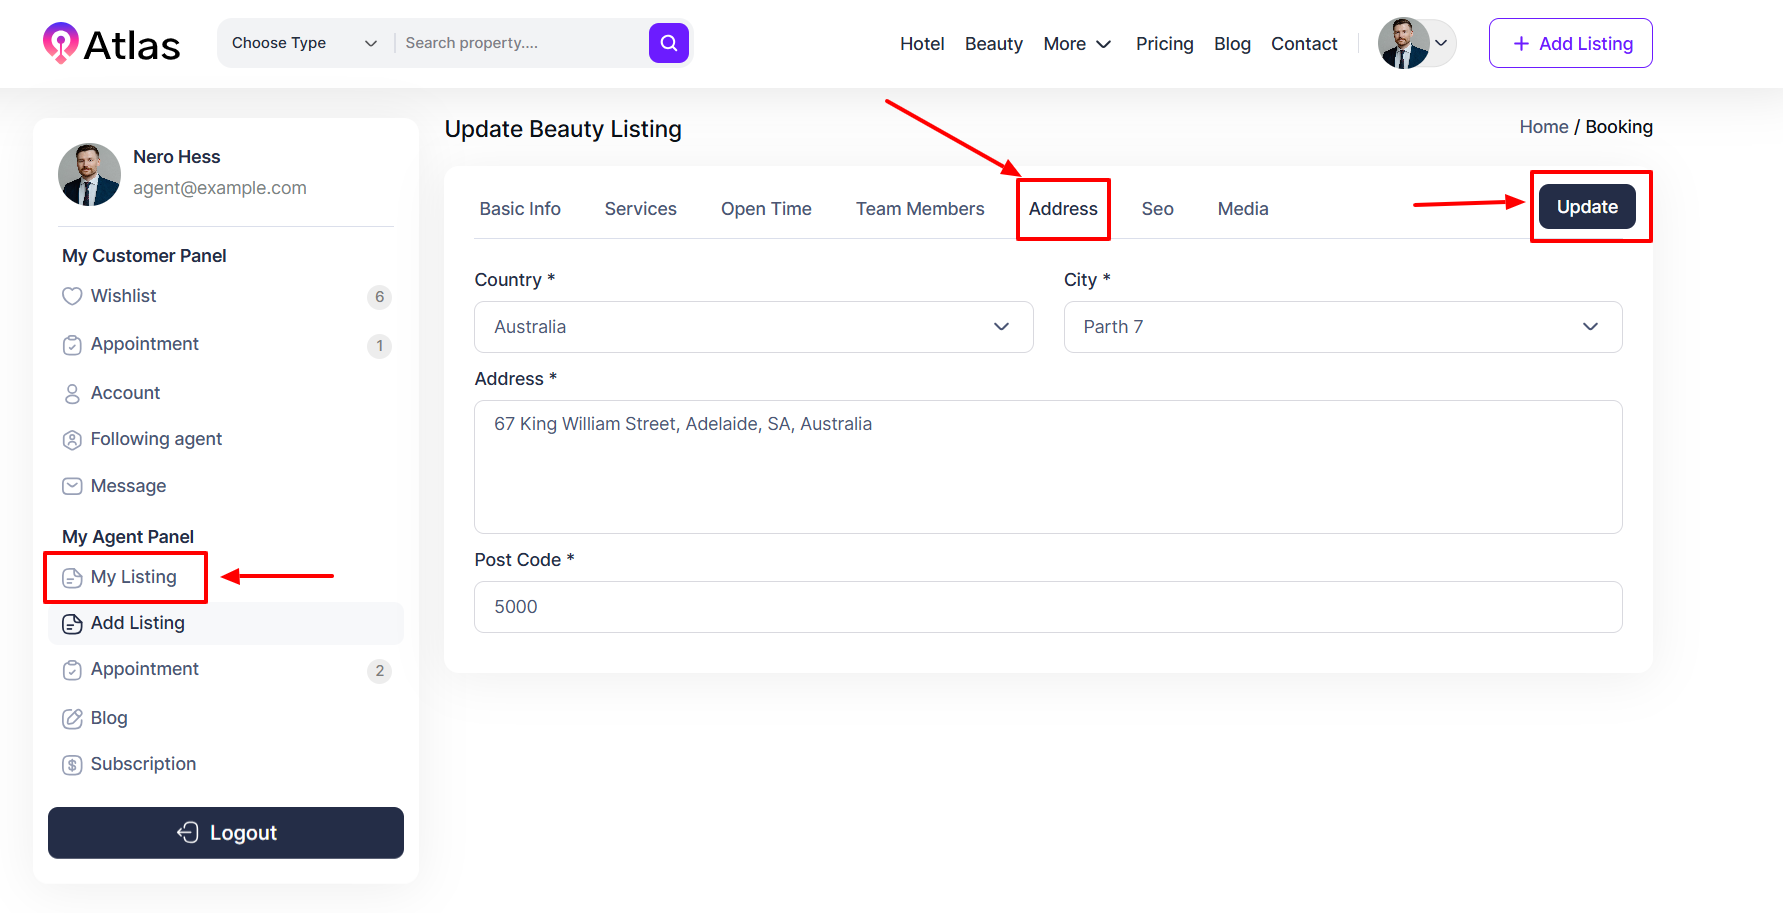
- In the Address Tab:
- Fill out the required fields:
-
- Country: Select Country from the Country dropdown menu.
- City: Choose City from the City dropdown menu.
- Address: Put Address in the Address field.
- Post Code: Type the postcode in the Post Code field.
-
- Finally, click the Update button to save the provided information.
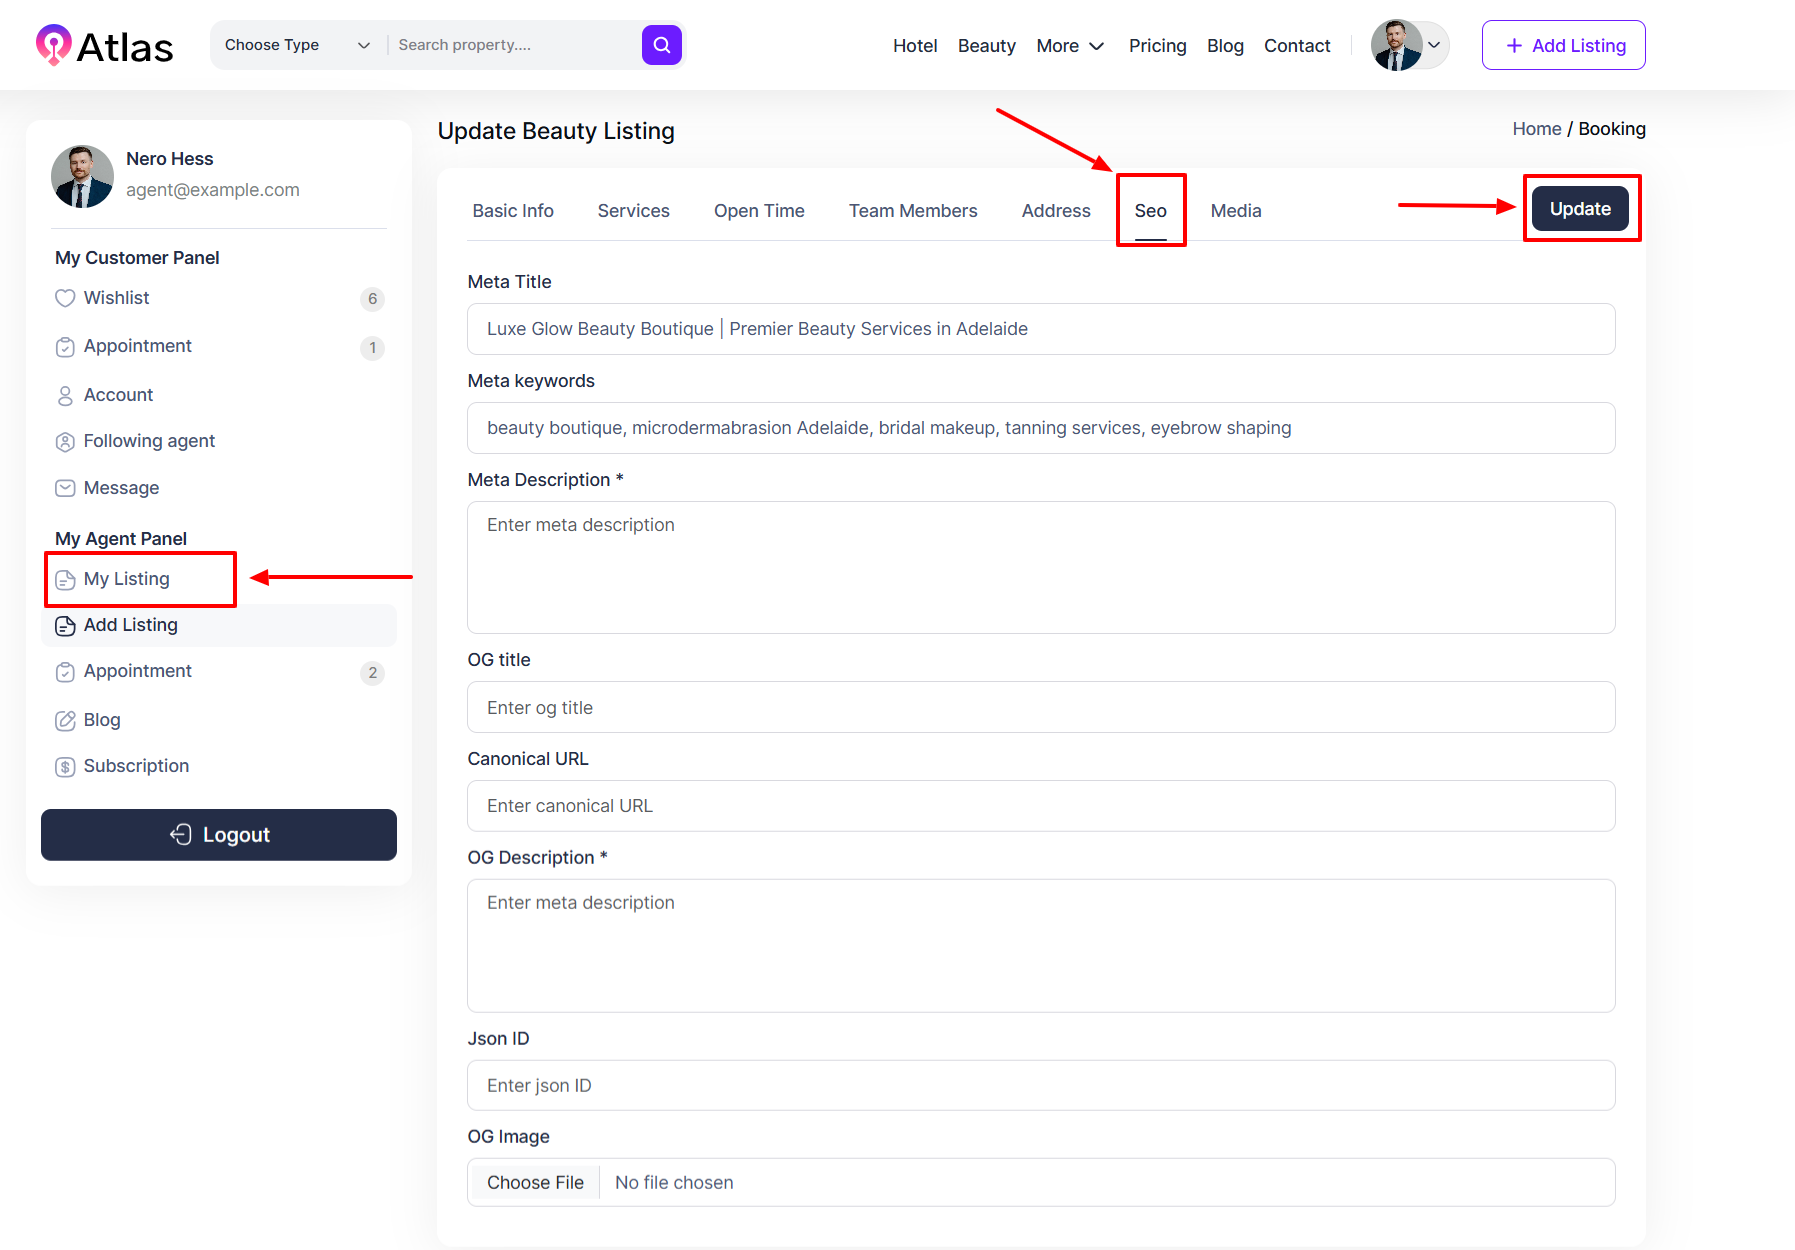
- In the SEO Tab:
- Fill out the required fields:
-
- Meta Title: Enter the Meta Title in the designated field.
- Meta Keywords: Type the Meta Keywords in the appropriate box.
- Meta Description: Fill out the Meta Description field as desired.
- Meta Robot: Set the Meta Robot settings in the applicable field.
- Canonical URL: Provide the Canonical URL in the designated field.
- Custom URL: Enter the Custom URL if applicable.
- OG Title: Type the Open Graph (Og) Title field.
- Og Description: Fill in the Og Description as required.
- Og Image: Upload an Og Image using the Choose file button.
- Json ID: Put the JSON ID in the respective field.
- Og Image: Upload the Og Image by clicking the Choose File button.
-
- Finally, click the Update button to save the provided information.
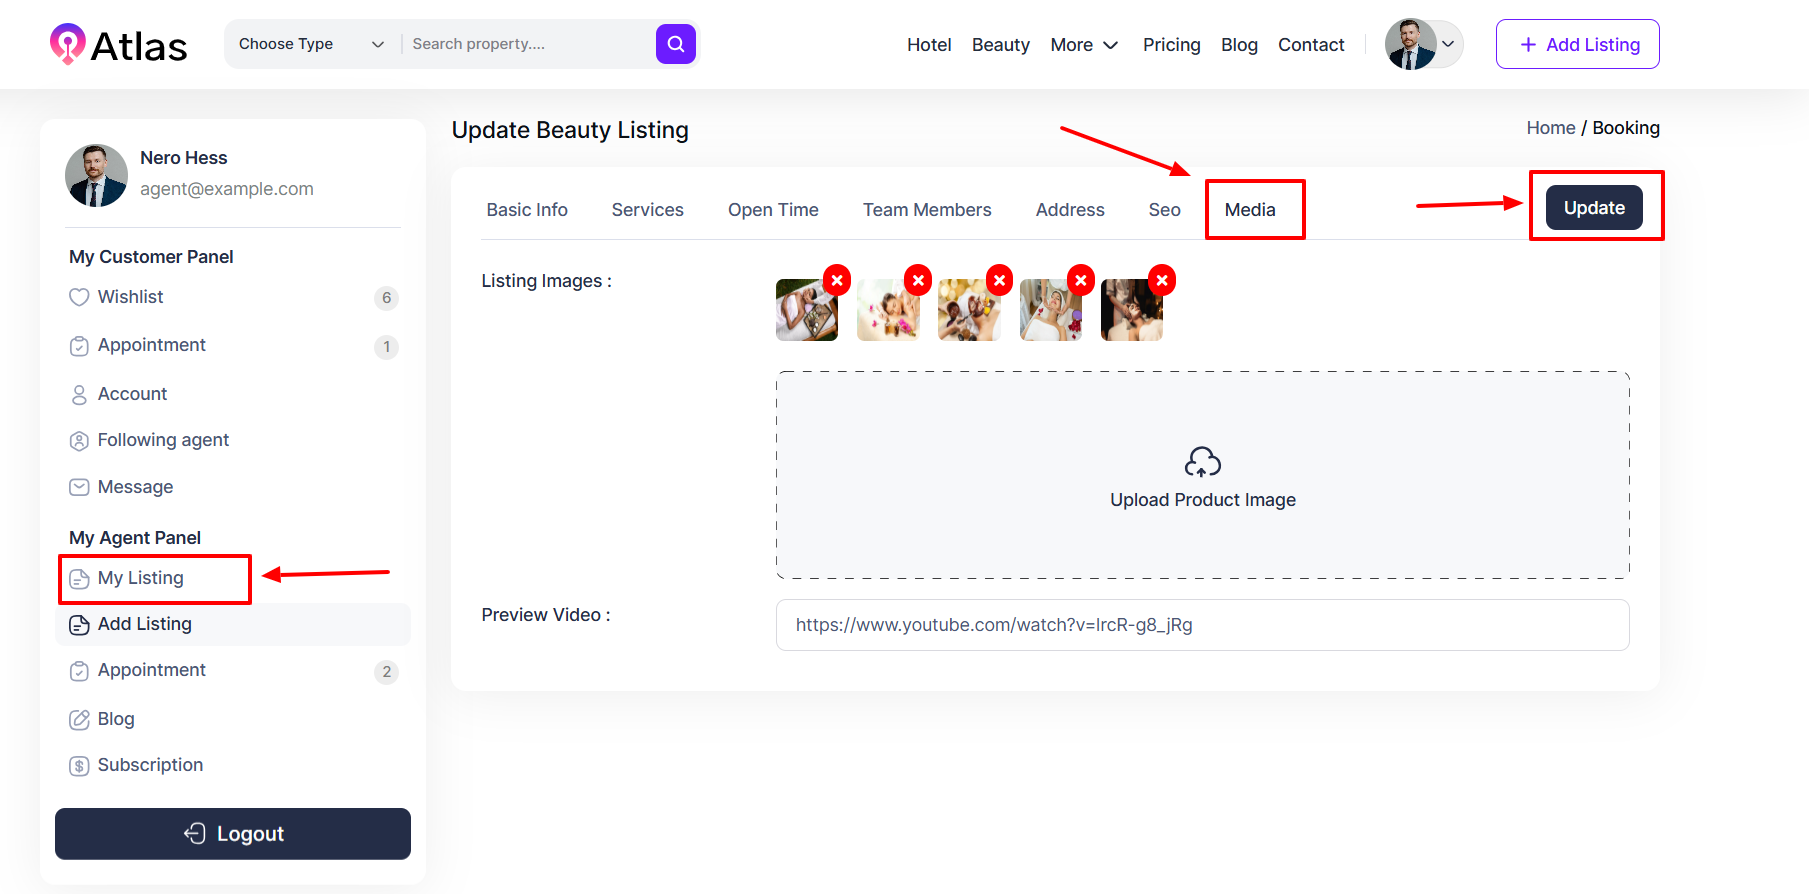
- In the Media Tab:
- Fill out the required fields:
-
- Listing Image: Upload a listing image by clicking Upload Product Image.
- Preview Video: Add a Video link in the Preview Video field, which is applicable.
-
- Finally, click the Update button to save the provided information.
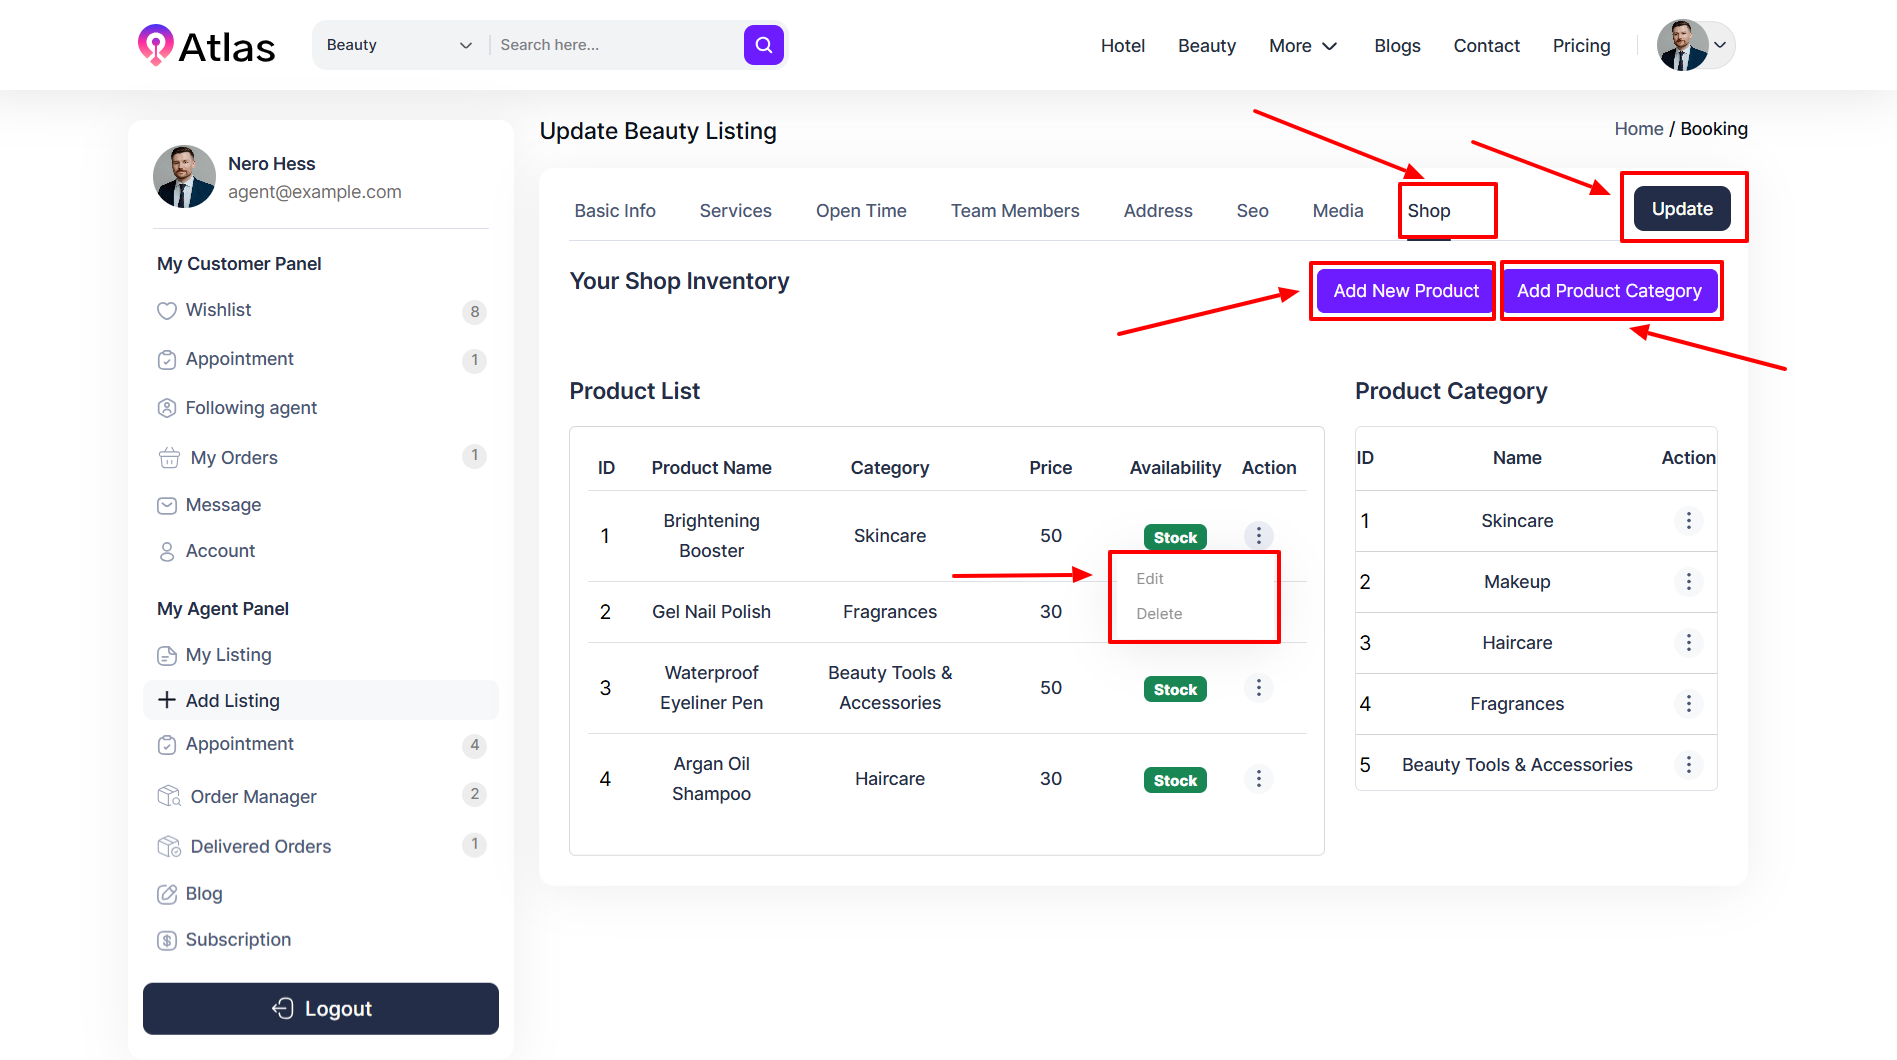
- In the Shop Tab:
- Click the Shop tab an entry form will appear with the following: Add New Product and Add Product Category buttons.
- Click the Add New Product button an entry form will appear.
- Fill out the required fields:
-
- Product Name: Type the product name.
- Category: Select category for the dropdown menu.
- Price: Put the price in the price field.
- Description: Type the description as you desire.
- Upload Product Image: Upload the Product Image by clicking Choose File.
- Radio button: Select the radio button for Available or Not Available.
-
- After the competition, provide all information, and click the Create button to save the information.
- Click the Add Product Category button an entry form will appear.
- Fill out the required fields:
-
- Category Title: Type the product category title in the category title field.
-
- Click the Create button to save the information.
- Click the Action button (three dots) to open a menu with the options: Edit and Delete.
-
-
Click the Edit button an entry form will appear.
-
After providing all the information, click the Update button to save the provided information.
-
-
-
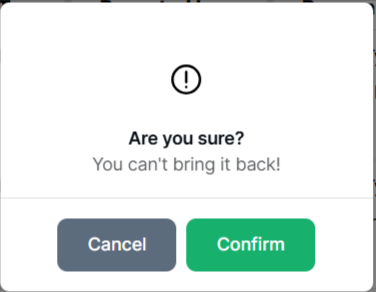
If you click the Delete button, a confirmation window will appear.
-
If you click the Confirm button, the item will be deleted permanently; otherwise, click Cancel.
- Click the Hide Listing relevant listing will be hidden.
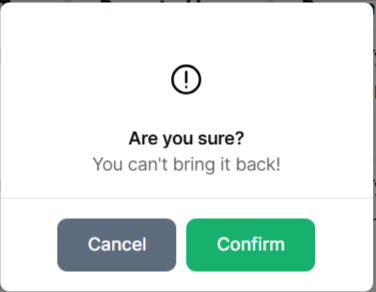
- Click the Remove Listing, and a confirmation menu will appear.
- If you click the Confirm button list will be deleted permanently; otherwise, Cancel.
Was this article helpful to you?
Contact us and we will get back to you as soon as possible

