Documentation
-
Introduction
-
Getting Started
-
Manage Directory Listing
-
Manage Subscription History
-
Manage Listing Categories
-
Manage Listing Amenities
-
Manage Listing Cities
-
Manage Users
-
Manage Agent Packages
-
Manage Blogs
-
Manage Newsletter
-
Manage Addons
-
Administrative Control
-
Manage My Profile
-
Customers Management
-
Agent Management
How to Manage an Account
In Atlas Laravel, the Account feature lets businesses manage profiles, listings, and activities easily. It keeps everything organized, saves time, and builds trust. To help businesses grow and deliver better customer experiences.
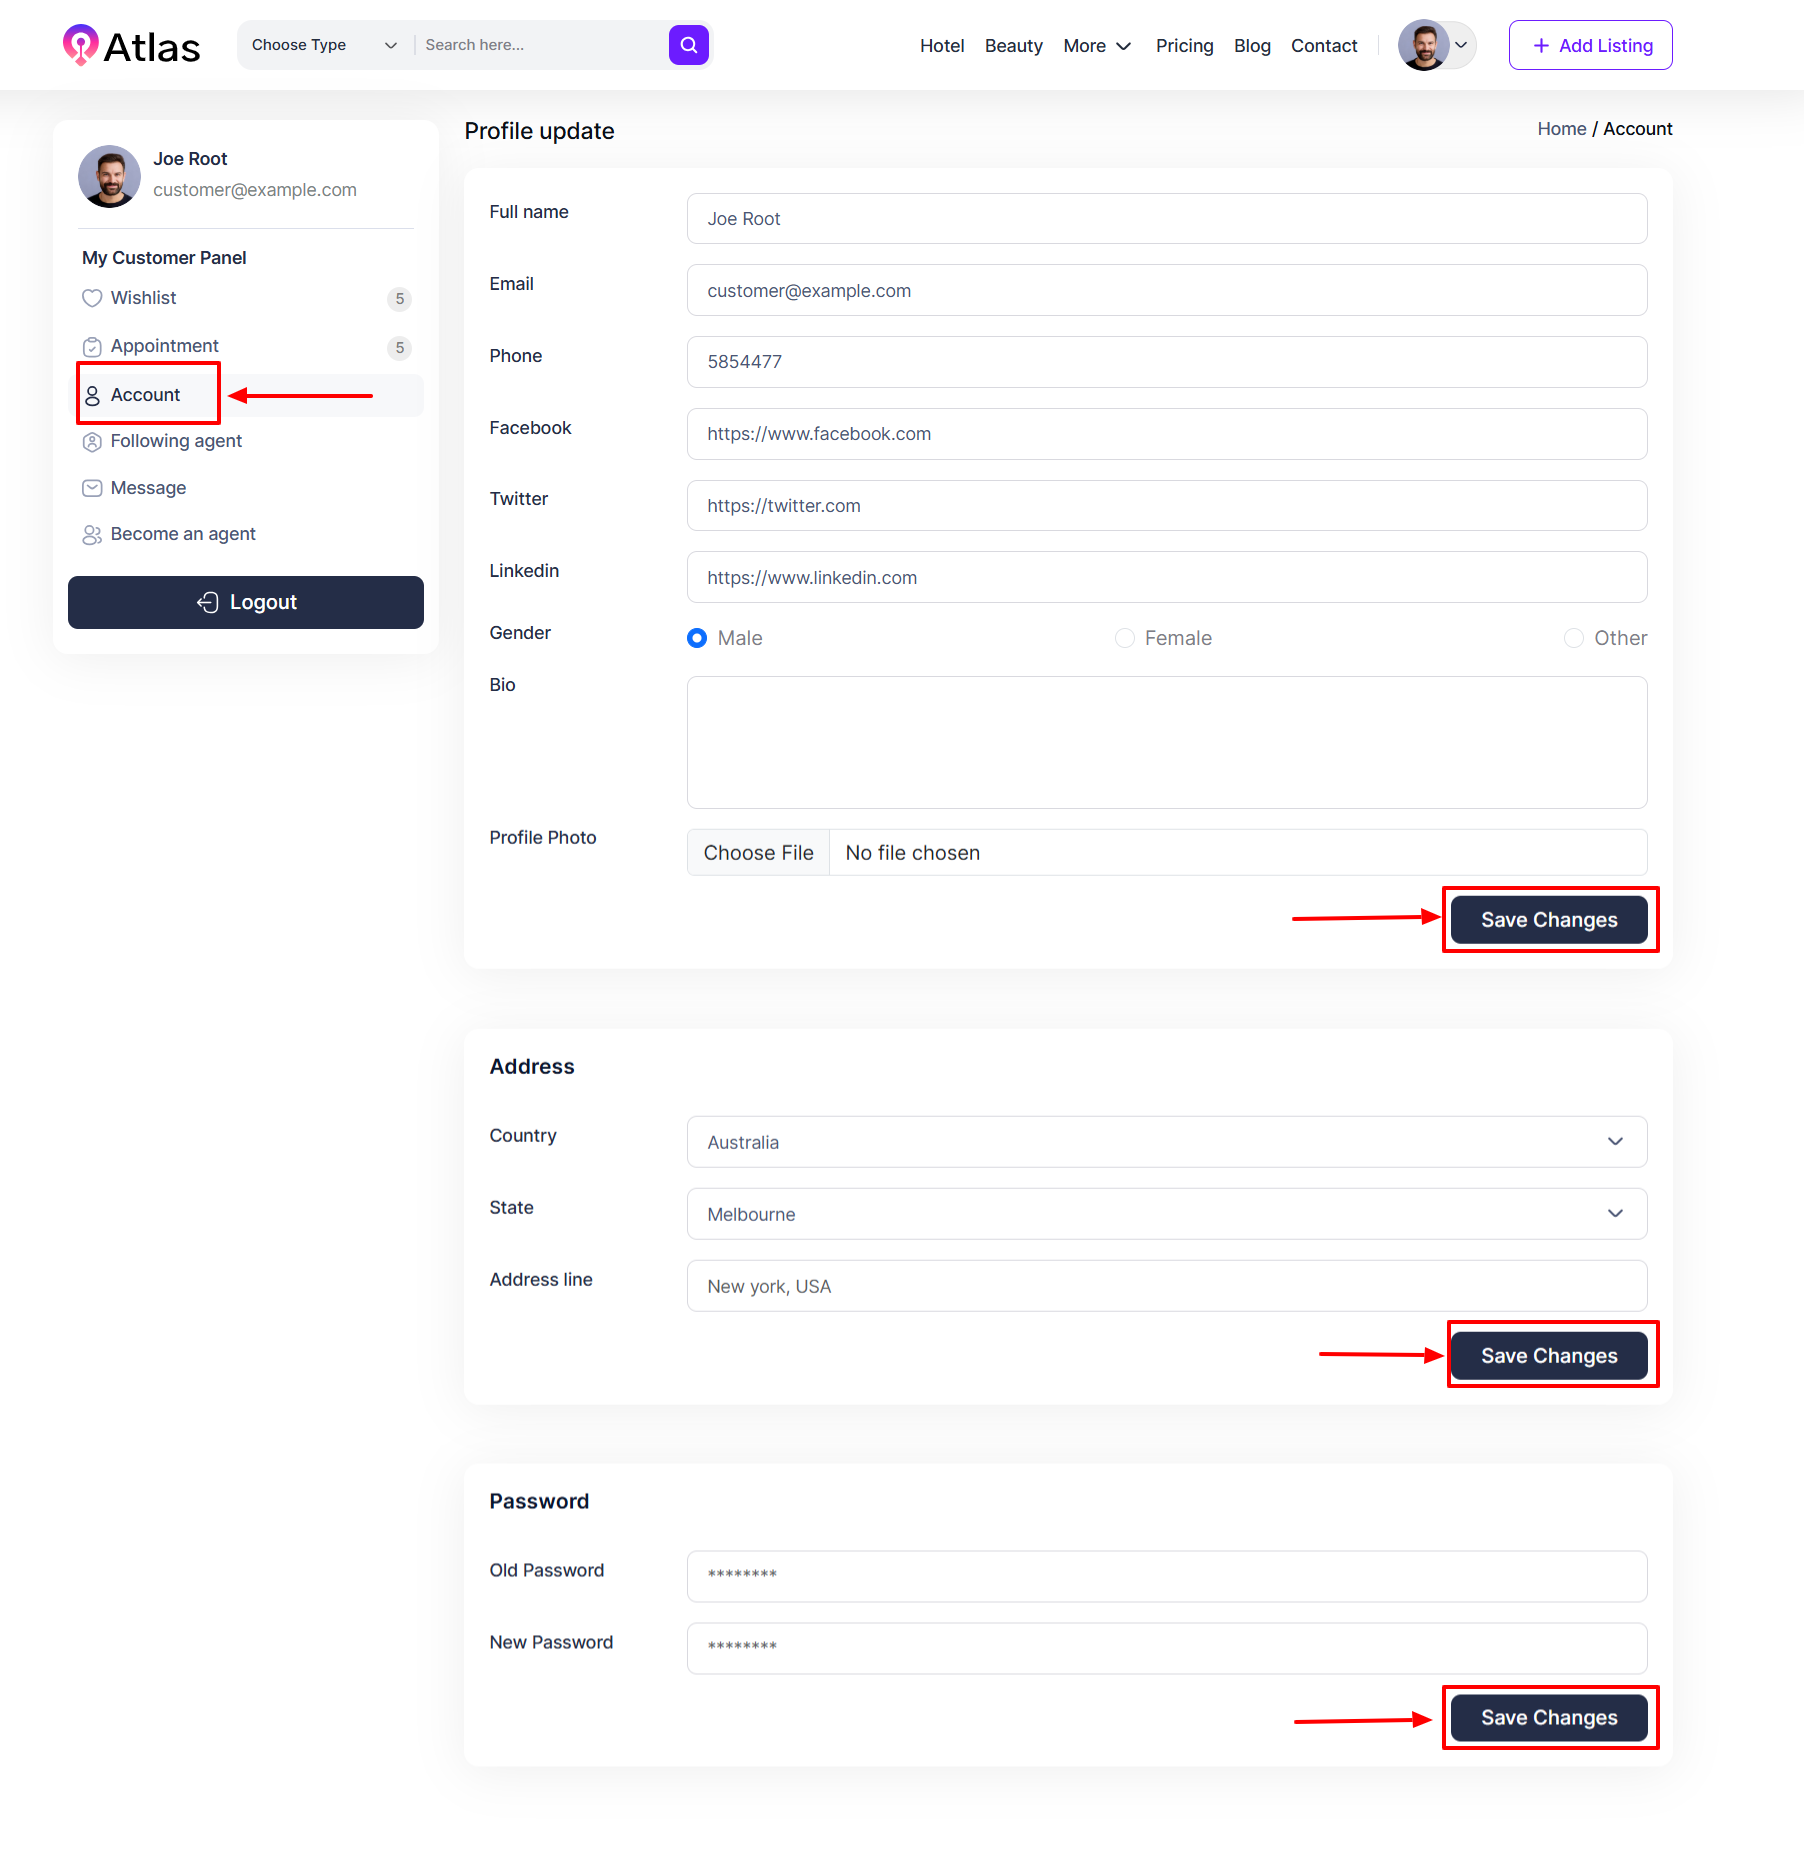
- Log in to the Customer from the Customer Panel.
- Navigate to Account from the left menu an entry form will pop up.
- Fill out the required fields:
-
- Full Name: Provide your full name in the respective field.
- Email: Type your email in the respective field.
- Phone Number: Provide phone number in the respective field.
- Facebook: Type the Facebook link in the field.
- Twitter: Provide a Twitter link.
- LinkedIn: Put the LinkedIn link.
- Gender: Select the radio button to select the gender as required.
- Bio: Provide a bio description in the respective field.
- Profile Photo: Click Choose File to upload a relevant image.
-
- Once all fields are completed with data entry, click the Save Changes button to apply the updates.
- In Address, fill out the required fields:
-
- Country: Select the Country from the dropdown menu.
- State: Select the desired state from the dropdown menu.
- Address: Type the address details in the address field.
-
- Once all fields are completed with data entry, click the Save Changes button to apply the updates.
- In Password, fill out the required fields:
-
- Old Password: Provide an old password in the respective field.
- New Password: Type the secured password in the respective field.
-
- Once all fields are completed with data entry, click the Save Changes button to apply the updates.

Was this article helpful to you?
How can we help?
Contact us and we will get back to you as soon as possible

