Documentation
-
Introduction
-
Getting Started
-
Manage Directory Listing
-
Manage Subscription History
-
Manage Listing Categories
-
Manage Listing Amenities
-
Manage Listing Cities
-
Manage Users
-
Manage Agent Packages
-
Manage Blogs
-
Manage Newsletter
-
Manage Addons
-
Administrative Control
-
Manage My Profile
-
Customers Management
-
Agent Management
How to Manage Language Settings
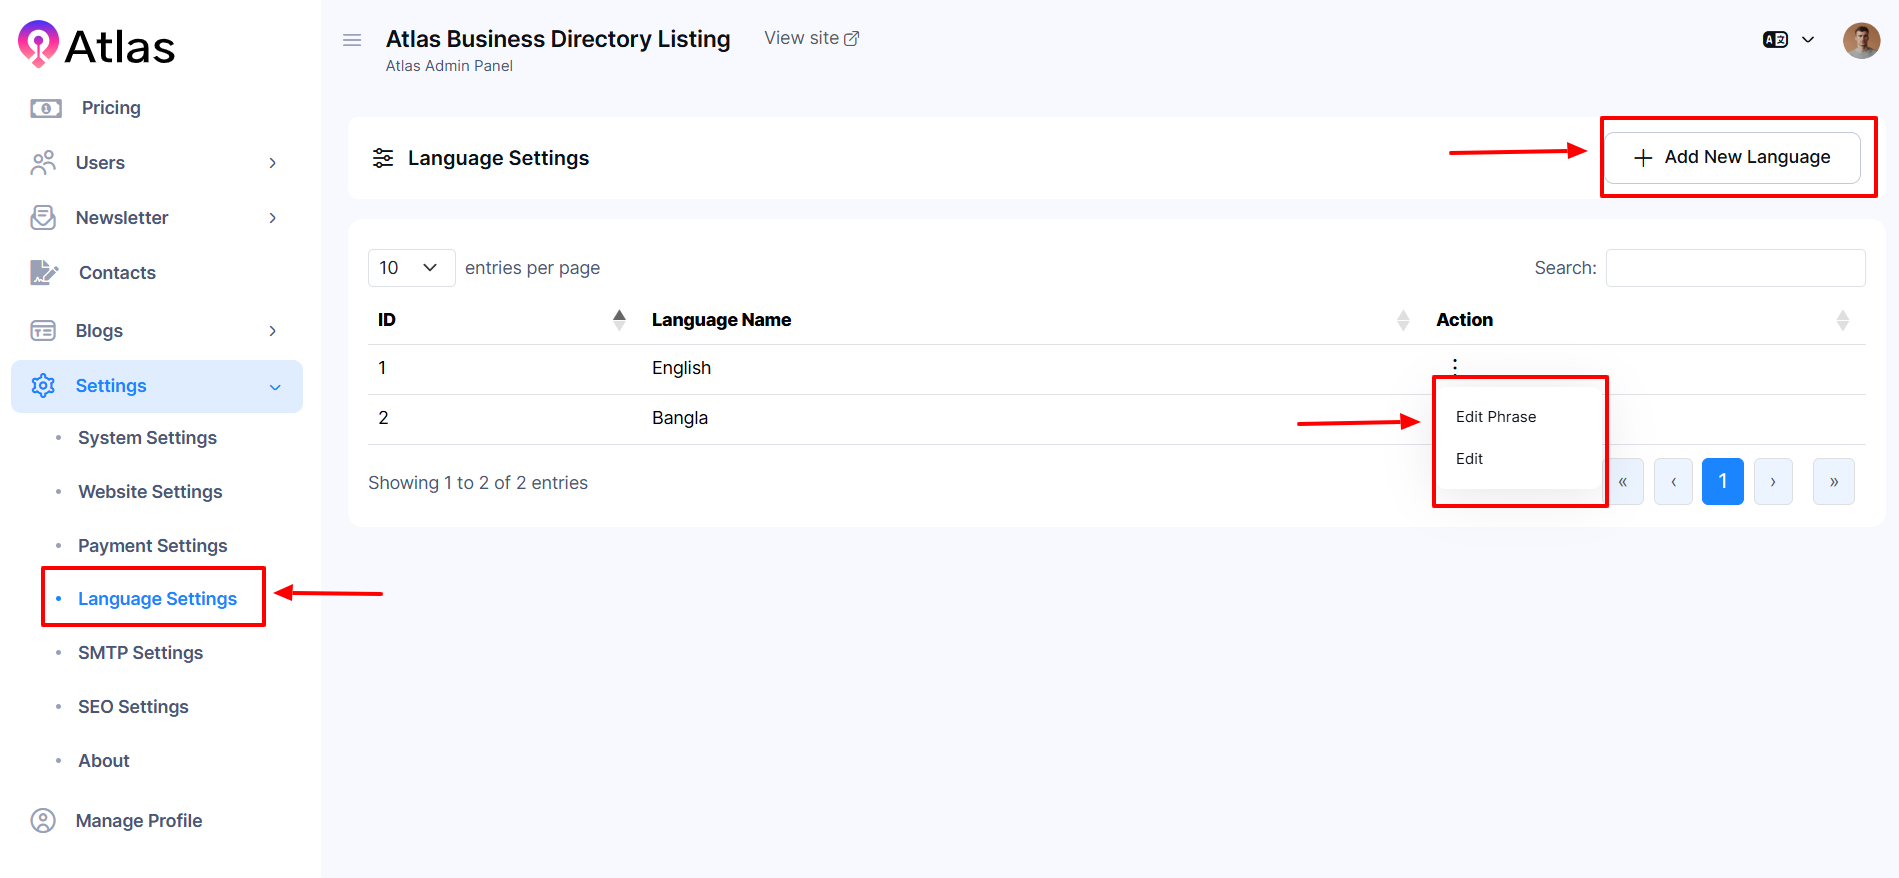
In Atlas Laravel, Language Settings allow businesses to customize their platform for different languages. Admins can add, edit, or manage languages to enhance user accessibility to diverse audiences, and create a more localized experience, improving engagement and global business reach.
- Log in to the Admin and access the Dashboard from the Admin Panel.
- Navigate to Settings from the left menu
- In the left sub-menu, choose Language Settings a new window will pop up.
- Type the language name in the Search field to show the desired.
- Click the Add New Language button an entry form will appear.
- Enter the Language Name and click the Create button to save the information.

How to Edit a Phrase
- Log in to the Admin and access the Dashboard from the Admin Panel.
- Navigate to Settings from the left menu
- In the left sub-menu, choose Language Settings a new window will pop up.
- Click the Action button (three dots), and a menu will appear with the following options: Edit Phrase & Edit.
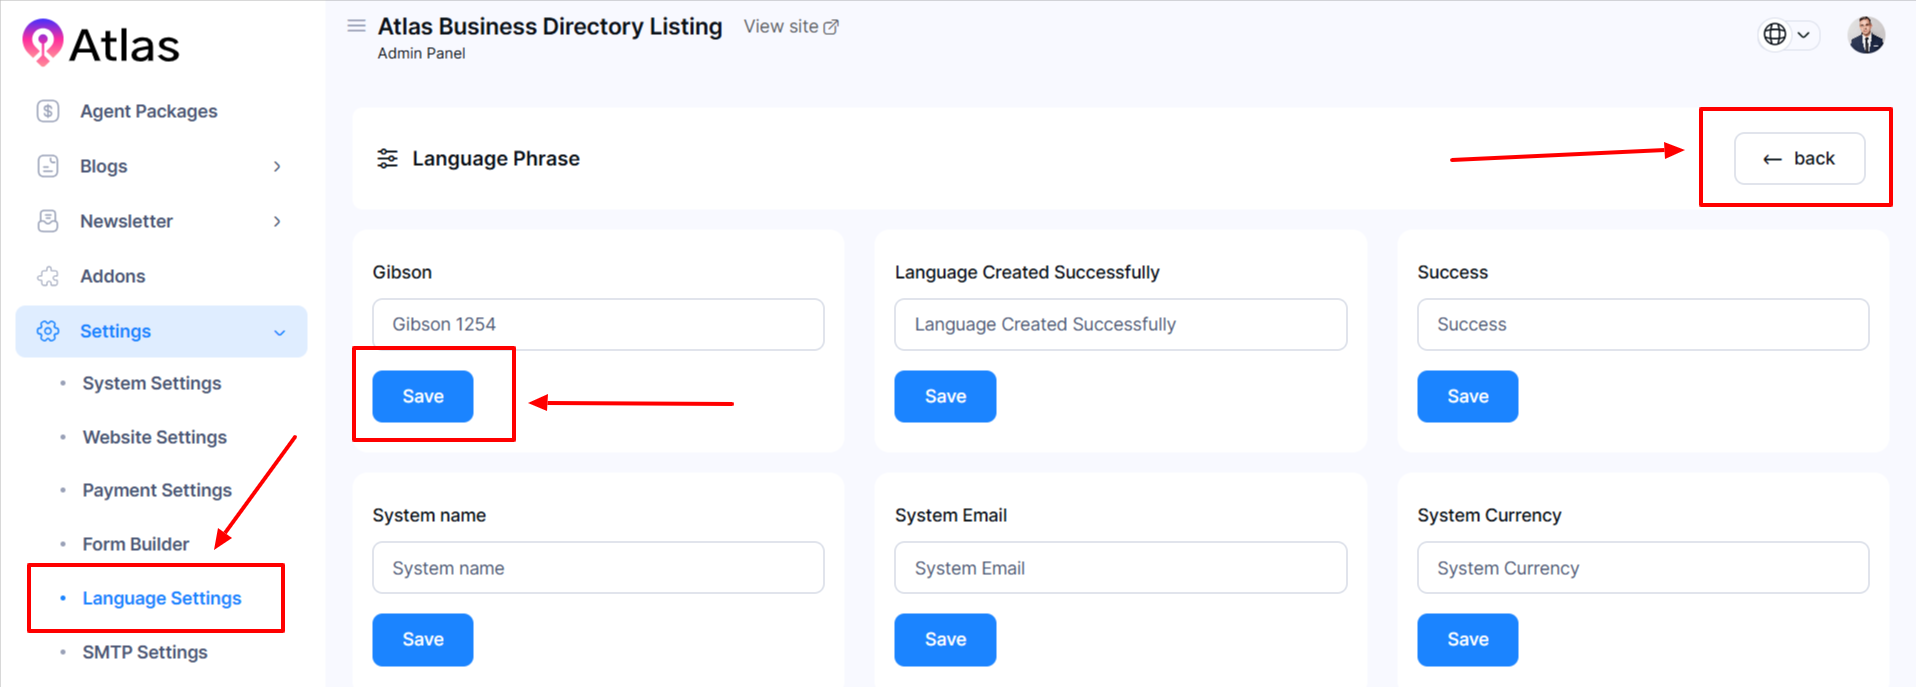
- Click the Edit Phrase in the Action (three dots) an entry form will appear.
- After completing the entries, click the Save button to save the changes.
- Click the Edit in the Action (three dots) an entry form will appear.
- Enter the Language name and click the Update button.
- Back to the previous page, click the Back button.
- After completing the entries, click the Update button to save the changes.


Was this article helpful to you?
How can we help?
Contact us and we will get back to you as soon as possible

