How to Manage Admins
The Manage Admins feature allows the creation, assignment, and control of additional administrative roles within the GrowUp LMS. This feature is essential for distributing administrative tasks, managing permissions, and maintaining the security of the platform by assigning different levels of control to different users.
How to Add New Admin:
-
Log in to the Admin Panel.
-
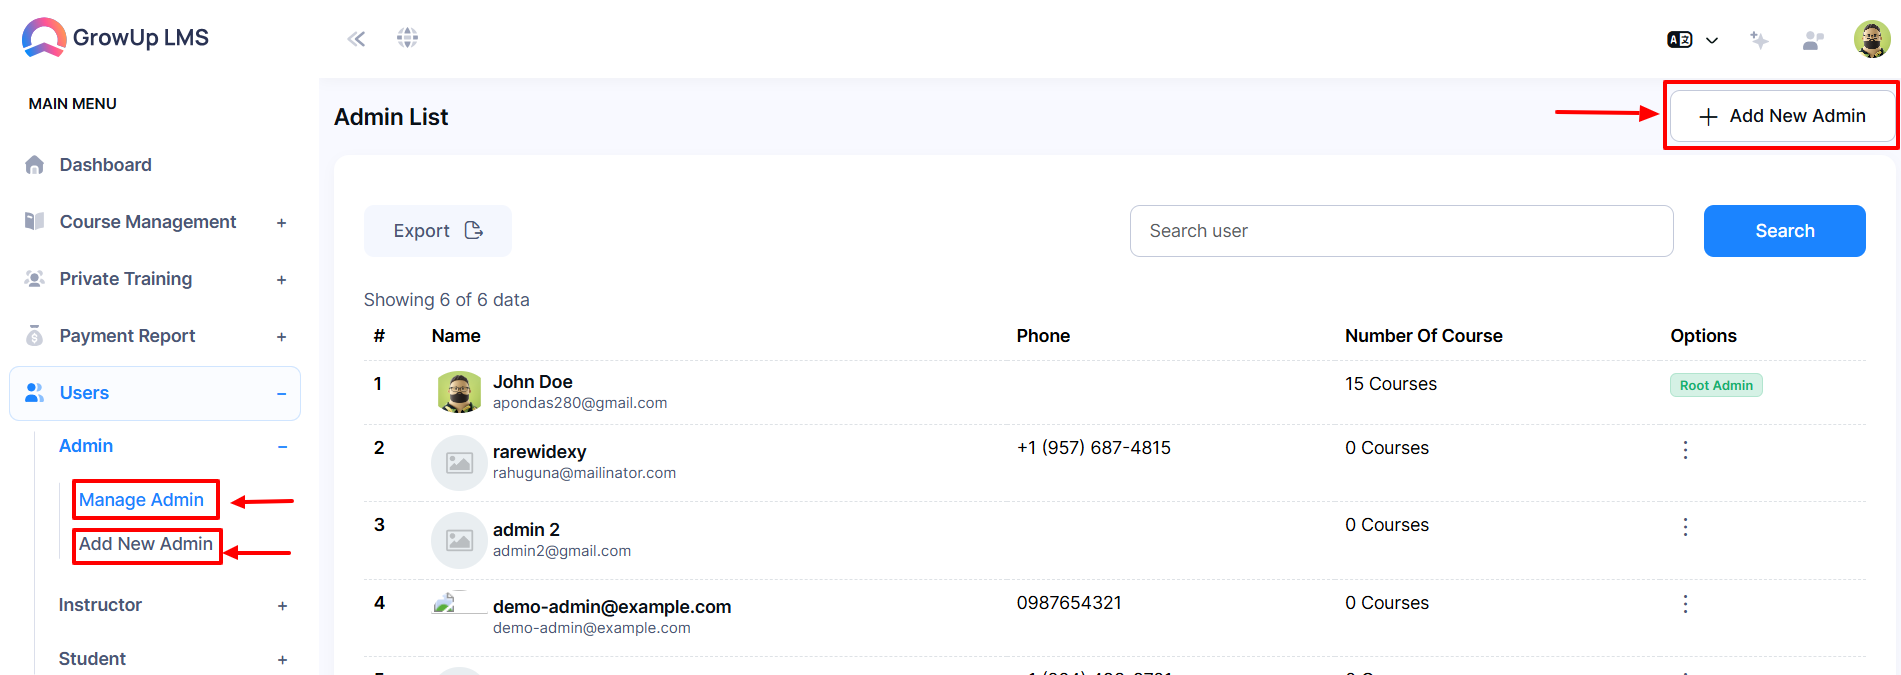
Select the "User" option from the left menu.
-
Choose the "Manage Admin" option from the sub-menu.
-
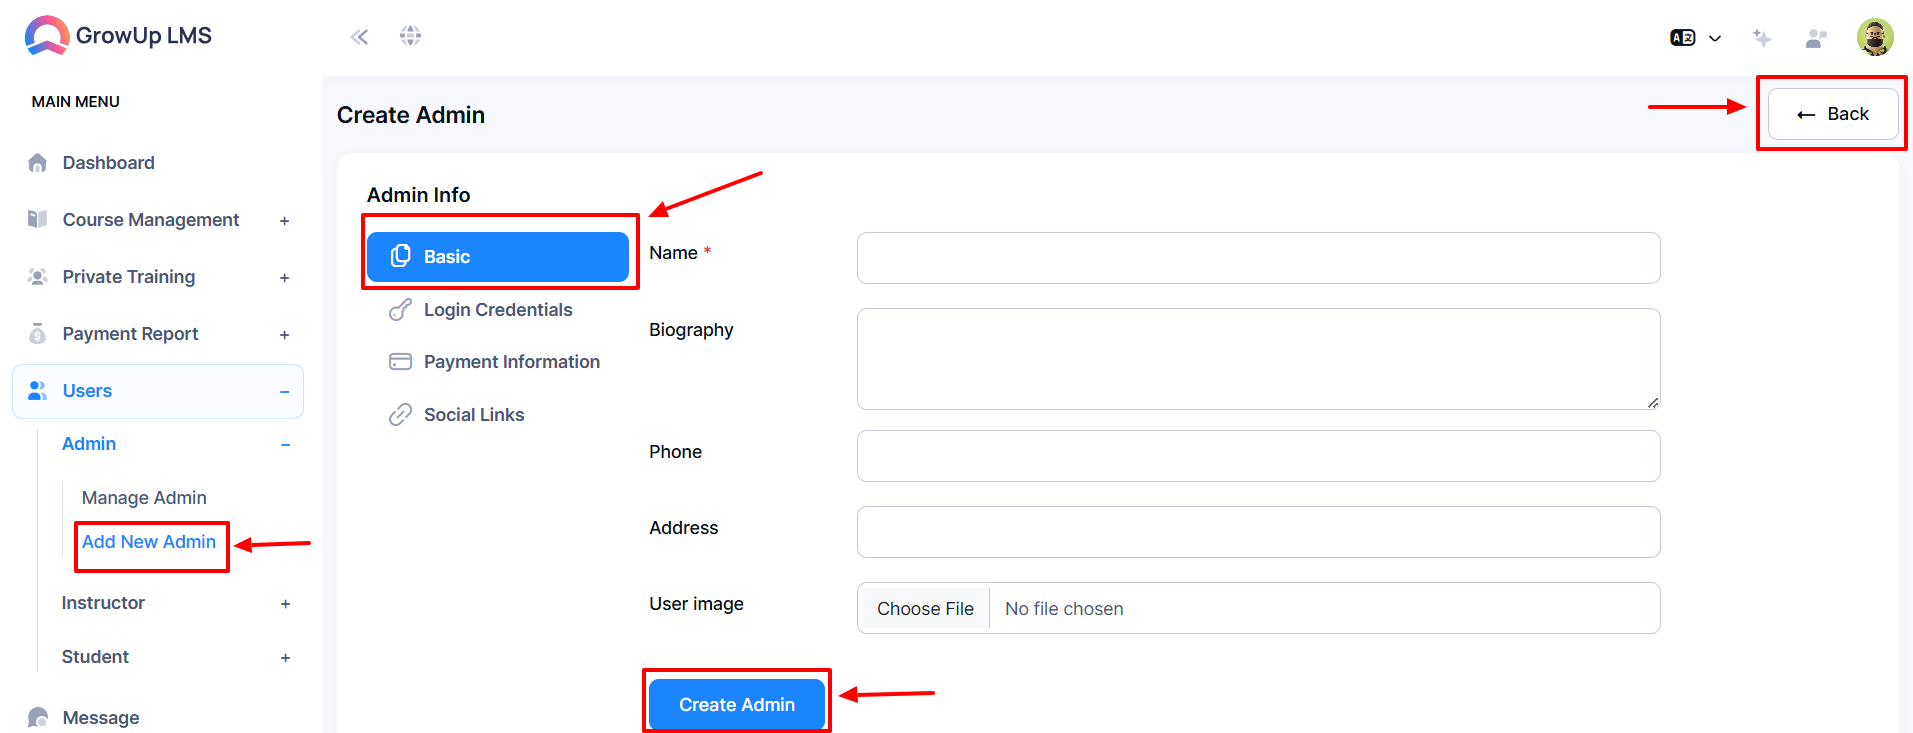
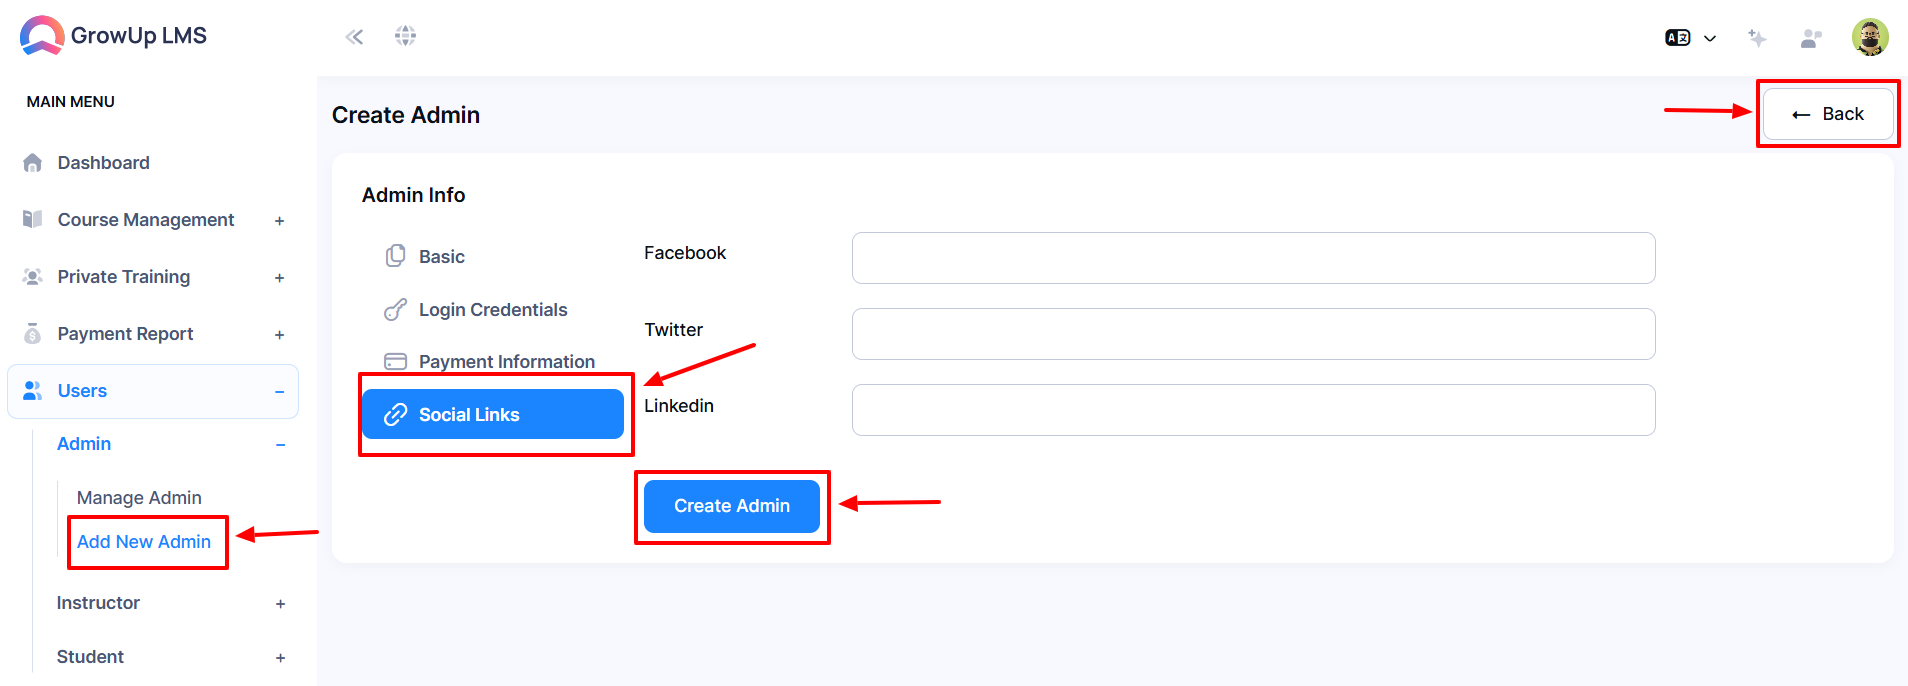
Choose the "Add New Admin" option from the sub-menu or click the "Add New Admin" button a new window will pop up.
-
Type the Admin Name using the Name option.
-
Type the Biography in the Biography option.
-
Type the phone number using the Phone option.
-
Type the Address in the Address option.
-
Click the "Choose File" button to choose the user image.
-
Click the "Create Admin" button to Update the information.
-
You will return to the previous page by clicking the "Back" button.
-
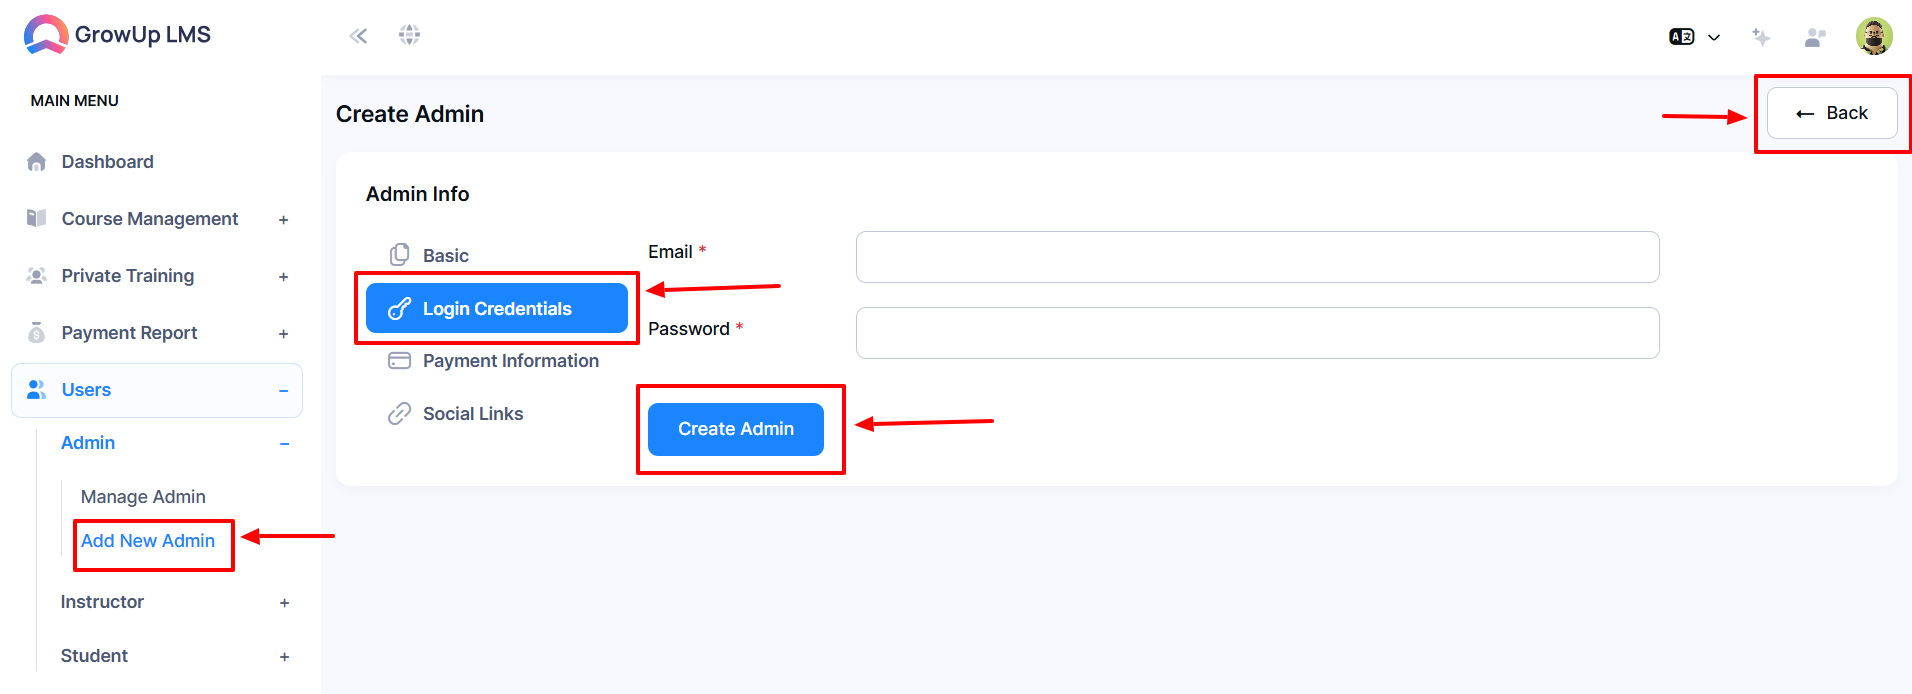
Click the "Login Credential" button a new window will pop up.
-
Type the email address using the Email option.
-
Type the Password in the Password option.
-
Click the "Create Admin" button to Update the information.
-
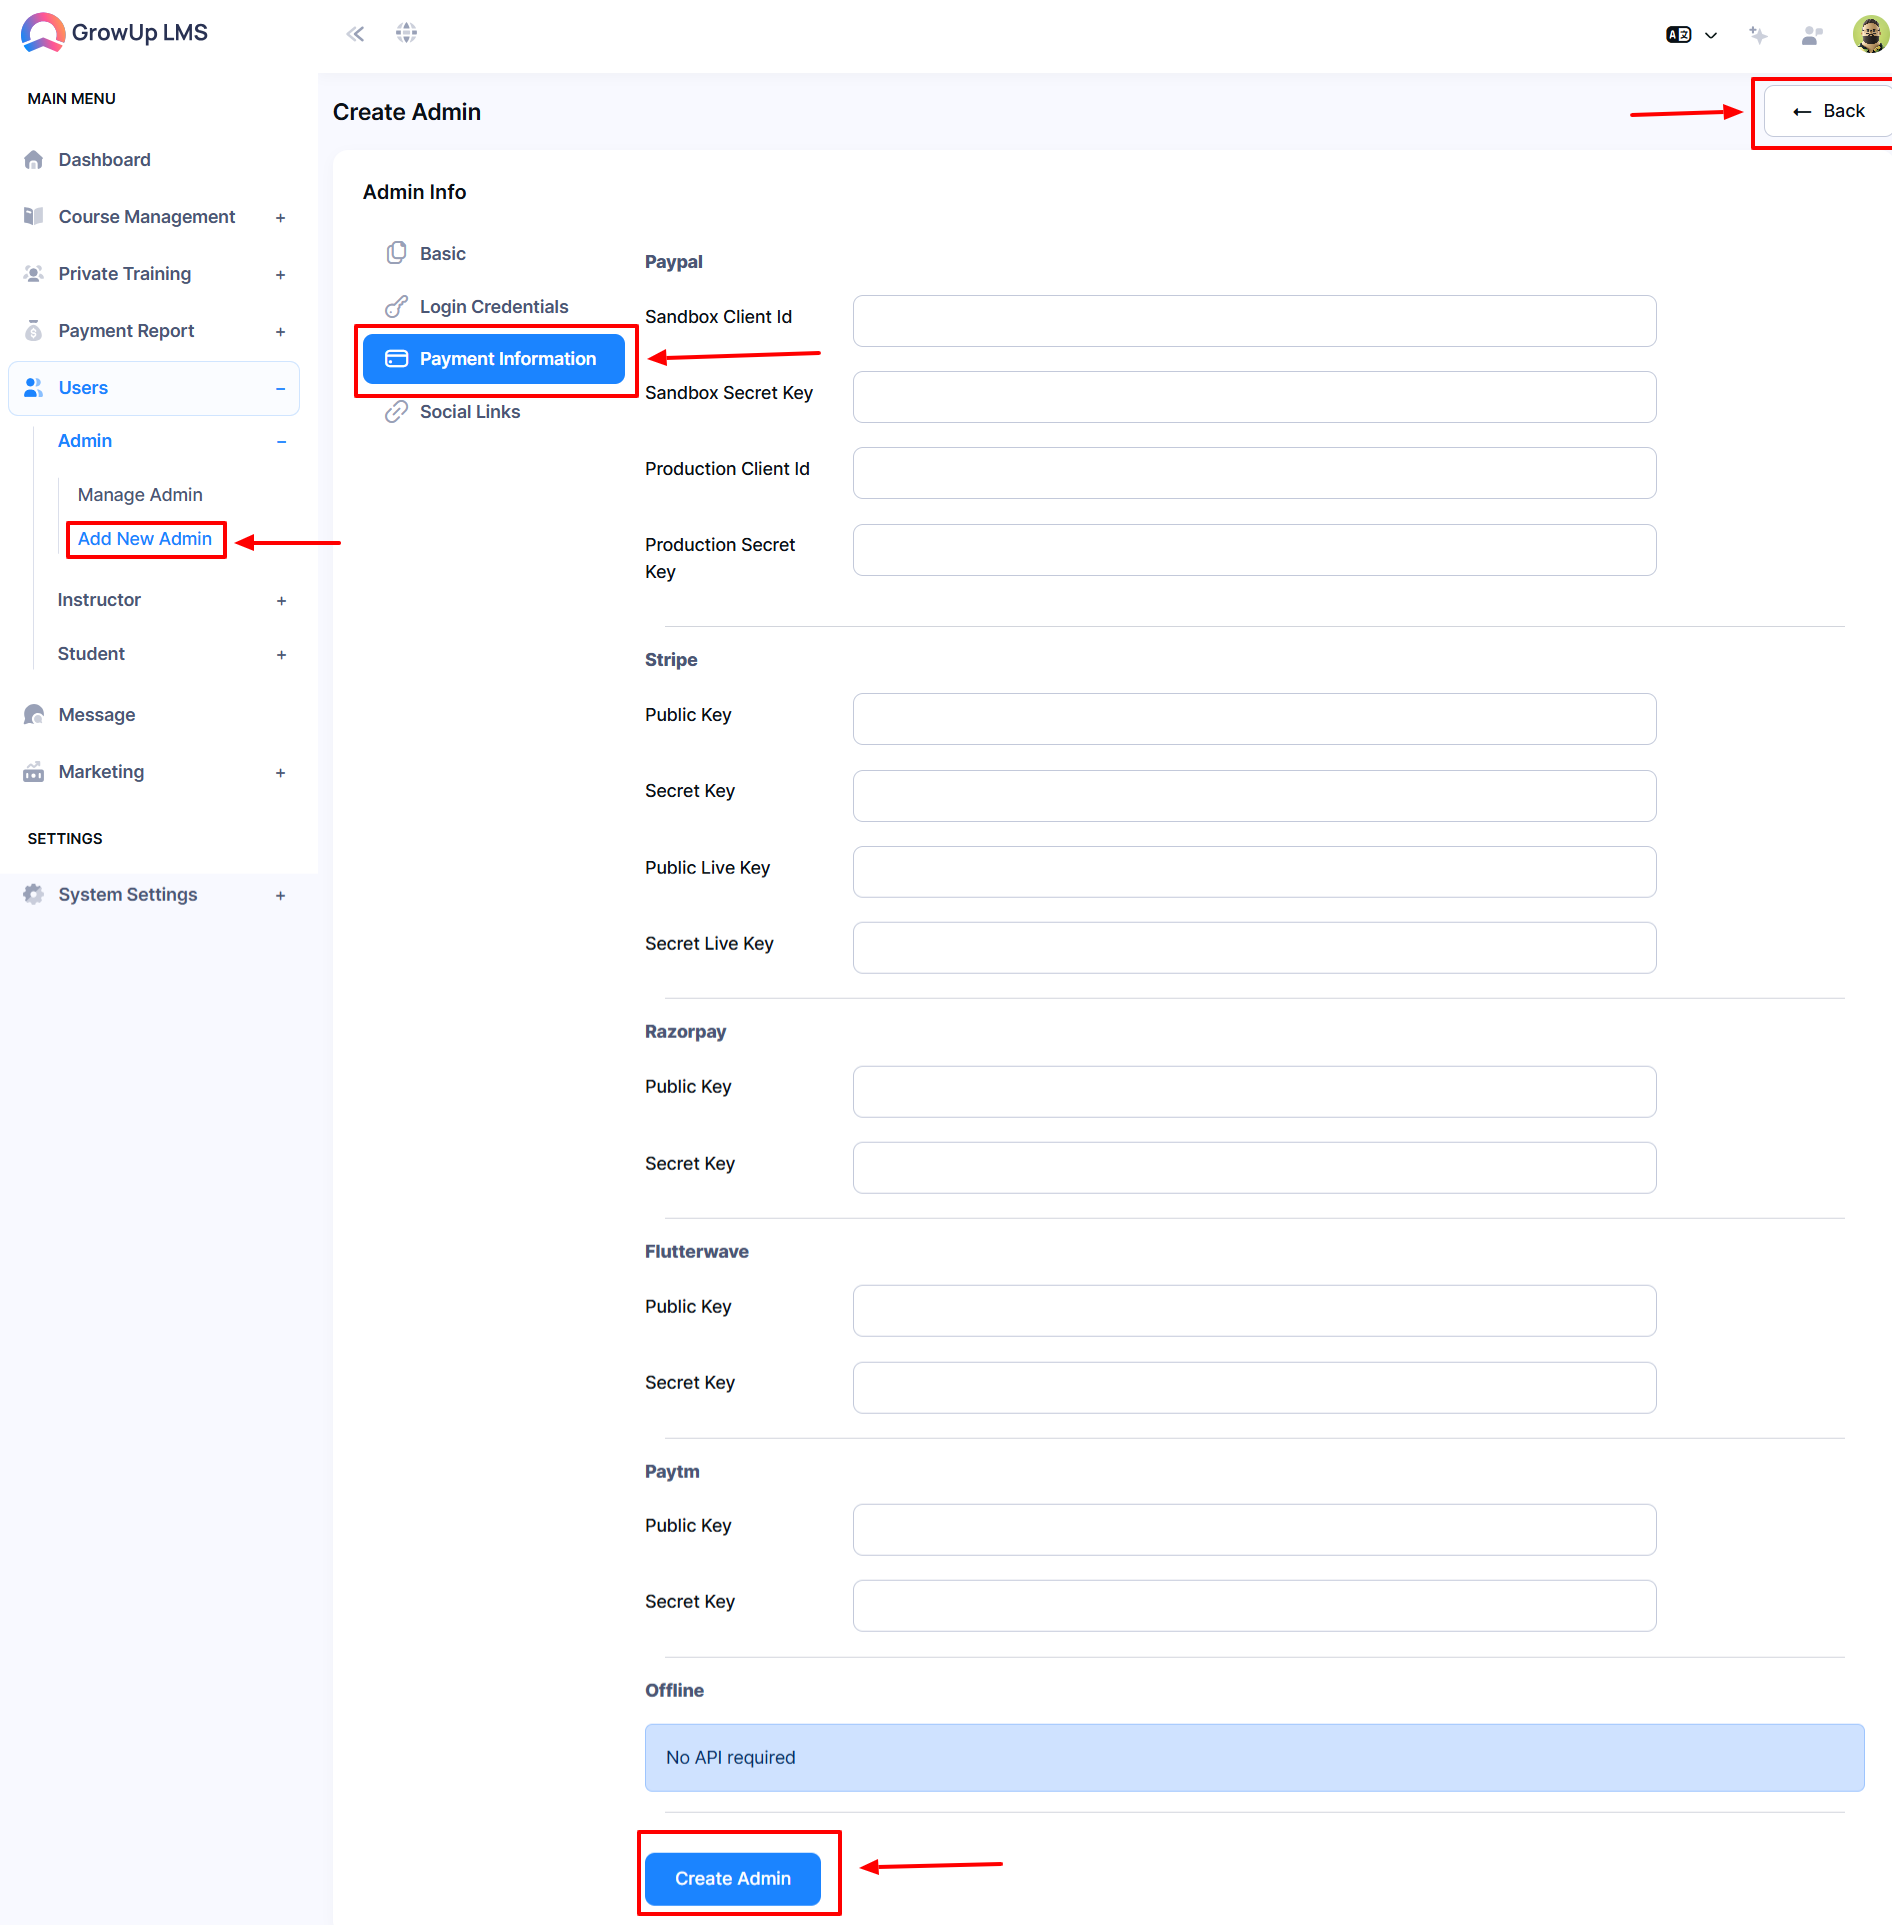
Click the "Payment Information" button a new window will pop up.
-
For Paypal payment type the necessary information in the designed format.
-
For Stripe payment type the necessary information in the designed format.
-
For Razorpay payment type the necessary information in the designed format.
-
For Flutterwave payment type the necessary information in the designed format.
-
For Paytm payment type the necessary information in the designed format.
-
Click the "Create Admin" button to Update the information.
-
Click the "Social Links" button a new window will pop up.
-
Click the "Create Admin" button to Update the information.
How to Assign Permission:
-
Log in to the Admin Panel.
-
Select the "User" option from the left menu.
-
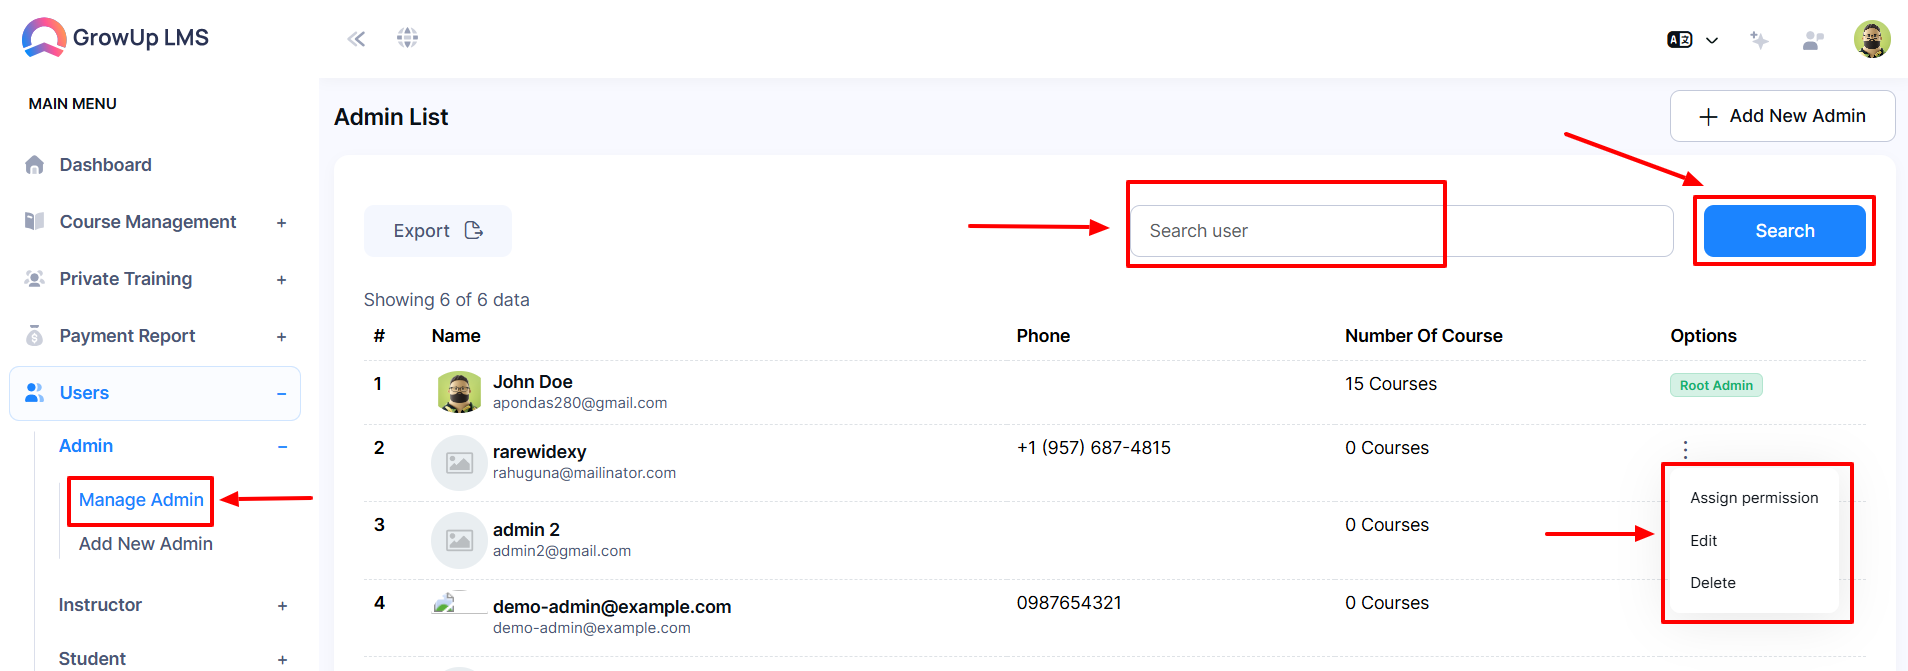
Choose the "Manage Admin" option from the sub-menu.
-
When you click the three dots in the "Options" button a new window will pop up.
-
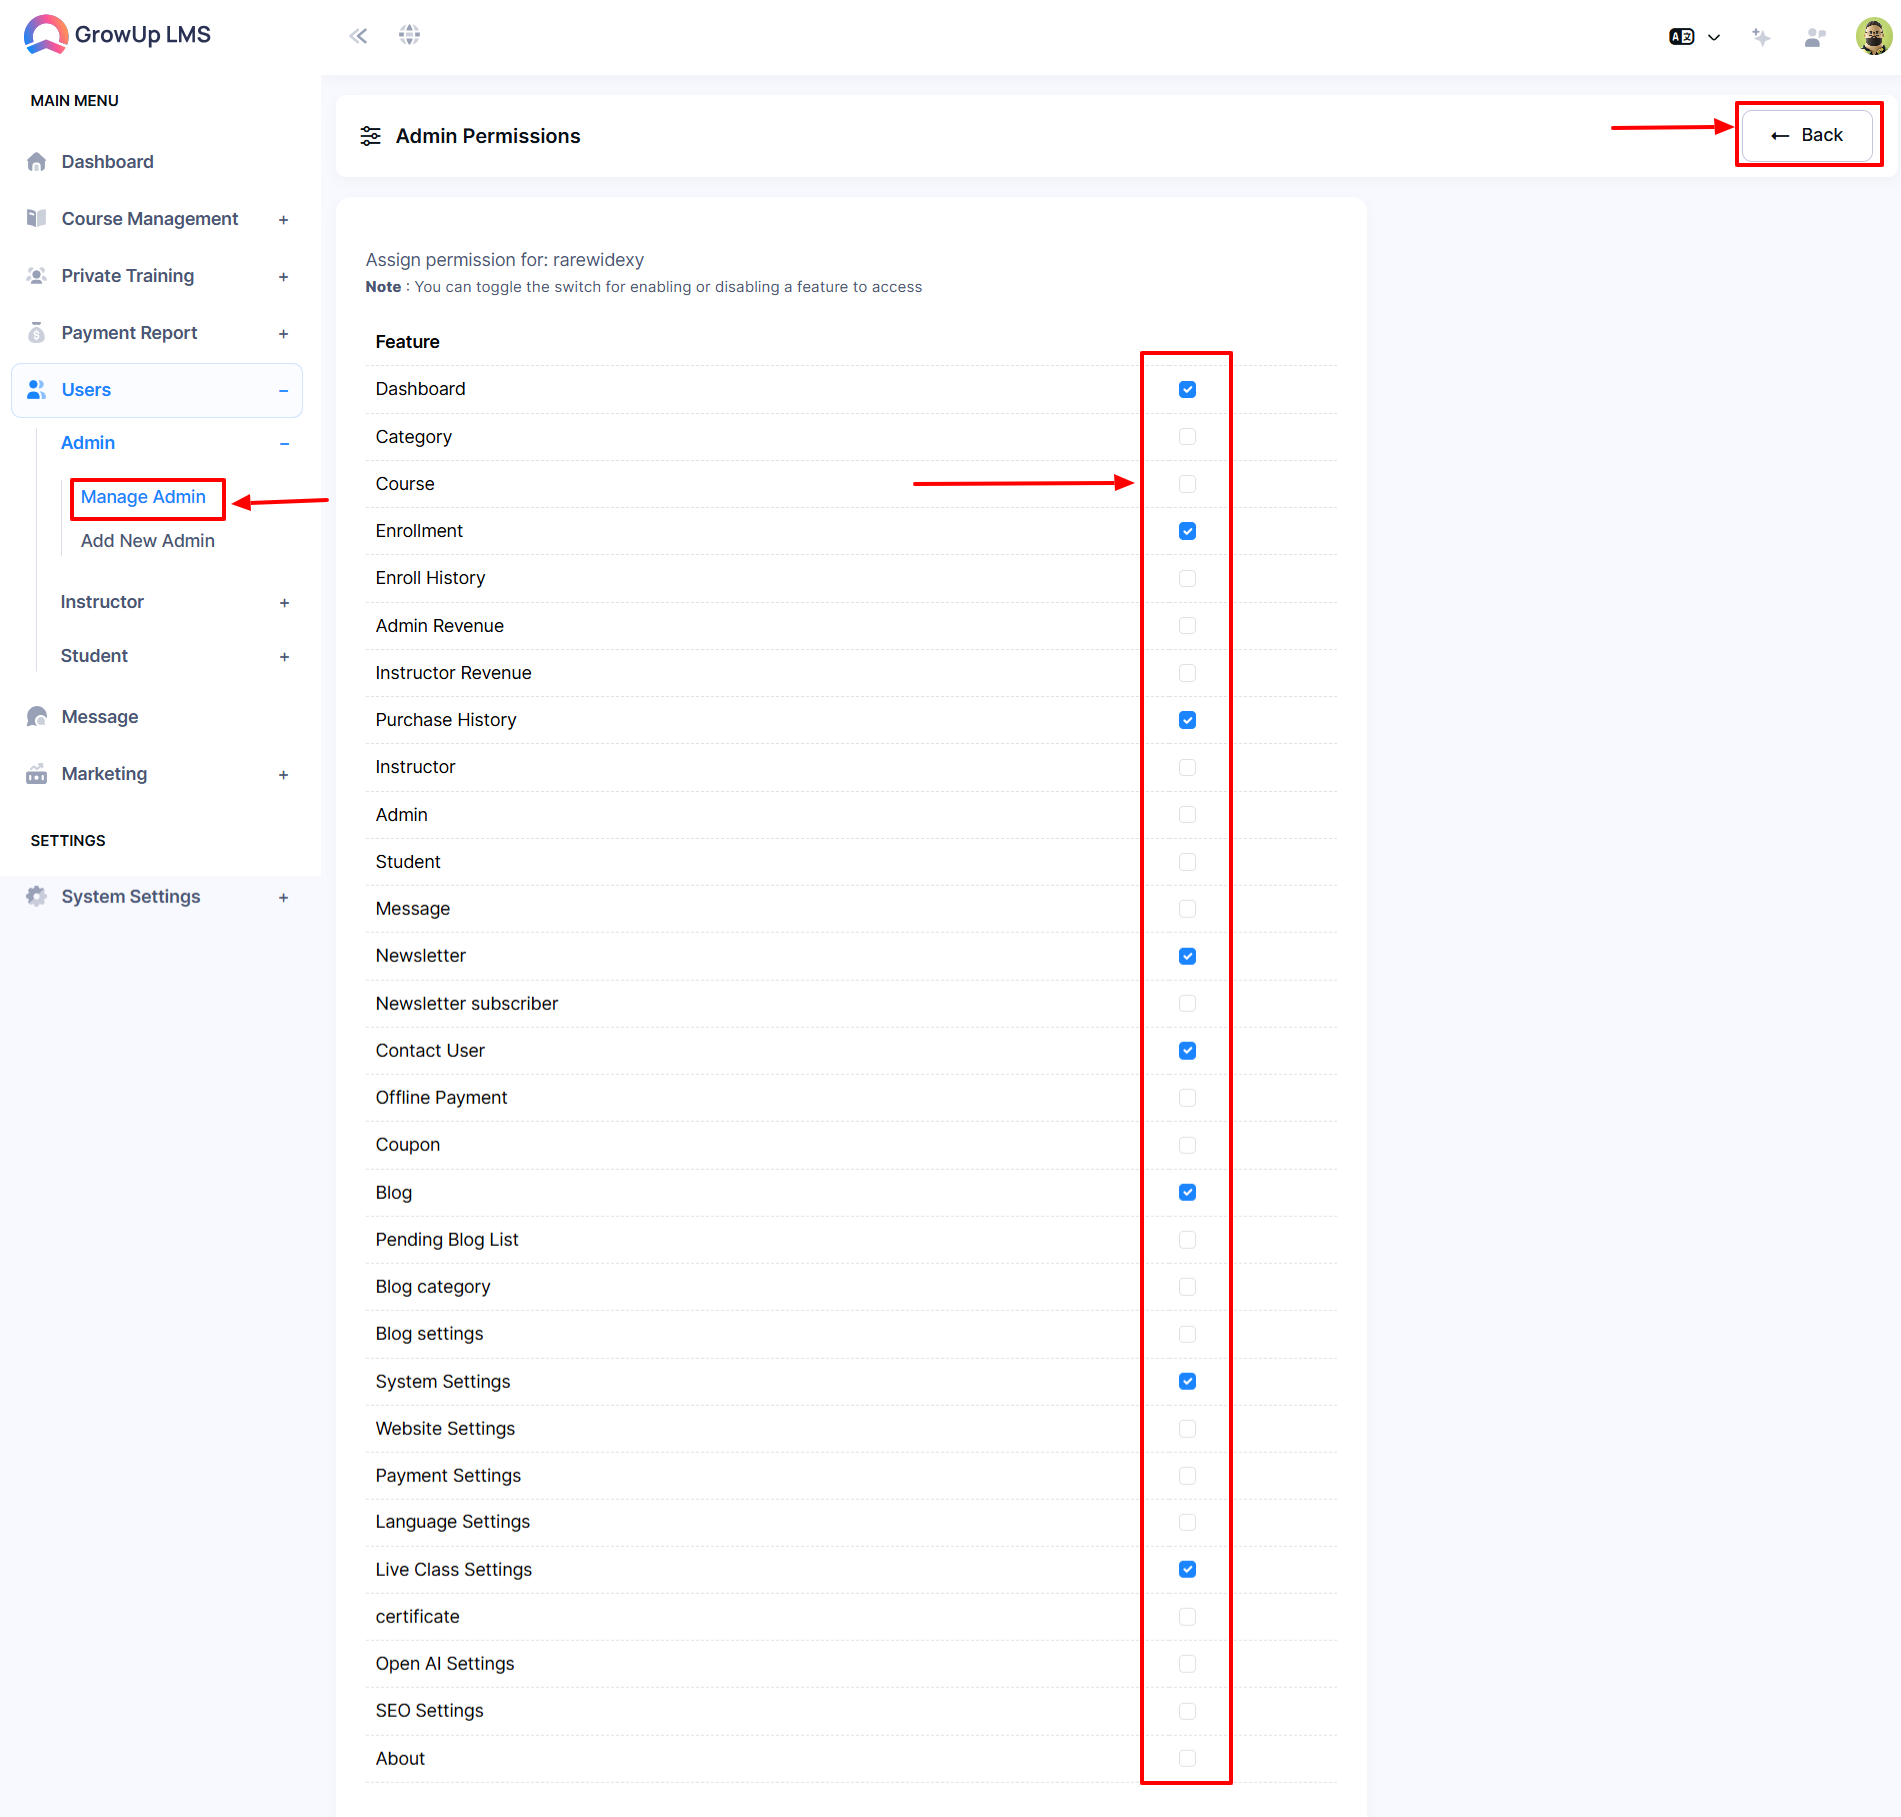
Click the "Assign Permission" button a new window will pop up.
-
Click the Check box to enable or disable a feature to access as you require.
-
You will return to the previous page by clicking the "Back" button.
How to Edit Admin:
-
Log in to the Admin Panel.
-
Select the "User" option from the left menu.
-
Choose the "Admin" option from the sub-menu.
-
Choose the "Manage Admin" option from the sub-menu.
-
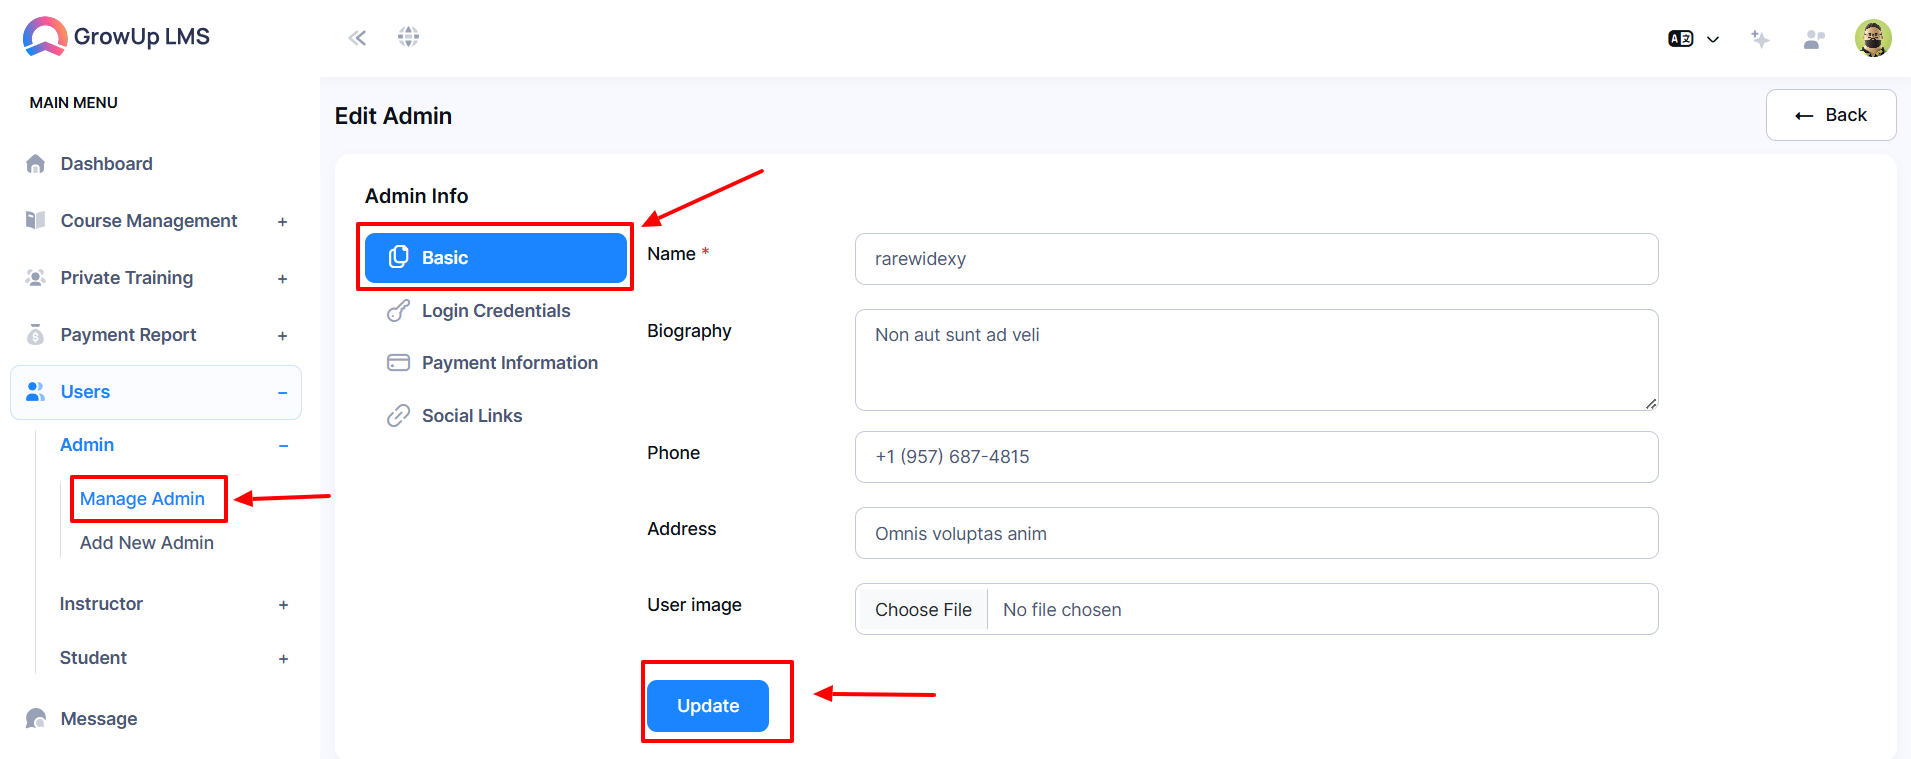
Click the "Edit" button from the option a new window will pop up.
-
Type the Admin Name using the Name option.
-
Type the Biography in the Biography option.
-
Type the phone number using the Phone option.
-
Type the Address in the Address option.
-
Click the "Choose File" button to choose the user image.
-
Click the "Create Admin" button to Update the information.
-
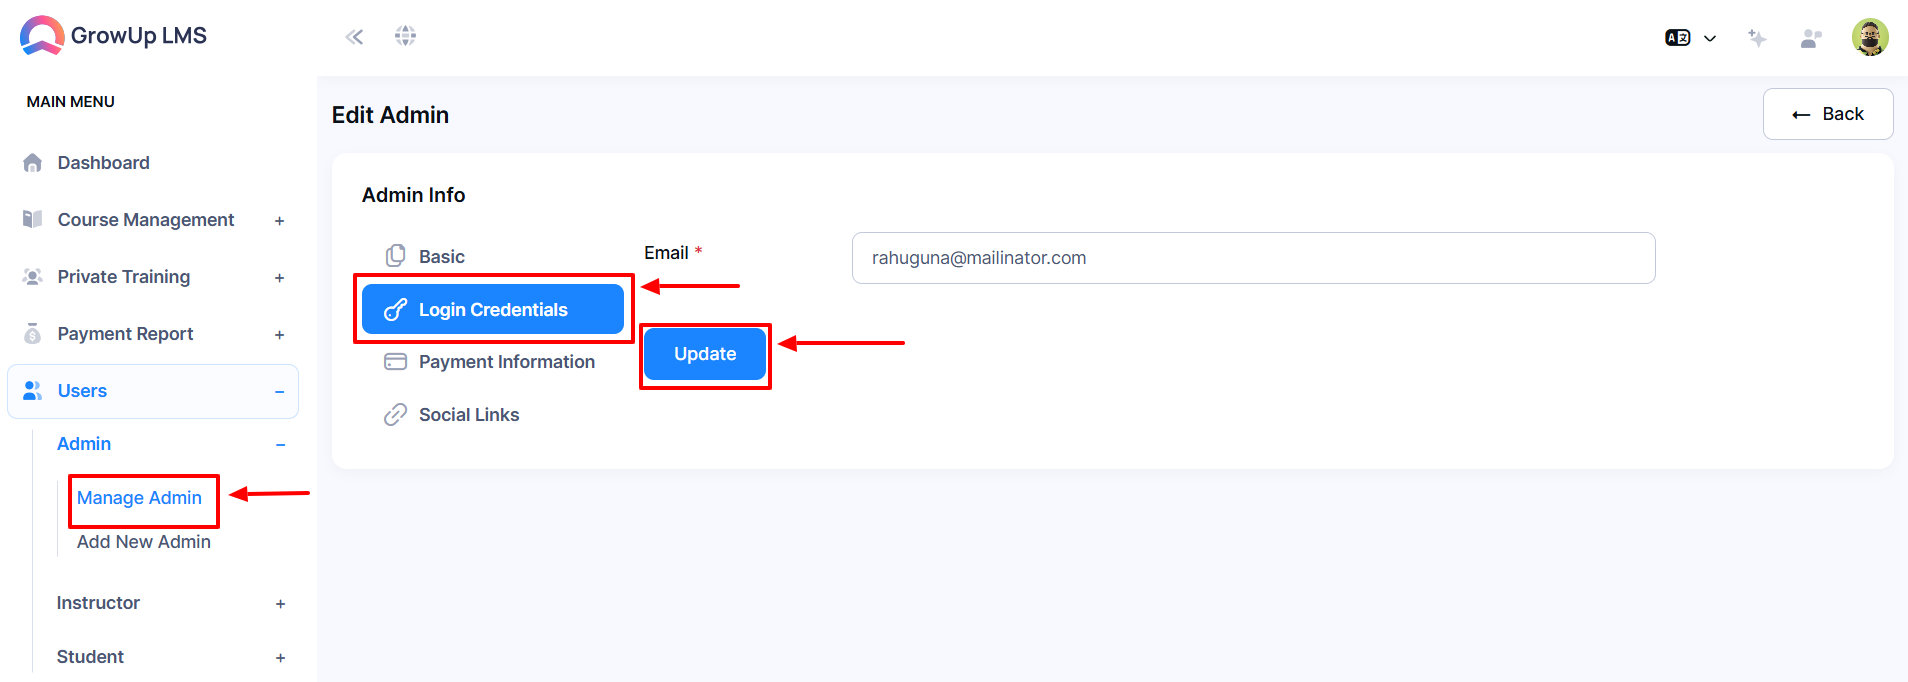
Click the "Login Credential" button a new window will pop up.
-
Type the email address using the Email option.
-
Click the "Update" button to Update the information.
-
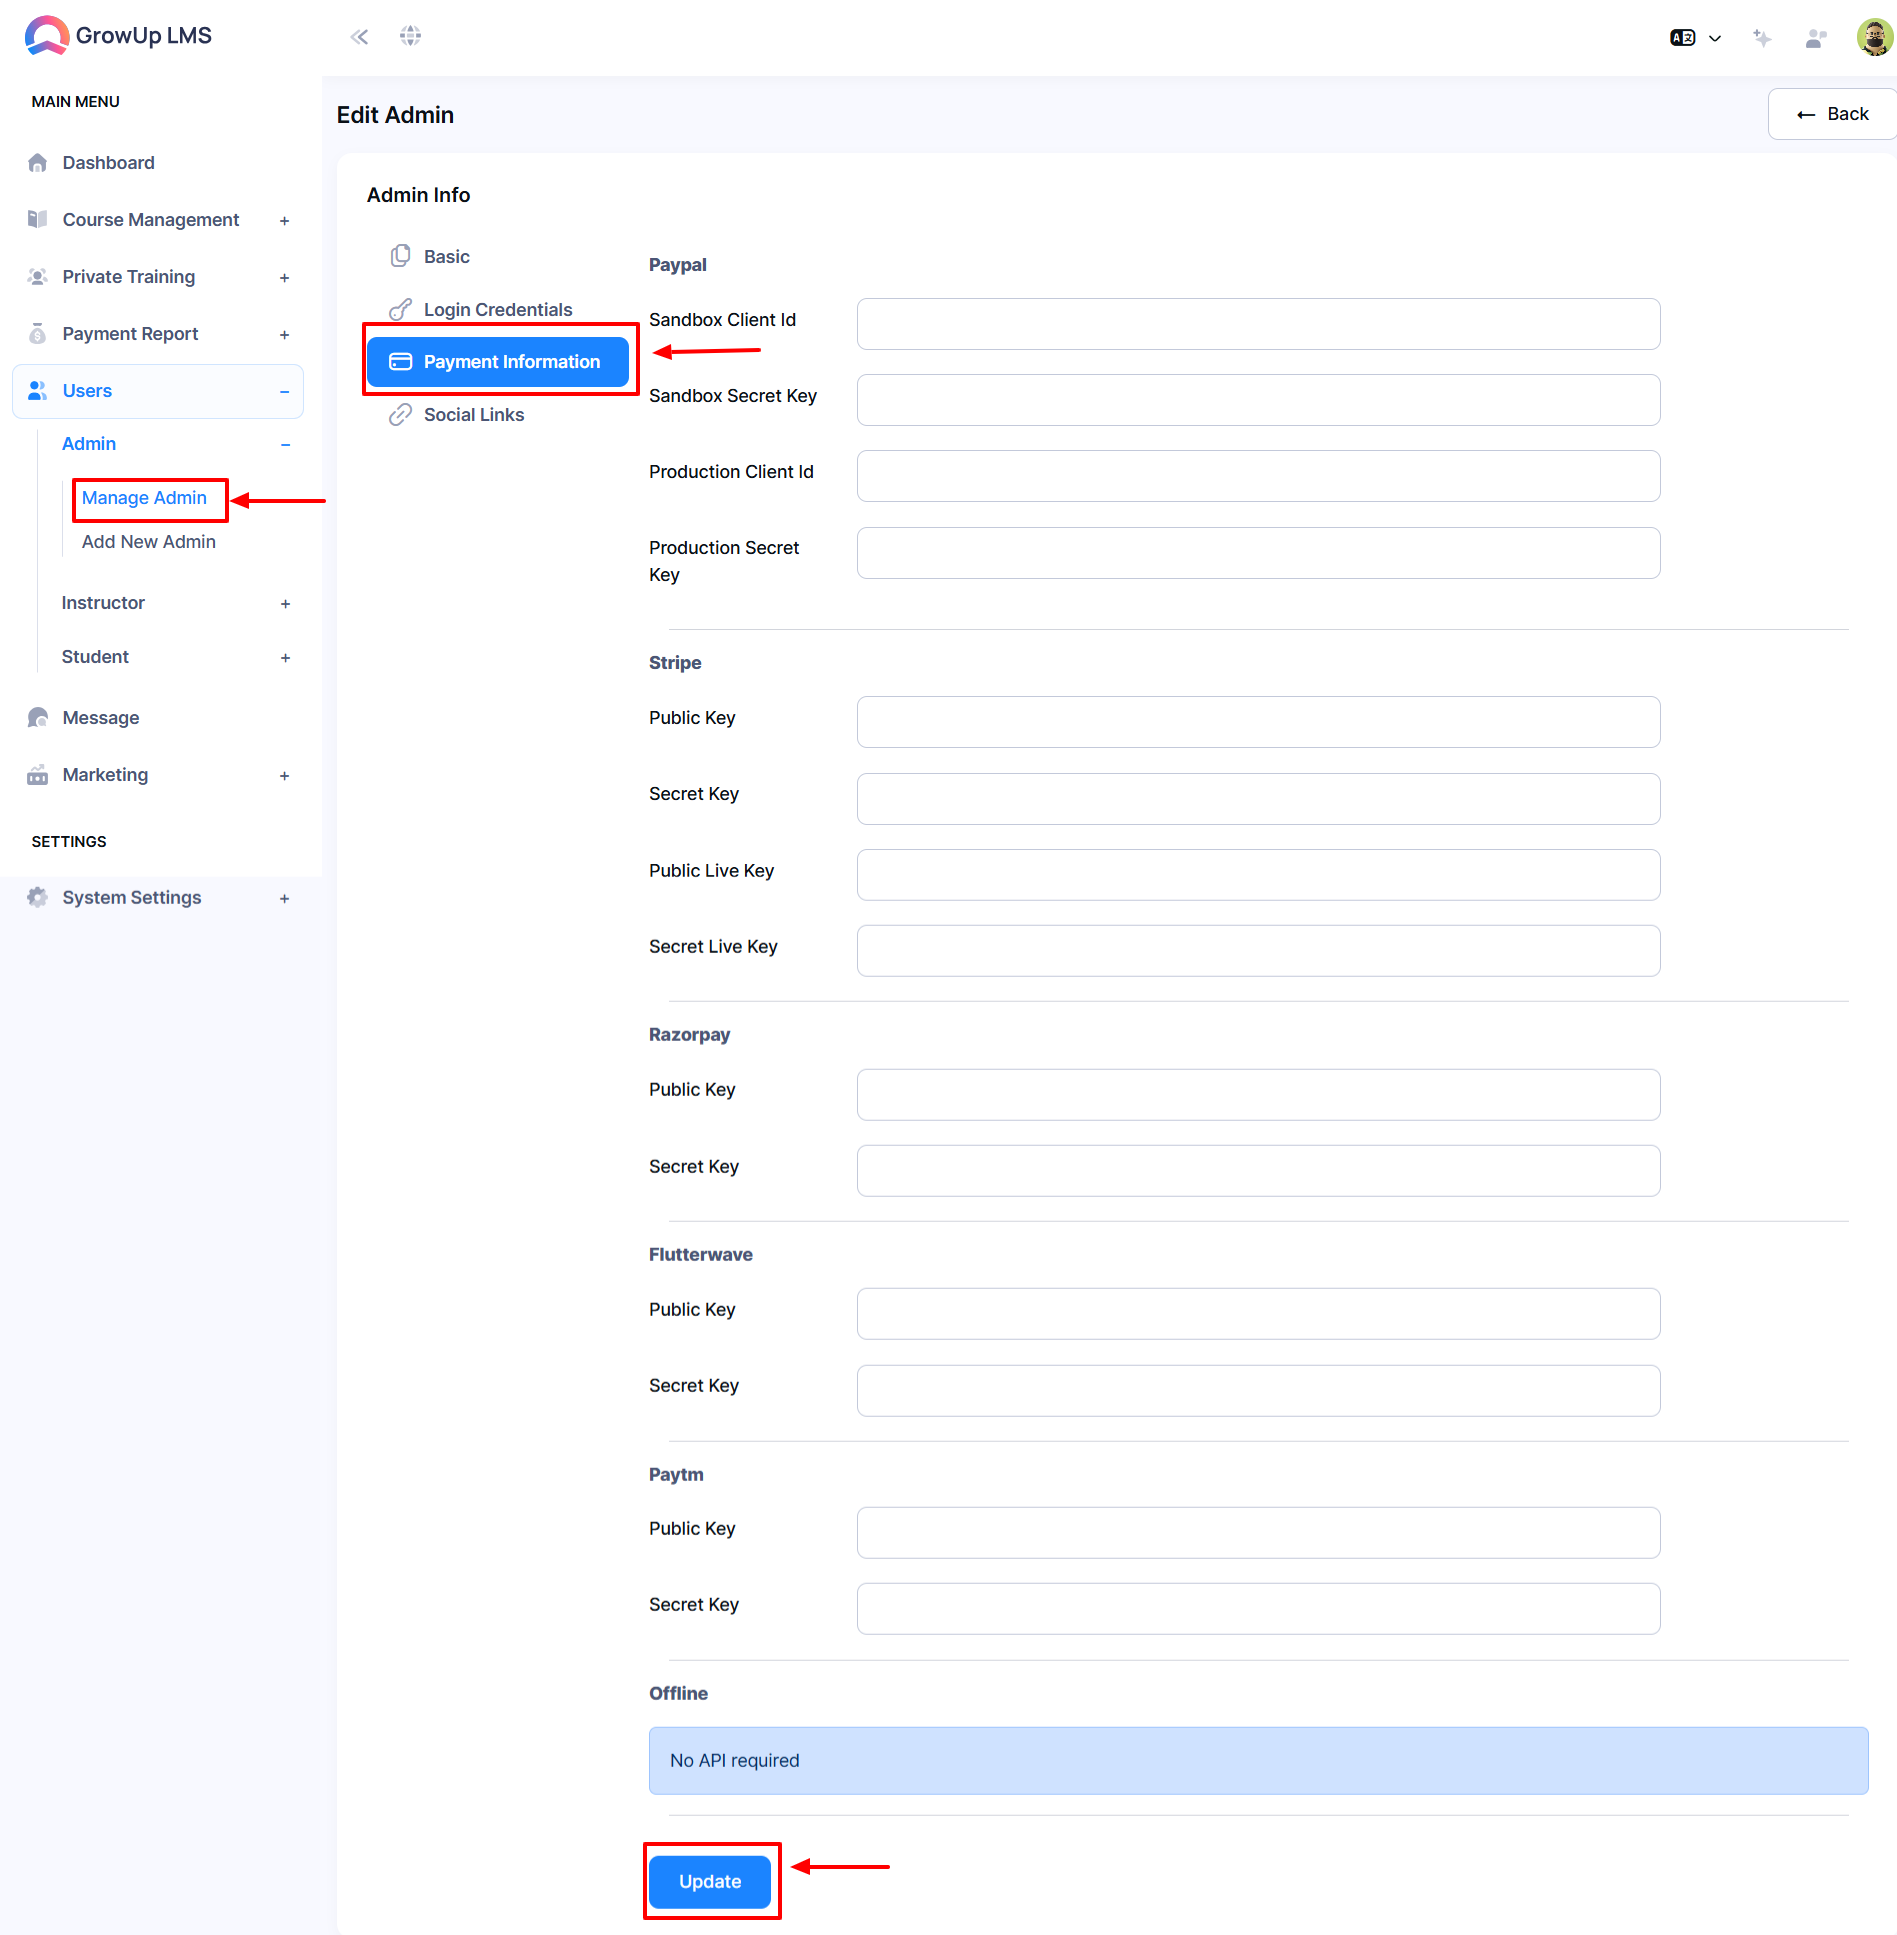
Click the "Payment Information" button a new window will pop up.
-
For Paypal payment type the necessary information in the designed format.
-
For Stripe payment type the necessary information in the designed format.
-
For Razorpay payment type the necessary information in the designed format.
-
For Flutterwave payment type the necessary information in the designed format.
-
For Paytm payment type the necessary information in the designed format.
-
Click the "Update" button to Update the information.
-
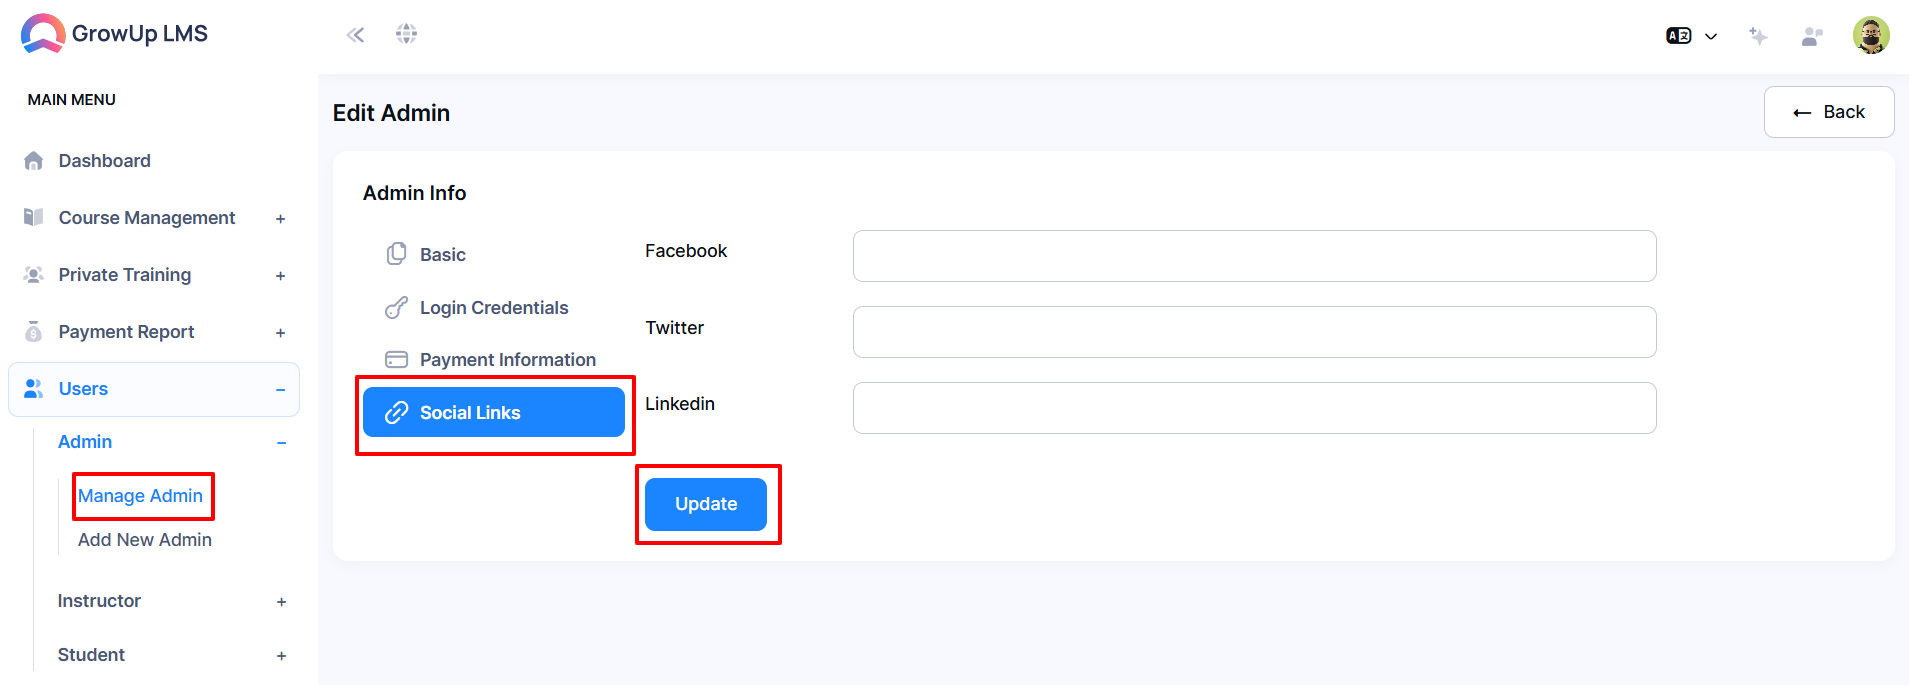
Click the "Social Link" button a new window will pop up.
-
Click the "Update" button to Update the information.

How to Delete Admin:
-
Log in to the Admin Panel.
-
Select the "User" option from the left menu.
-
Choose the "Admin" option from the sub-menu.
-
Choose the "Manage Admin" option from the sub-menu.
-
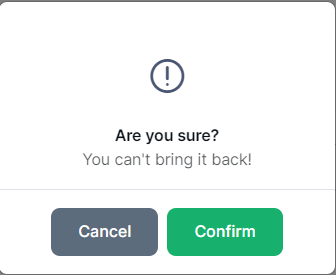
Click the "Delete" button from the option a new window will pop up.
-
If you click the "Confirm" button you cannot bring it back.

Was this article helpful to you?
Contact us and we will get back to you as soon as possible

