# How to Manage System Settings
In Atlas Laravel, System Settings helps businesses control core platform configurations. Admins can manage language, currency, time zone, and other essential settings to optimize functionality. This ensures a smooth user experience, efficient operations, and a customized platform aligned with business needs.
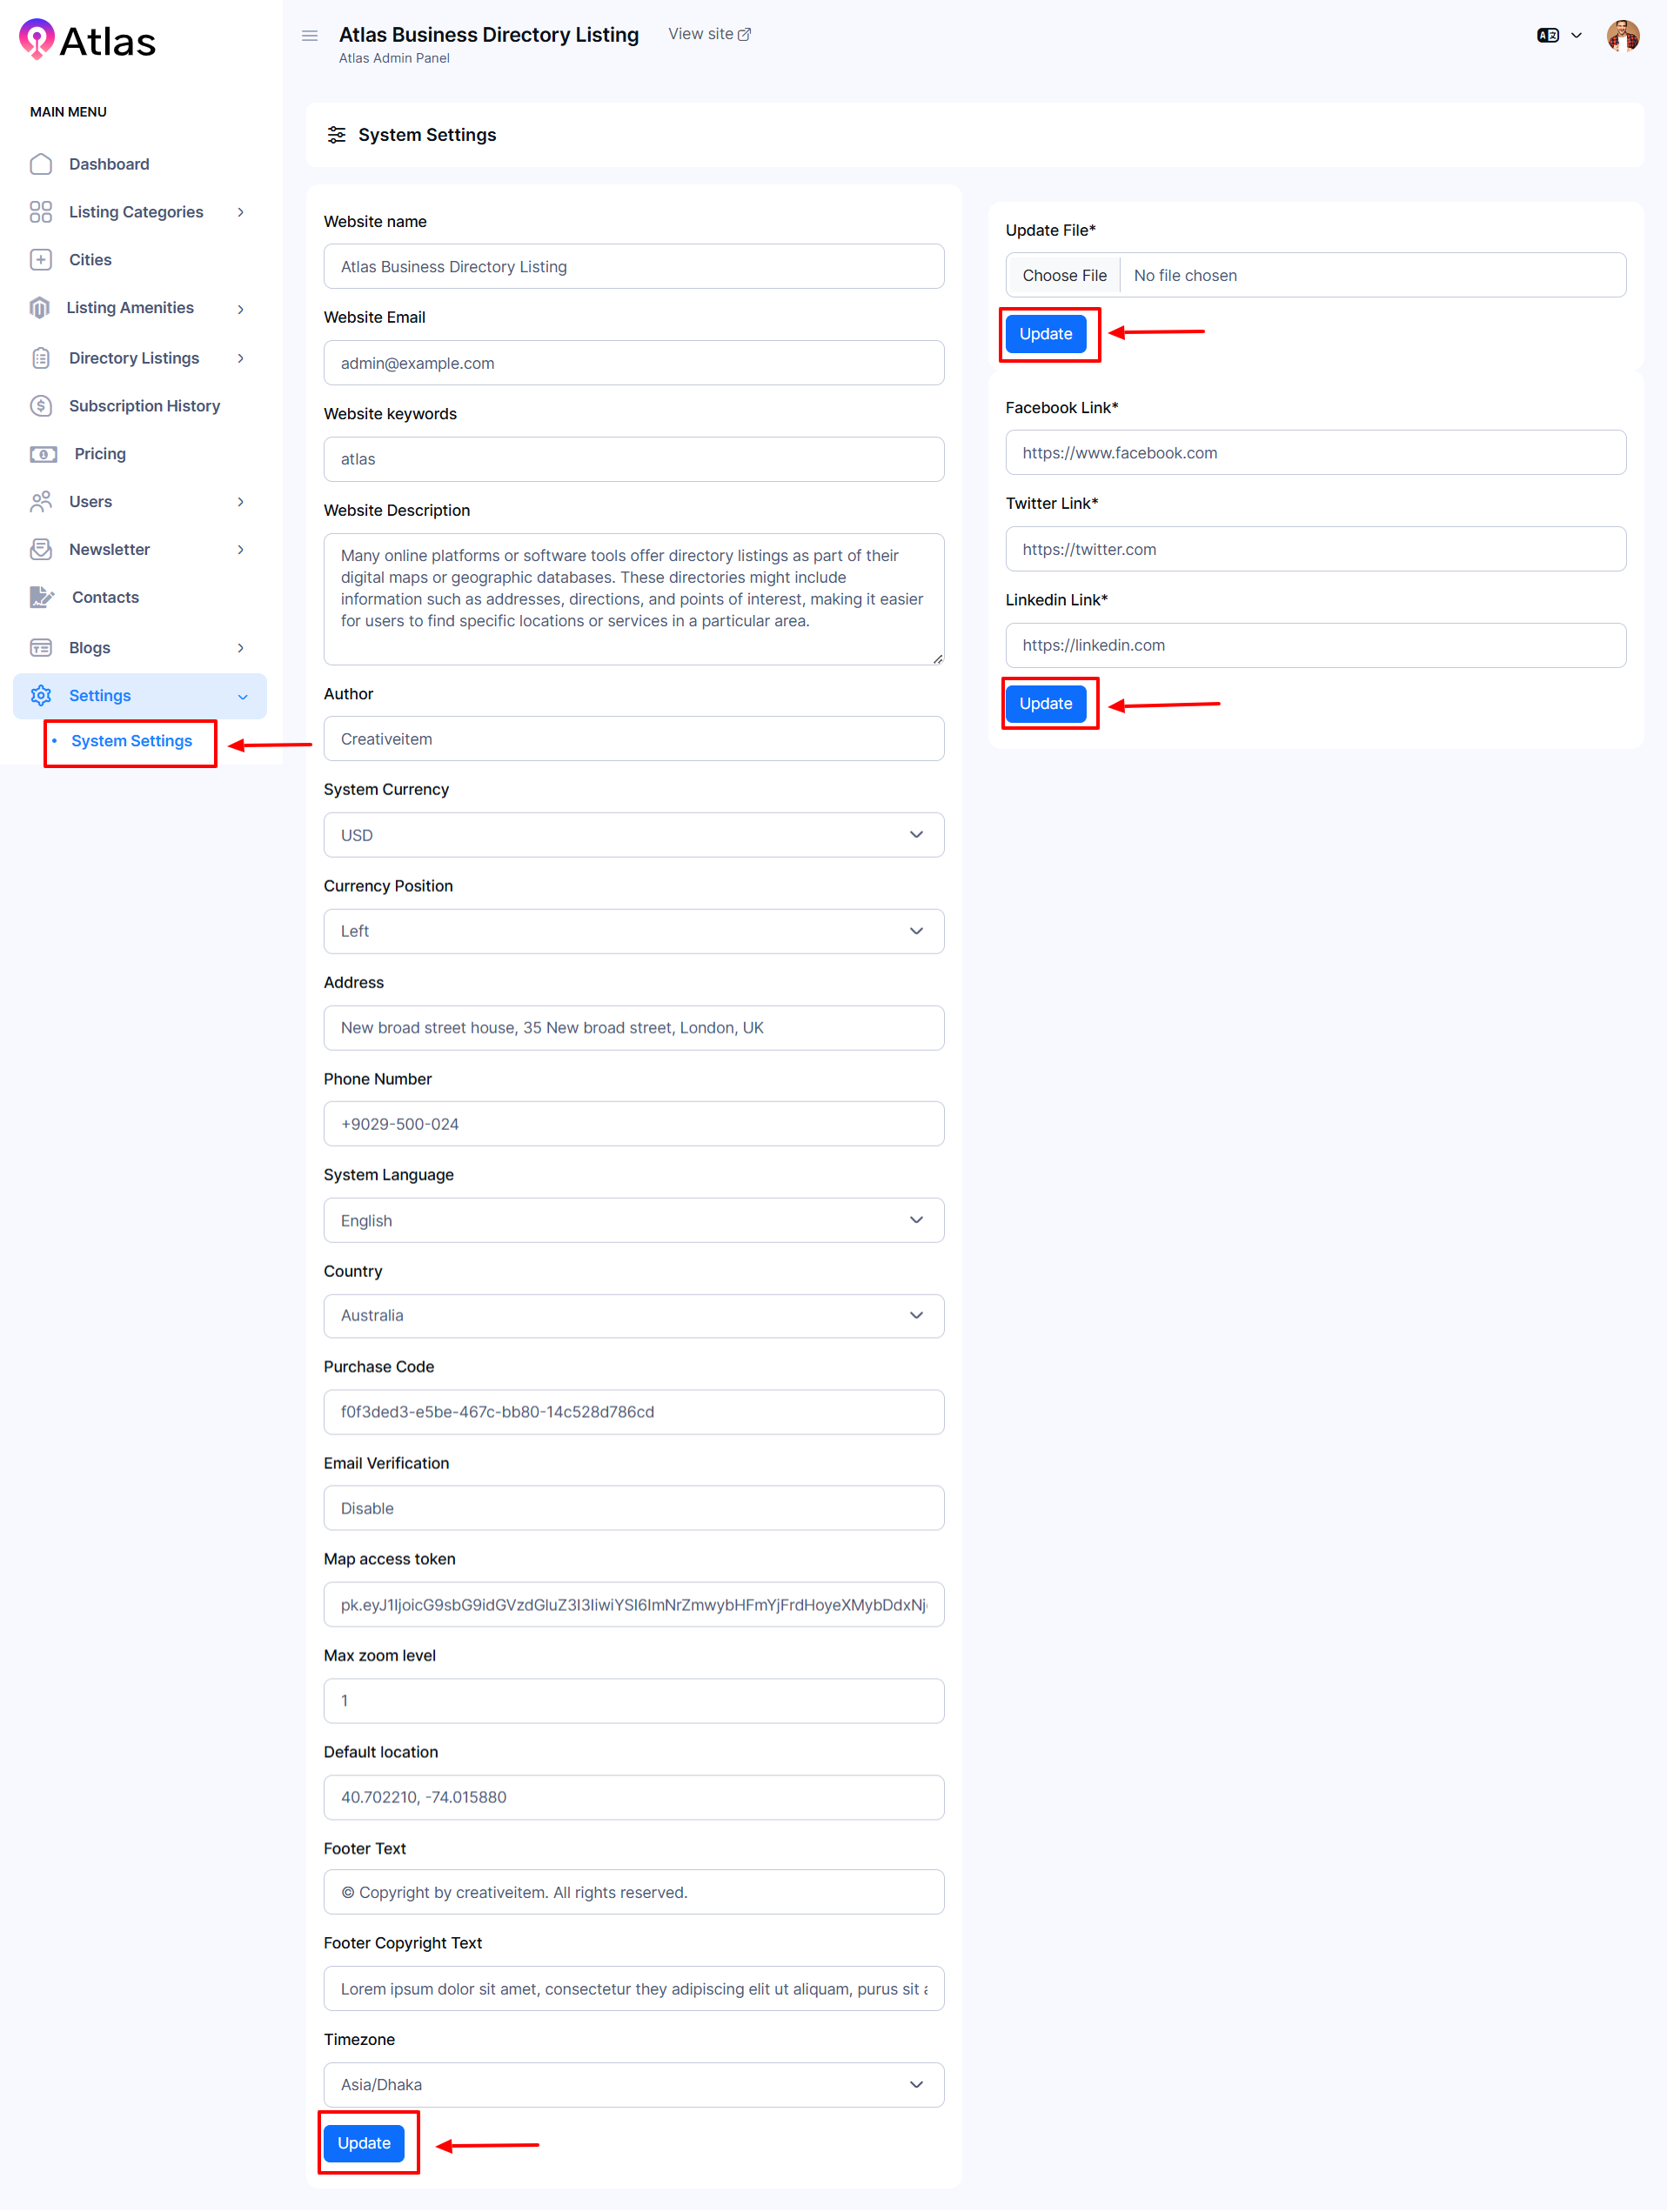
- Log in to the Admin and access the Dashboard from the Admin Panel.
- Navigate to Settings from the left menu.
- Select System Settings from the sub-menu to open the entry form.
- Fill in the required details:
-
- Website Name: Enter the desired website name.
- Website Email: Input the email address.
- Website Keyword: Enter relevant keywords.
- Website Description: Type the desired description.
- Update File: Click Choose File to upload an image, then click the Update button.
- Facebook Link: Provide the Facebook link.
- Twitter Link: Provide the Twitter link.
- LinkedIn Link: Enter the LinkedIn link, then click the Update button to update the same.
- Author: Enter the author's name or description.
- System Currency: Select the preferred currency from the dropdown.
- Currency Position: Choose the currency position.
- Address: Enter the business address.
- Phone Number: Provide a contact number.
- System Language: Choose the language from the dropdown.
- Country: Select the country.
- Email Verification: Enable or disable email verification.
- Map Access Token: Enter the map access token.
- Max Zoom Level: Input the maximum zoom level.
- Default Location: Set the default location.
- Footer Text: Type the footer text.
- Footer Copyright Text: Enter copyright information.
- Timezone: Select the appropriate timezone.
-
- After completing all fields, click Update to apply and save the changes.