How to Manage Students
Managing Students involves a comprehensive set of tasks that instructors or administrators perform to support student learning and track their progress. Like: Enrollment and User Management, Course Access and Progress Monitoring, Guiding and Assessment, Communication, Attendance and Scheduling, etc.
How to add a new Student
- Log in to the Admin Panel.
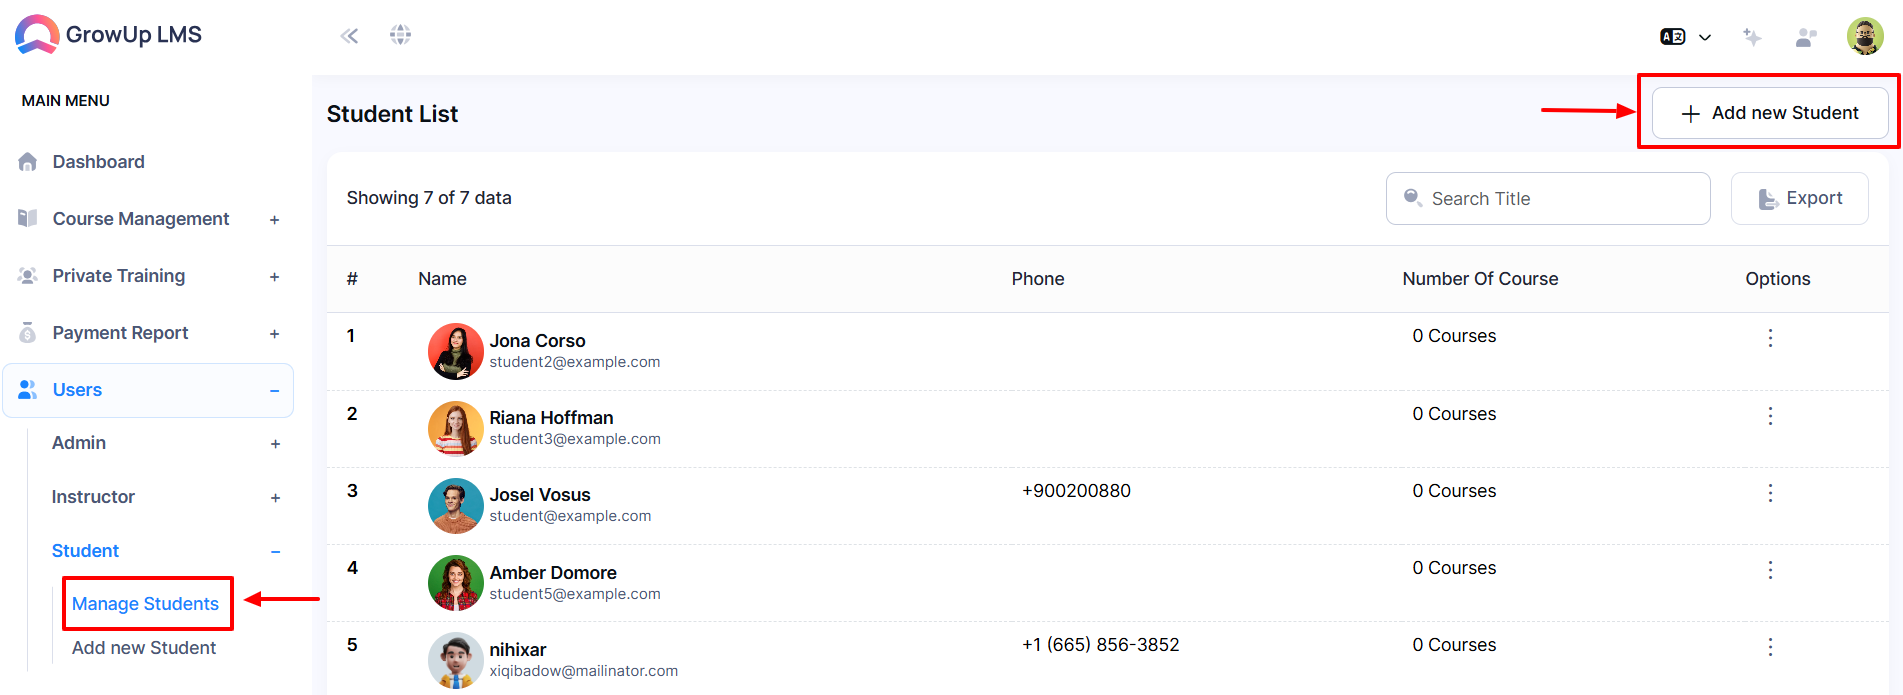
- Navigate to the Users section in the left menu and select Student from the sub-menu.
- Choose Add New Student from the sub-menu or click the Add New Student button to open a new window.
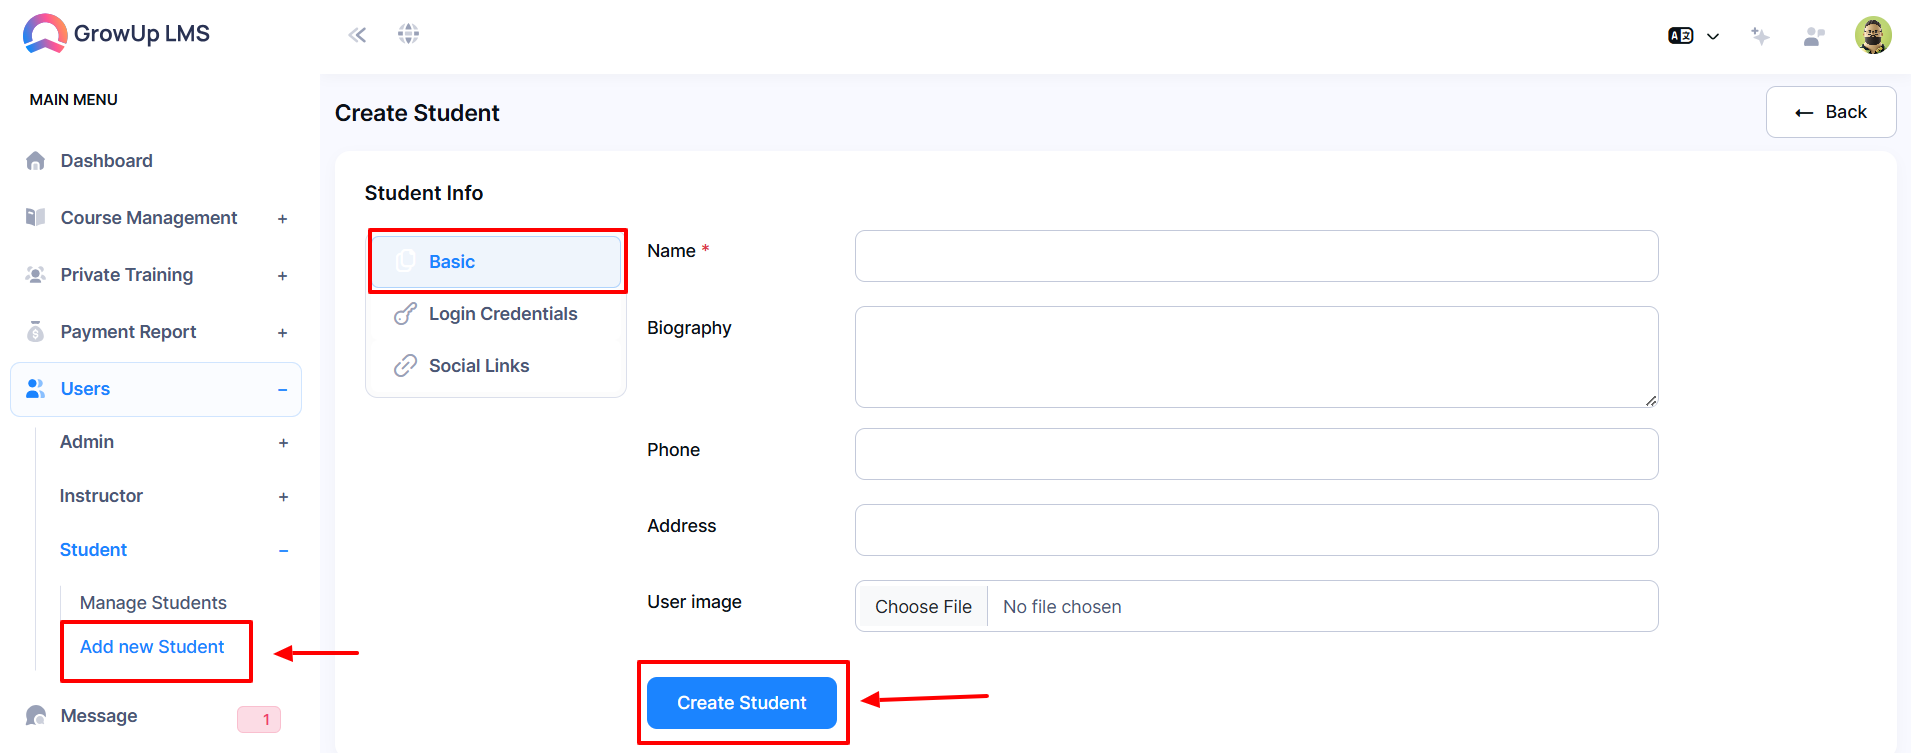
- Fill in the required details:
-
-
-
Name in the Name field.
-
Biography in the Biography field.
-
Phone Number in the Phone Number field.
-
Address in the Address field.
- Use the Choose File button to upload the student's image.
- Click Create Student to save the information.
- If needed, click the Back button to return to the previous window.
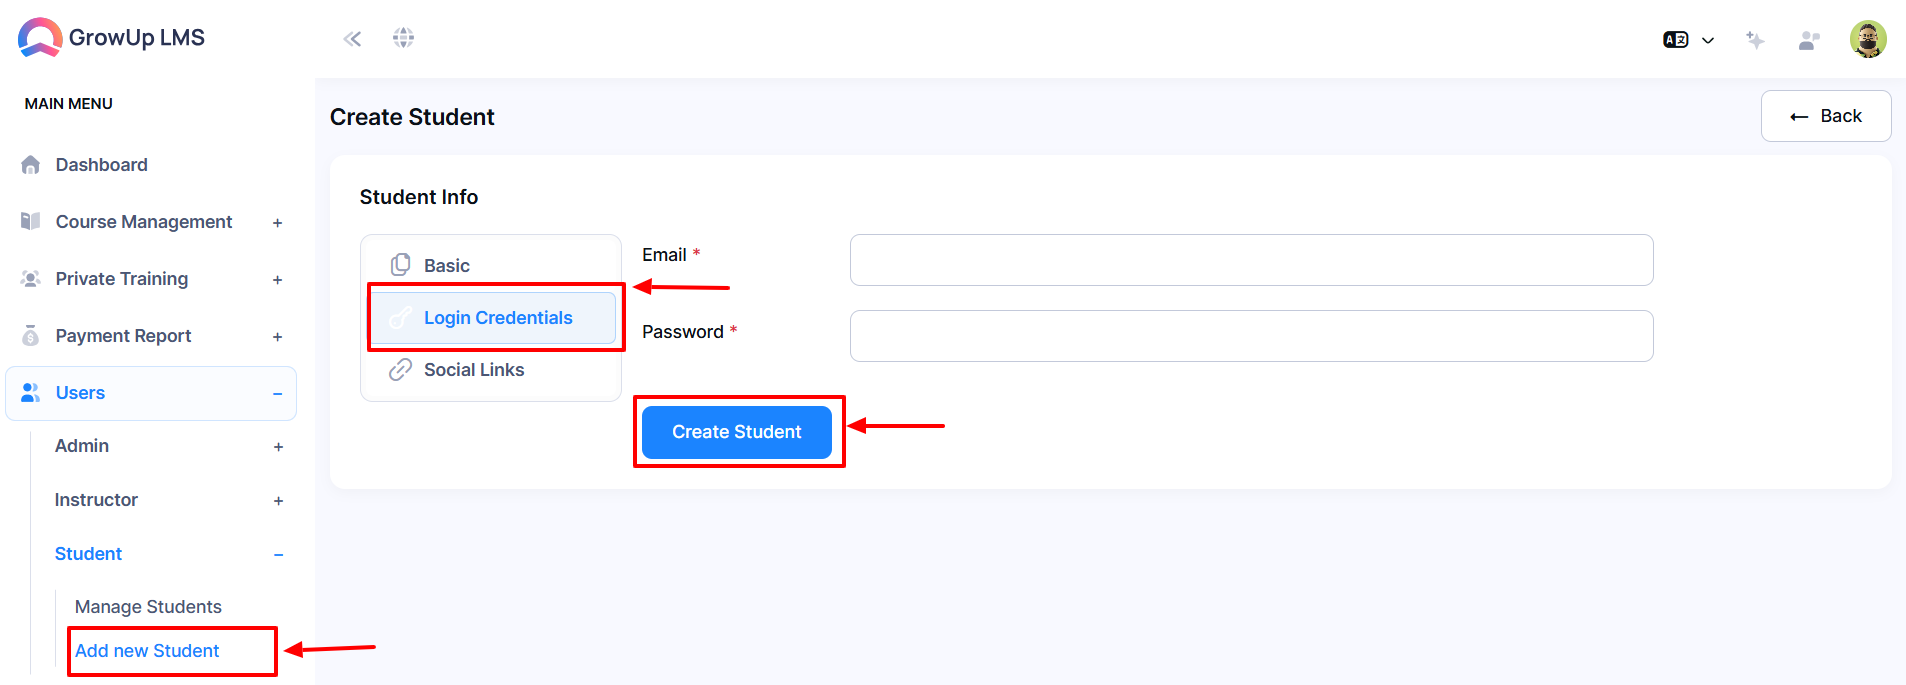
- In the Student Info menu, click Login Credentials.
- Enter the following:
- Click Create Student to update the login details.
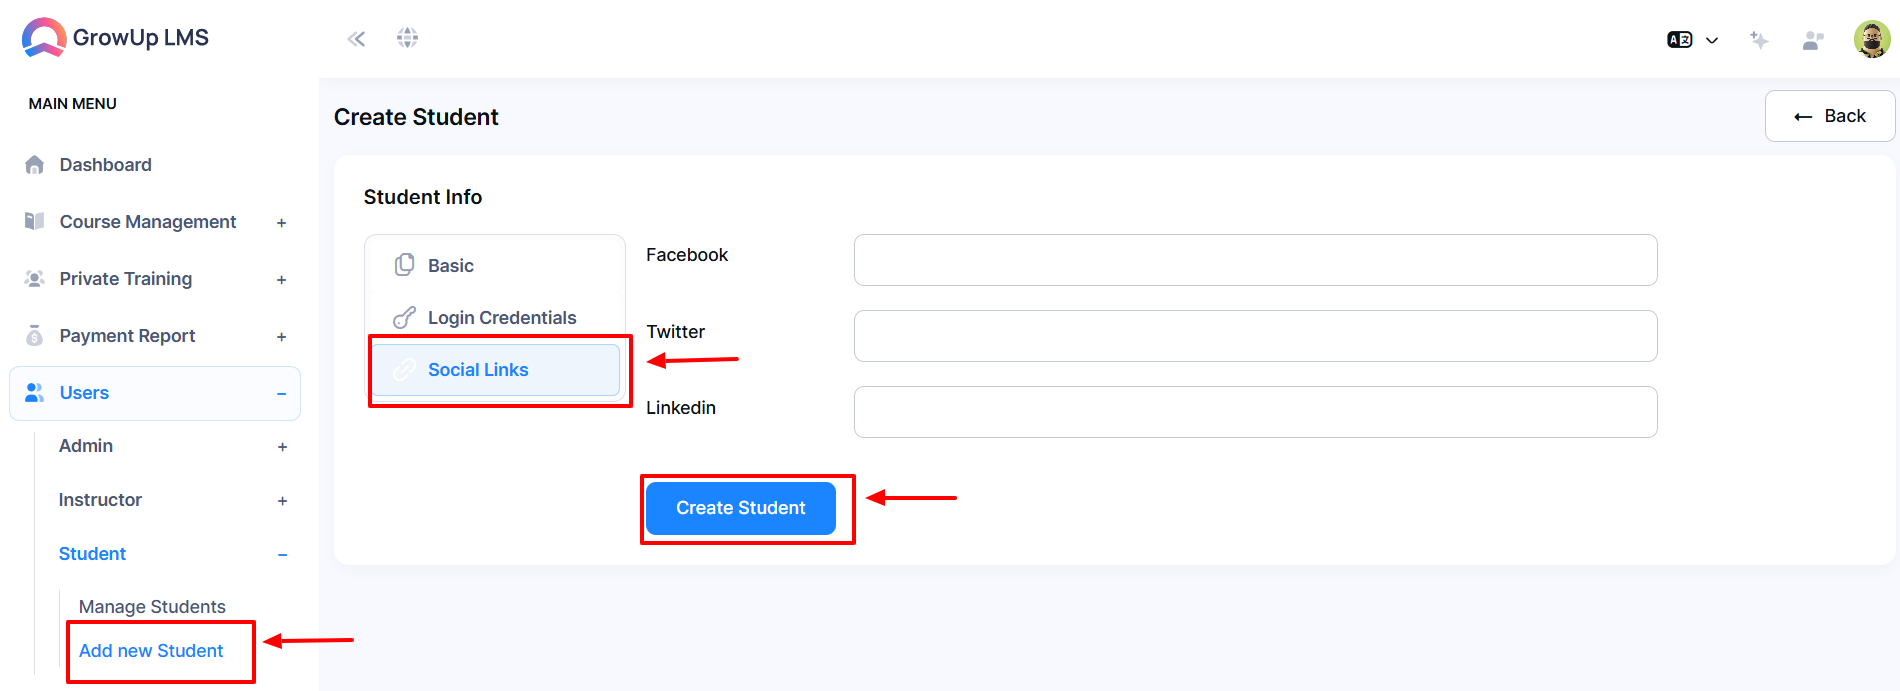
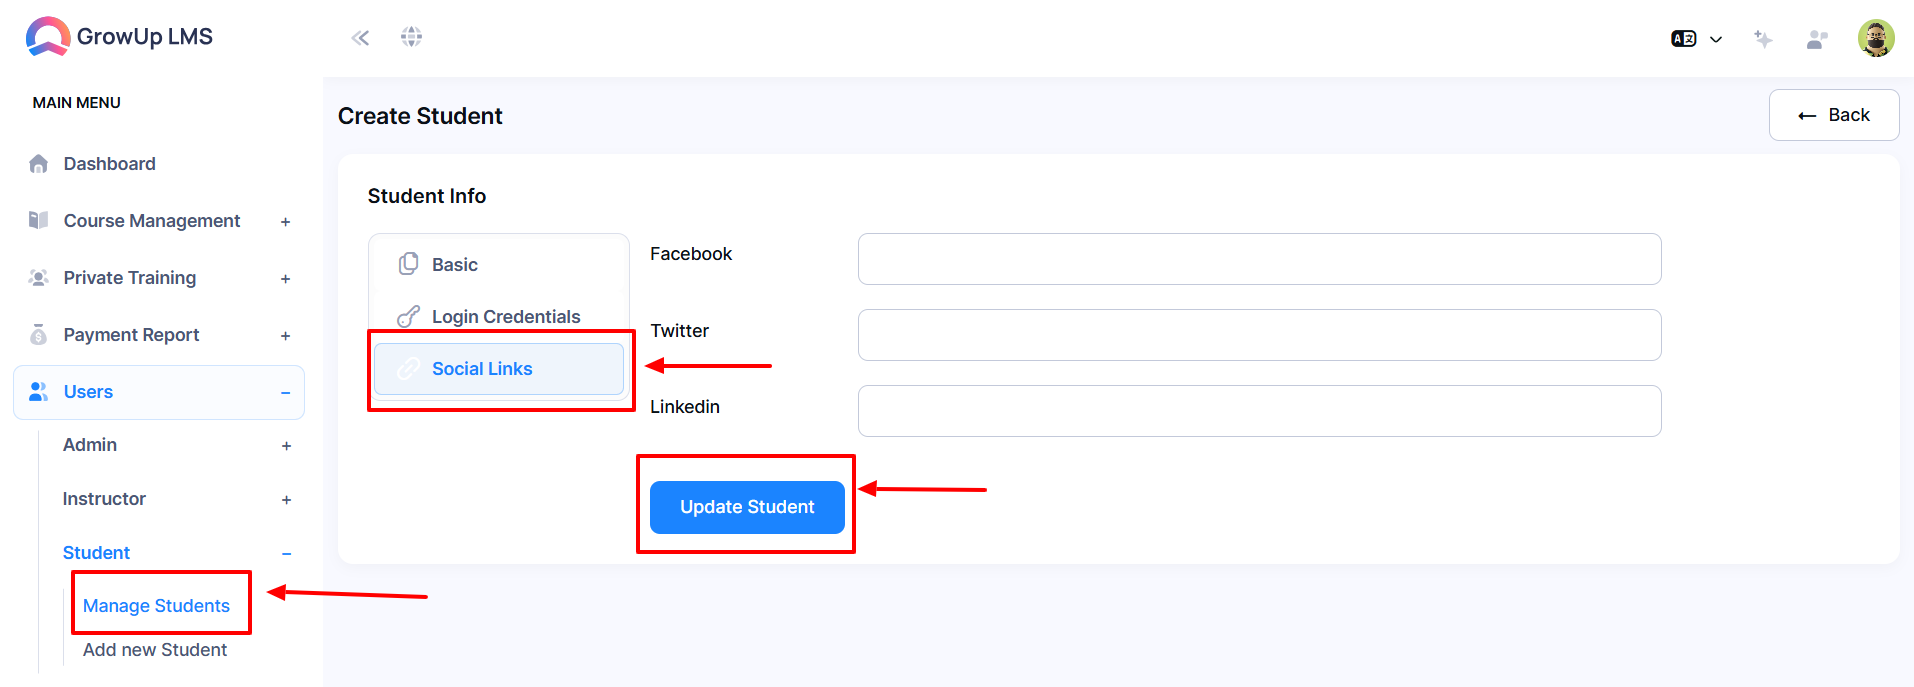
- In the Student Info menu, click Social Links.
- Provide the following links:
-
-
-
Facebook in the Facebook field.
-
Twitter in the Twitter field.
-
LinkedIn in the LinkedIn field.
- Click Create Student to save the social links.
How to Manage Students
- Log in to the Admin Panel.
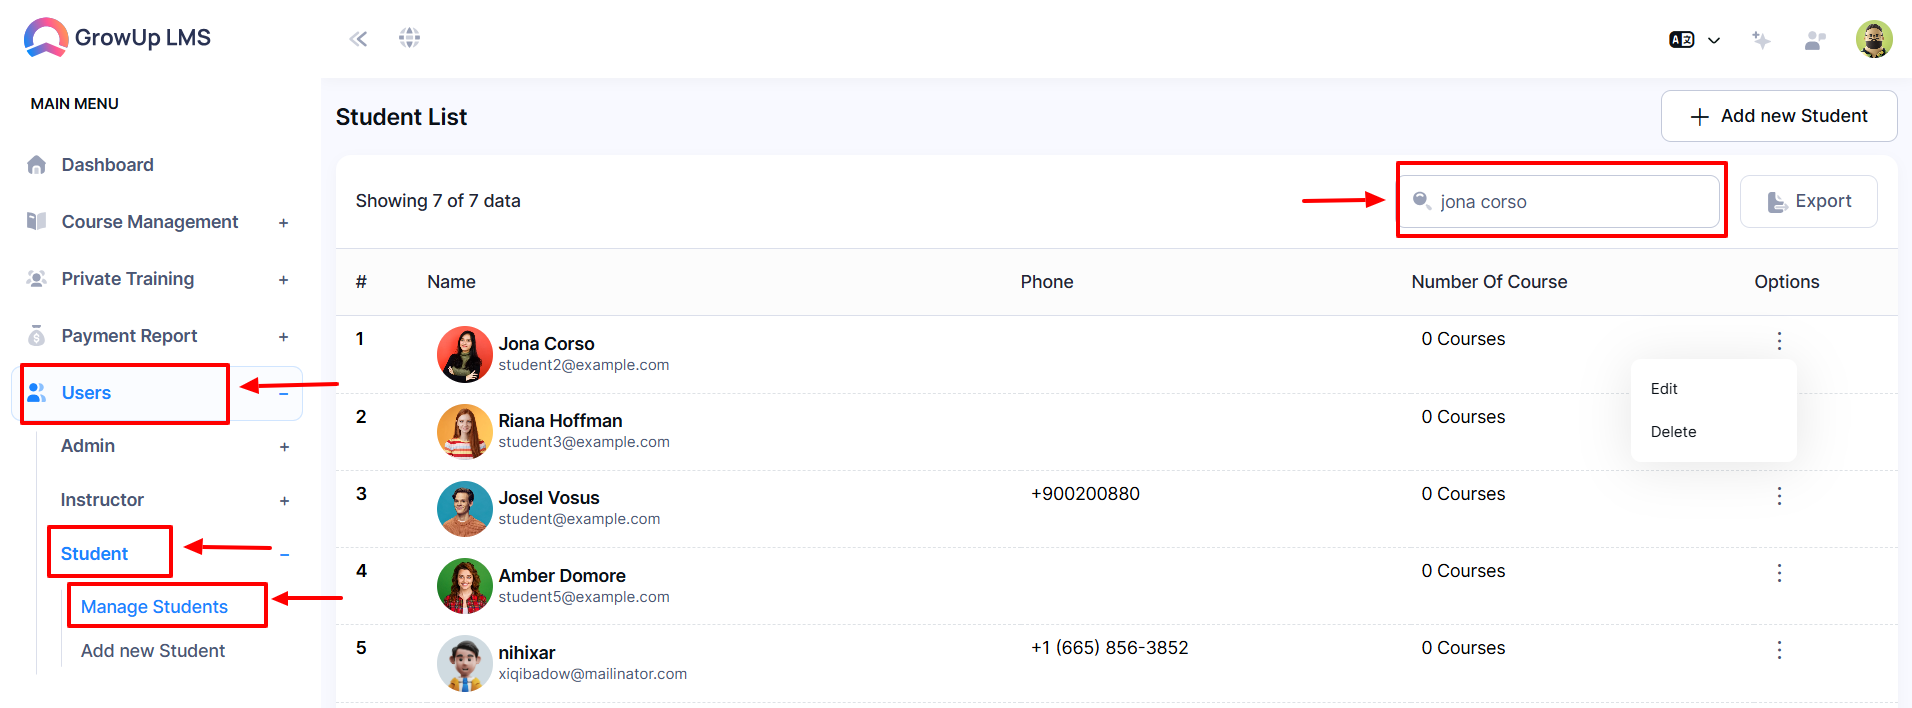
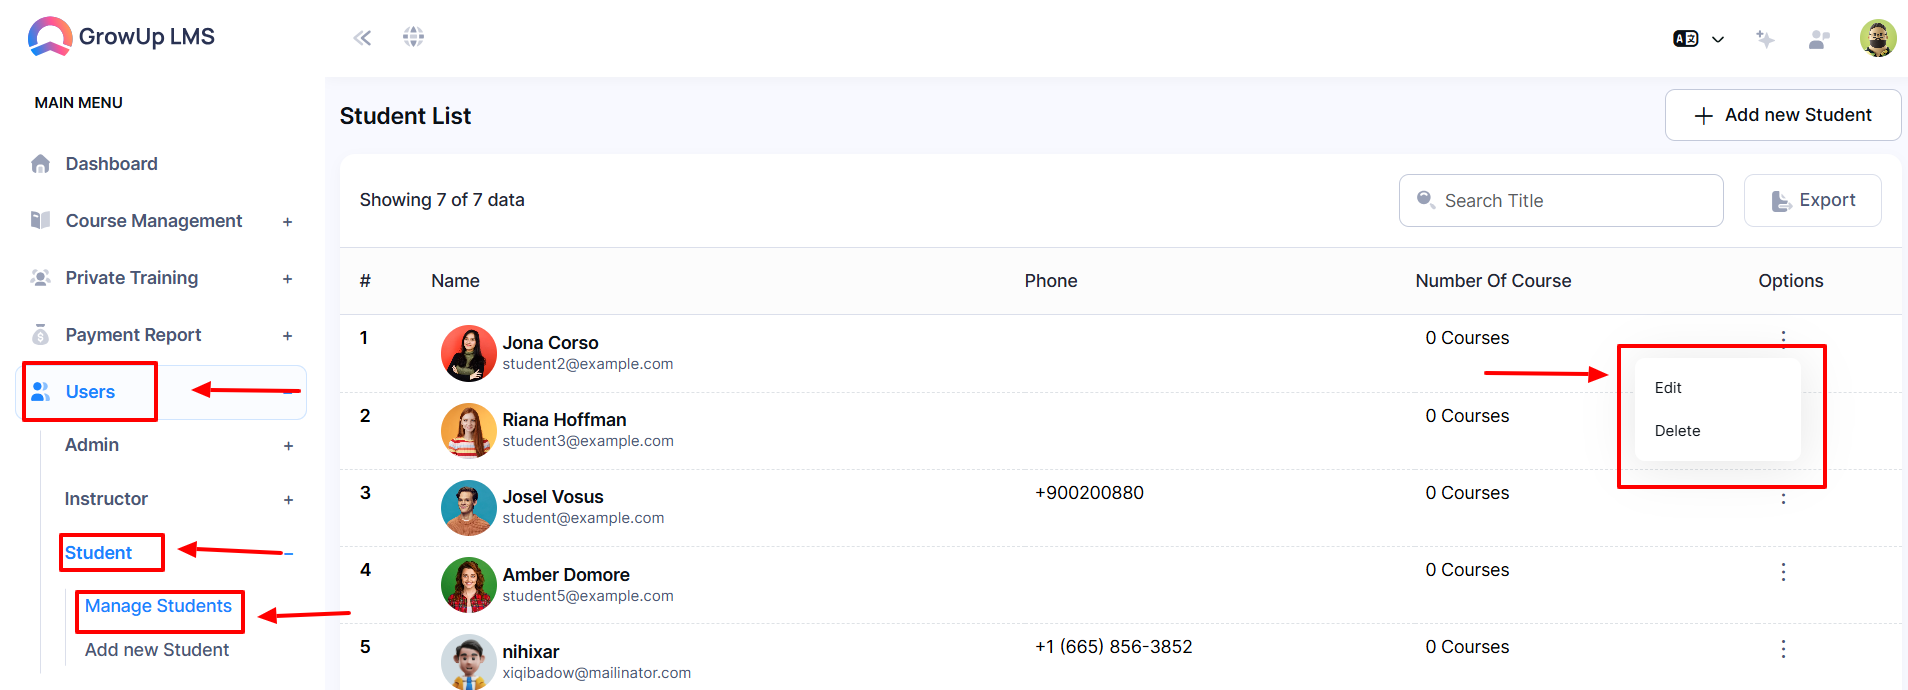
- Navigate to the Users section from the left menu and select Student from the sub-menu.
- Click Manage Student from the sub-menu.
- Enter the Student Name in the search bar.
- Click the Search button to display the desired results in a new window.
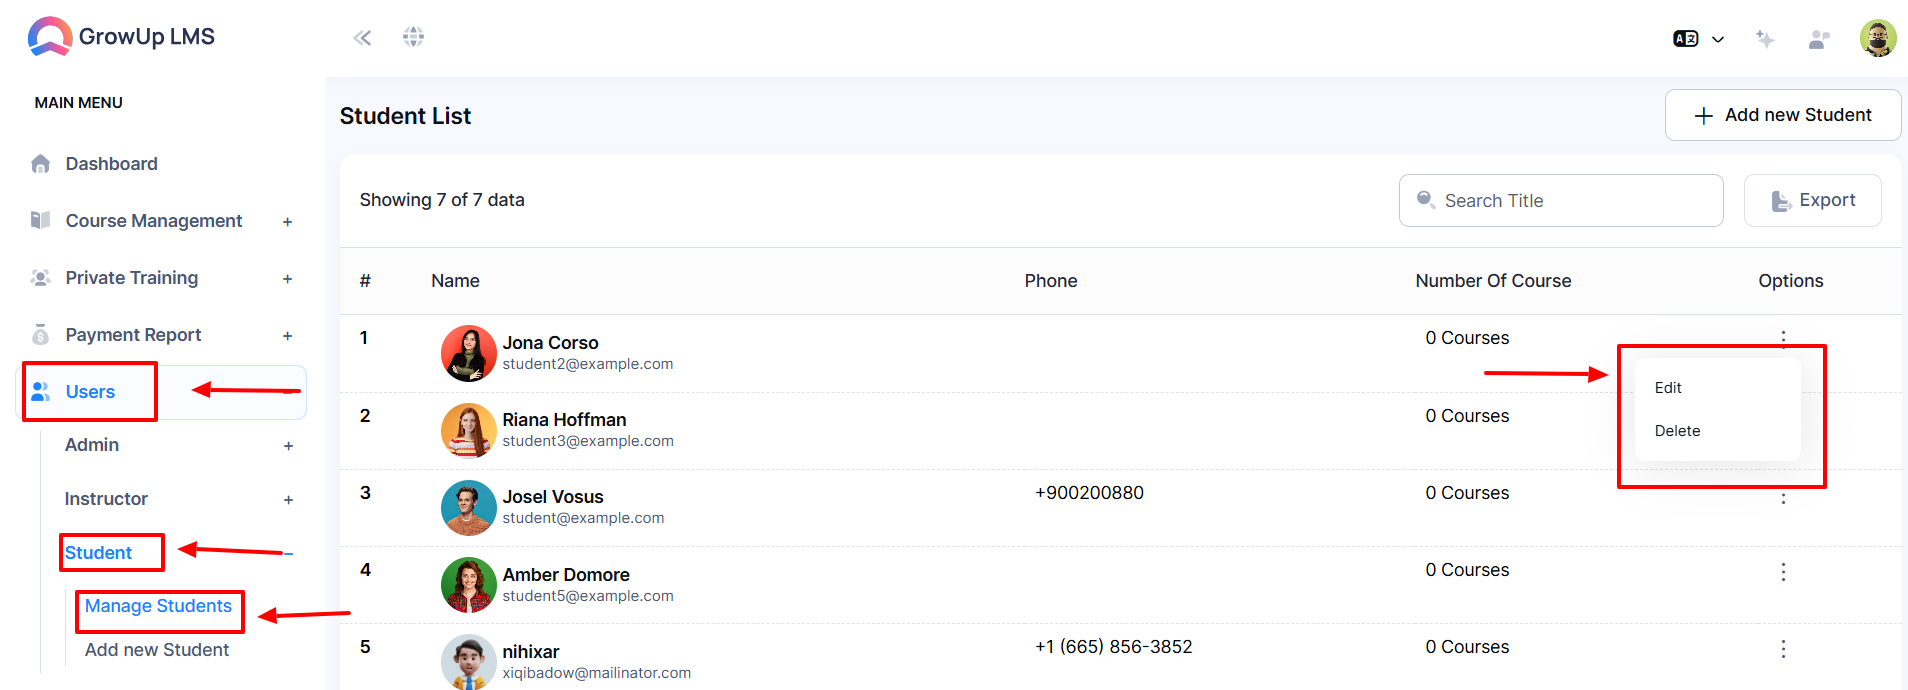
- Click the three dots under Options to open a menu with the following actions:
How to Edit Student
- Log in to the Admin Panel.
- Navigate to the Users section in the left menu and select Student from the sub-menu.
- Choose Manage Student from the sub-menu.
- Click the Edit button under the three-dot menu; a new window will appear.
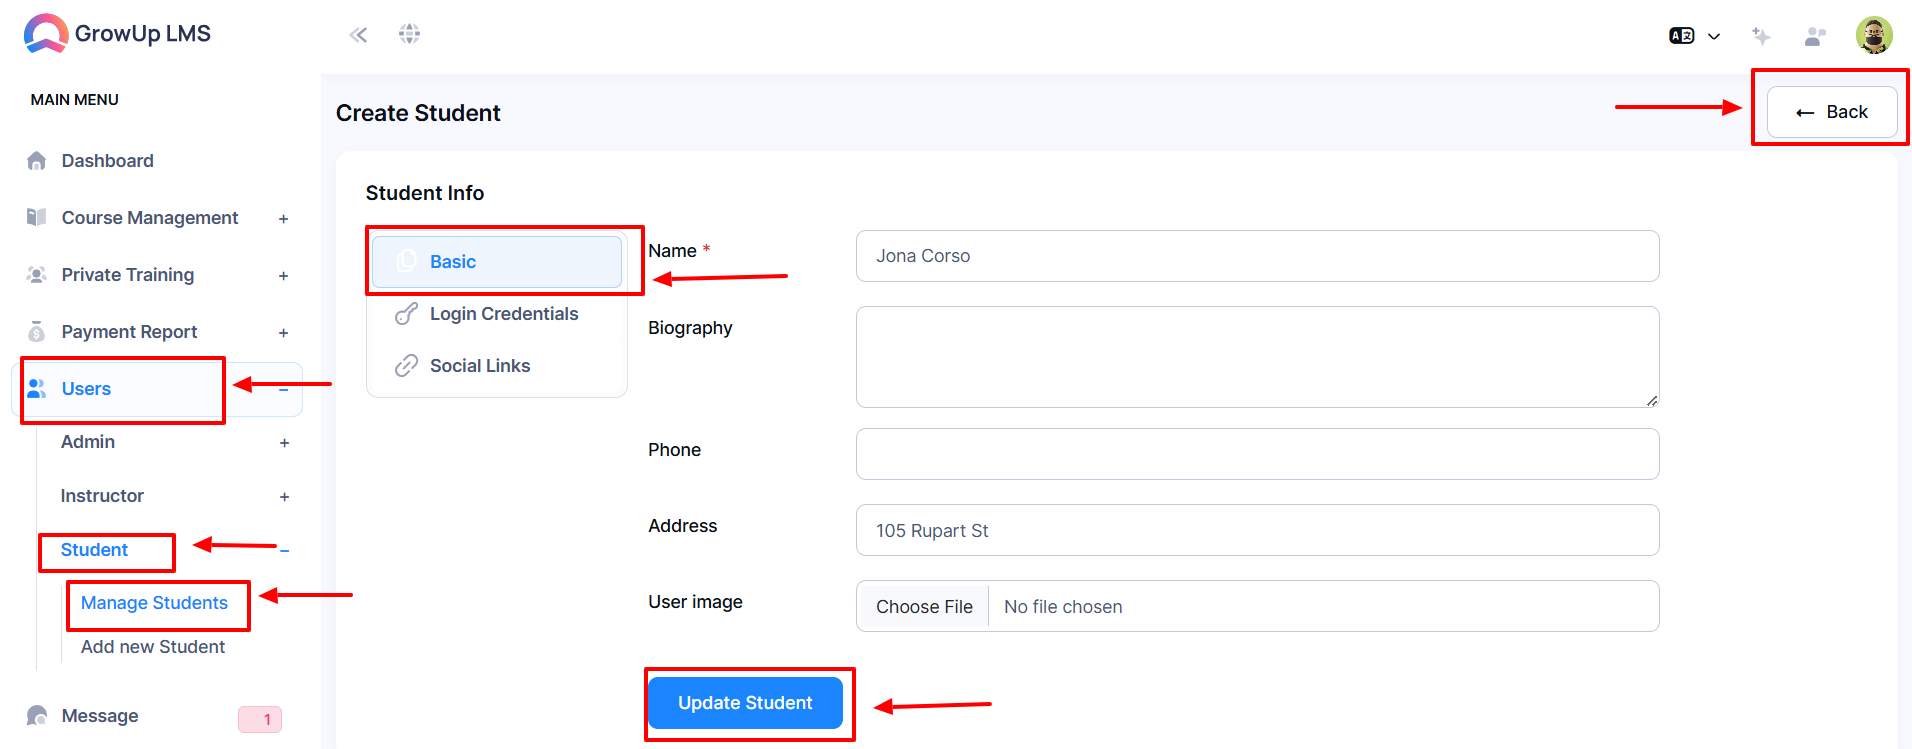
- Update the necessary details:
-
-
-
-
Name in the Name field.
-
Biography in the Biography field.
-
Phone Number in the Phone Number field.
-
Address in the Address field.
- Use the Choose File button to upload or change the student's image.
- Click Update Student to save the changes.
- To return to the previous window, click the Back button.
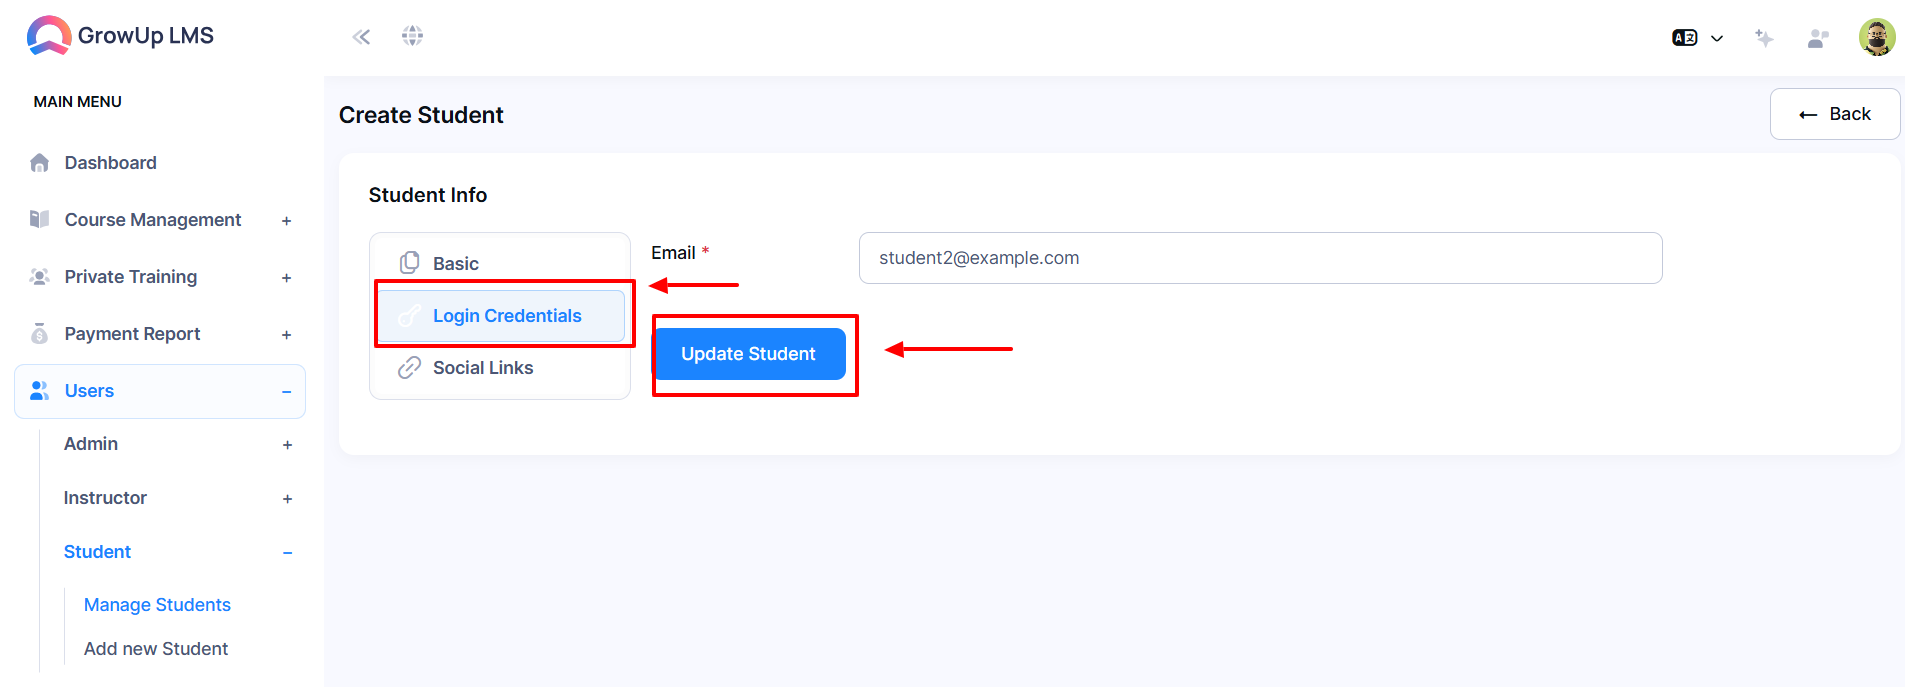
- In the Student Info menu, select Login Credentials.
- Enter the Email in the Email field.
- Click Update Student to save the credentials.
- In the Student Info menu, click Social Links.
- Update the following:
-
-
-
-
Facebook in the Facebook field.
-
Twitter in the Twitter field.
-
LinkedIn in the LinkedIn field.
- Click Update Student to save the social links.
How to Delete Students
- Log in to the Admin Panel.
- Navigate to the Users section in the left menu and select Student from the sub-menu.
- Choose Manage Student from the sub-menu.
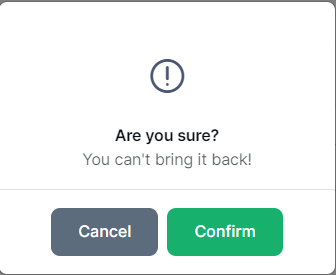
- Click the Delete button under the three-dot menu; a confirmation window will appear.
- Click Confirm to permanently delete the student. Note: This action is irreversible.
Was this article helpful to you?
How can we help?
Contact us and we will get back to you as soon as possible
