Manage Instructors
Managing instructors involves a range of administrative and organizational tasks to streamline and support instructors' roles in delivering and managing courses. Effective instructor management contributes to a well-structured, supportive environment that benefits both instructors and learners.
In addition to that you can add new instructors, handle their payouts, and manage other details as an admin of the system.
How to Add New Instructor:
-
Log in to the Admin Panel.
-
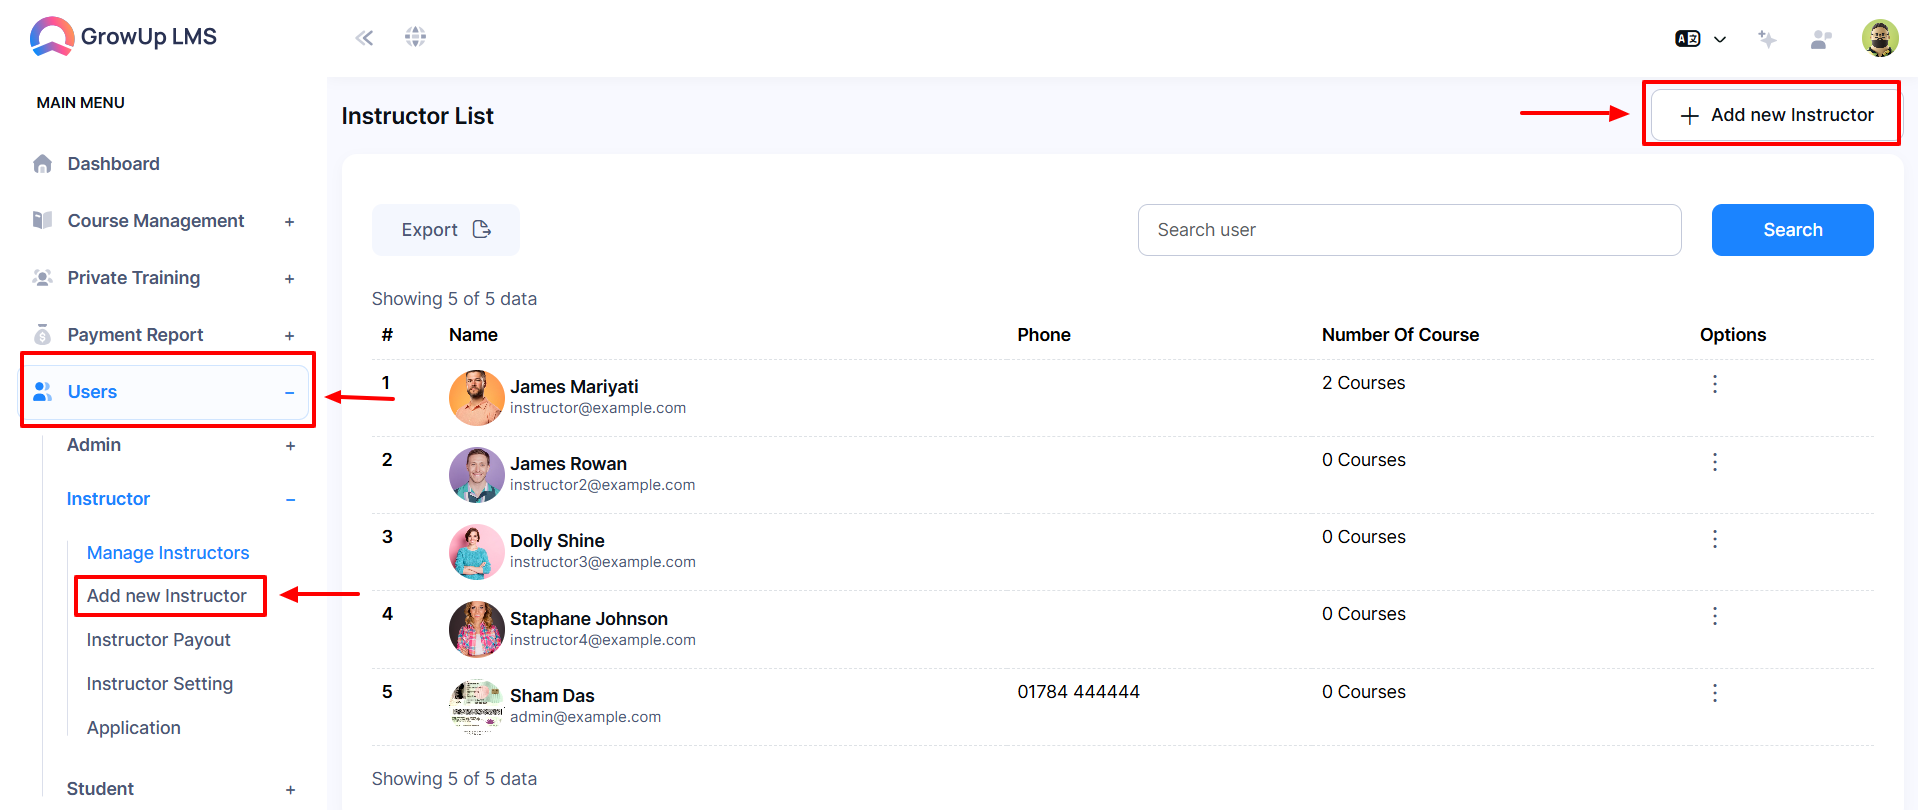
Select the "User" option from the left menu.
-
Choose the "Instructor" option from the left sub-menu.
-
Choose the "Manage Instructors" option from the left sub-menu.
-
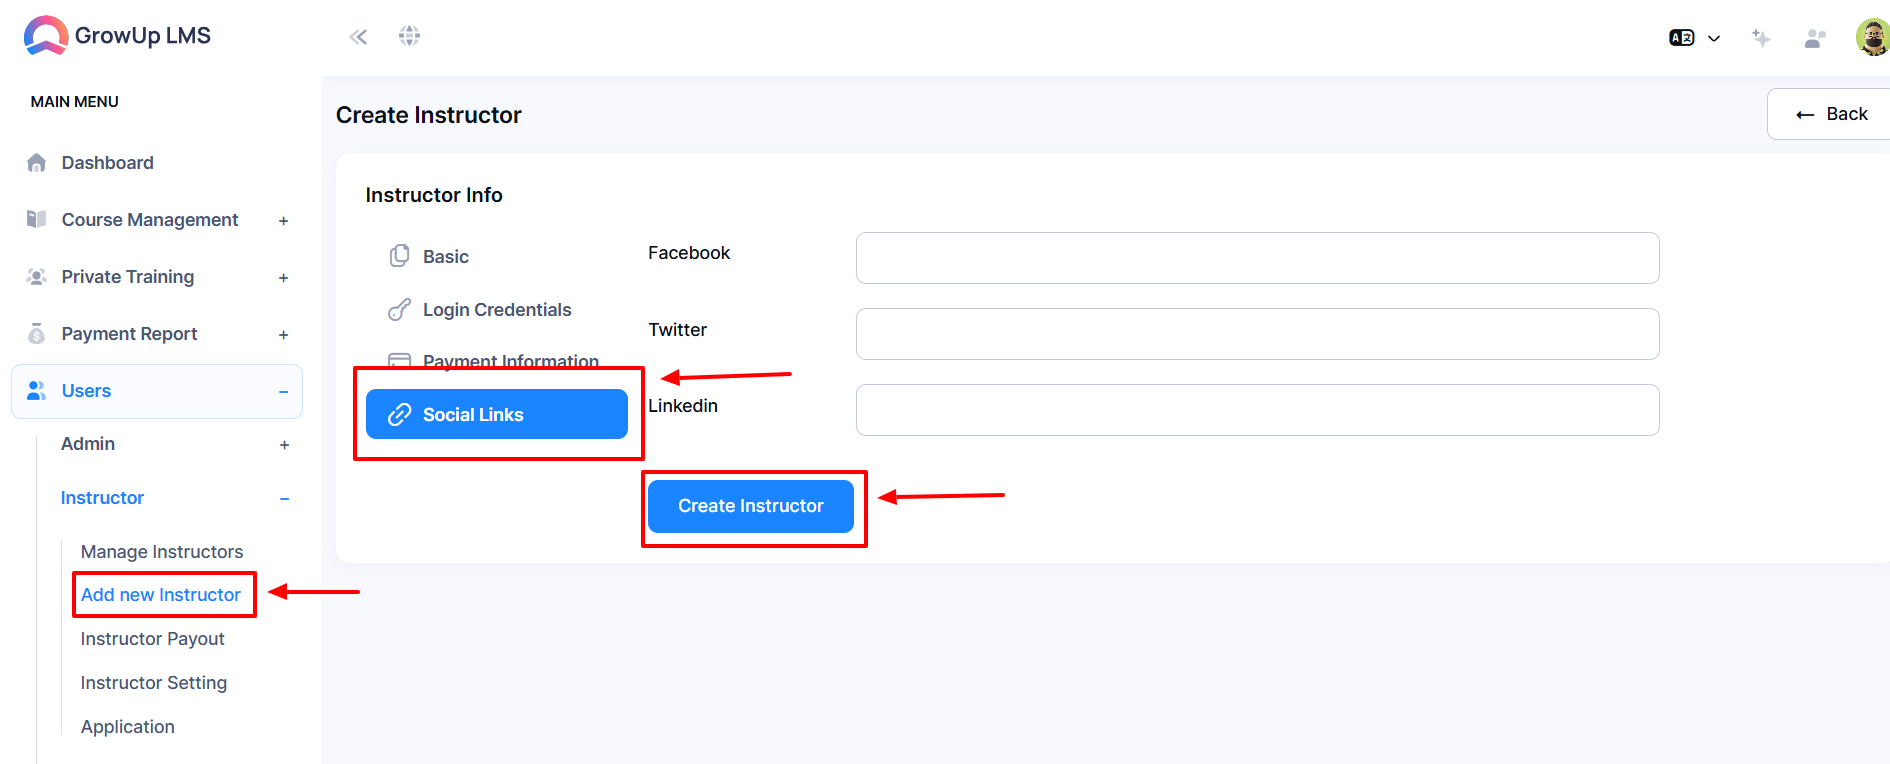
Choose the "Add New Instructor" option from the left sub-menu or click the Add New Instructor button a new window will pop up.
-
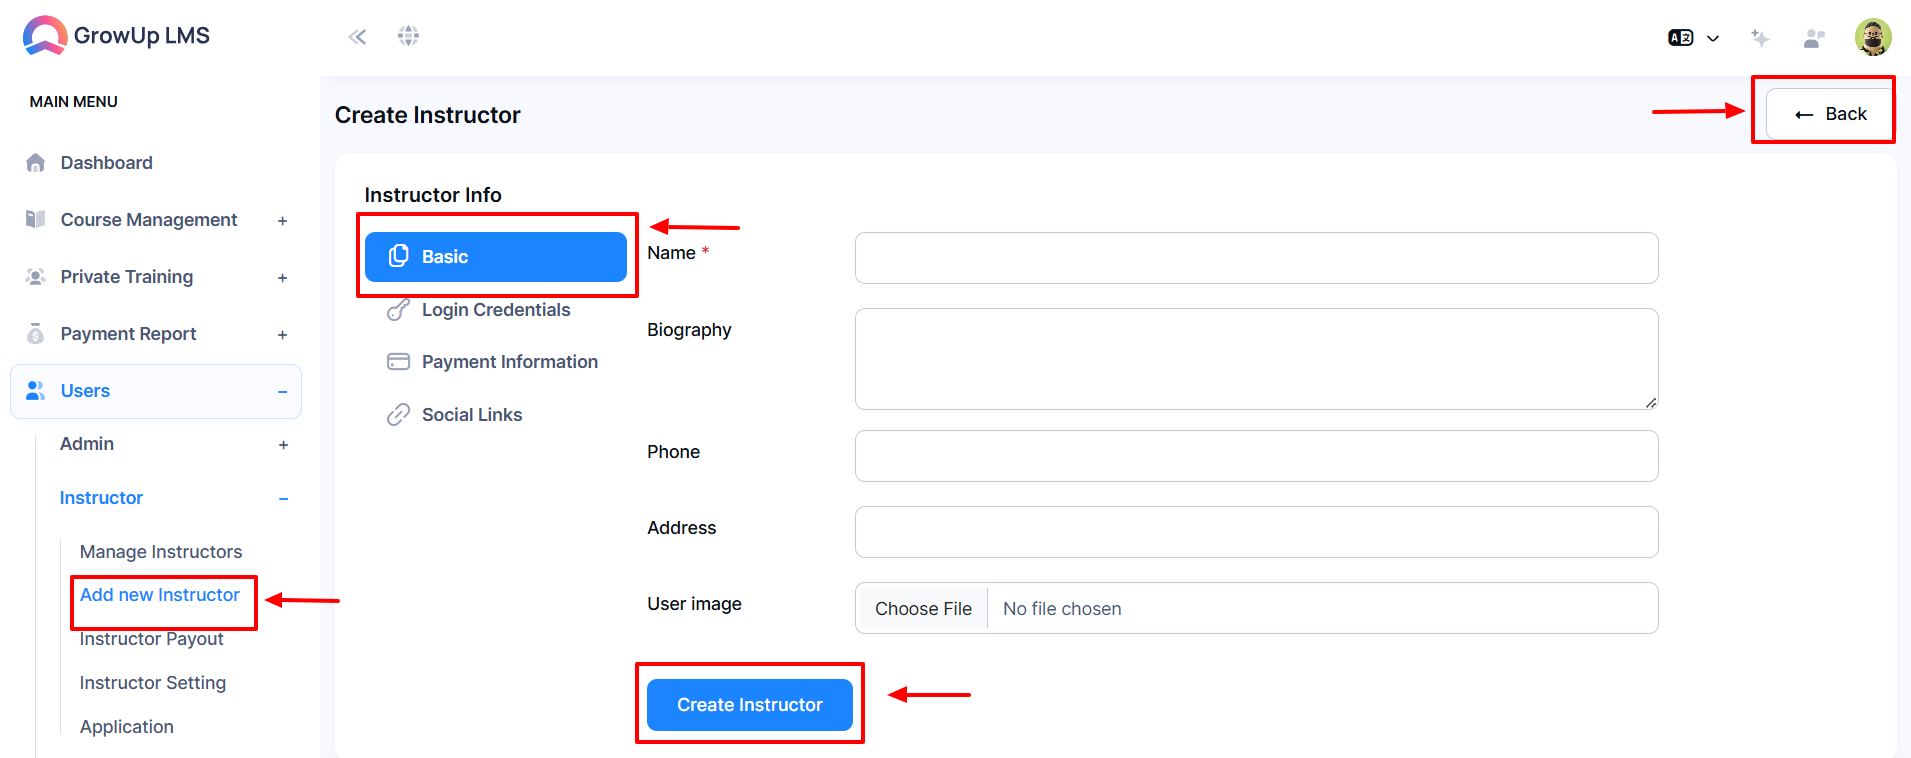
Type the Instructor's Name using the Name option.
-
Type the Biography in the Biography option.
-
Type the phone number using the Phone option.
-
Type the Address in the Address option.
-
Click the "Choose File" button to choose the user image.
-
Click the "Create Instructor" button to Update the information.
-
You will return to the previous page by clicking the "Back" button.
-
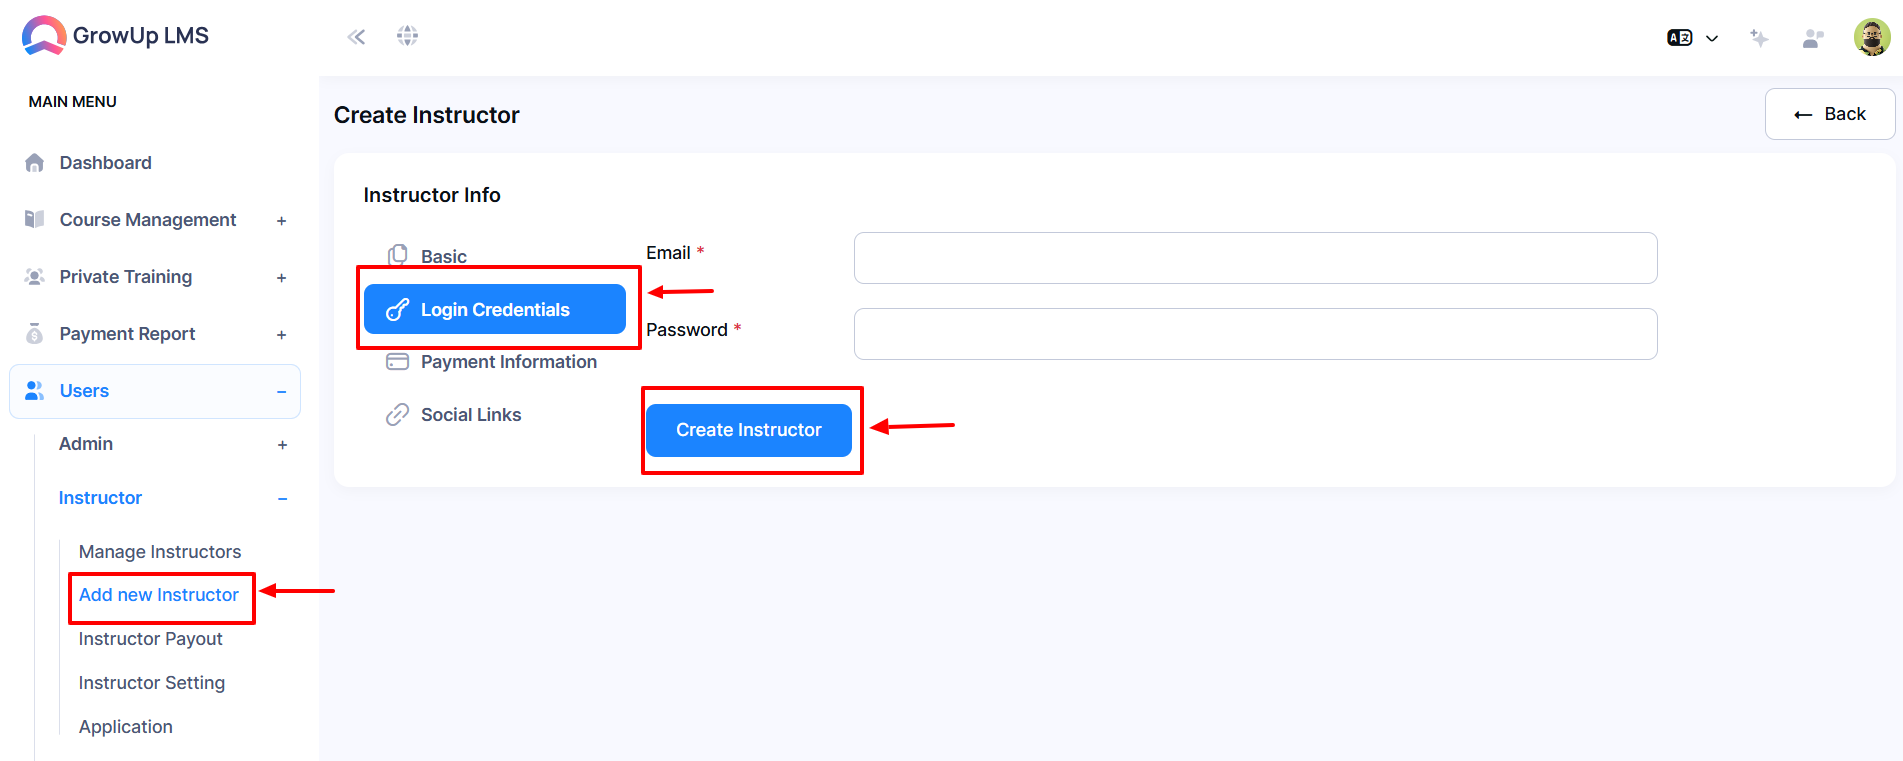
Click the "Login Credential" button a new window will pop up.
-
Type the email address using the Email option.
-
Type the Password in the Password option.
-
Click the "Create Instructor" button to Update the information.
-
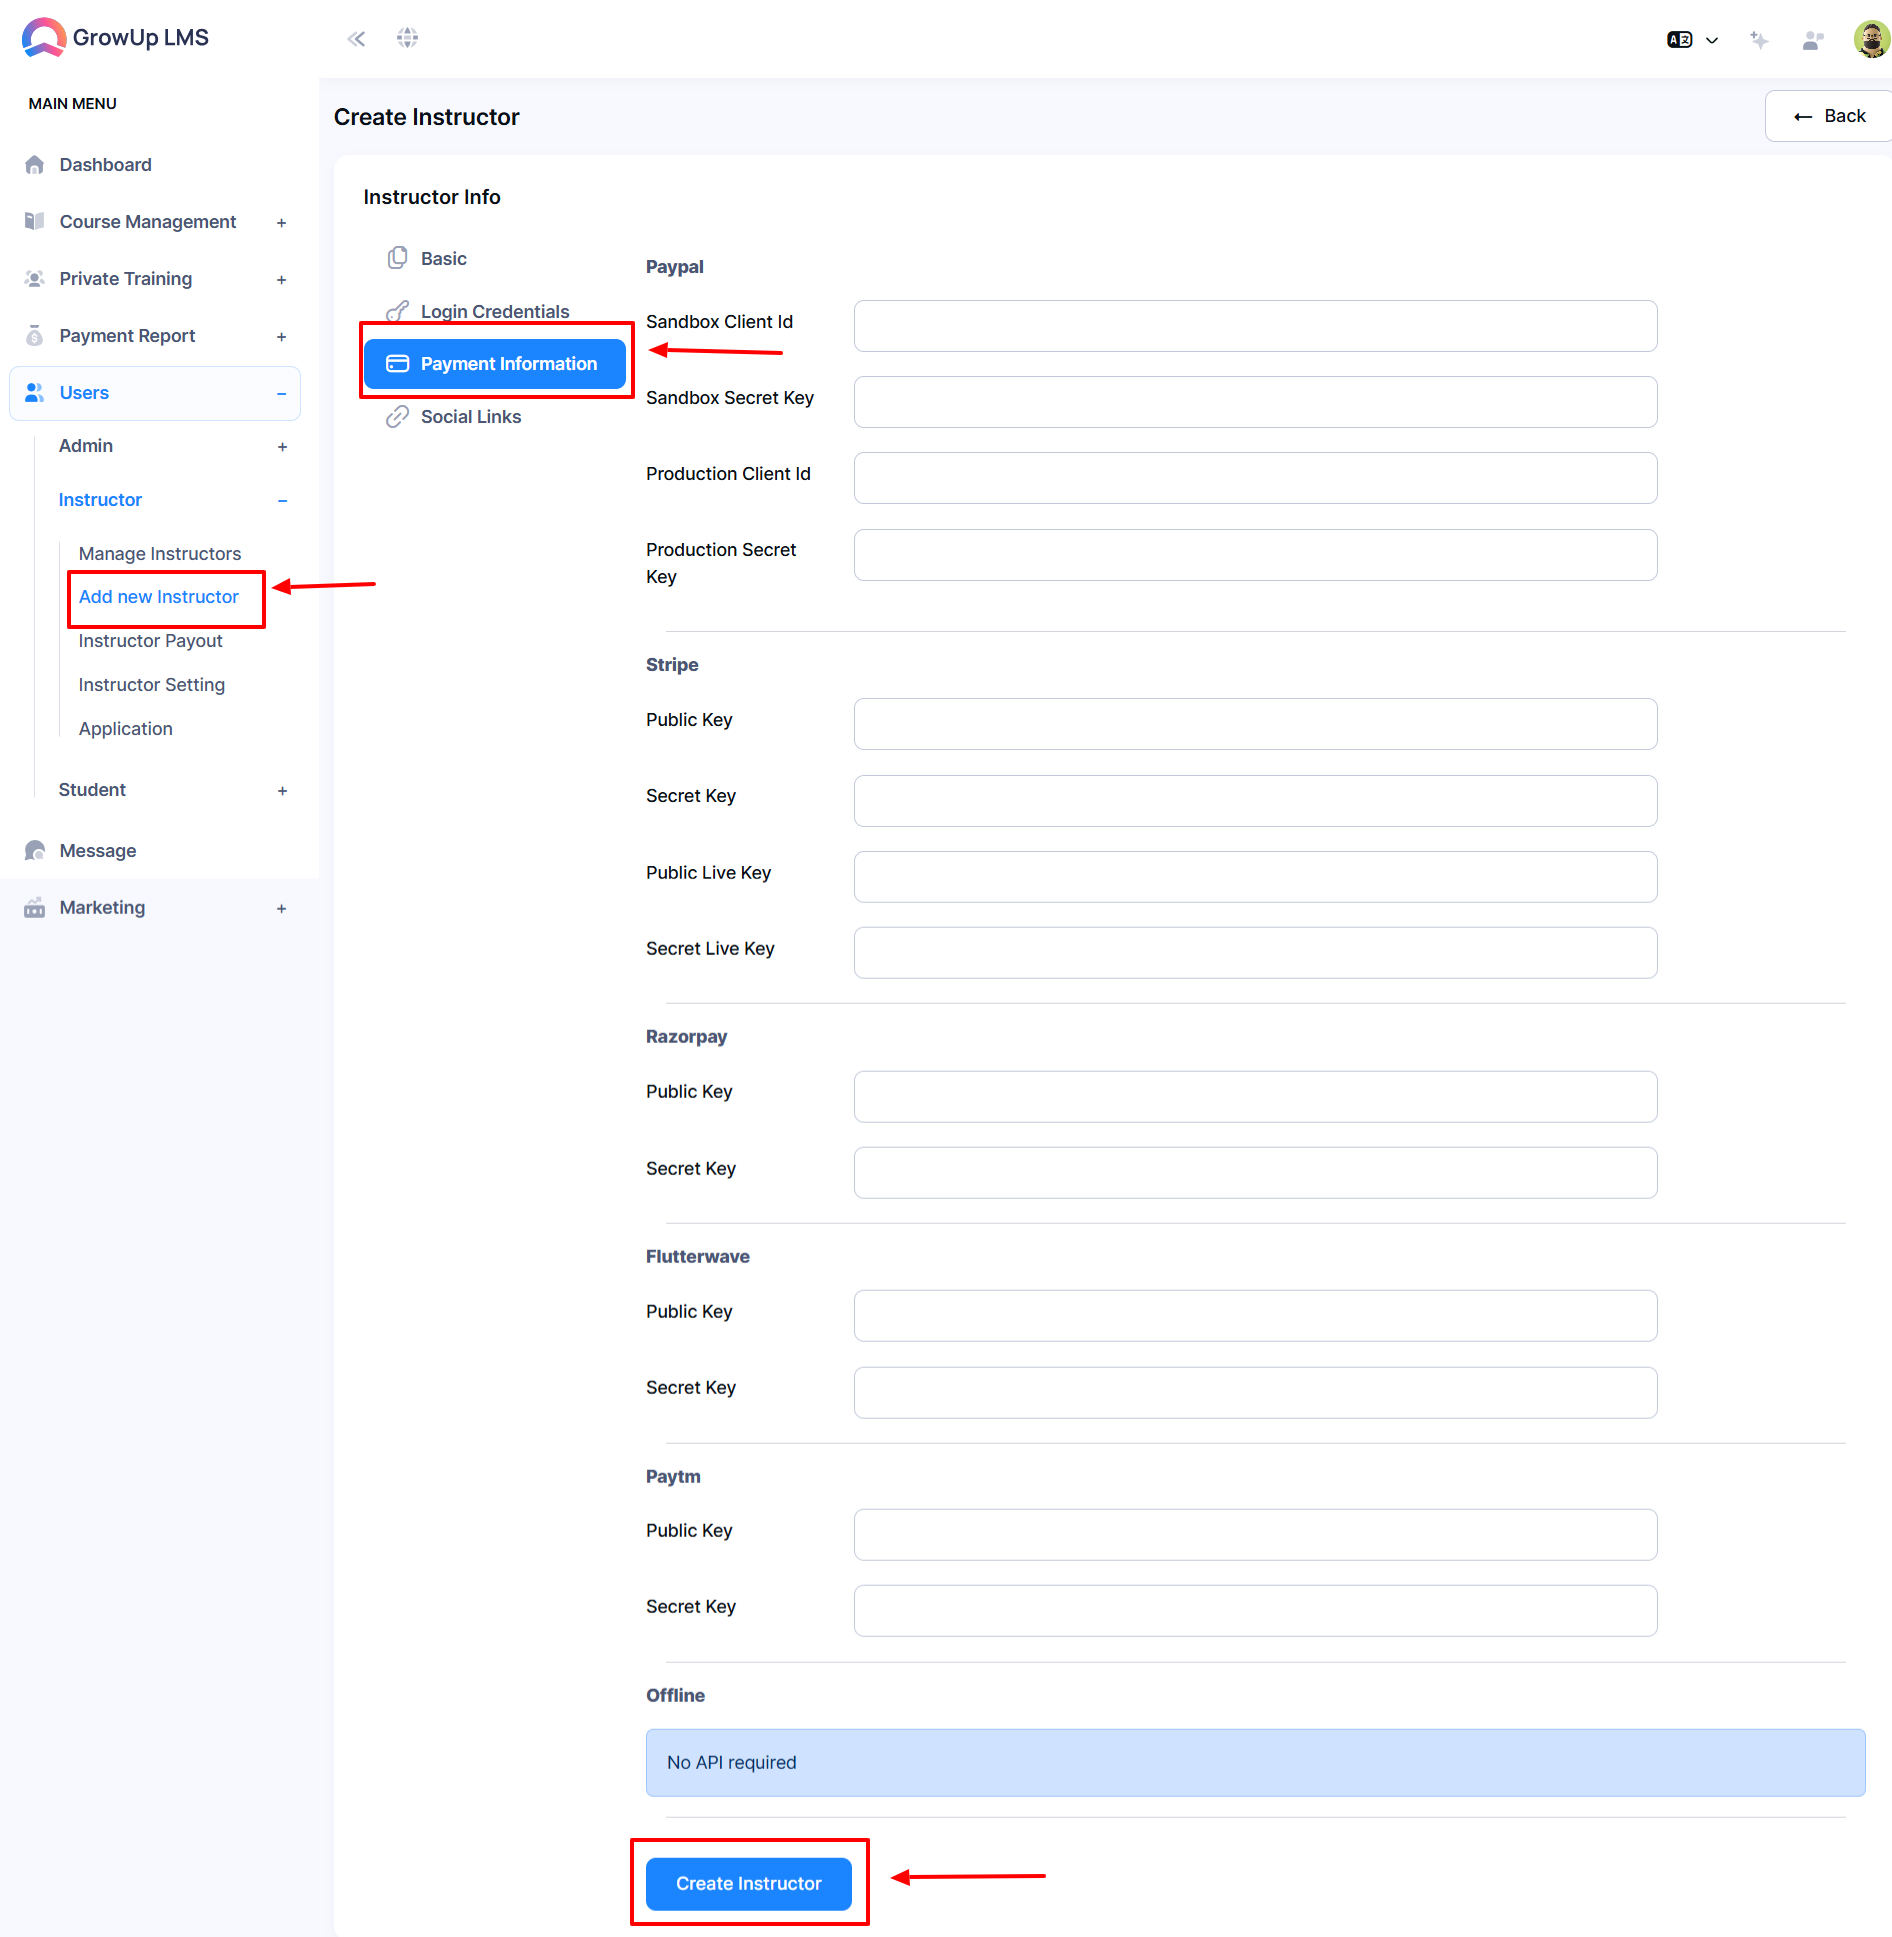
Click the "Payment Information" button a new window will pop up.
-
For Paypal payment type the necessary information in the designed format.
-
For Stripe payment type the necessary information in the designed format.
-
For Razorpay payment type the necessary information in the designed format.
-
For Flutterwave payment type the necessary information in the designed format.
-
For Paytm payment type the necessary information in the designed format.
-
Click the "Create Instructor" button to Update the information.
-
Click the "Social Links" button a new window will pop up.
-
Click the "Create Instructor" button to Update the information.
How to Manage Instructors:
-
Log in to the Admin Panel.
-
Select the "User" option from the left menu.
-
Choose the "Manage Instructors" option from the sub-menu.
-
Type the Instructor Name in the Search option.
-
Click the "Search" button new window will pop up as you desire.
-
When you click the three dots in the "Options" button a new window will pop up with View Courses, Edit, and Delete.

How to View Courses:
-
Log in to the Admin Panel.
-
Select the "User" option from the left menu.
-
Choose the "Instructor" option from the left sub-menu.
-
Choose the "Manage Instructors" option from the left sub-menu.
-
Click the "View Courses" button a new window will pop up.
-
Type the Course Name in the Search Options.
-
Click the "Search" button new window will pop up as you desire.


How to Edit Instructor:
-
Log in to the Admin Panel.
-
Select the "User" option from the left menu.
-
Choose the "Instructor" option from the left sub-menu.
-
Choose the "Manage Instructor" option from the left sub-menu.
-
Click the "Edit" button a new window will pop up.
-
Type the Instructor's Name using the Name option.
-
Type the Biography in the Biography option.
-
Type the phone number using the Phone option.
-
Type the Address in the Address option.
-
Click the "Choose File" button to choose the user image.
-
Click the "Create Instructure" button to Update the information.
-
Click the "Login Credential" button a new window will pop up.
-
Type the email address using the Email option.
-
Click the "Create Instructure" button to Update the information.
-
Click the "Social Link" button a new window will pop up.
-
Click the "Create Instructure" button to Update the information.
-
Click the "Payment Information" button a new window will pop up.
-
For Paypal payment type the necessary information in the designed format.
-
For Stripe payment type the necessary information in the designed format.
-
For Razorpay payment type the necessary information in the designed format.
-
For Flutterwave payment type the necessary information in the designed format.
-
For Paytm payment type the necessary information in the designed format.
-
Click the "Create Instructure" button to Update the information.
-
Click the "Social Link" button a new window will pop up.
-
Click the "Create Instructure" button to Update the information.


How to Delete Instructor:
-
Log in to the Admin Panel.
-
Select the "User" option from the left menu.
-
Choose the "Instructor" option from the left sub-menu.
-
Choose the "Manage Instructor" option from the left sub-menu.
-
Click the "Delete" button from the option a new window will pop up.
-
If you click the "Confirm" button you cannot bring it back.


How to Find Instructor’s Payout?
-
Log in to the Admin Panel.
-
Select the "User" option from the left menu.
-
Choose the "Instructor" option from the sub-menu.
-
Choose the "Instructor Payout" option from the sub-menu.
-
Select the Date from the dropdown calendar in the Filter box and click the "Apply" button.
-
Click the "Filter" button a new window will pop up with a compiled revenue list.
-
Click the "Export" button a new window will pop up with PDF and Print.
-
If you click the "PDF" button automatically download the appeared document.
-
If you click the "Print" button a window will pop up with a print option.


How to Instructor Setting?
-
Log in to the Admin Panel.
-
Select the "User" option from the left menu.
-
Choose the "Instructor" option from the sub-menu.
-
Click the "Instructor Setting" option from the sub-menu a new window will pop up.
-
Select Yes or No from the dropdown button or the Allow Public Instructor option.
-
Type Note in the Instructor application note option.
-
Click the "Update Setting" button to update the information.
-
Type the Instructor Percentage in the Instructure revenue percentage option or Choose the percentage from the dropdown menu.
-
Type the Admin Revenue Percentage in the Admin Revenue Percentage option.
-
Click the "Update Setting" button to update the information.

How to Manage Instructure Application?
-
Log in to the Admin Panel.
-
Select the "User" option from the left menu.
-
Choose the "Instructor" option from the sub-menu.
-
Click the "Application" option from the sub-menu a new window will pop up.
-
If you click "Pending Applications" a new window will pop up related to pending applications.
-
If you click "Approved Applications" a new window will pop up related to approved applications.
-
When you click the three dots from the options button a new window will pop up with the following options: Approve and Delete.
-
If you click the "Approve" button a new window will pop up.
-
If you click the "Confirm" button the Approved status show in the status button.
-
If you click the "Cancel" button the Pending status shows in the status button.
-
If you click the "Application details" button a new window will pop up with applicant information.
-
Click the "Close" button to close the window.


Was this article helpful to you?
Contact us and we will get back to you as soon as possible
