CREATIVEITEM

How to Manage Website Settings

Web settings in a business-to-business platform enable companies to customize their digital presence. From branding (logo, colors) to essential configurations like keywords, language, and system emails, these settings ensure professionalism, streamline communication, and optimize user experience, helping businesses build trust and drive collaborations effectively.


  • Log in to the Admin Panel.
  • Navigate the System Settings in the left menu.
  • In the left sub-menu choose Website Settings to access the Frontend Settings entry form.
  • Fill out the required fields:
      • Banner Title: Enter the name of your website banner.

      • Banner Sub-title: Provide the sub-title of your website banner.

      • Promo Video Provider: Click the radio button to activate as desired.

      • Promo video link: Write a video link as required.

      • Cookie status: Choose to radio button for active or inactive.

      • Facebook: Put the Facebook link.

      • Twitter: Put the Twitter link.

      • Linkedin: Enter the LinkedIn link.

      • Cookie policy: Type the Cookie policy as required.

      • About us: Enter your site about.

      • Terms and conditions: Input the terms and conditions.

      • Privacy policy: Provide your privacy policy.

      • Refund policy: Add your refund policy.

      • Mobile App Download Link: Input the Mobile App download link.
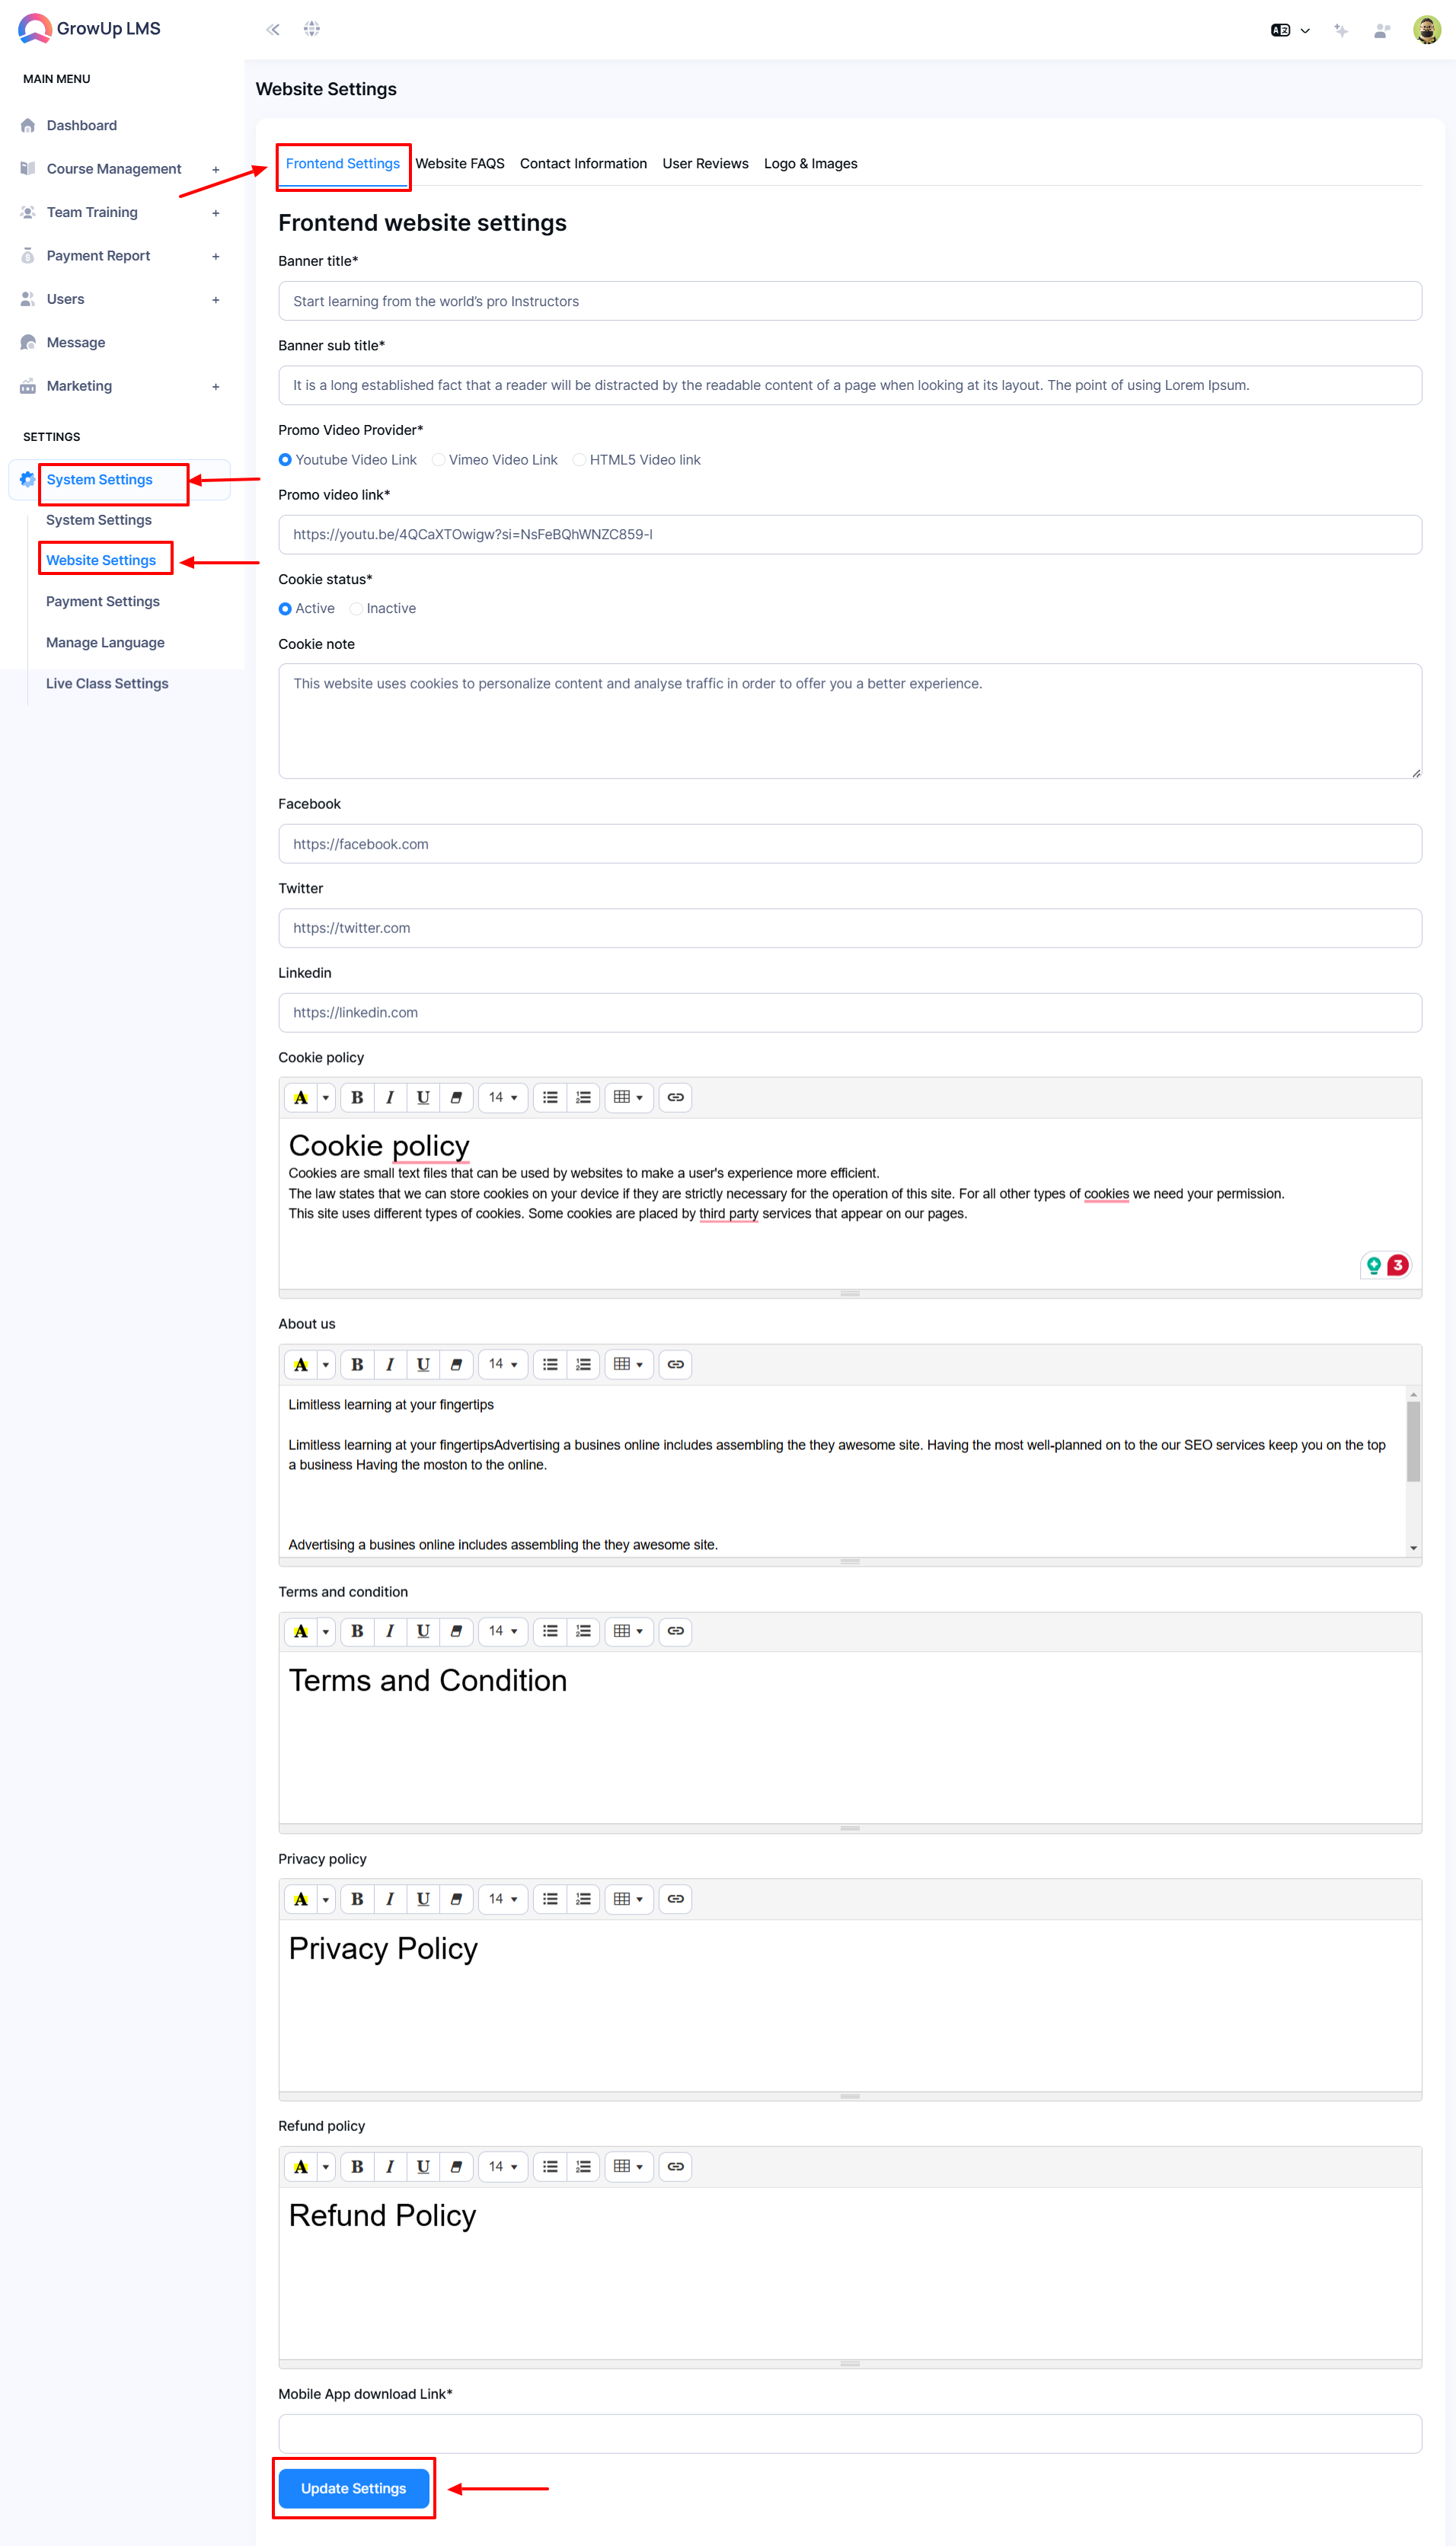
    • Once all fields are completed, Click Update Settings to apply the updates.


17339980110

Website FAQS

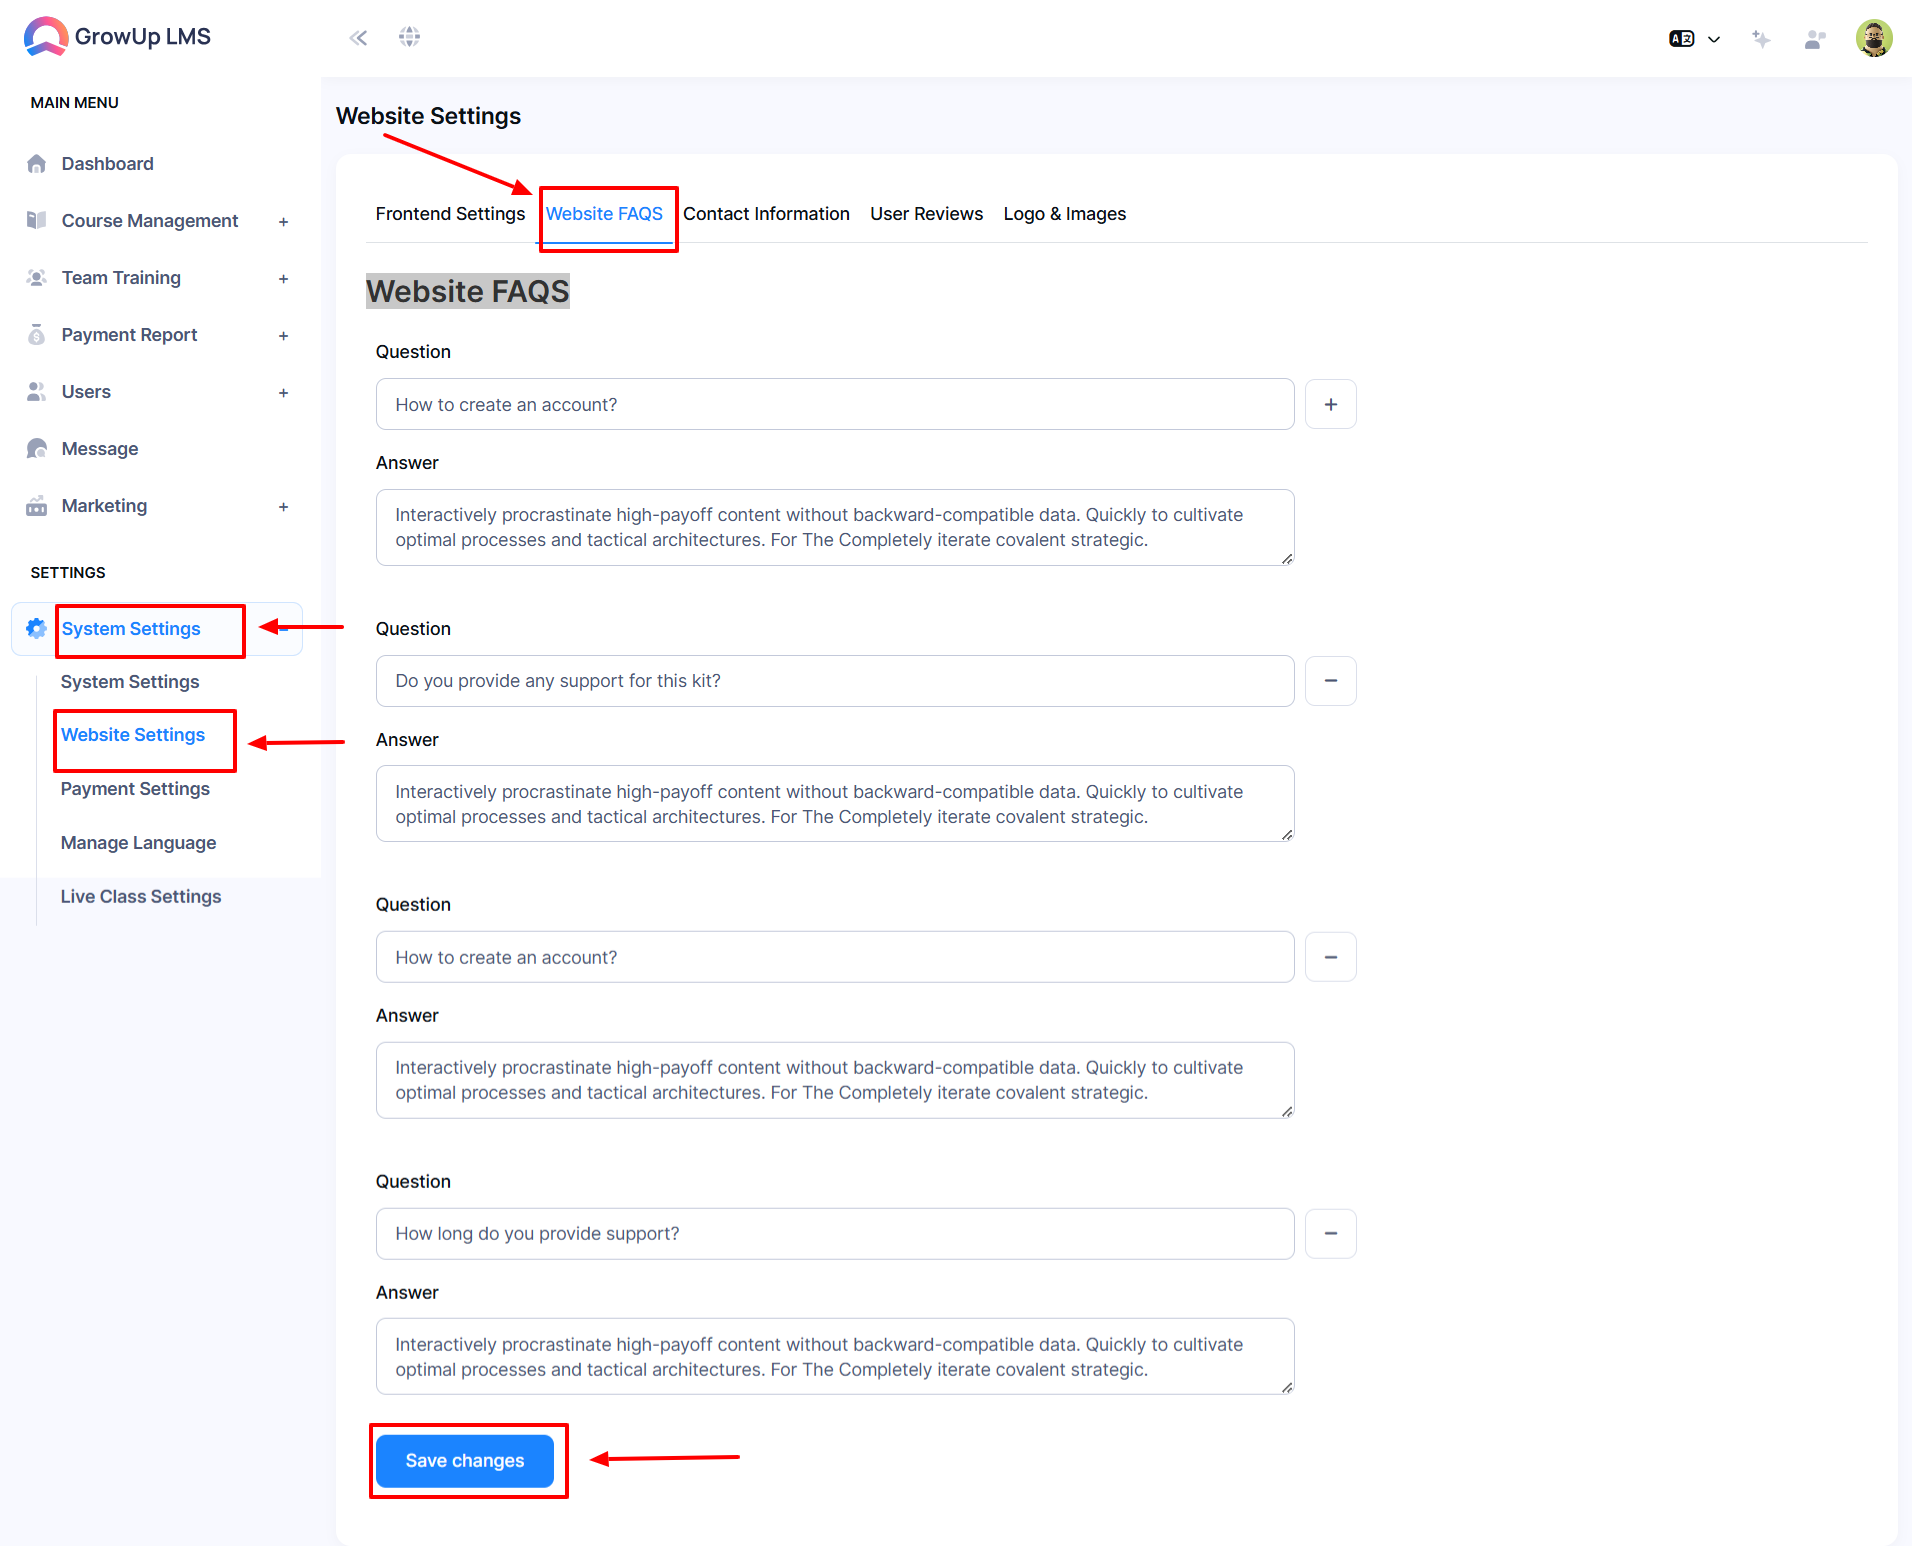
  • Log in to the Admin Panel.
  • Navigate the System Settings in the left menu.
  • In the left sub-menu choose Website Settings to access the Website FAQS entry form.
  • Fill out the required fields related to Question and Answer.
  • Once all fields are completed, Click the Save Changes button to apply the updates.


17339986461


Contact Information

  • Log in to the Admin Panel.
  • Navigate the System Settings in the left menu.
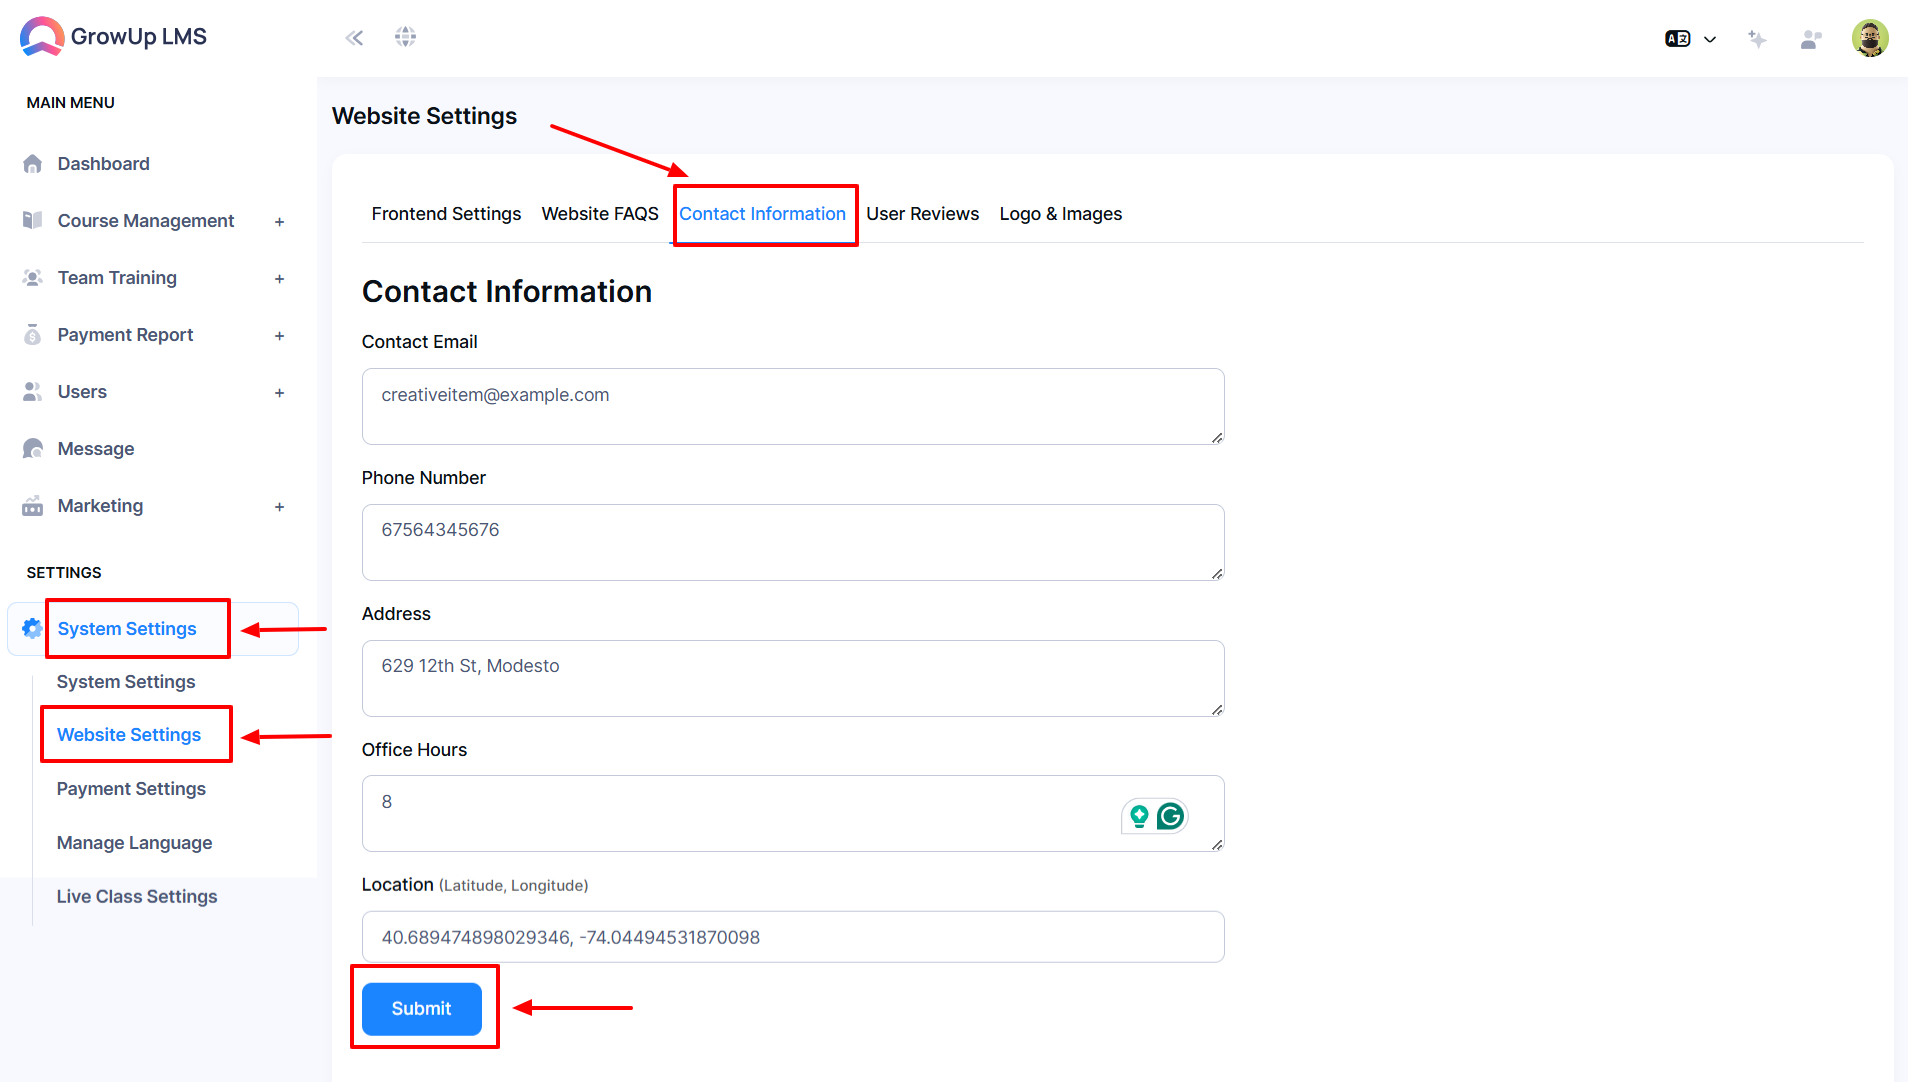
  • In the left sub-menu choose Website Settings to access the Contact Information entry form.
  • Fill out the required fields:
      • Contact Email: Enter the contact email address.

      • Phone Number: Provide the phone number.

      • Address: Enter the details address.

      • Office Hours: Write a convenient office hour.

      • Location: Provide Latitude and longitude information.

  • Once all fields are completed, Click Submit to apply the updates.
 

17339995302


User Reviews

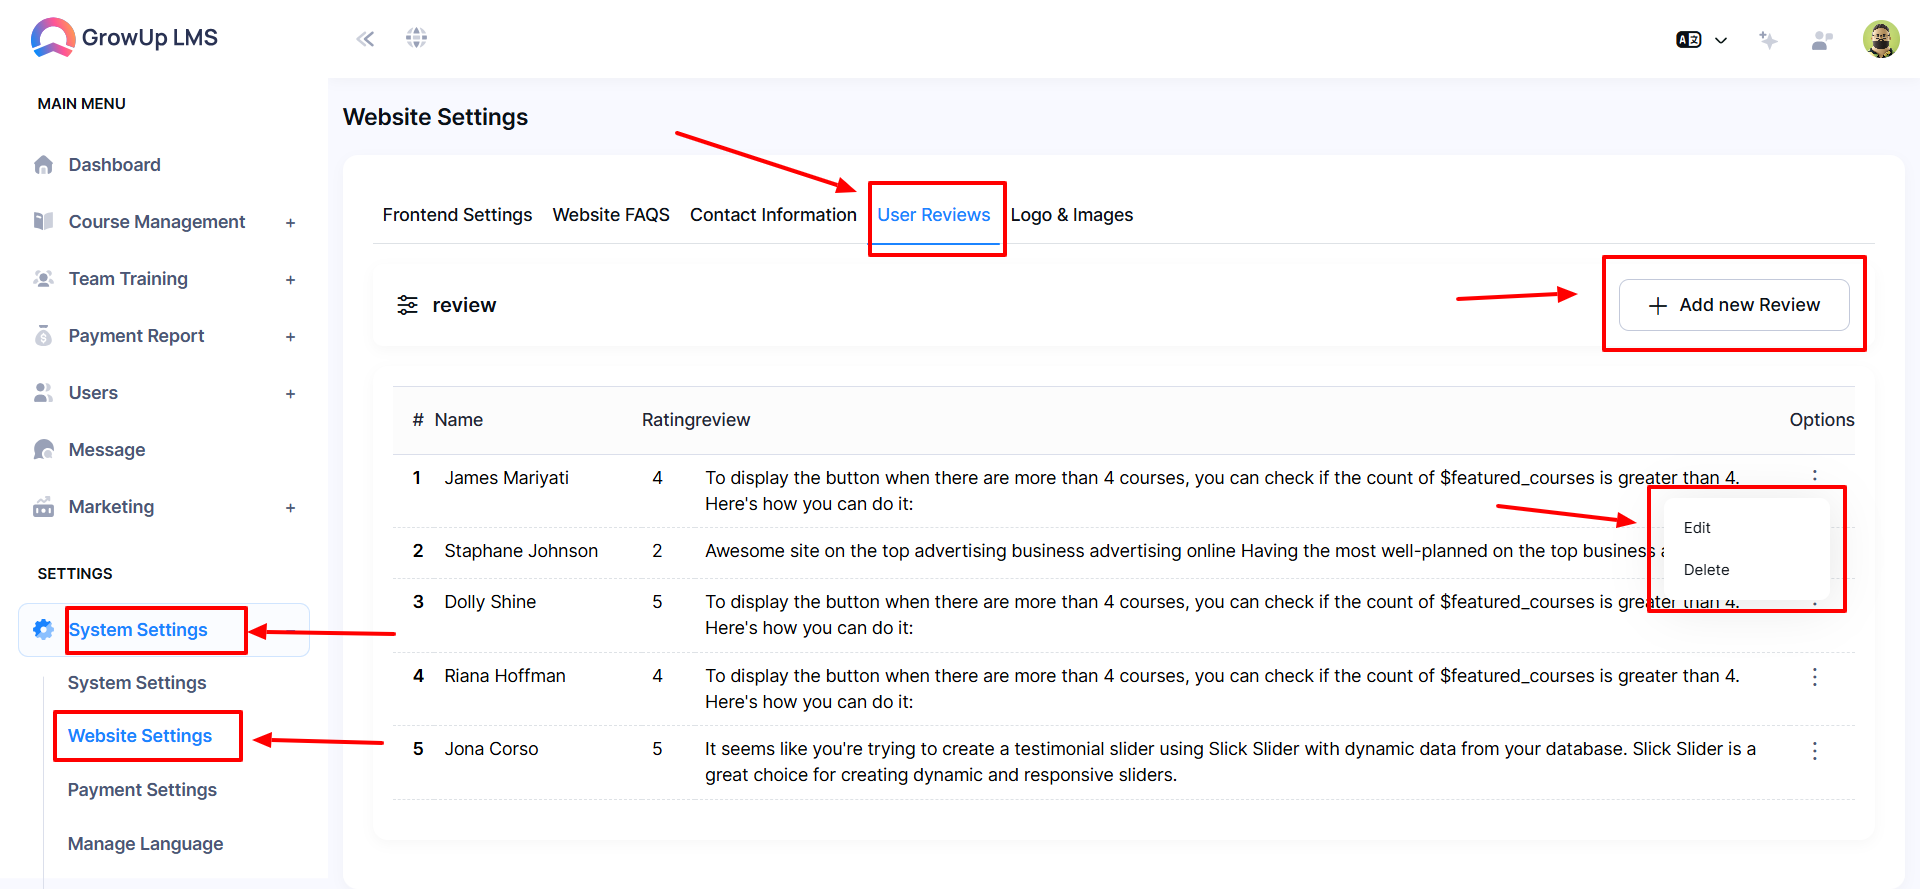
  • Log in to the Admin Panel.
  • Navigate the System Settings in the left menu.
  • In the left sub-menu choose Website Settings to access the User Reviews.
  • Click the Add New Reviews button the entry form will open.
  • Once all fields are completed, Click the Add Review button to apply the updates.
  • Click the three dots in the option the following will appear Edit and Delete.
  • Click the Edit button to appear an entry form.
  • Once all fields are completed, Click the Update button to apply the updates.
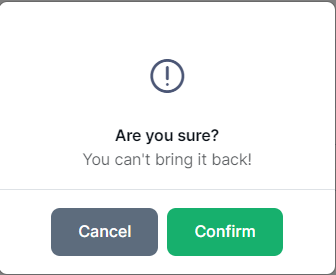
  • Click the Delete button appear a Confirm or Cancel window
  • If you click the Confirm never back again


17340009643


17340009644


User Reviews

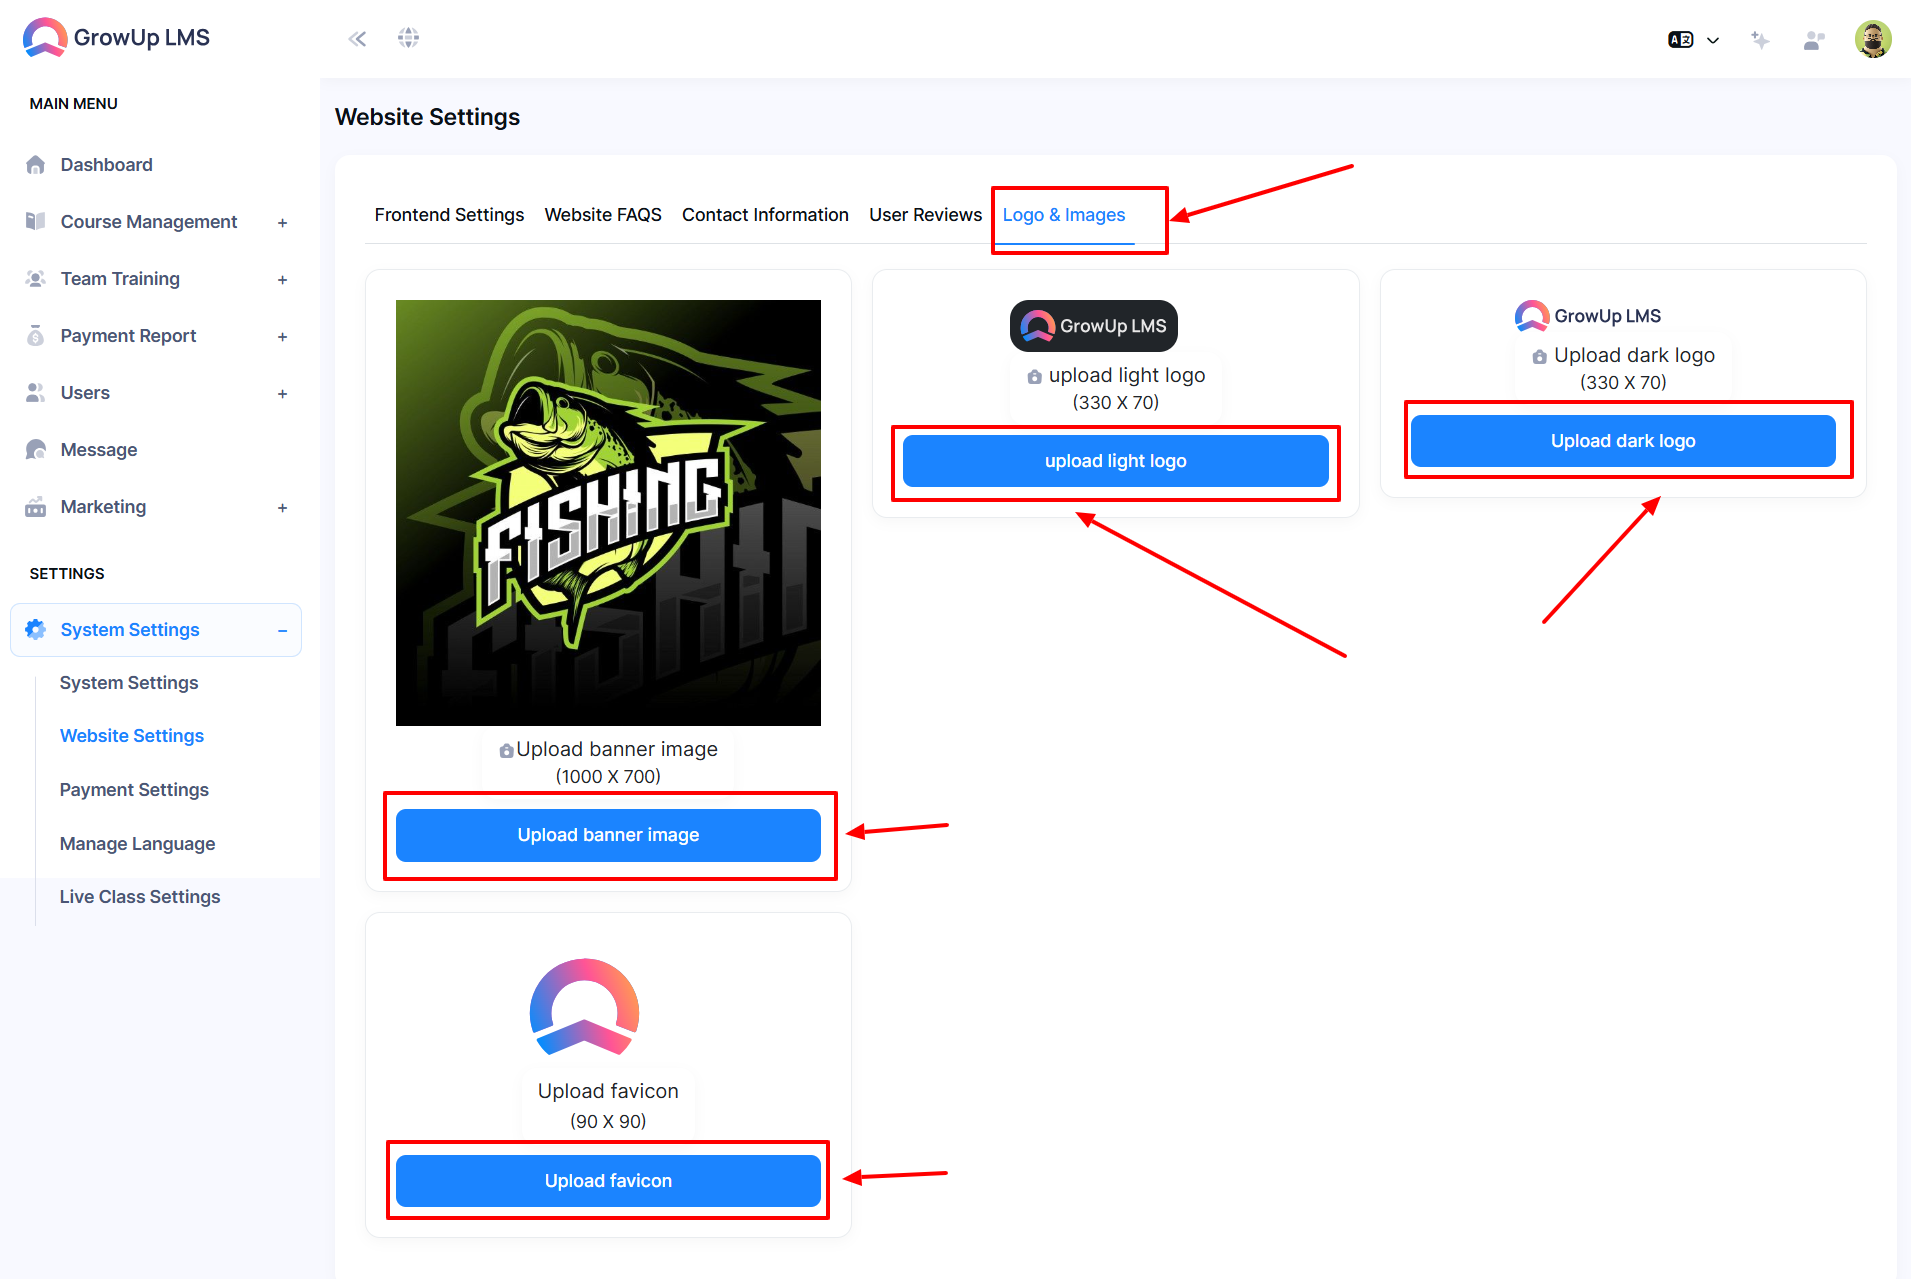
  • Log in to the Admin Panel.
  • Navigate the System Settings in the left menu.
  • In the left sub-menu choose Website Settings to access the Logo & Images.
  • Click the desired to upload the Logo & Images.


17340014435


Was this article helpful to you?

How can we help?

Contact us and we will get back to you as soon as possible